Overview
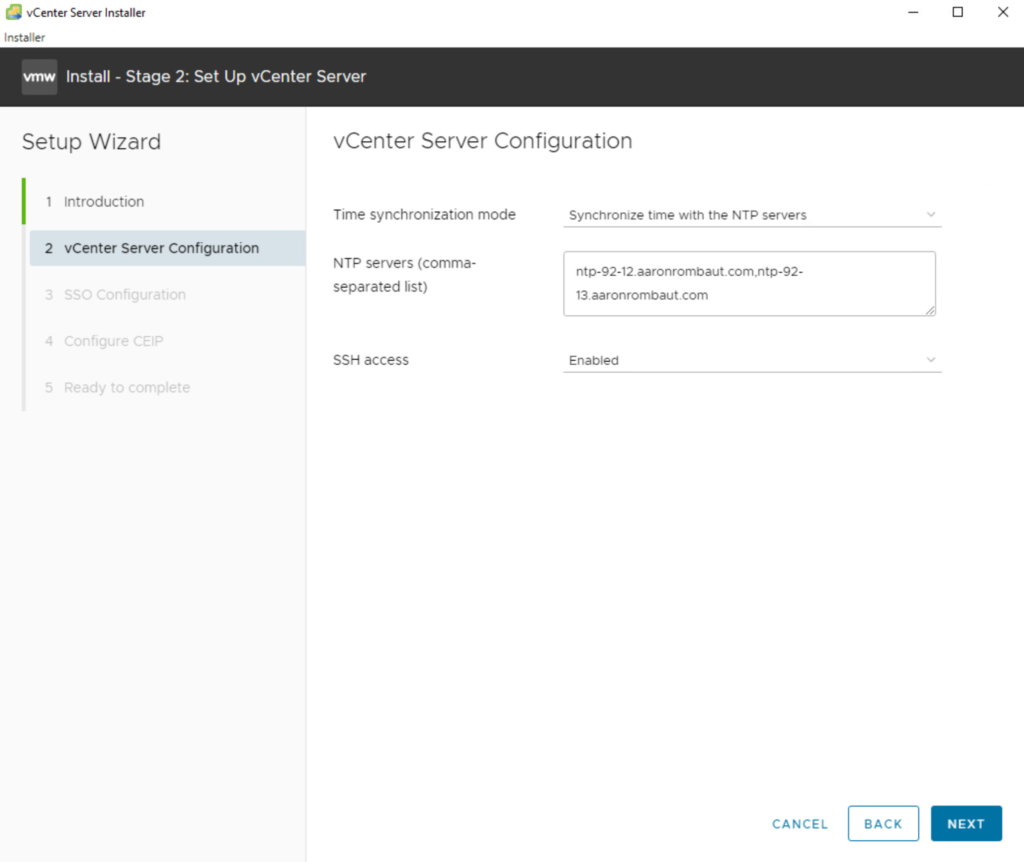
I am using VMware vSphere 7.0.3 for this lab. Before starting the deployment, ensure there are forward and reverse DNS records created for the ESXi host that vCenter will be installed on, the vCenter Server appliance itself, and optionally any NTP servers. Ideally, there should be localized NTP.
Install vCenter Server Appliance (VCSA)
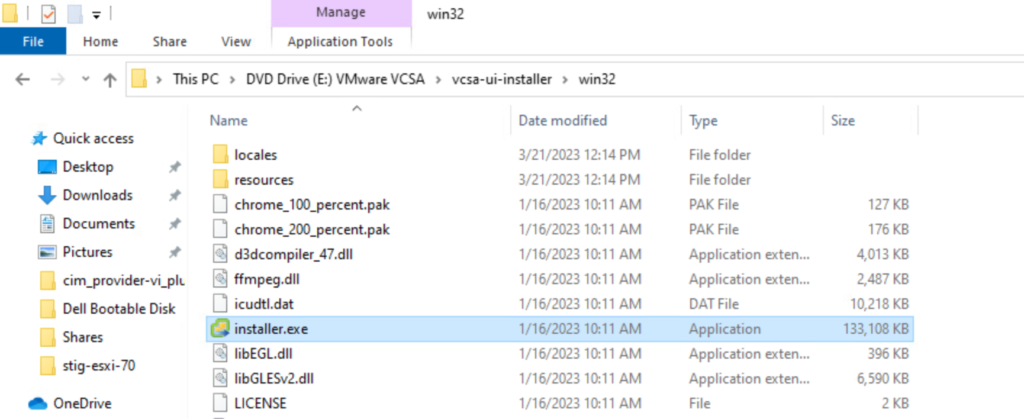
Mount the ISO and double-click the installer located at vcsa-ui-installer\win32.
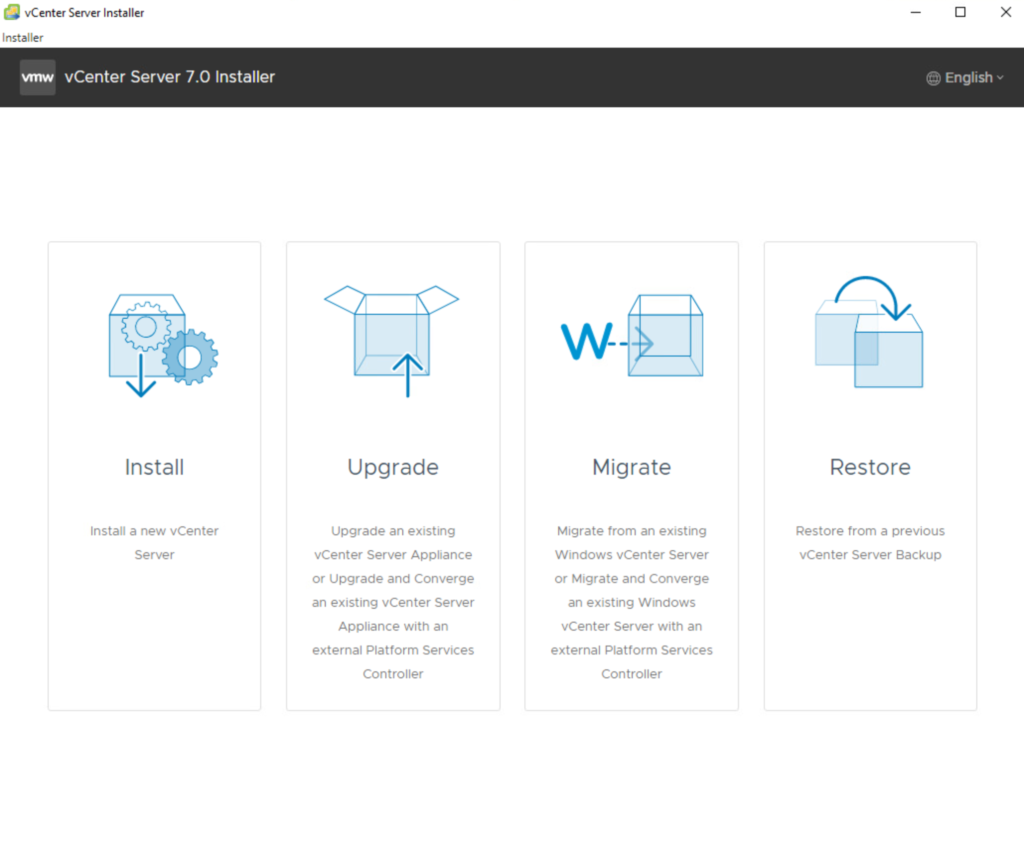
Choose Install.
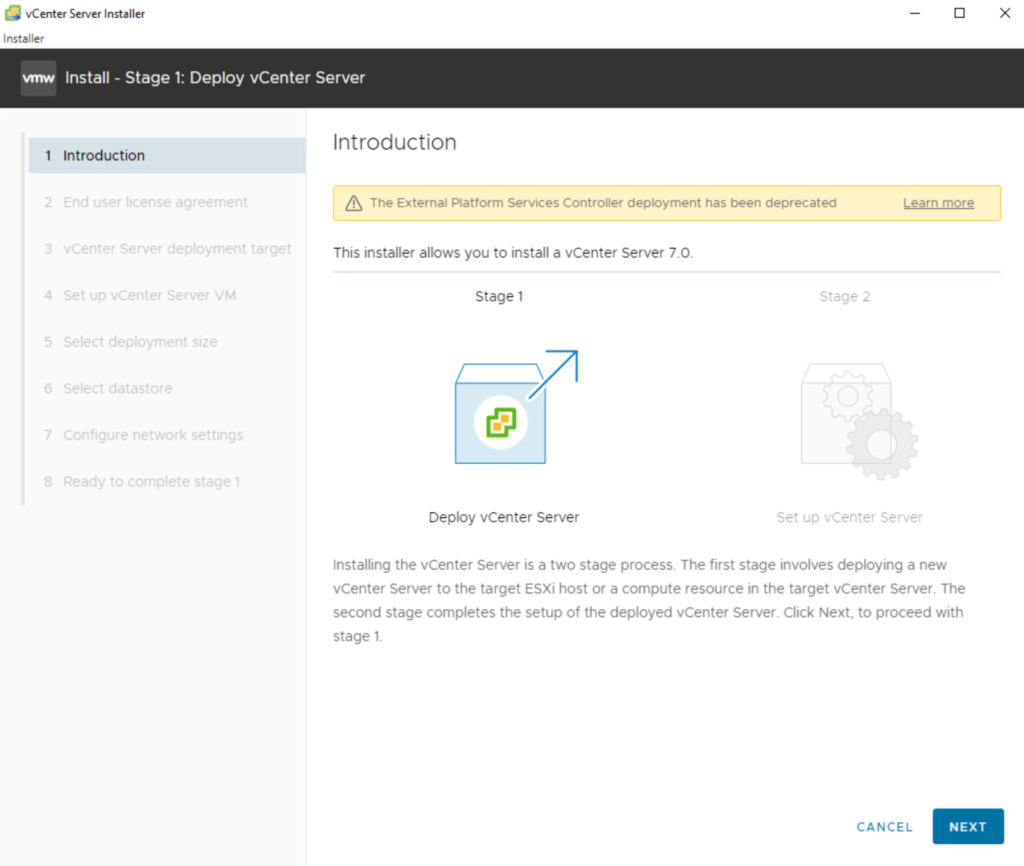
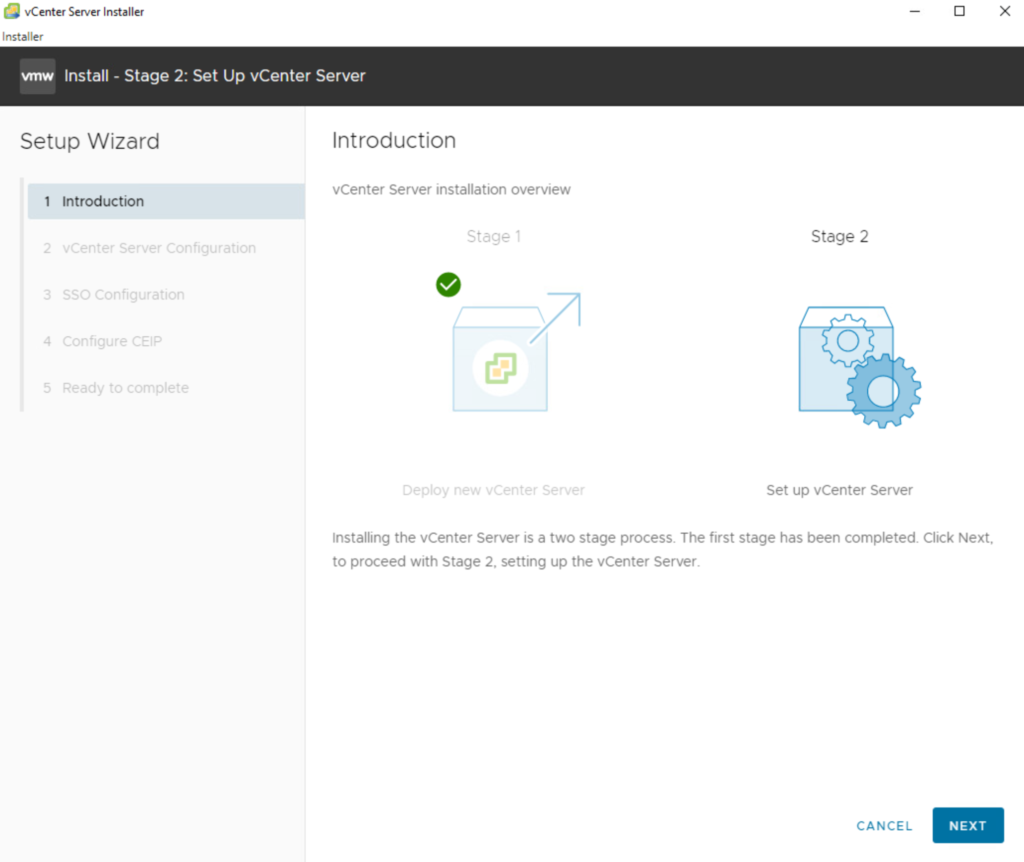
Review the Introduction and click Next.
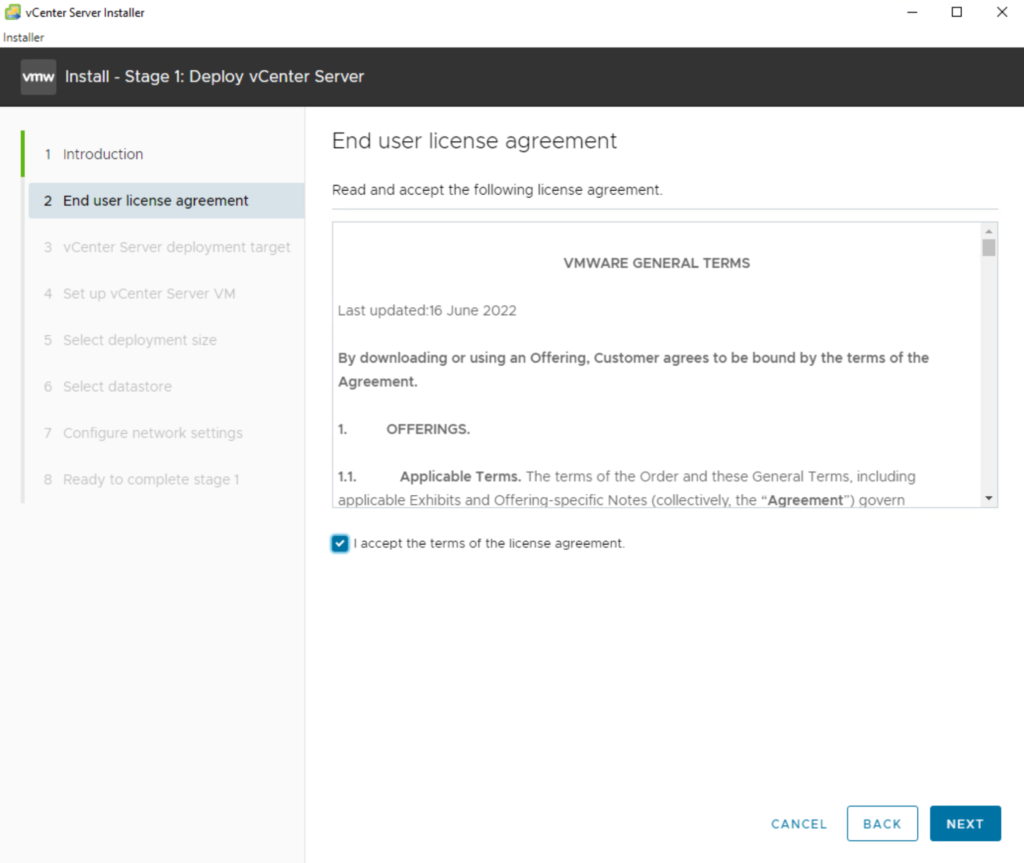
Review the End user license agreement and click Next.
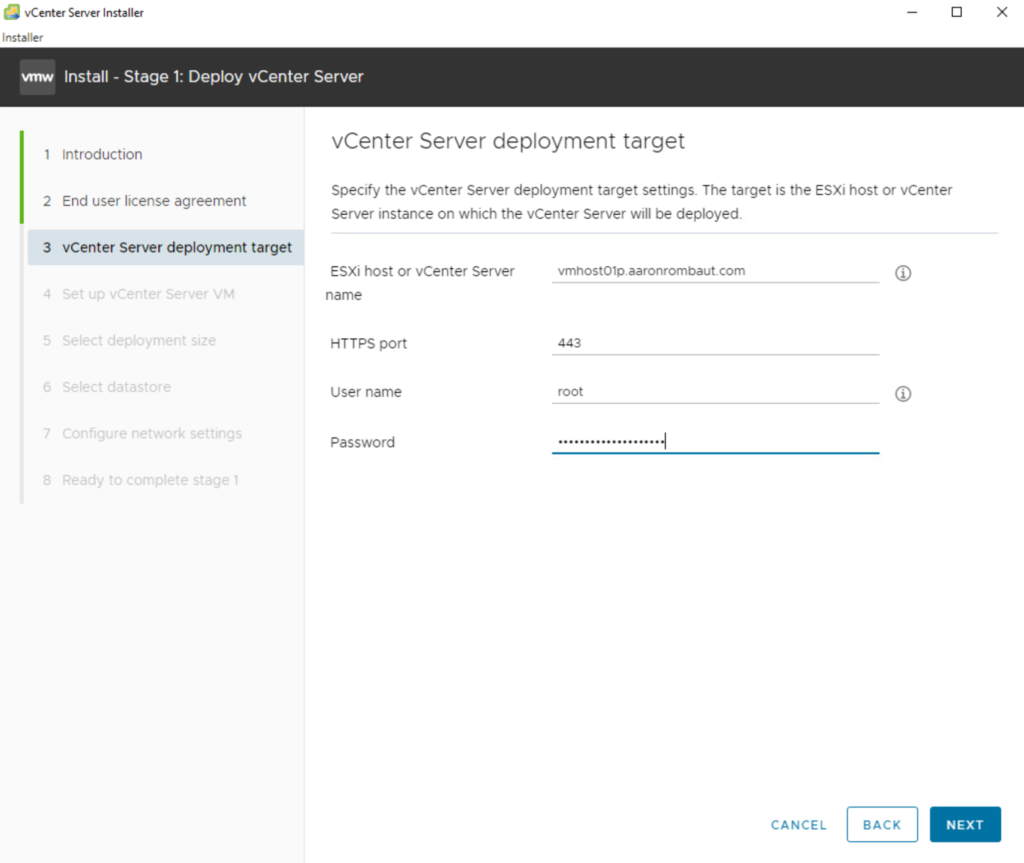
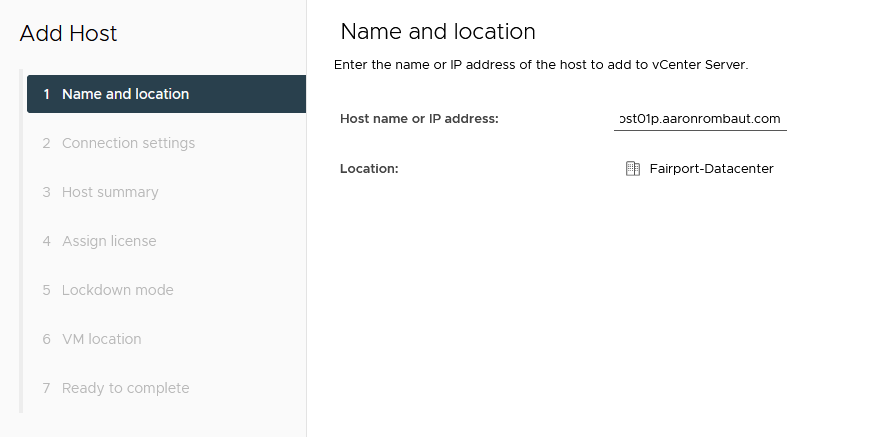
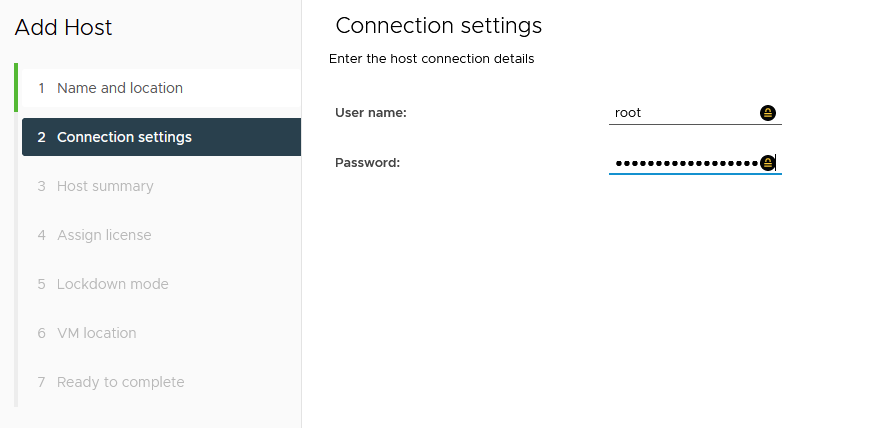
Add the details for the ESXi host to deploy to and click Next.
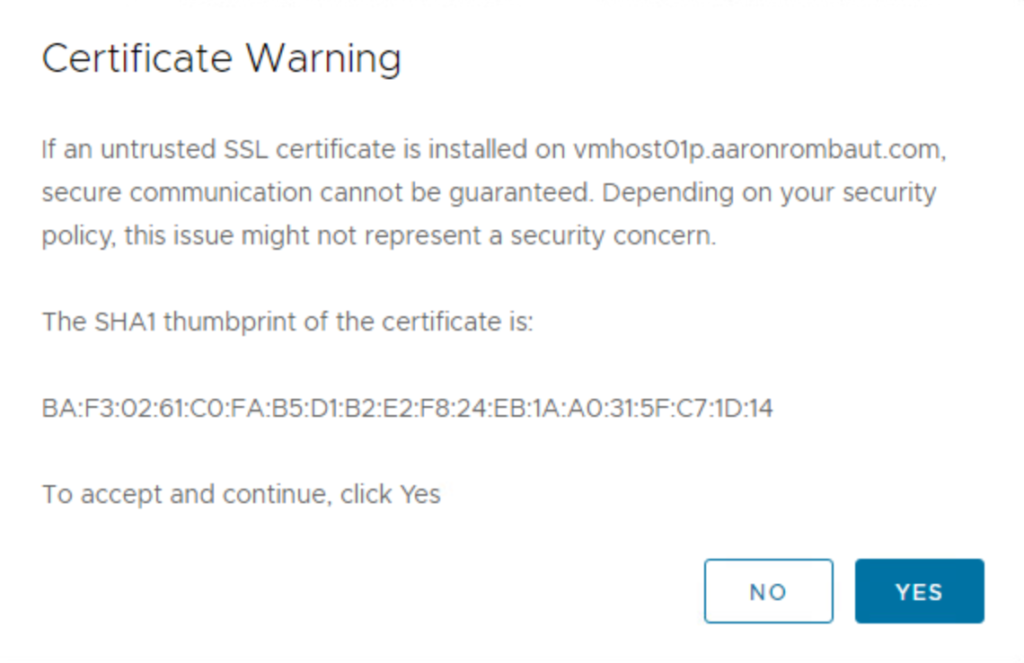
Confirm the certificate thumbprint of the ESXi host and click Next.
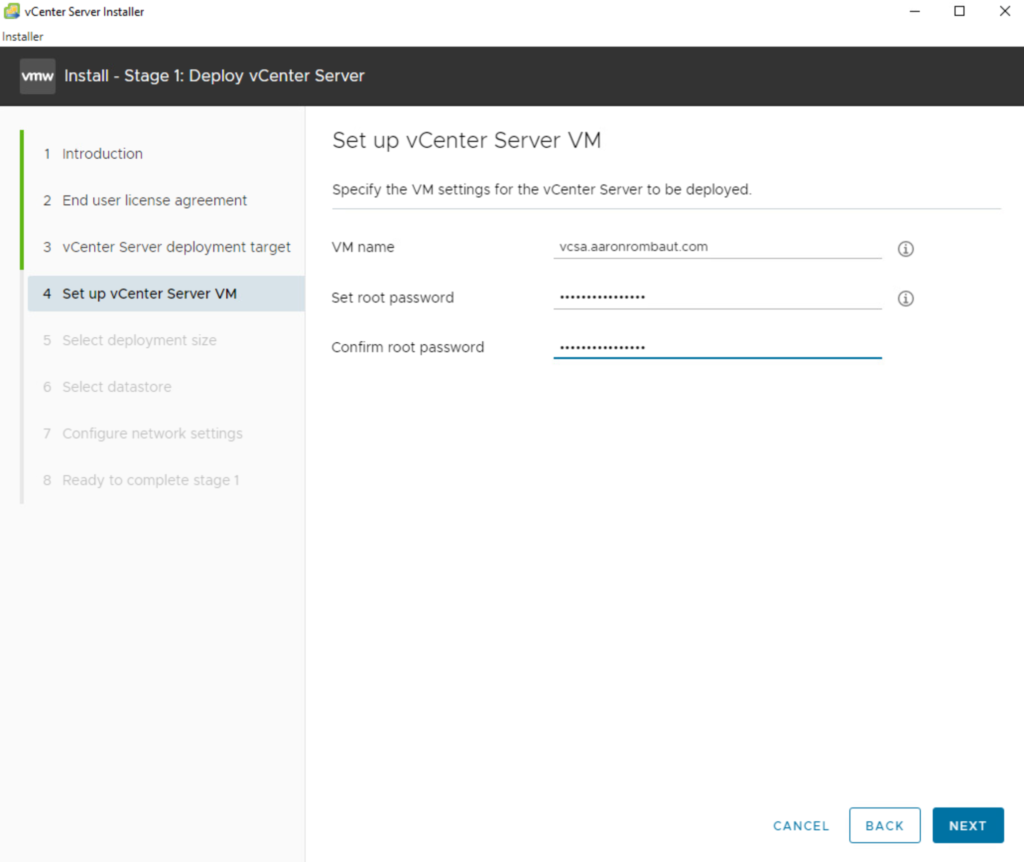
Add the details for the vCenter Server virtual machine and click Next.
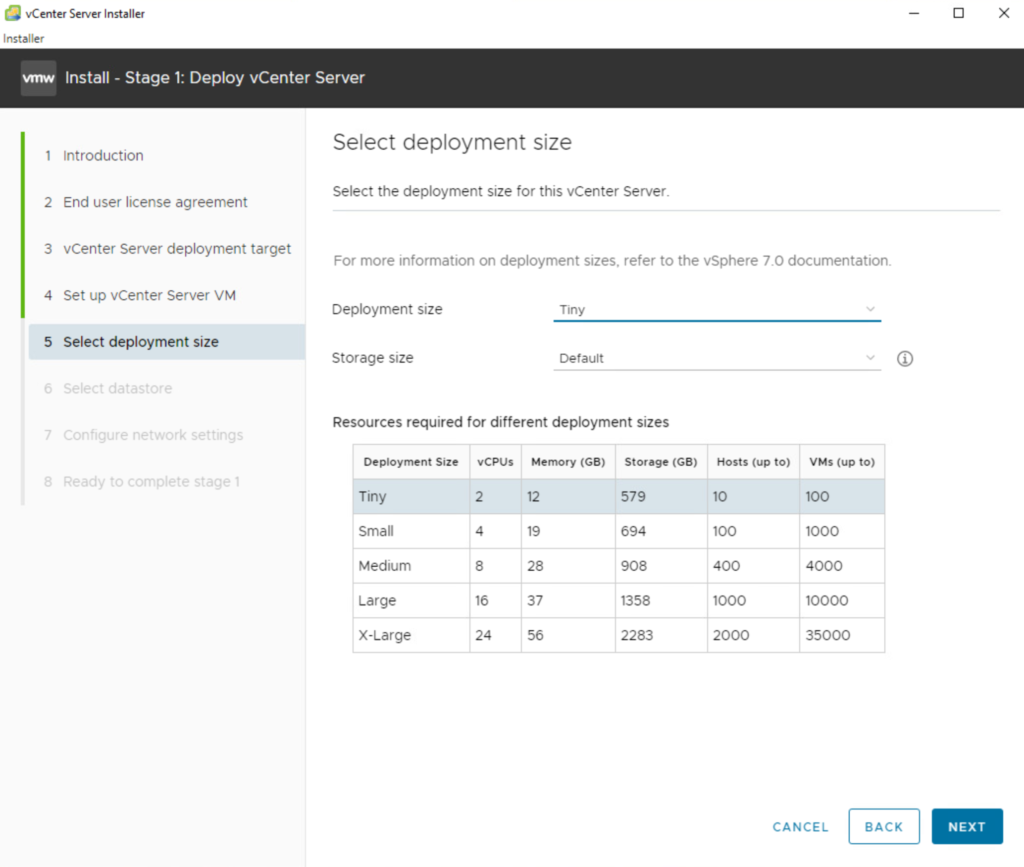
Leave the default deployment size and click Next.
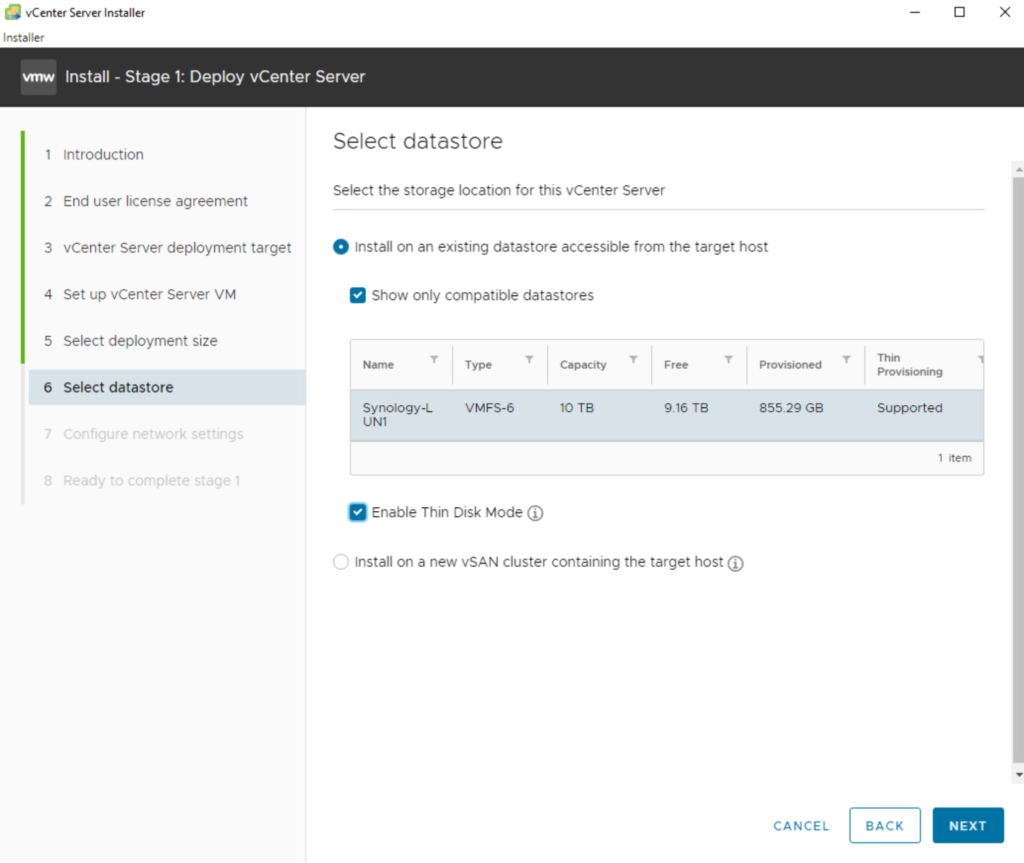
I am leaving the default option of Install on an existing datastore accessible from the target host and I chose to Enable Thin Disk Mode. Click Next.
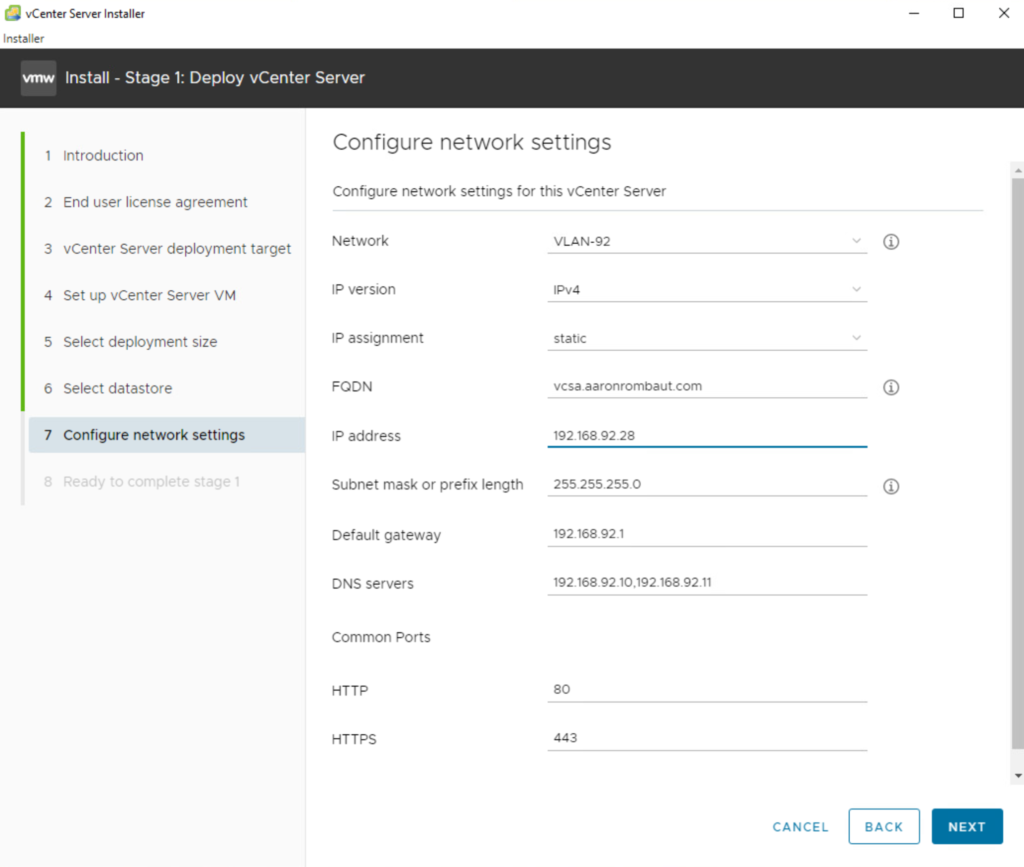
Configure the network settings and click Next.
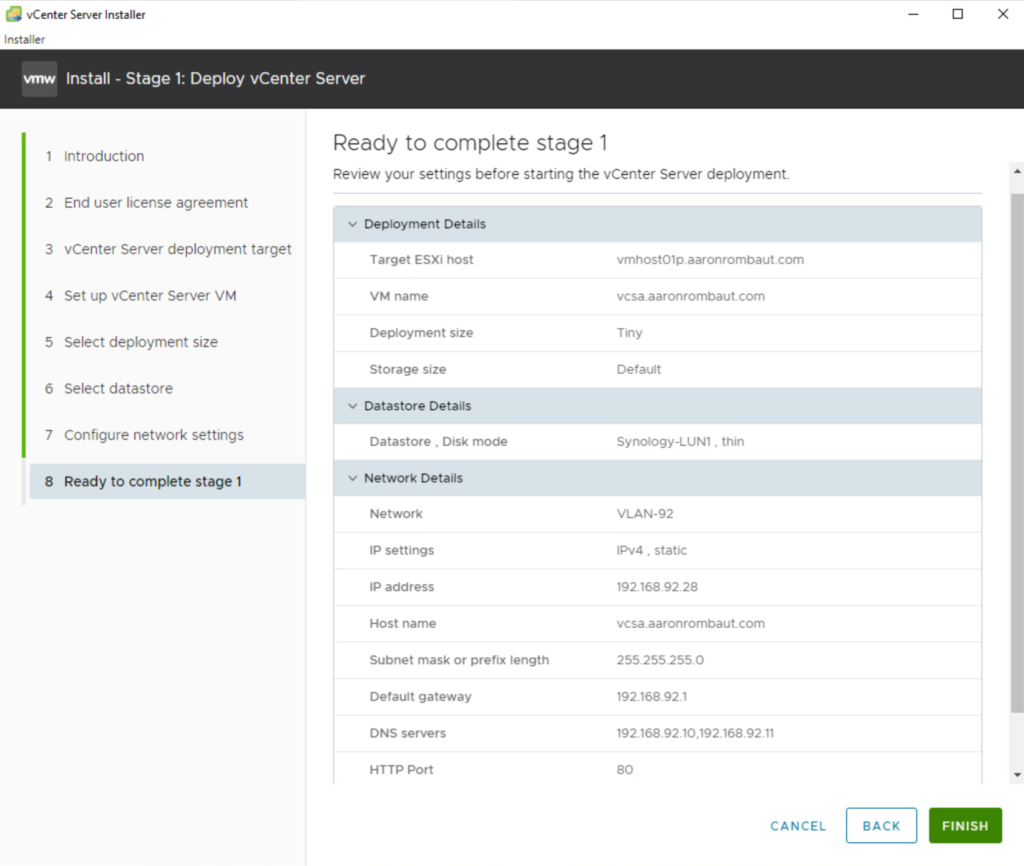
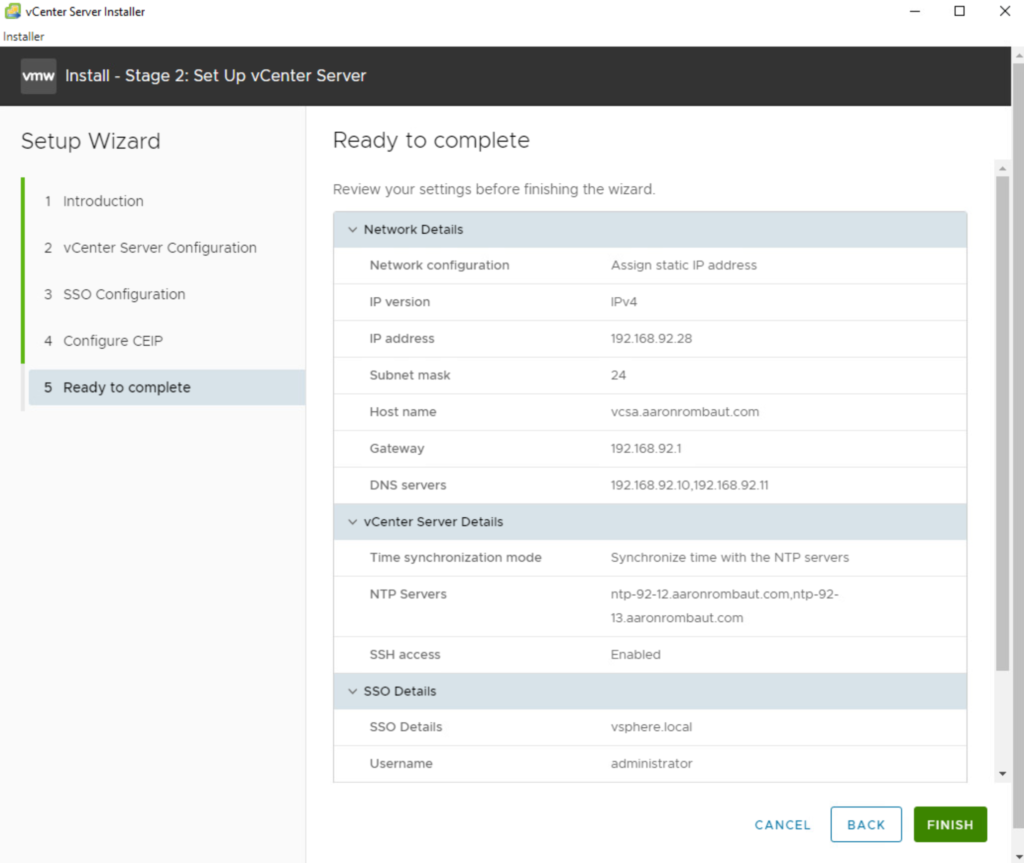
Review the installation details and click Finish.
Click Continue to move on to the second stage of the installation.
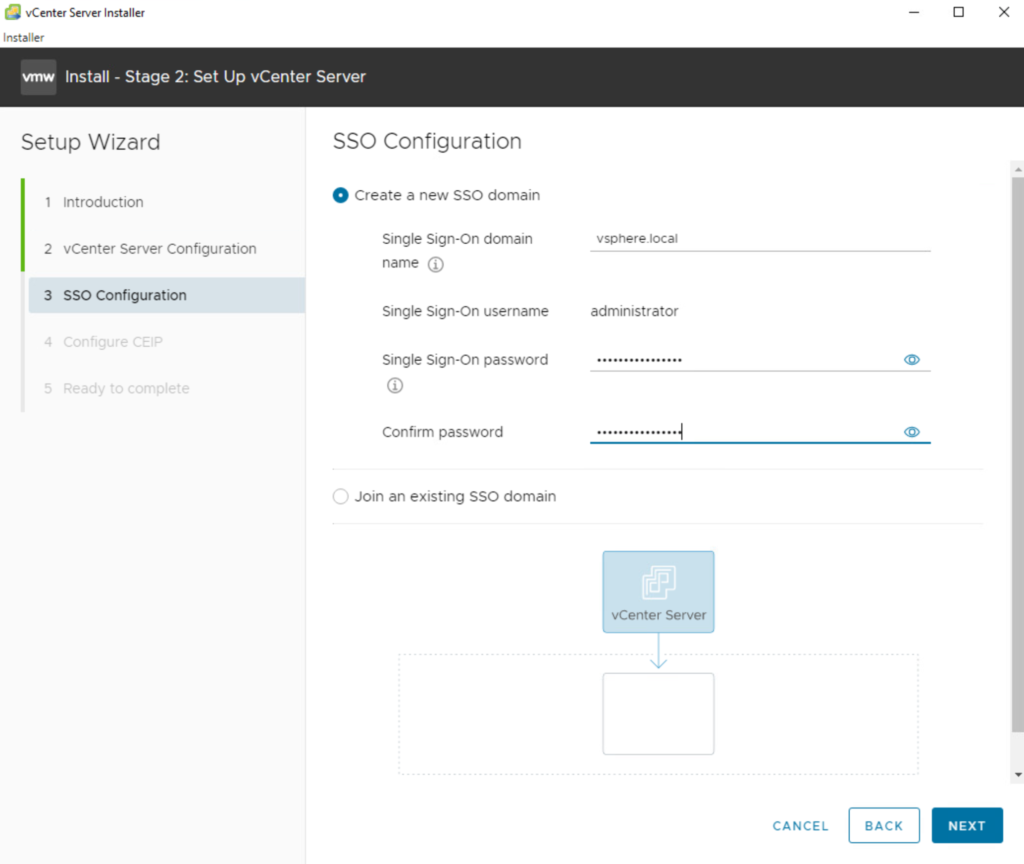
It is important to note that you do not want to use any Active Directory domain for the Single Sign-On domain name, here. The default is usually acceptable unless there is a compelling reason to change this. You have been warned!
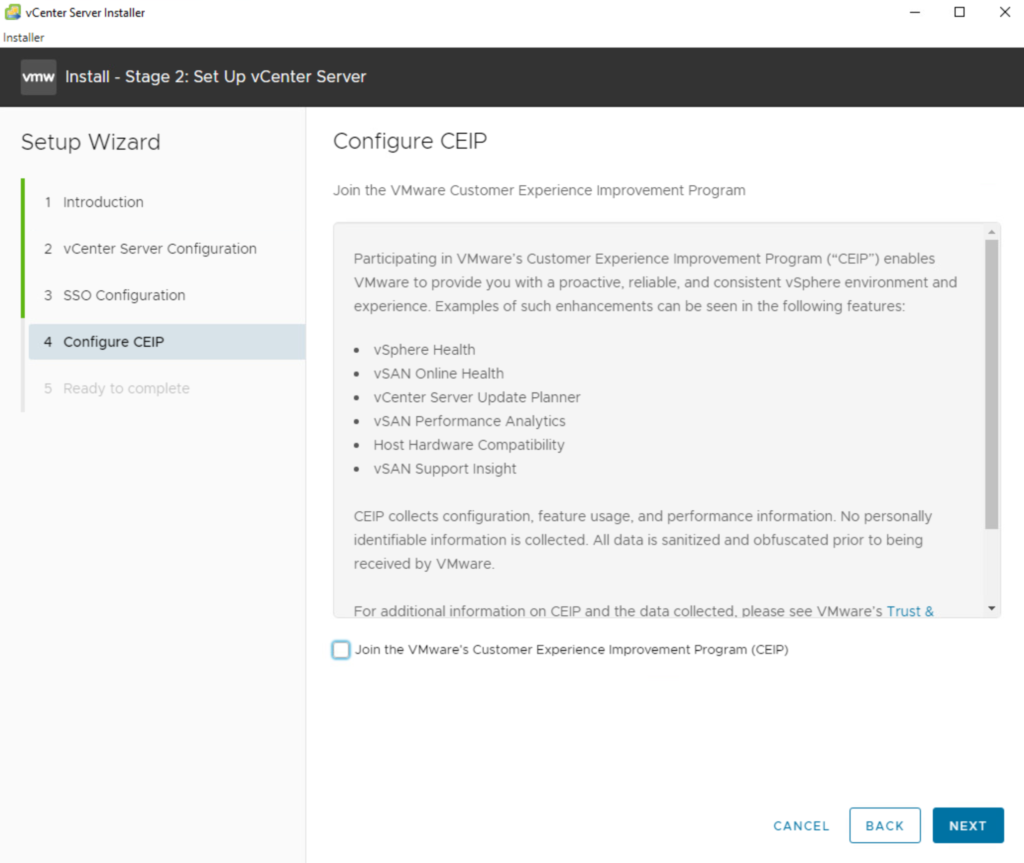
I choose not to Join the VMware’s Customer Experience Improvement Program (CEIP) so I uncheck the box.
Review the settings and ensure everything is configured correctly.
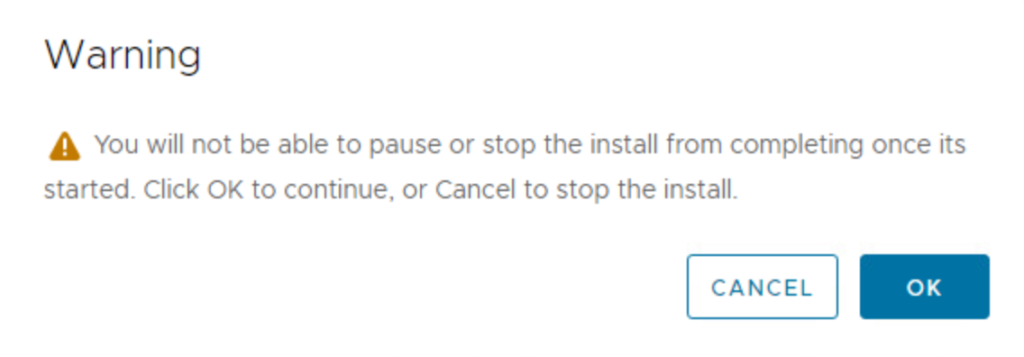
A warning will pop up letting you know that this is the final attempt to go back and revise any configured settings.
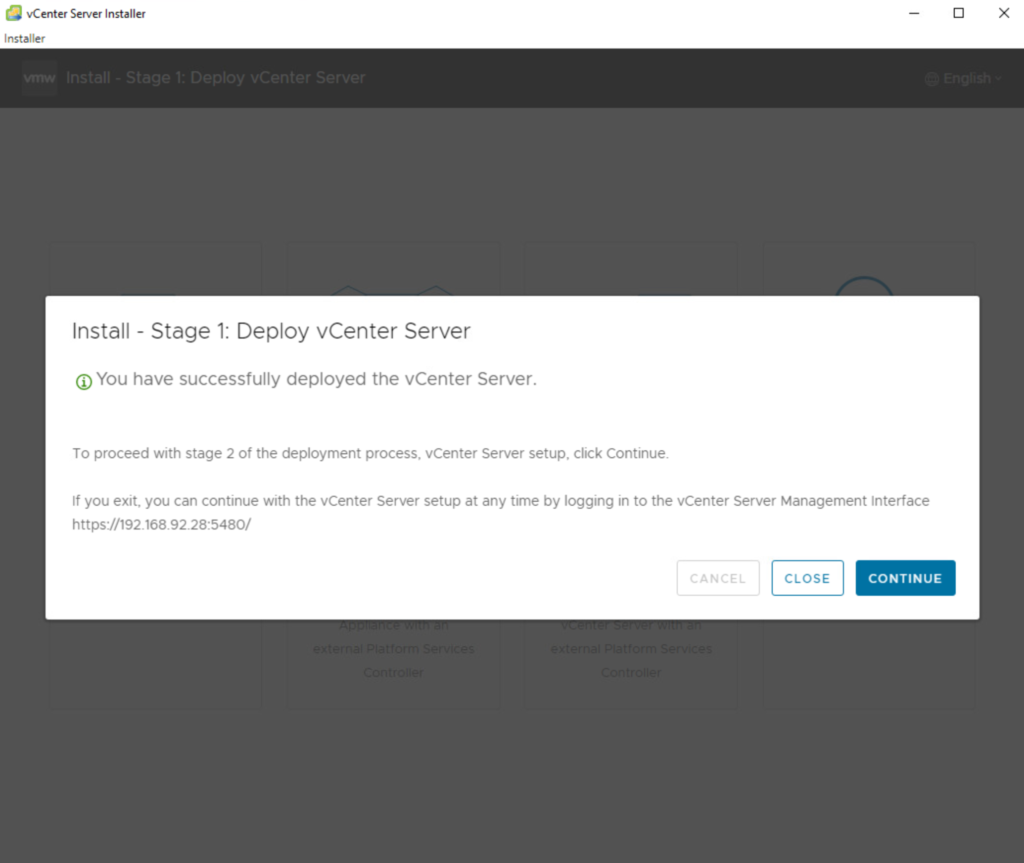
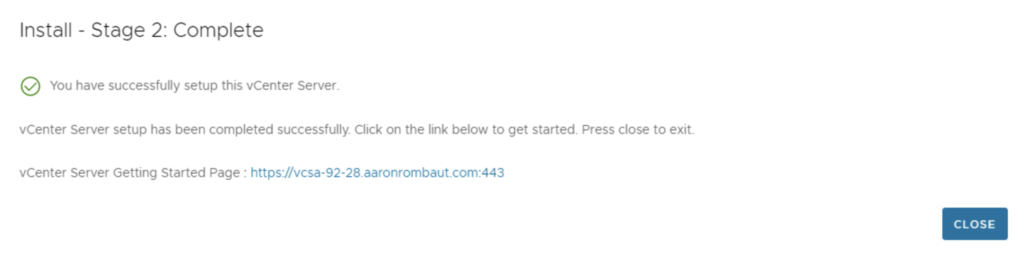
When the installation is complete, you should receive the following message. Click Close.
Navigate to the VMware Appliance Management Interface (VAMI)
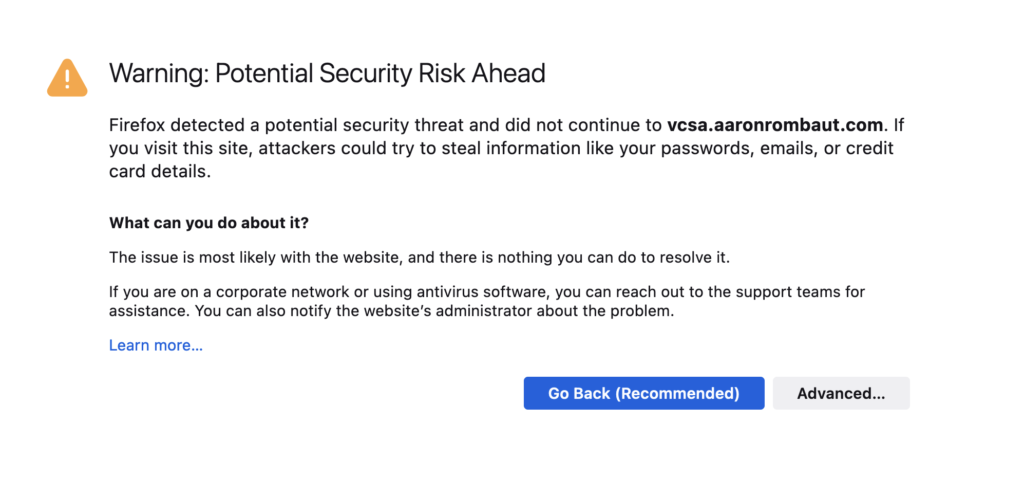
Open up a web browser and navigate to the fully qualified domain name and add the port 5480 to the end. It will look similar to https://vcsa.aaronrombaut.com:5480. Since the appliance is new and using a self-signed certificate, the browser should warn you. Get past the security warning according to your browser.
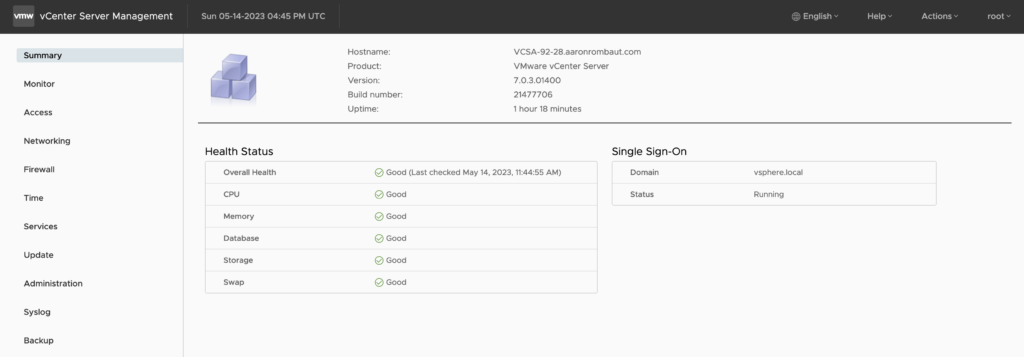
Log in to the appliance with the root user name and password set up during deployment.
Check the overall health of the appliance, if desired.
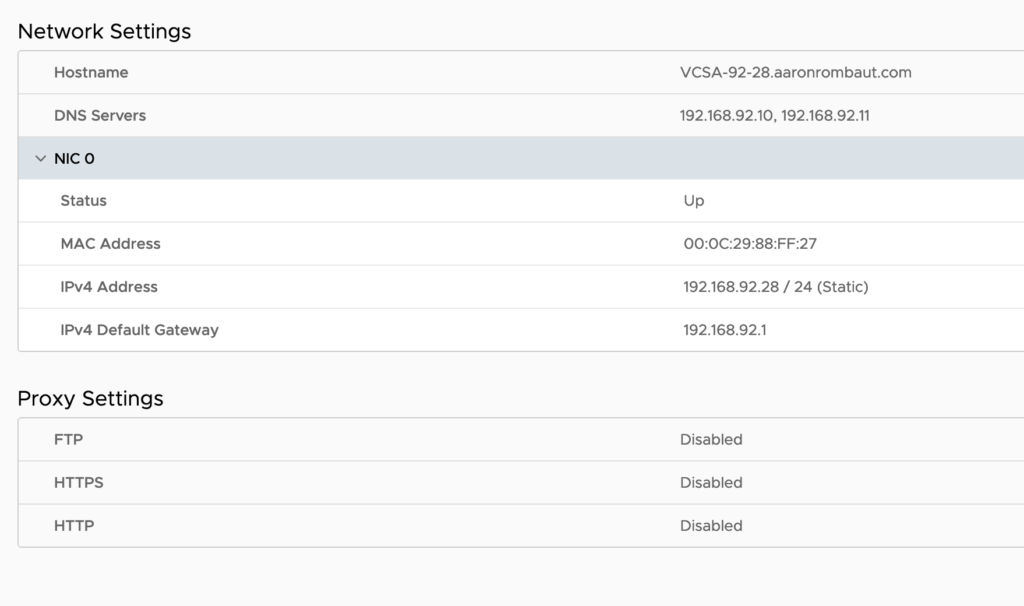
A few things to check would be that the networking parameters that were configured during the deployment are still accurate or adding additional DNS servers.
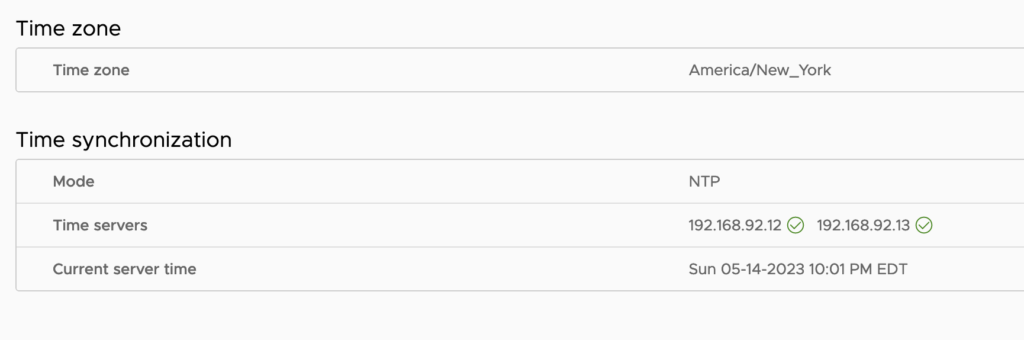
I will also check the Time settings and look for the green check marks to ensure the NTP is actually working. I will also set the time zone to be reflective of where I am setting this up.
Securing the Appliance with a Transport Layer Security (TLS) Certificate
In order for third party and other VMware products to fully trust the appliance, it is imperative to install a TLS certificate sooner than later. It will save tons of time re-configuring services afterwards.
When requesting the certificate, my preference is to use the actual machine name as the common name and then add any CNAME entries as well as the IPv4 and IPv6 address (if in use). This way, I can be certain that I can access the service in any manor and not have trouble.
Since I have a PFX file, I will need to break it into PEM format. For this I will refer to my post, OpenSSL Commands.
Log into the VMware vCenter Server Appliance (VCSA) with the [email protected] account.
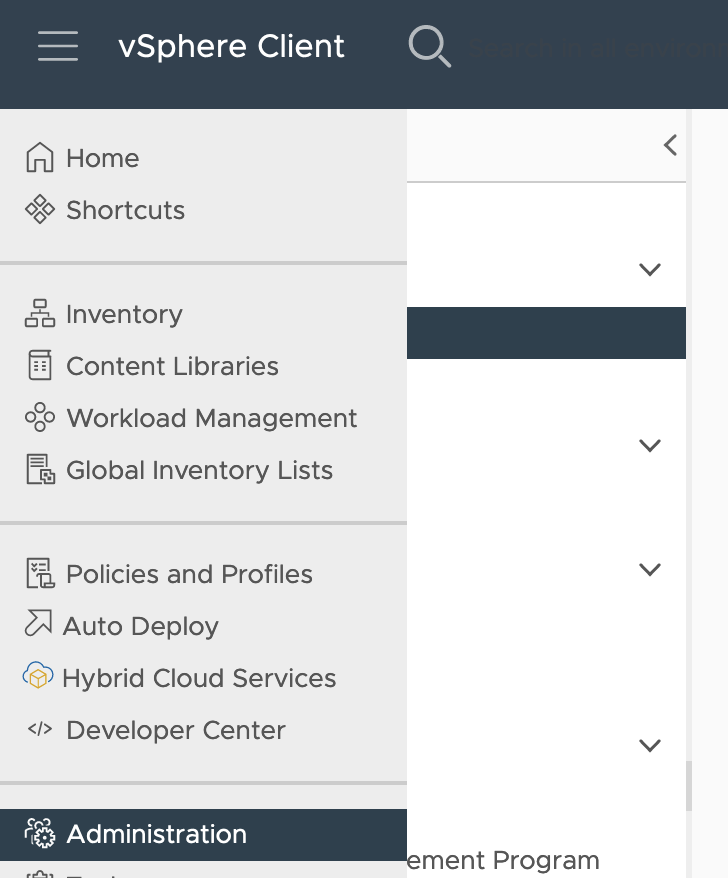
Navigate to Settings and choose Administration.
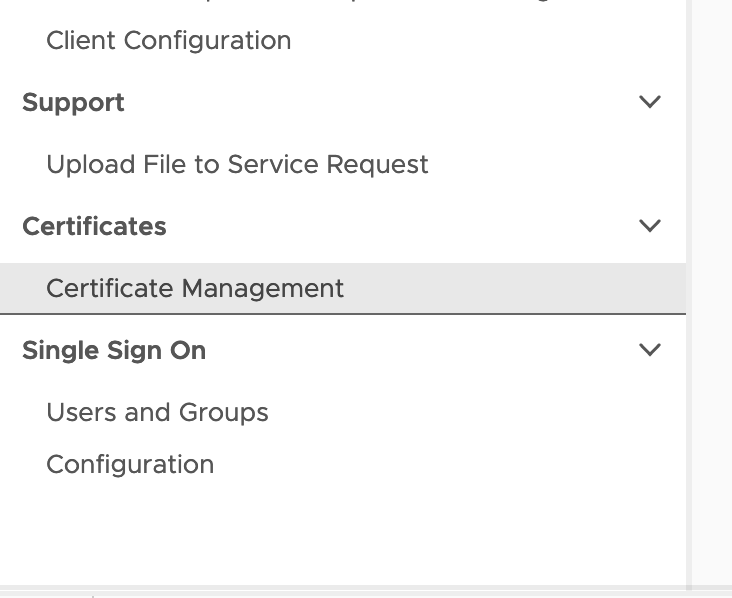
Click Certificate Management.
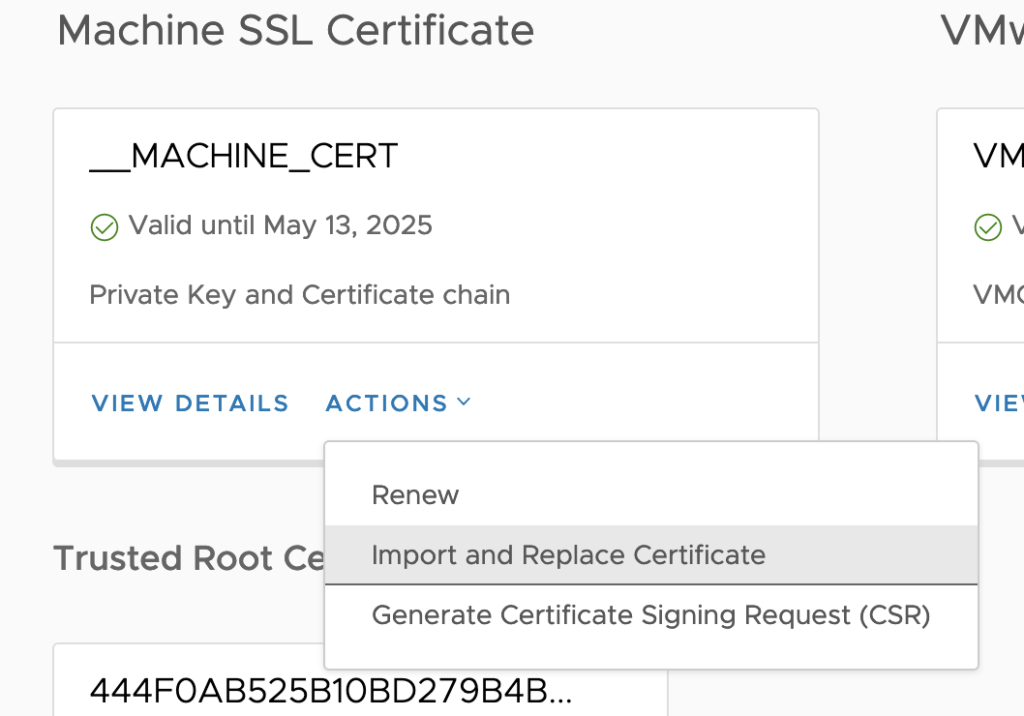
Click Import and Replace Certificate in the Actions menu of the Machine SSL Certificate.
Choose Replace with external CA certificate (requires private key) option.
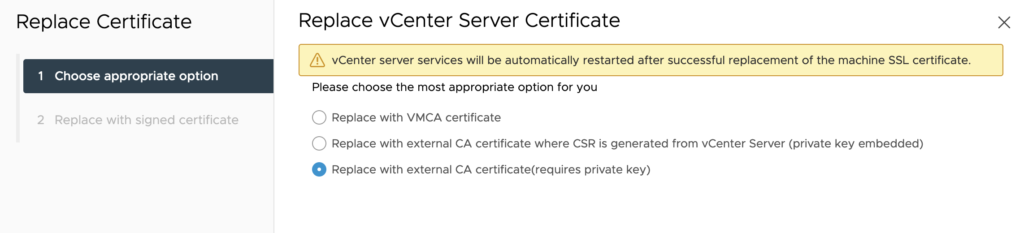
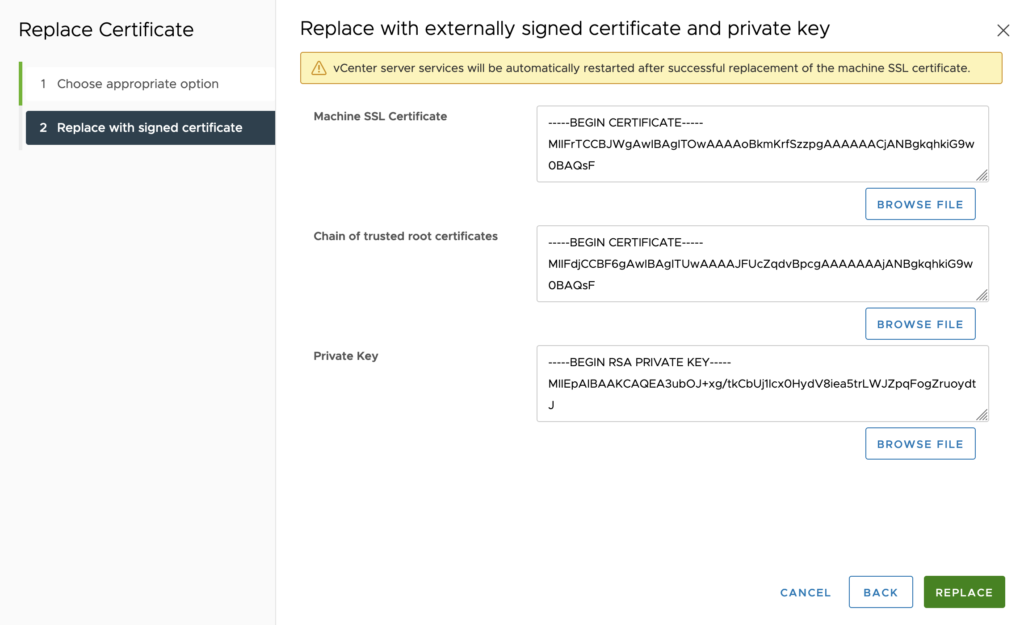
Add the certificate information as necessary. For the chain, I used Intermediate + Root ordering.
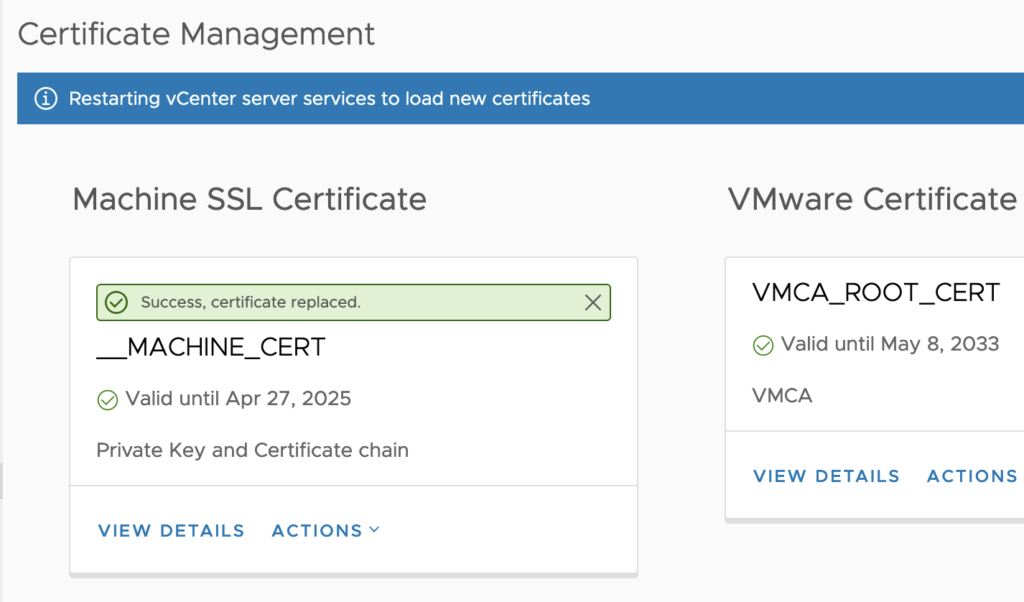
If you refresh the browser page prior to all the services restarting, this message may show up. If after, say, 15 minutes, this message is still there, then the server may have a more drastic issue. The easiest thing to do might be to reset the certificates back to factory default since there are no connected hosts or services, yet.

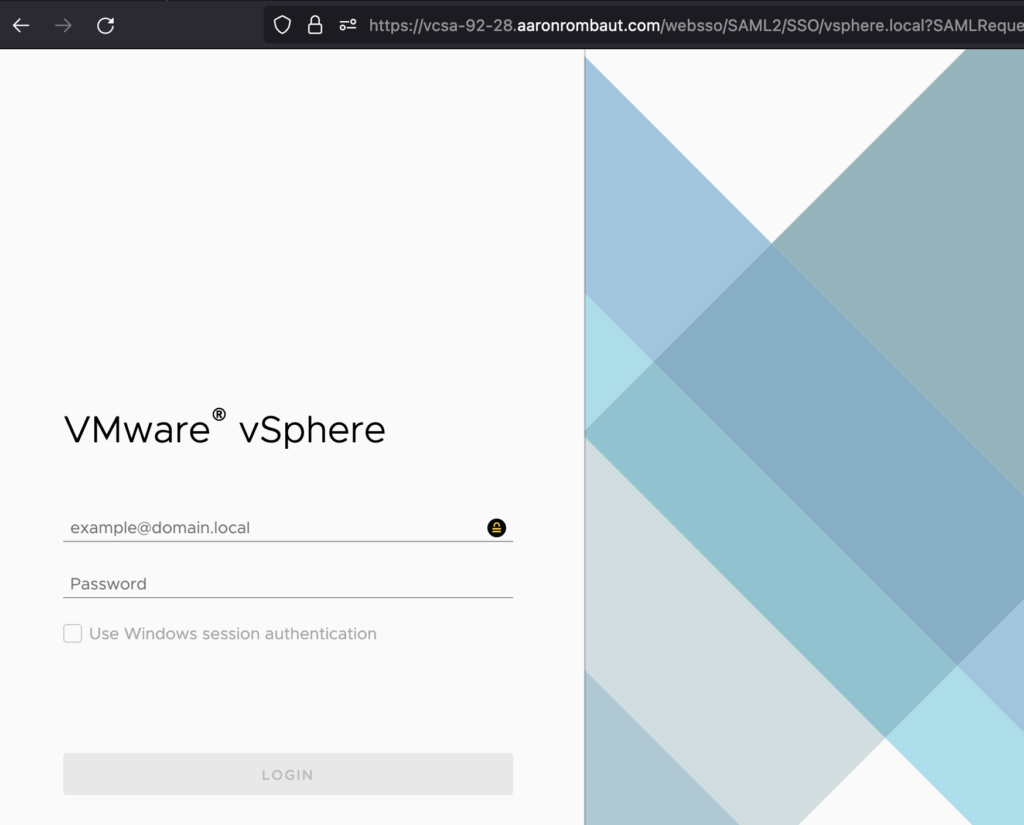
Eventually, the services should restart and you will get this screen. You can see from the image below, the lock is secure, now.
Log back in and change the certificate mode to custom if you plan on adding ESXi hosts with custom certificates. (https://docs.vmware.com/en/VMware-vSphere/7.0/com.vmware.vsphere.security.doc/GUID-122A4236-9696-4E1F-B9E8-738855946A93.html)
If you do not change the mode, the VMware Certificate Authority (VMCA) will issue a self-signed certificate and render all of your work wasted.
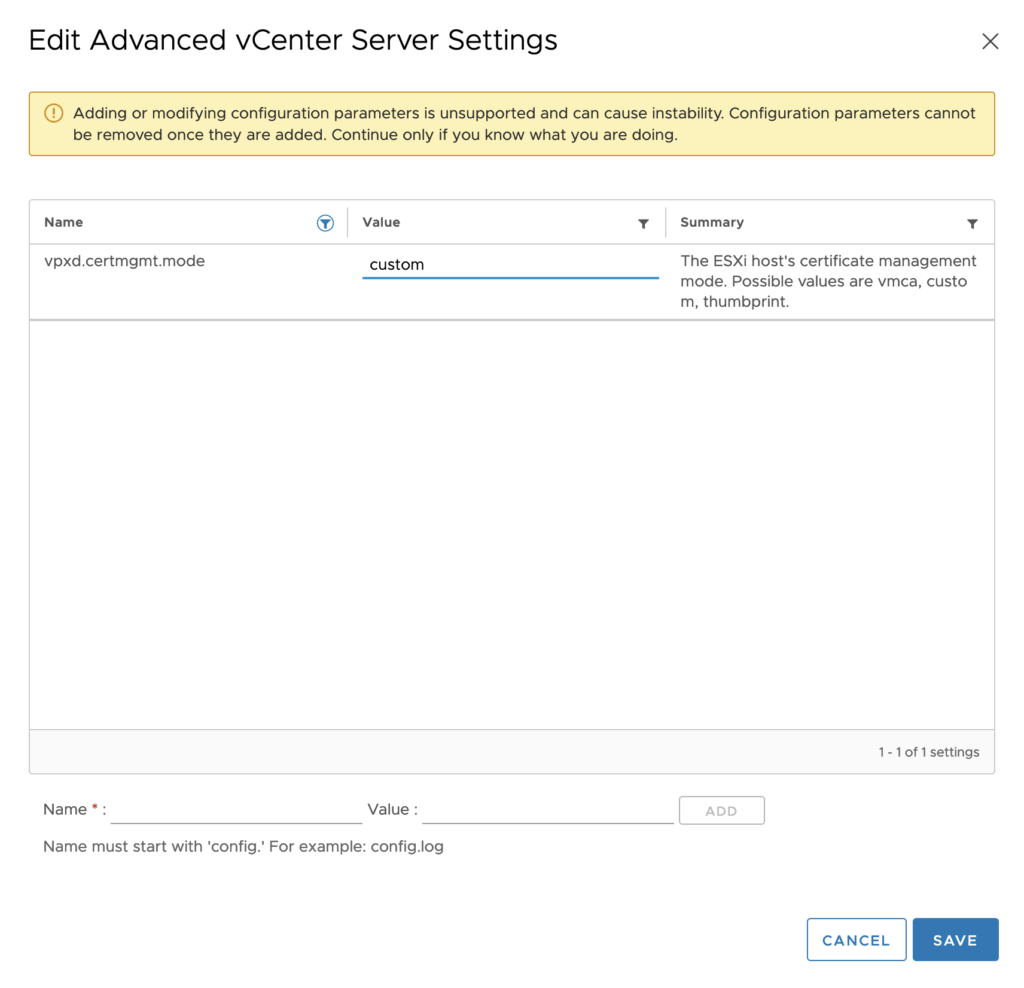
After changing the mode, be sure to restart the appliance for the settings to take place.
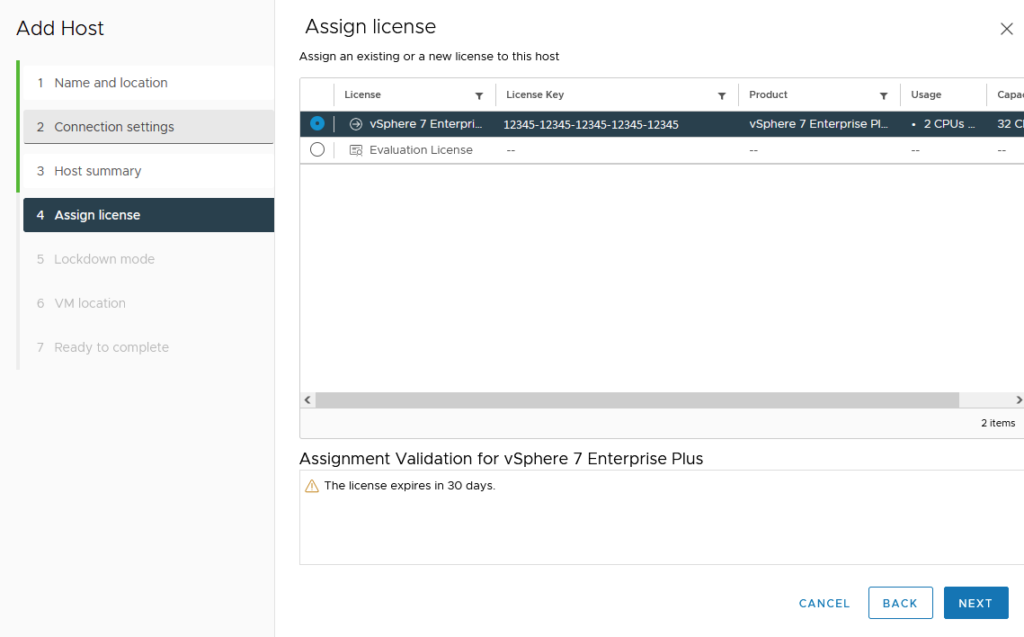
Add Licenses to the Virtual Appliance
I am choosing to add licenses now so that when I bring in my hosts, whether physical hosts or nested, I can choose the license, then. Licenses can be added after, though.
Navigate to the Administration menu and choose Licenses under licensing.
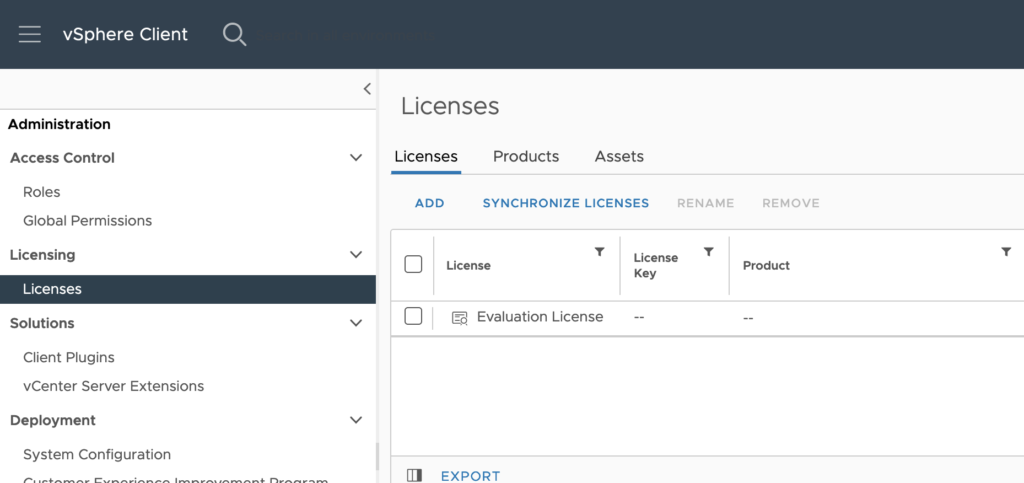
Add and assign the correct licenses to use for vCenter Server and ESXi hosts. I am not using NSX or vSAN, but those licenses can be added here as well.
Add Certificates to the ESXi Hosts
Whether you are using physical host or virtual nested hosts, you should swap out the self-signed certificates prior to adding to vCenter server.
For my lab, I only have a single physical host. It is actually the host that vCenter resides on so I have to do this very methodically. My server is a Dell PowerEdge server and I have a way to administer the server through an out of band management interface. This means I can power off the server and still administer basic things. Ensure the iDRAC or other out of band interface is accessible before powering off the server.
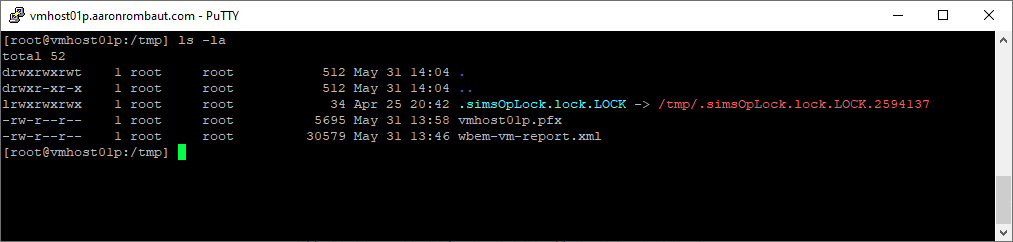
Make an SSH connection to the ESXi host. If the certificate is not already available on the ESXi host, use a program, such as WinSCP, to move the file up. Alternatively, if you are unable to use software like this, you can just upload the certificate using the Datastore browser from the ESXi host itself.
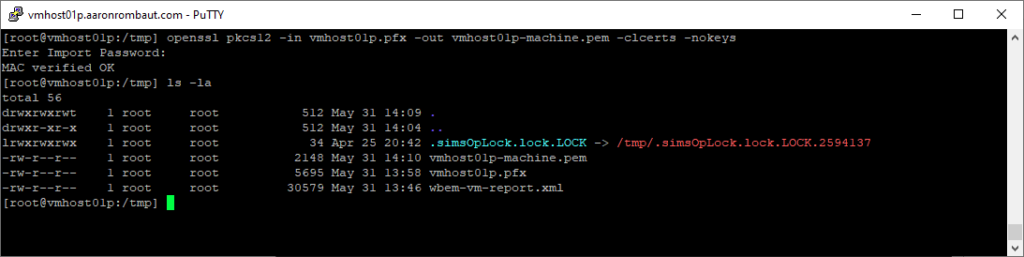
The following OpenSSL command will provide the client certificate (-clcerts) and no keys (-nokeys).
openssl pkcs12 -in <in file> -out <out file> -clcerts -nokeys
The following OpenSSL command will provide the private key (-nocerts) in an unencrypted format (-nodes).
openssl pkcs12 -in <in file> -out <out file> -nocerts -nodes
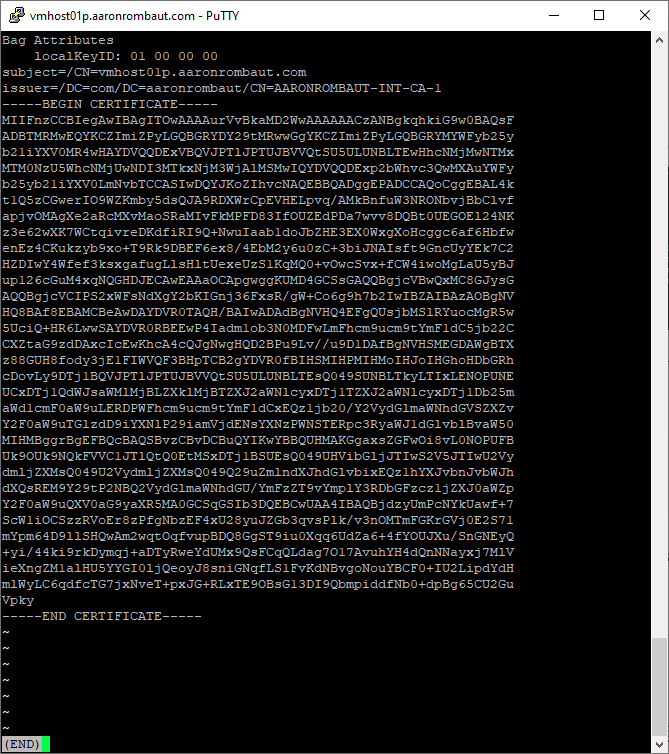
Use less to view the files and verify they converted as expected. You can vi the file to remove the bag attributes if you choose.
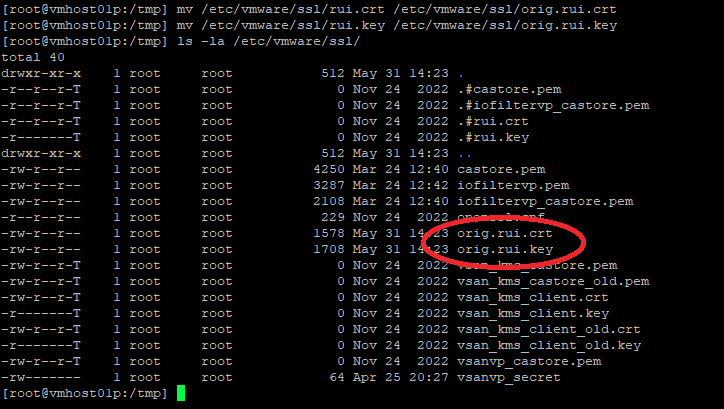
Make backups of the existing certificates.
mv /etc/vmware/ssl/rui.crt /etc/vmware/ssl/orig.rui.crt
mv /etc/vmware/ssl/rui.key /etc/vmware/ssl/orig.rui.key
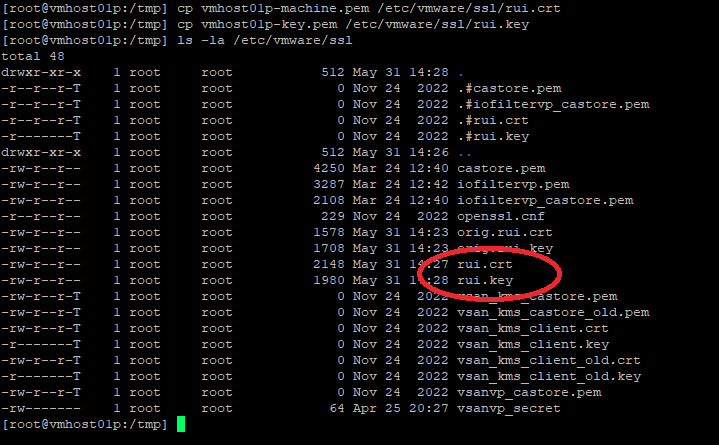
Copy the new converted files to the /etc/vmware/ssl directory.
cp vmhost01p-machine.pem /etc/vmware/ssl/rui.crt
cp vmhost01p-key.pem /etc/vmware/ssl/rui.key
If this is your only host, like me, then you will want to save all in-progress work and shut down all running virtual machines. Ensure you can access the out of band management (such as an iDRAC) or have physical access to the host before restarting. I am performing the next few items through my host’s iDRAC.
Verify there are no running virtual machines with esxcli vm process list.

Put the host into maintenance mode with esxcli system maintenanceMode set --enable=true.

Reboot the ESXi host from the out of band management interface with reboot. I am not providing an image for this.
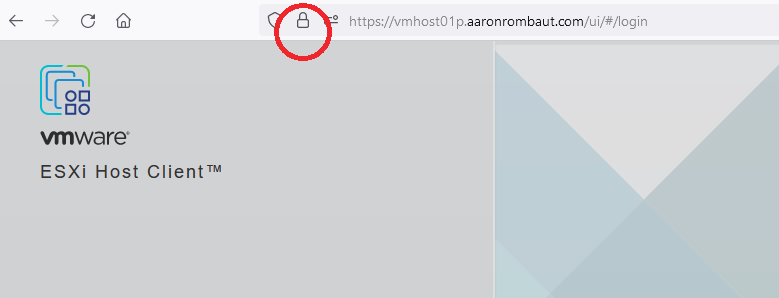
When the host reboots, check that you can navigate to it with a web browser and that the page is secured. If there are any issues, there may be an issue with the certificate. You can swap out the certificate with a new one and then reboot the host again.
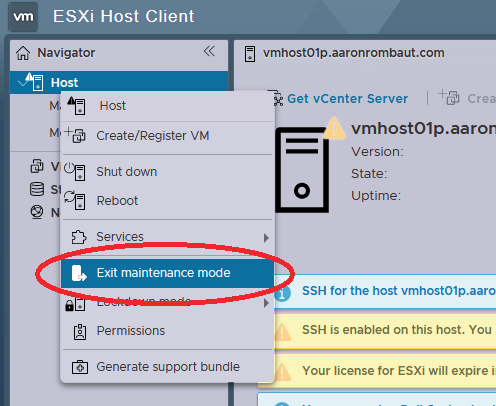
Log in and take the host out of Maintenance Mode.
Power on all the previously running virtual machines before continuing to the next section.
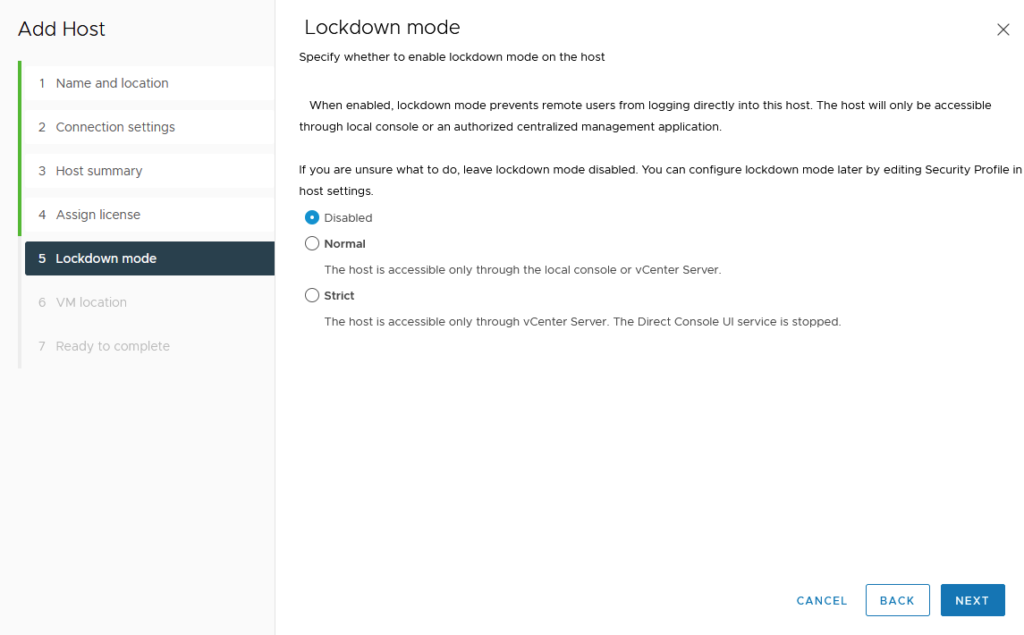
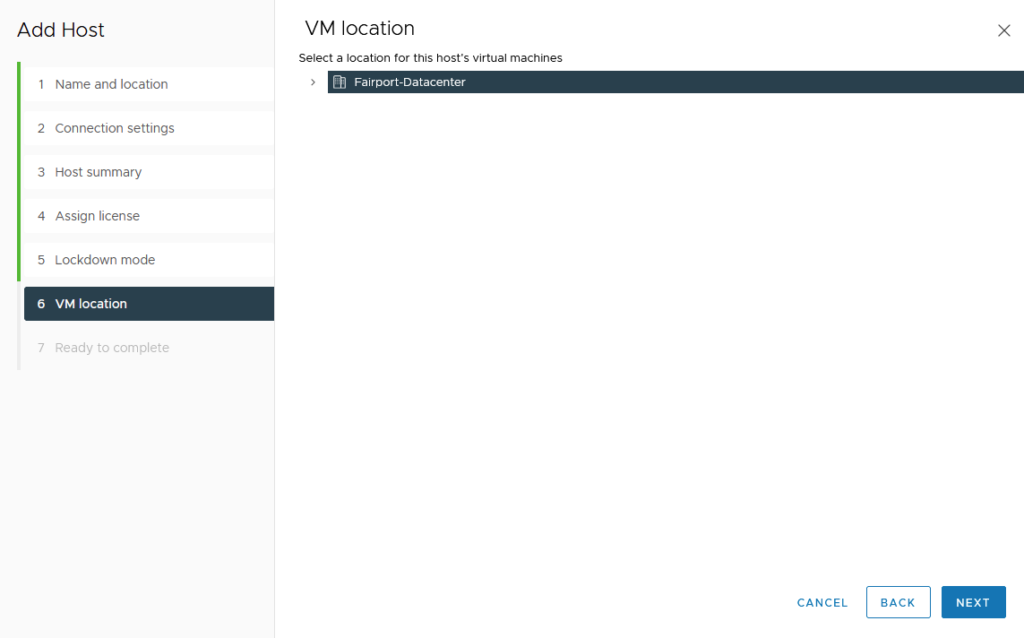
Adding VMware ESXi Hosts to vCenter Server Appliance
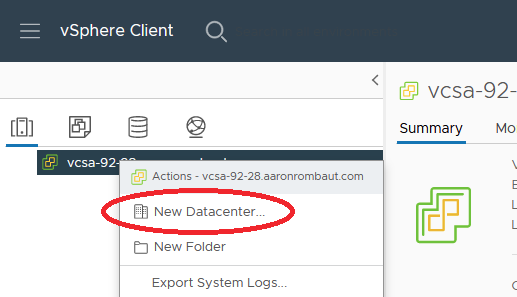
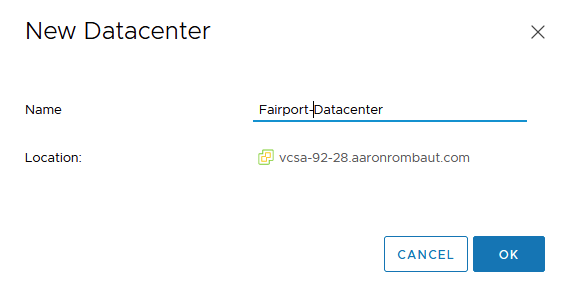
Log in to the the vSphere Client and add a New Datacenter.
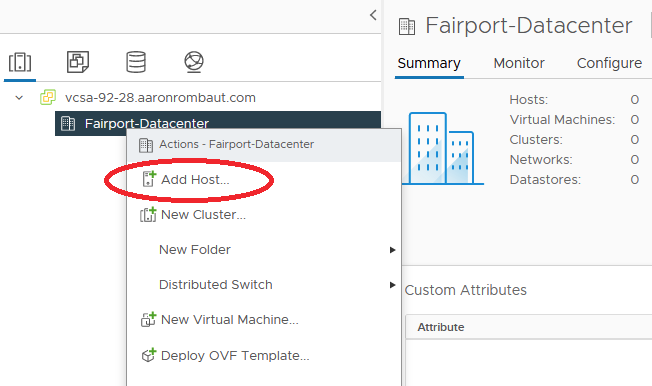
Now we will add a host. Be sure the ESXi hosts have forward and reverse DNS entries before proceeding!
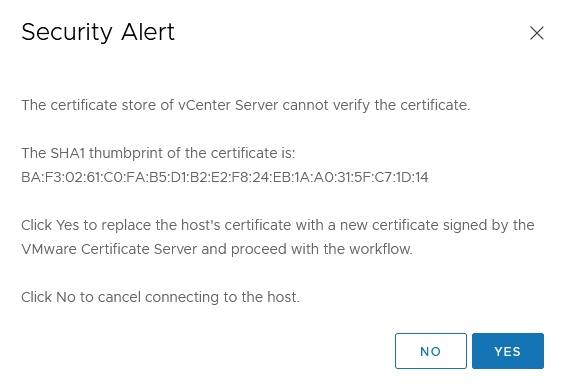
If the certificate is not trusted (i.e. the ESXi host certificate has not been swapped out yet) then the following Security Alert window might display. Verify the SHA1 thumbprint of the vCenter server.
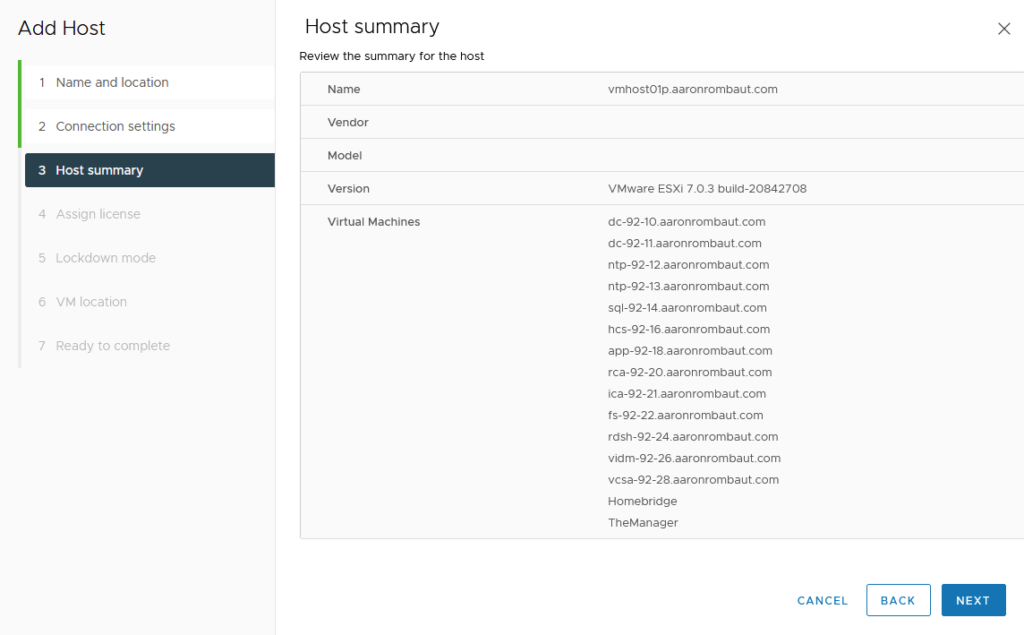
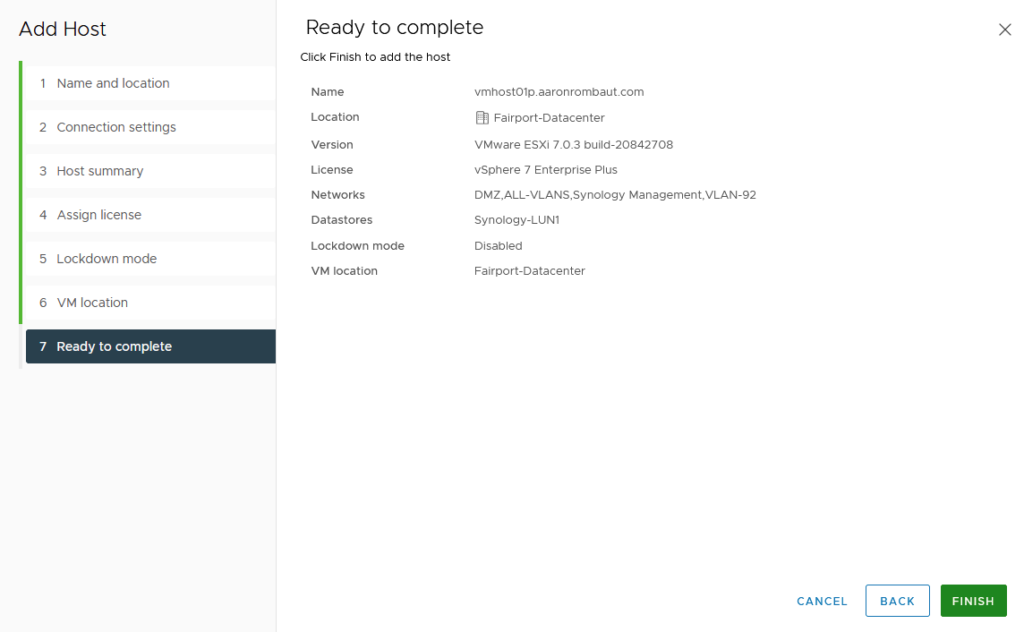
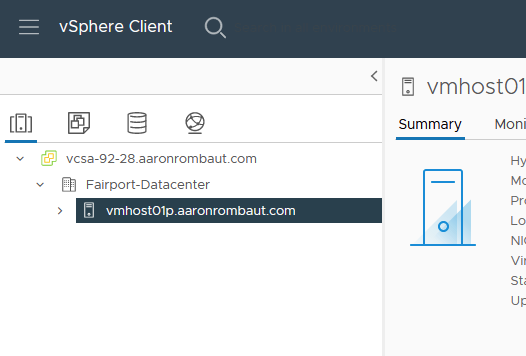
The host is added to vCenter and available.
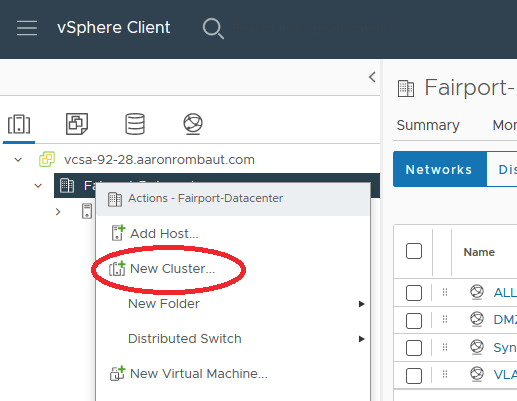
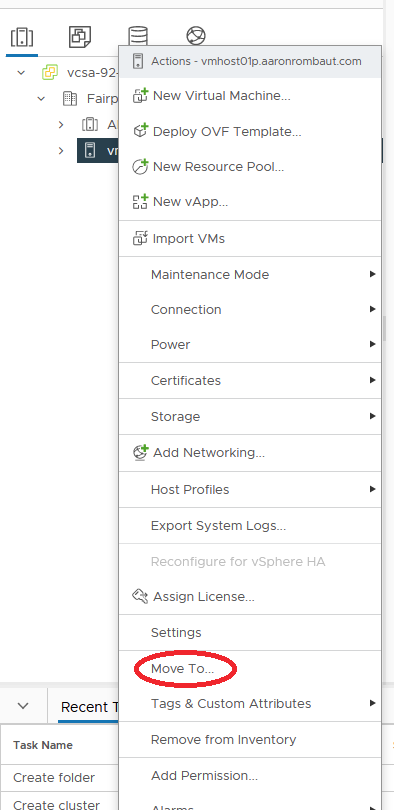
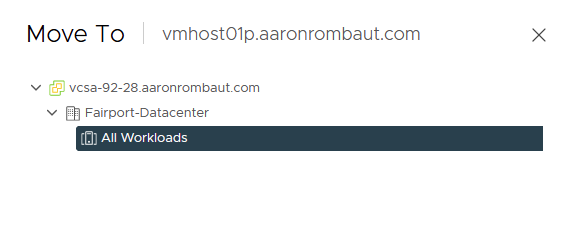
Add ESXi Host to a Cluster
Even though I only have one host, I will need to add the host to a cluster. I just will not be running vSphere HA (high availability) or vSphere DRS (Distributed Resource Scheduler).
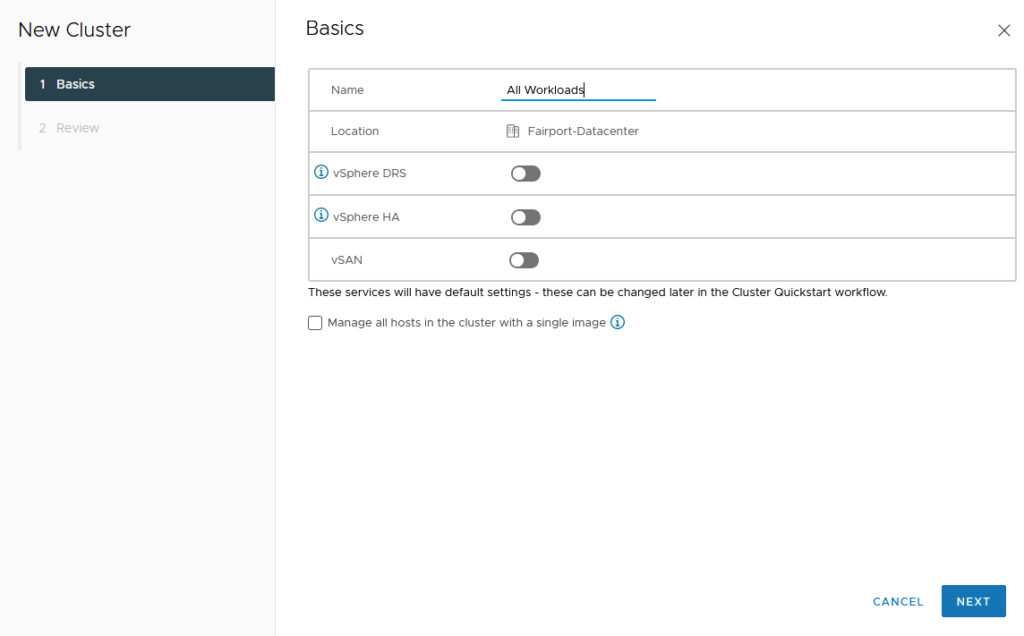
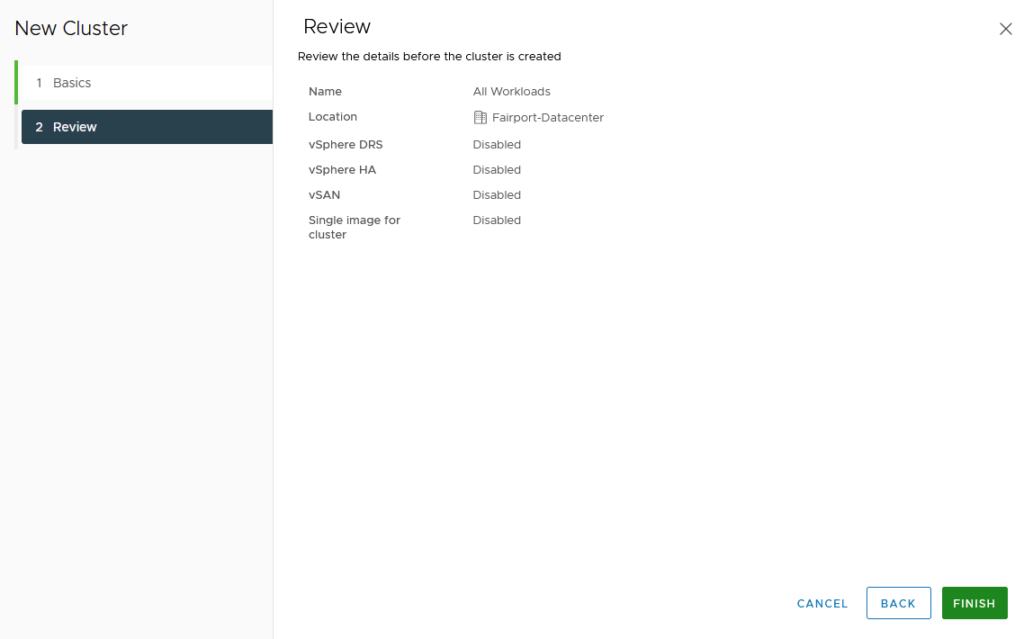
Add a cluster if one does not already exist.
Click and drag the ESXi host into the cluster. Alternatively, right-click the host and move into the cluster.
Leave a Reply