Overview
I am choosing to install VMware Workspace ONE Access 22.09.1.0 (current as of this writing) so that I have a single pane of glass to access shared applications as well as virtual desktops. Workspace ONE Access will also provide a means to standardize authentication mechanisms through on-premises or cloud directories.
Download and Deploy the Open Virtual Appliance (OVA)
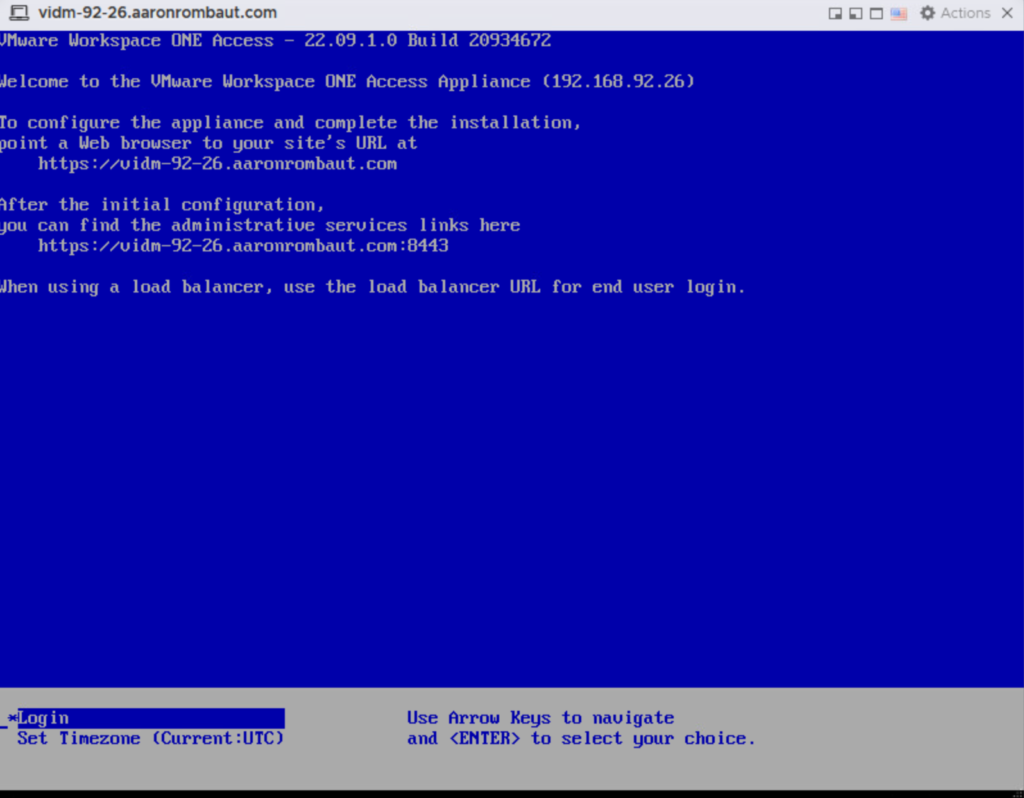
Download the OVA from customerconnect.vmware.com and deploy into the vSphere environment. When the deployment completes, the following should be displayed on the virtual machine’s console.
Configure Microsoft SQL Database for VMware Workspace ONE Access with Local SQL Server Authentication
Review the script from the referenced page above to create a database and add a user.
/*
Values within angle brackets (< >) are example values. When replacing the example value,
remove the angle brackets. The database name is case sensitive, and the name must be one word with no spaces.
Make sure you enter the database name the same in all instances.
*/


CREATE DATABASE <saasdb>
COLLATE <Latin1_General_CS_AS>;
ALTER DATABASE <saasdb> SET READ_COMMITTED_SNAPSHOT ON;
GO

BEGIN
CREATE LOGIN [<loginusername>] WITH PASSWORD = N'<password>';
END
GO

USE <saasdb>;
IF EXISTS (SELECT * FROM sys.database_principals WHERE name=N'<loginusername>')
DROP USER [<loginusername>]
GO

CREATE USER [<loginusername>] FOR LOGIN [<loginusername>]
WITH DEFAULT_SCHEMA=saas;
GO

CREATE SCHEMA saas AUTHORIZATION [<loginusername>]
GRANT ALL ON DATABASE::<saasdb> TO [<loginusername>];
GO

ALTER ROLE [db_owner] ADD MEMBER [<loginusername>];
GO
Run the following script to confirm the database and user were created correctly.
 execute as user = 'domain\username' or 'localSQLuser'


/* Check if user is db owner. Return true */
SELECT IS_ROLEMEMBER('db_owner') as isRoleMember

/* Make sure user is not sysadmin. Should return false */
SELECT IS_SRVROLEMEMBER('sysadmin')  as isSysAdmin

/* check if saas schema exists, should be not null */
SELECT SCHEMA_ID('saas') as schemaId

/* check schema owner, should be user provided to installer */
SELECT SCHEMA_OWNER FROM INFORMATION_SCHEMA.SCHEMATA where SCHEMA_NAME='saas'

/* check if saas is user default schema, should return saas */
SELECT SCHEMA_NAME() as SchemaName

/* check db collation, should return Latin1_General_CS_AS */
SELECT DATABASEPROPERTYEX('<saasdb>', 'Collation') AS Collation

/* check if read committed snapshot is on, should return true */
SELECT is_read_committed_snapshot_on FROM sys.databases WHERE name='<saasdb>'
Configure VMware Workspace ONE Access Appliance
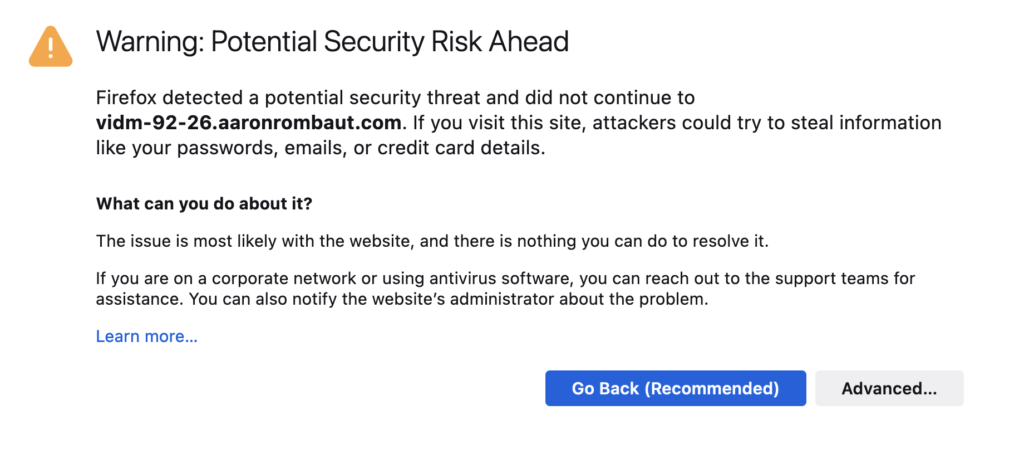
Use the address provided on the console and open the page in a web browser. Since there is only a self-signed certificate, the browser will likely not trust the page. Click through for now as the certificate will be replaced soon.
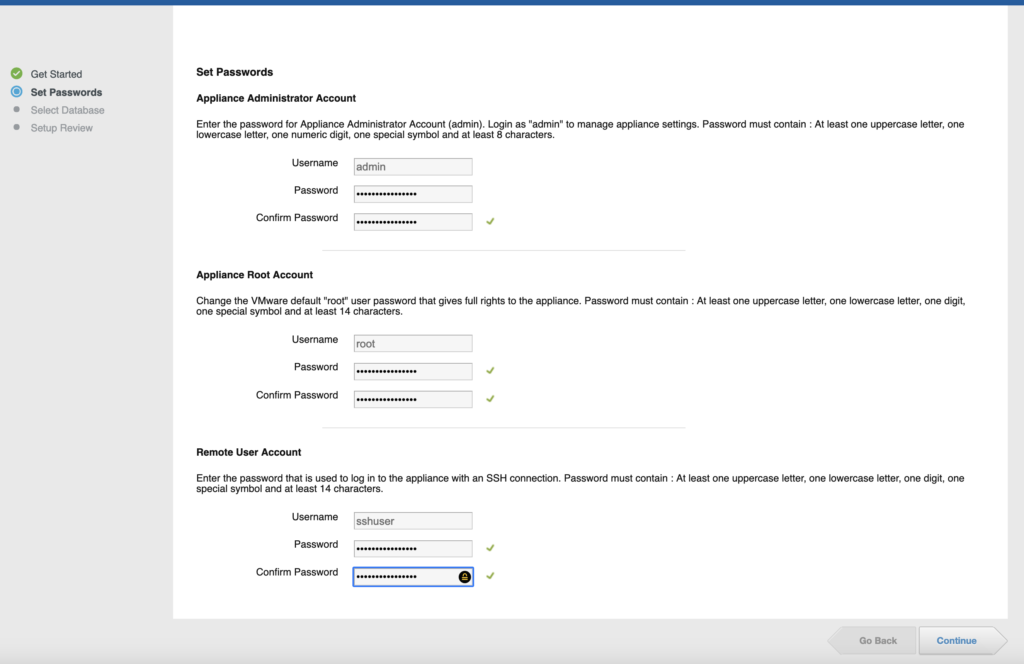
Set the passwords accordingly.
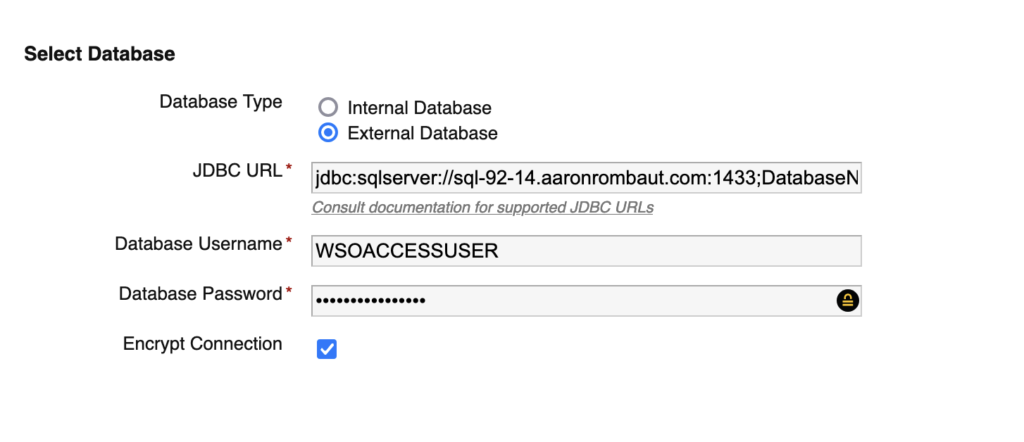
Fill in the details for the connection to the database. Since the Microsoft SQL server should already be secured by this point, I am opting to also check the box to Encrypt Connection. If the certificates are not already loaded, add any root and intermediate certificates to trust the SQL server that are needed. These are added individually.
The Java Database Connection (JDBC) URL follows this format:
jdbc:sqlserver://<hostname_or_IP_address:port#>;DatabaseName=<saasdb>
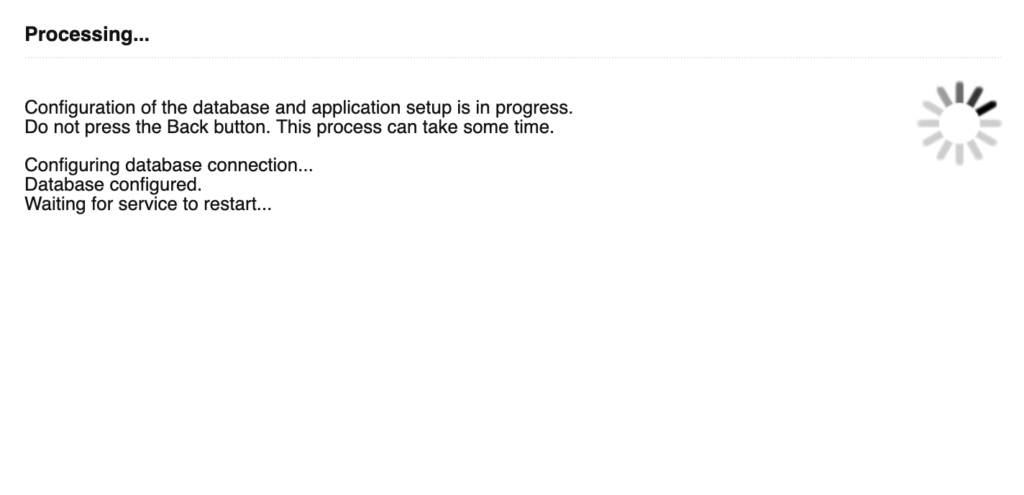
If the database and user were configured correctly, the following window will display. You should see the message, Database configured.
After a short while, the following window will open up indicating the Setup is complete.
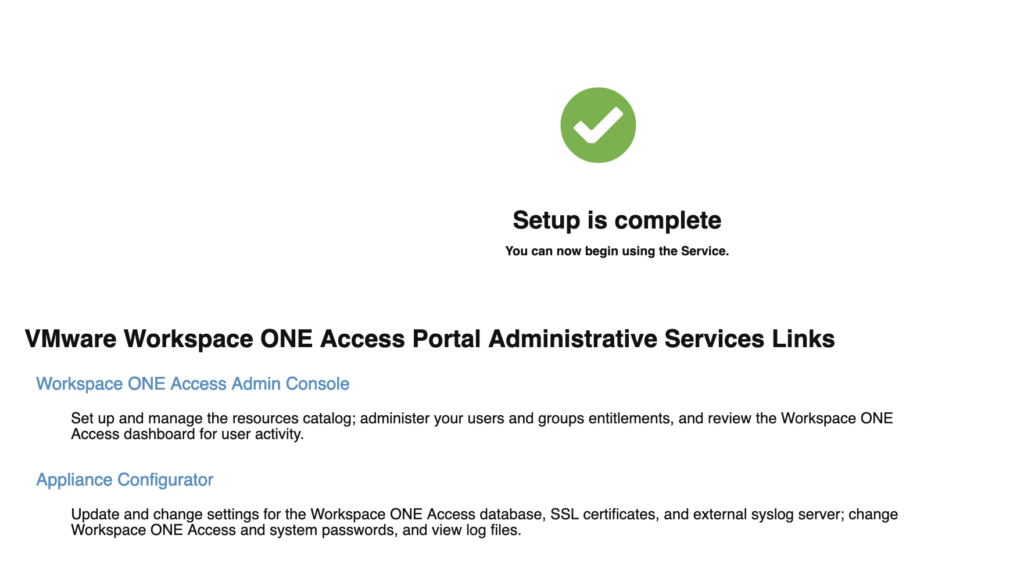
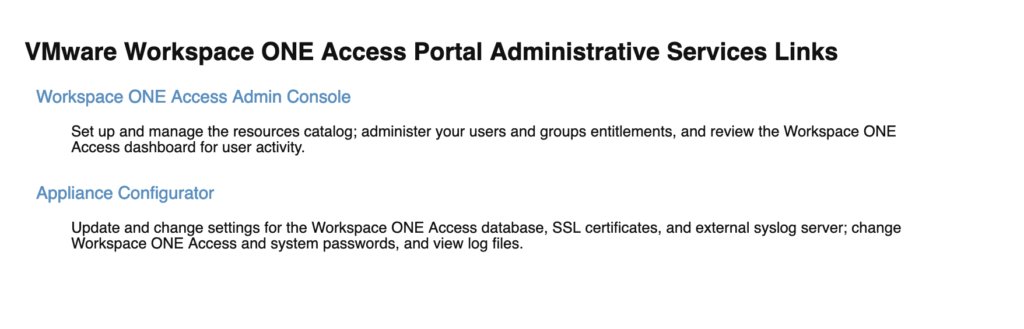
Click on the Appliance Configurator so that we can add a trusted Transport Layer Security (TLS) certificate and set the appropriate time configuration. Since this is an authentication virtual appliance, this is an extremely important step to complete!
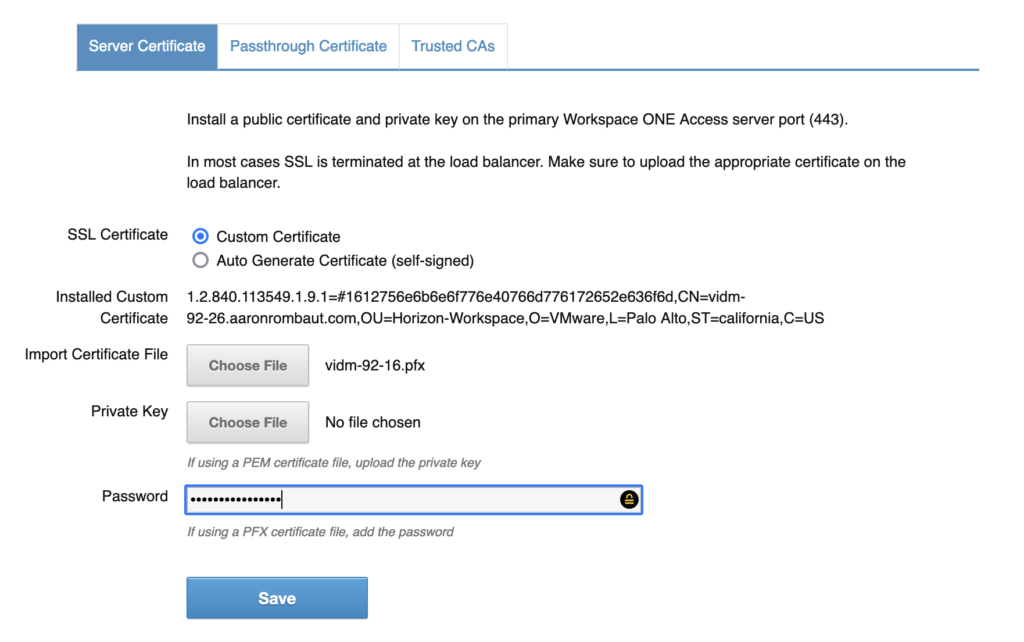
Once on the configurator page, click Install SSL Certificates. Add the certificate file and optional private key if not using a PFX file. Provide the password if using a PFX file and click Save.
The following windows should pop up, indicating that the certificate was accepted and is being installed.
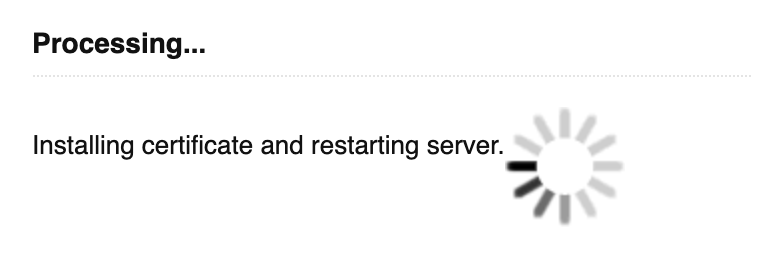
Wait for the page to refresh before proceeding.
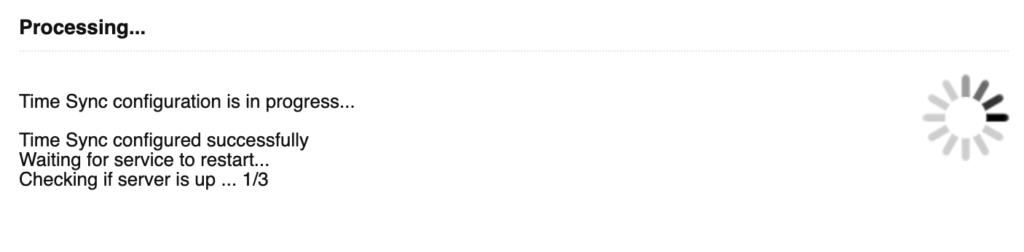
Once the page refreshes, click Time Synchronization. Change the Time Sync to NTP and add the NTP servers to the text box. The documentation displays one, but I added two as space separated.
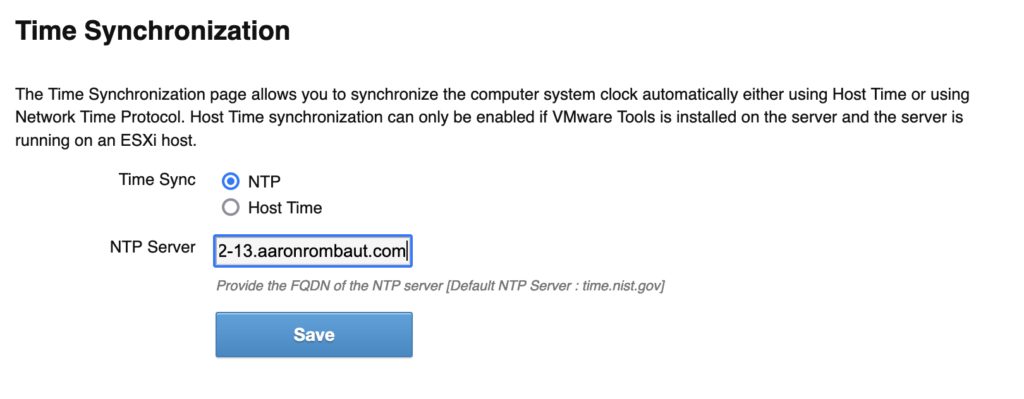
As above, when the Save button is clicked, the following box should pop up indicating the configuration is successful.
The appliance is now configured. In the next section, we will configure the services.
Configure the VMware Workspace ONE Services
To log into the Admin Console or the Configurator, the base URL can be used.
https://fully.qualified.domain.name:8443/cfg/shortcuts
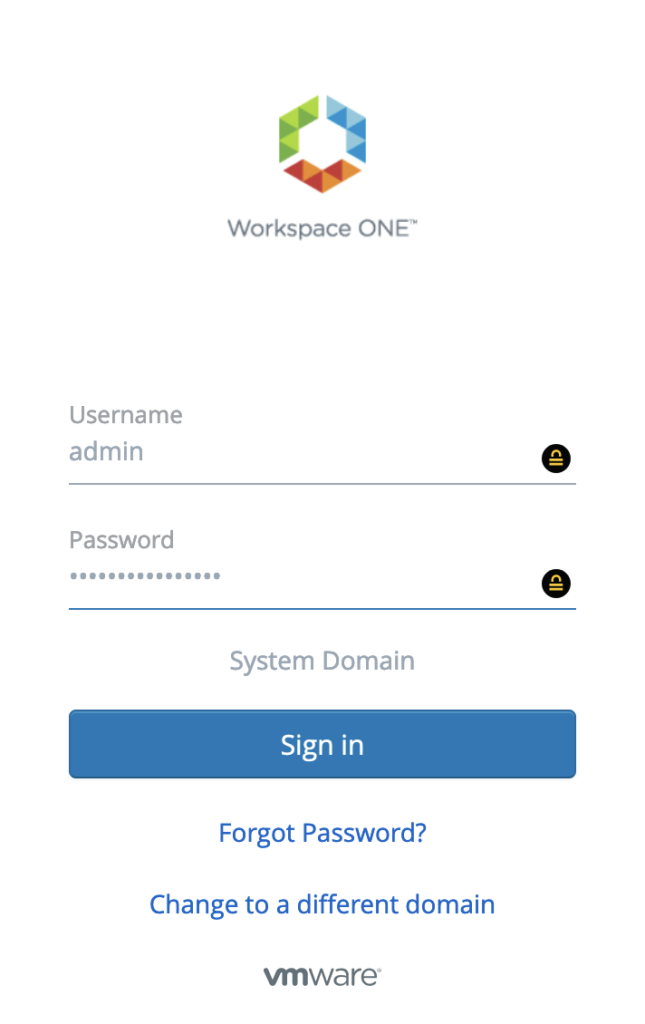
Click Workspace ONE Access Admin Console. Log in with the admin credentials set during the appliance configuration.
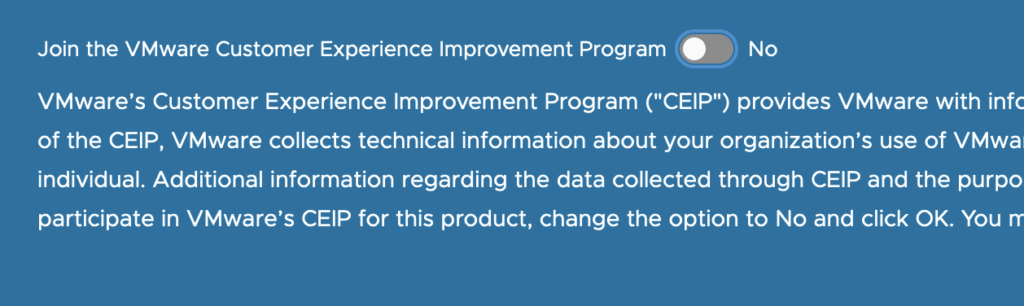
Join the Customer Experience Improvement Program (CEIP) if necessary. I am opting out.
Download the Configuration File from Workspace ONE Access Appliance
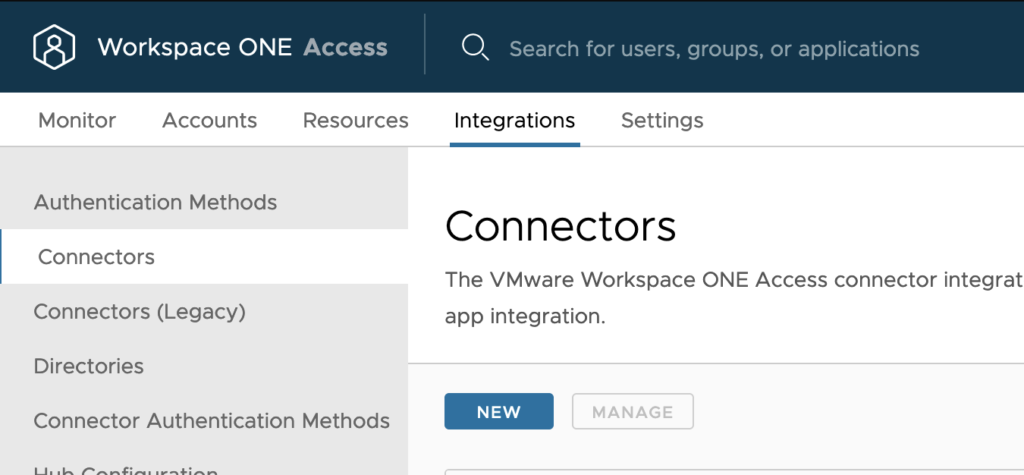
Click on Integrations > Connectors. Click New.
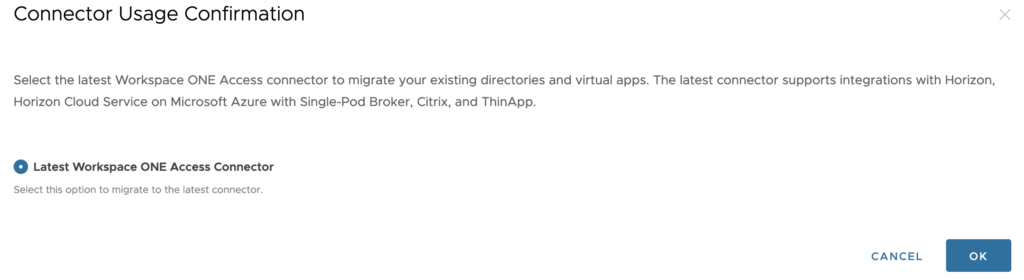
Leave the default and click OK.
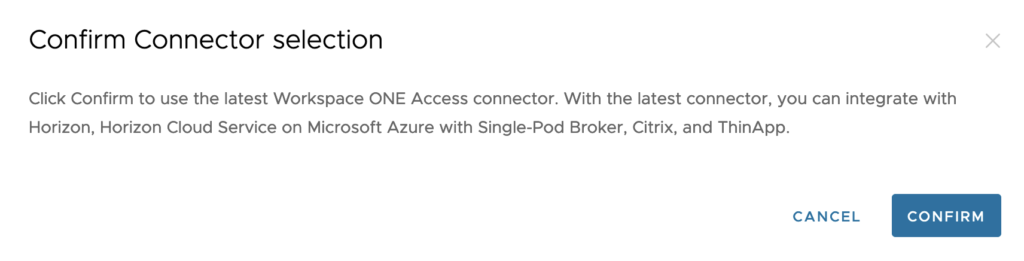
Confirm the selection by clicking Confirm.
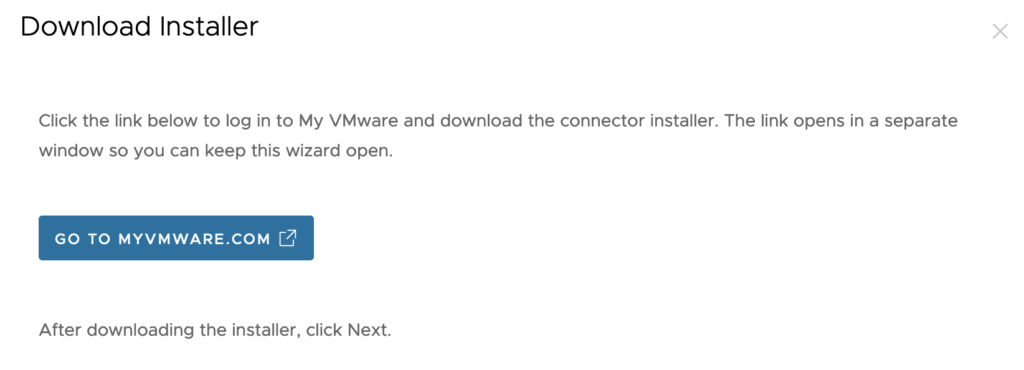
Download the installer from customerconnect.vmware.com.
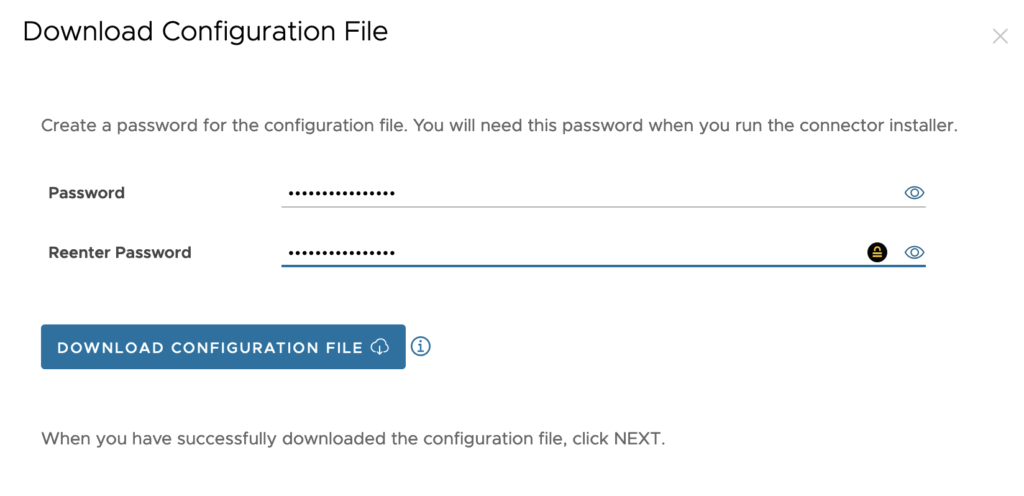
Download the Configuration File after typing in a password and a confirmation password. Pay attention to the password. Follow this article for more guidance on password restrictions.
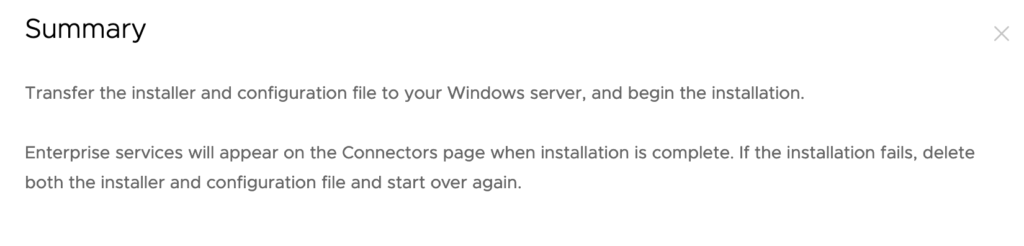
The summary screen displays. When ready, click Close.
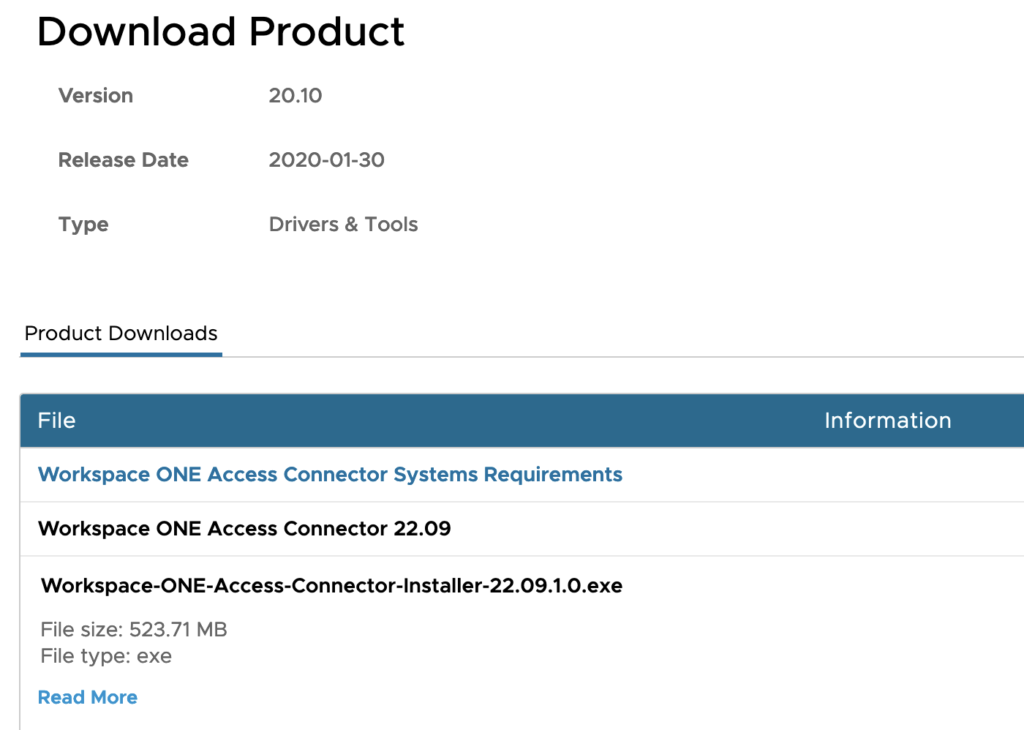
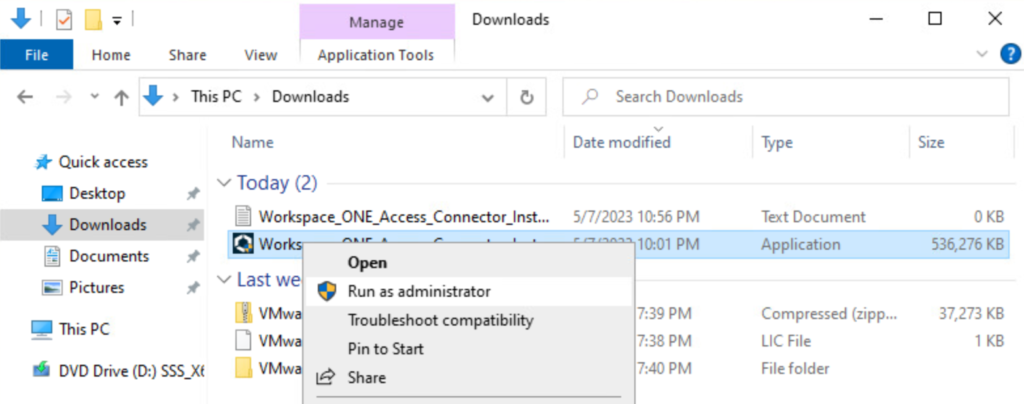
I downloaded the following connector.
I am choosing to install the connector on the file server I have set up.
Even though the account I am using to install the connector is a member of the Domain Admins Security Group and the Security Group is also in the local computer’s Administrators group, I had to explicitly add the individual user account (my admin account). When I started the install, I also right-clicked and chose the Run as administrator on the installer file that was downloaded. This allowed a successful installation; mileage may vary.
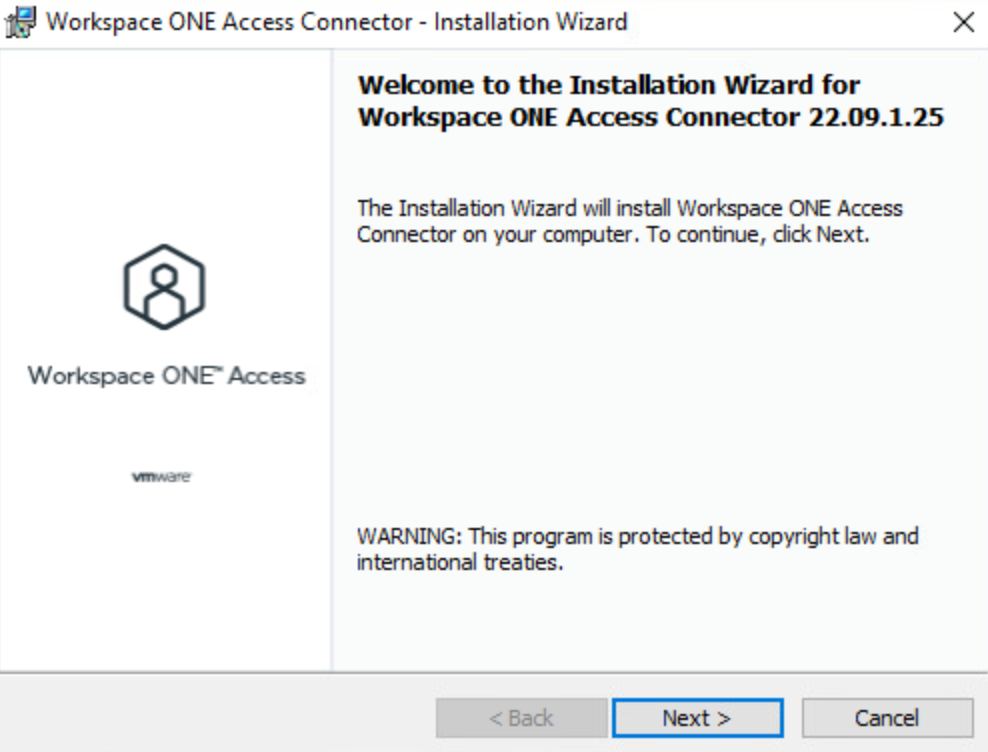
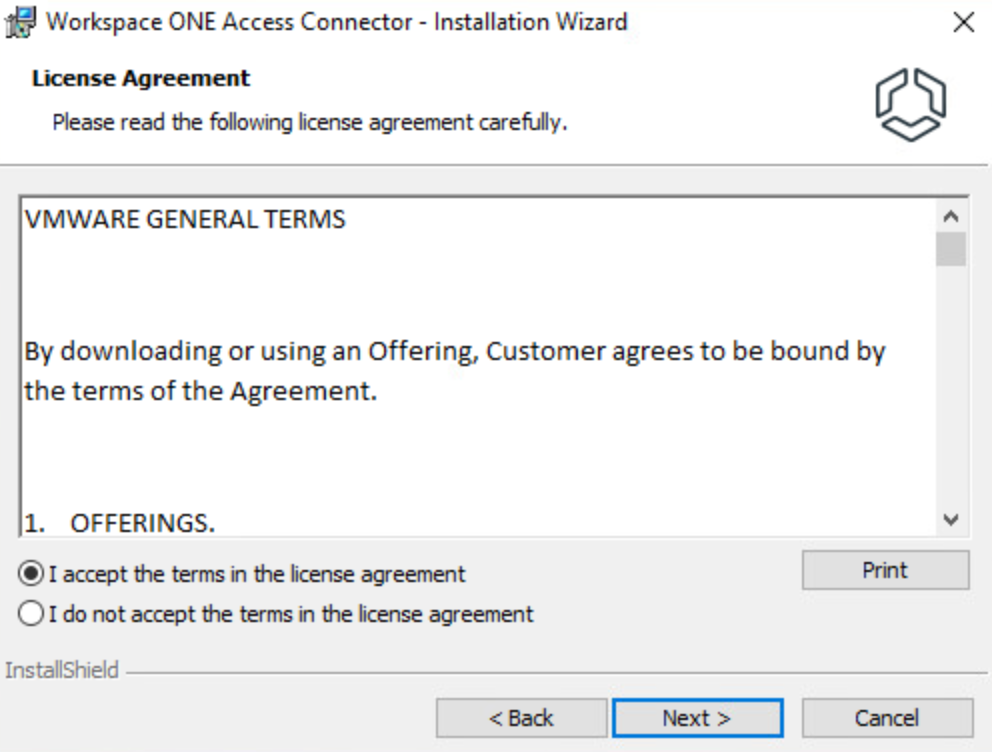
Accept the license agreement and click Next.
Leave the default and click Next.
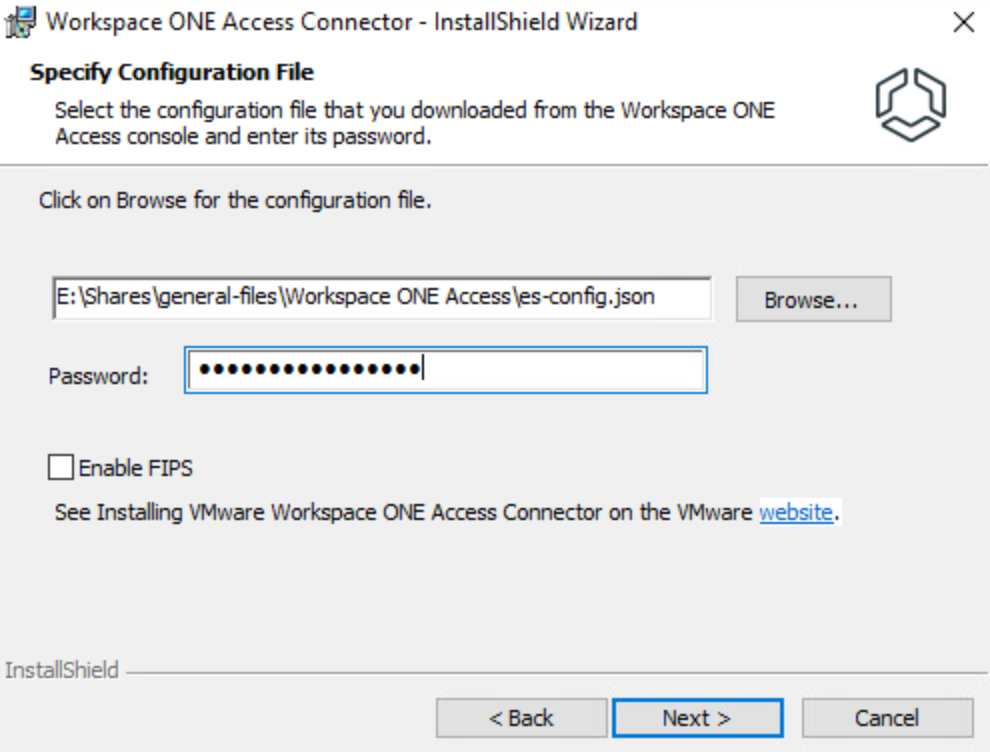
Browse to the configuration file that was downloaded and type the password. Enable FIPS if necessary.
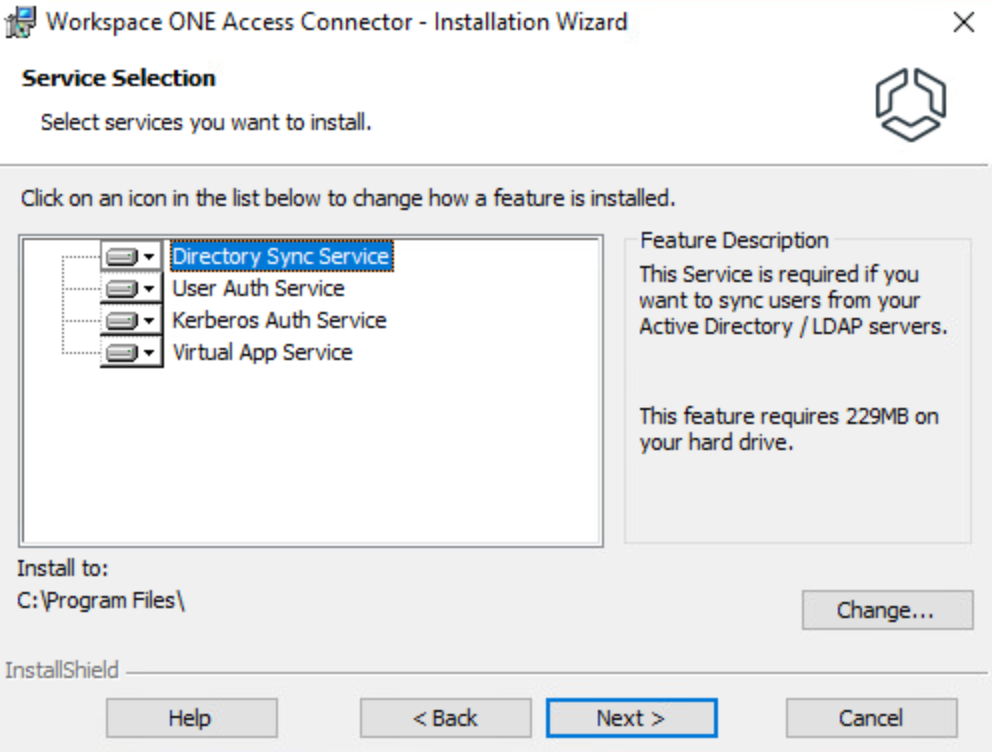
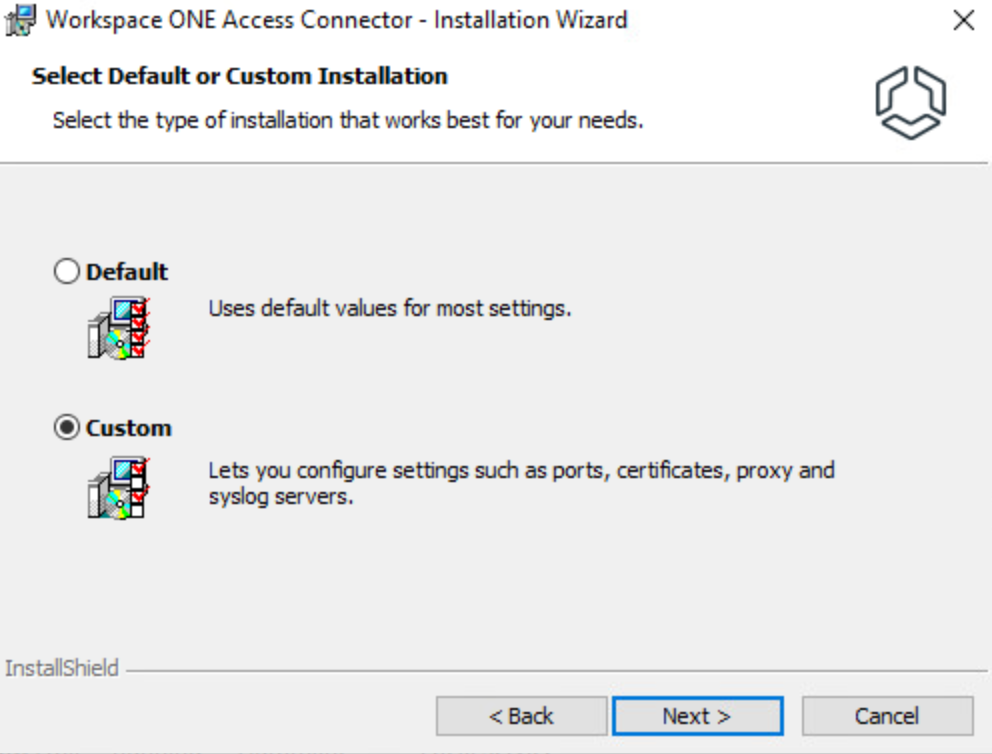
For this installation, I am going to select a Custom installation and click Next.
I am not using a Proxy, so I am leaving the checkbox unchecked.

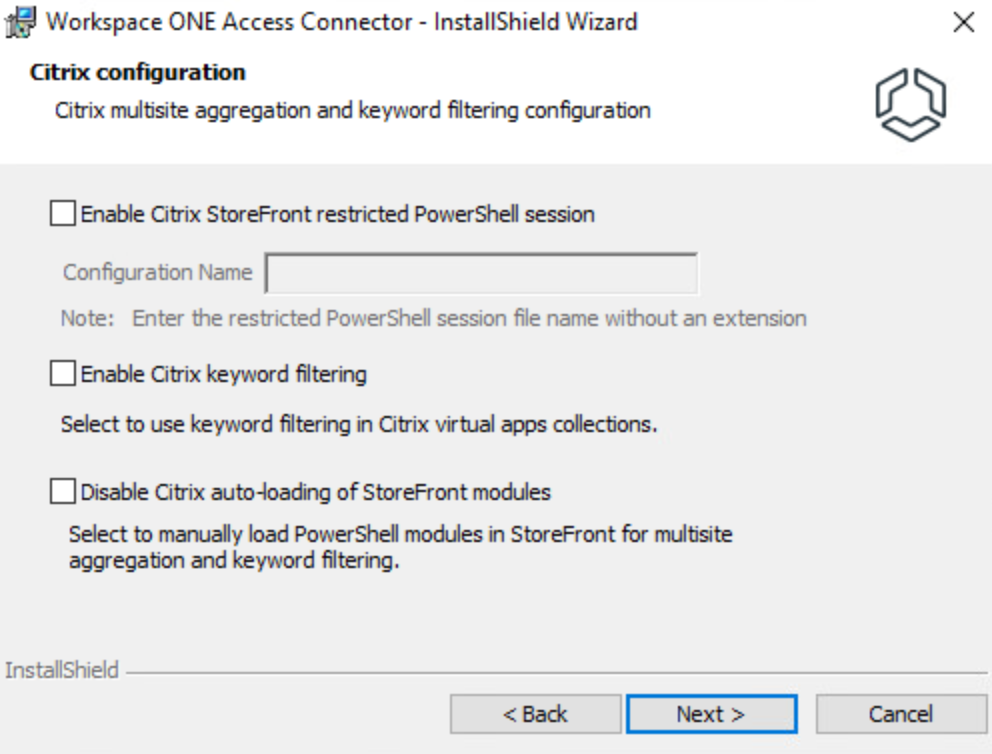
I am not configuring anything for Citrix, so I will leave these unchecked as well.
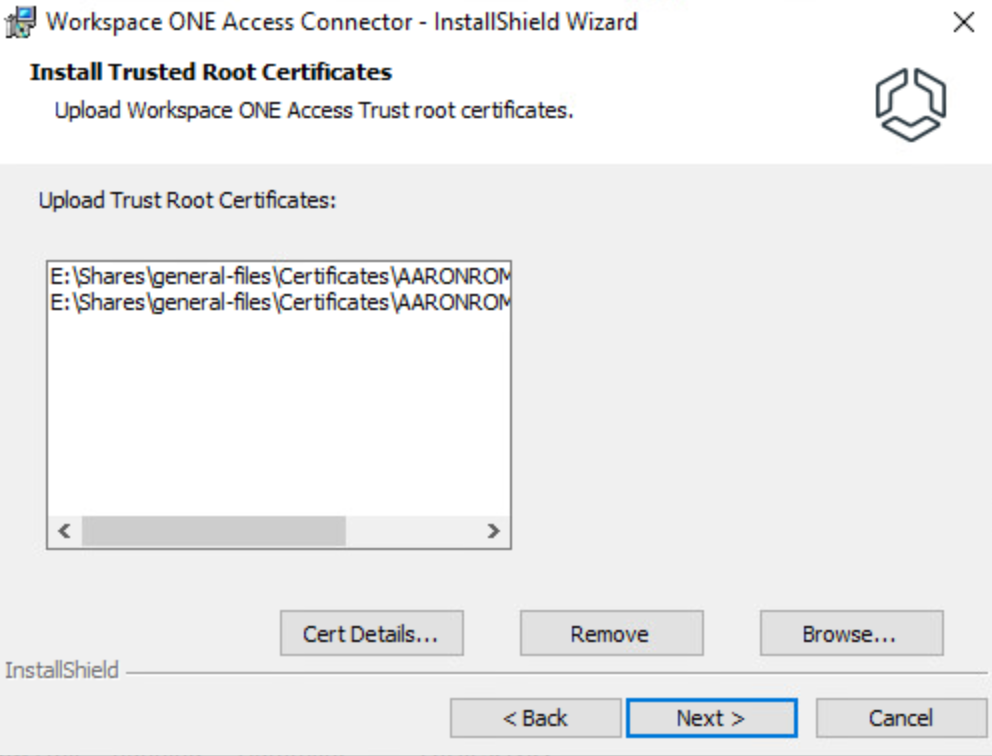
I am adding my domain’s intermediate and root certificates.
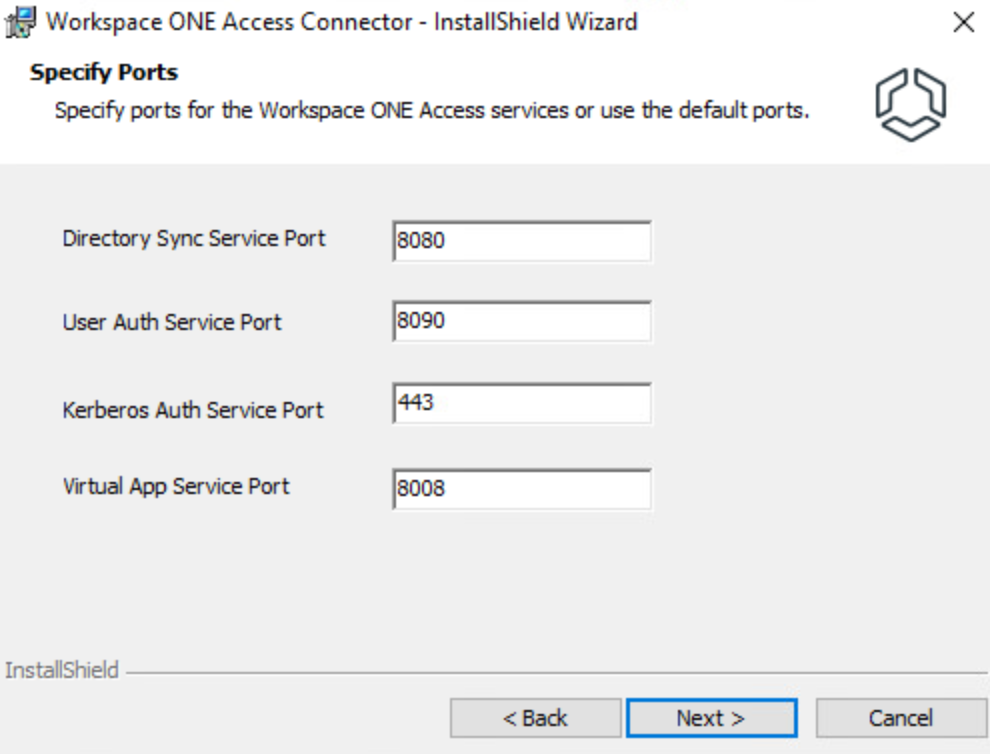
I am going to leave the default ports selected.
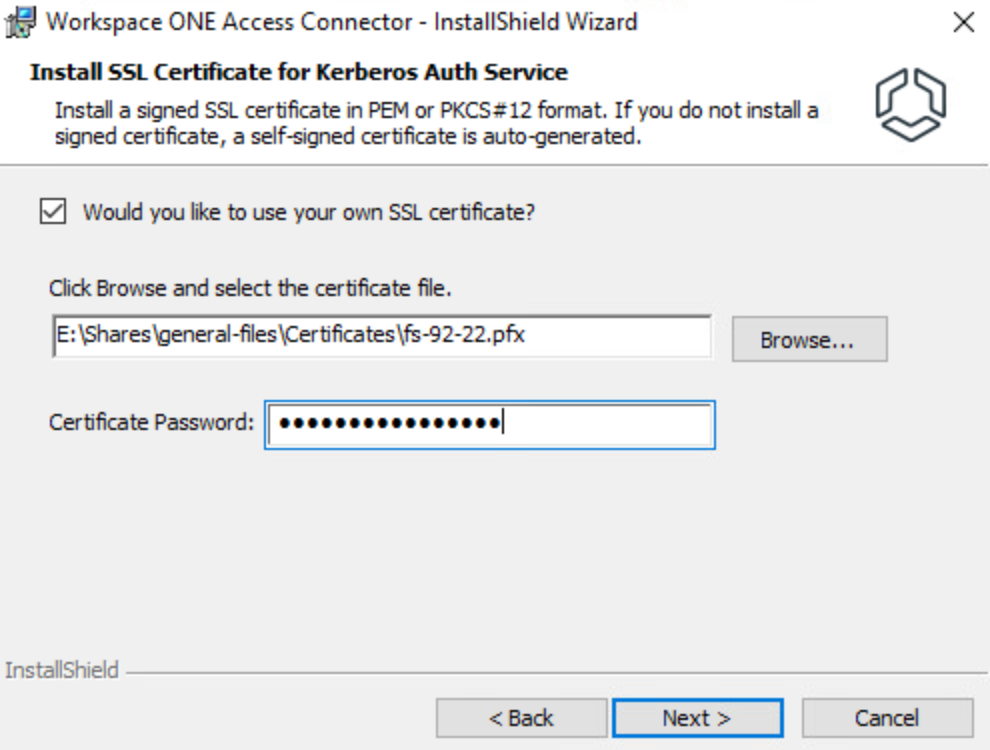
I am going to install an SSL Certificate for the Kerberos Auth Service. Since this is my file server, I am going to install that certificate. I added the PFX file and password.
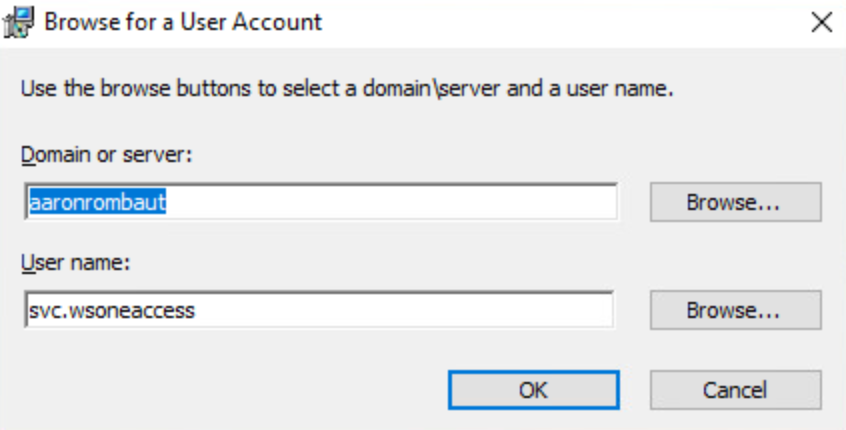
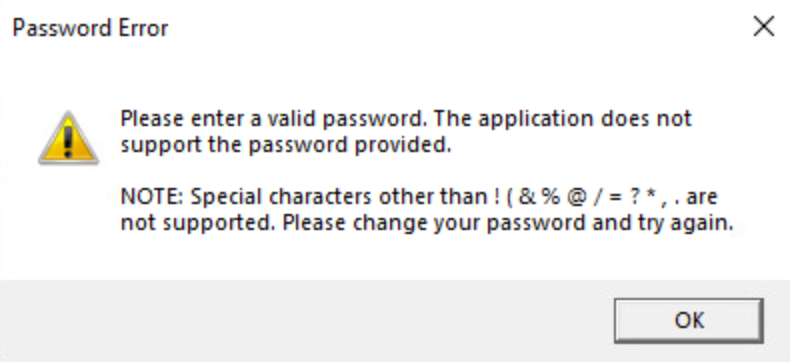
Add or search for the Service Account intended for connecting to the domain. Make sure the Service Account belongs to the Administrators security group for the domain. I tried to use the domain in uppercase, but that did not work. It is easier to use the search function to get the right parameters. Again, mileage may vary here, I suspect.
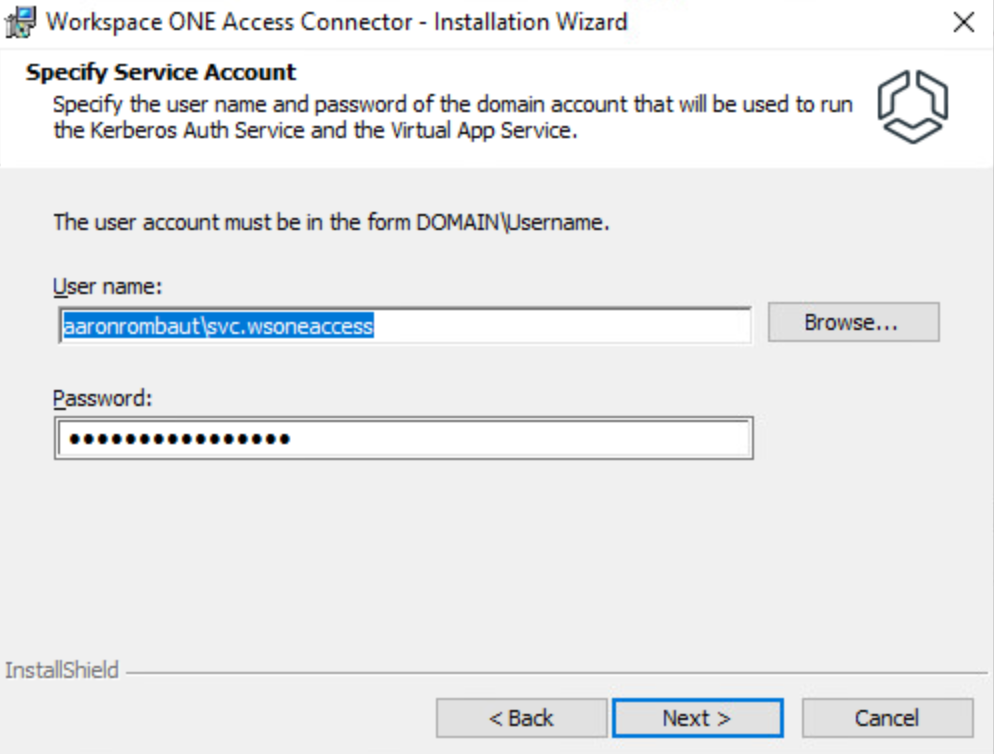
The following windows may display indicating a character in the password is not accepted. Change the Service Account password to something acceptable and try again.
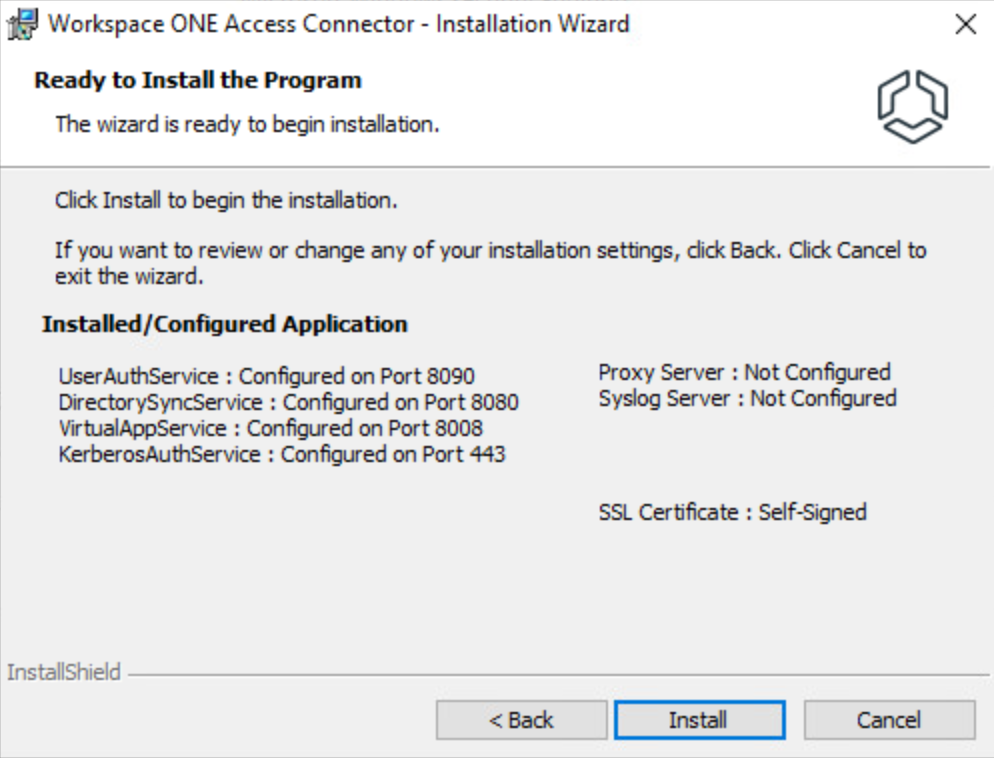
Review the information and click Install.
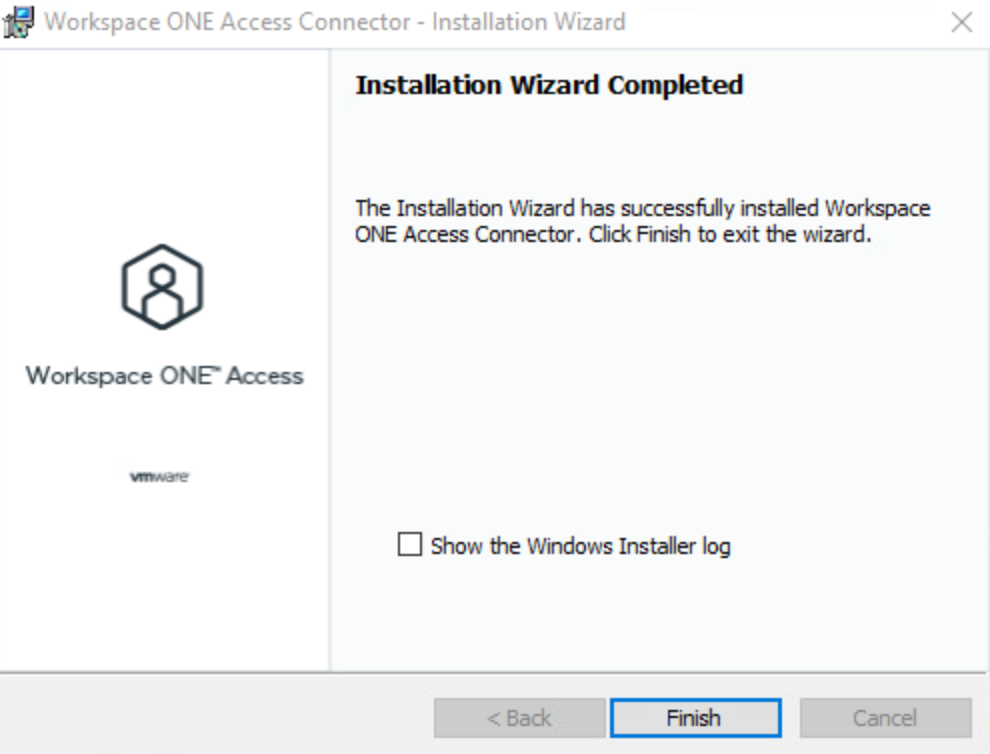
If all goes well, the following Installation Wizard Completed window will show a successful message. Click Finish when ready.
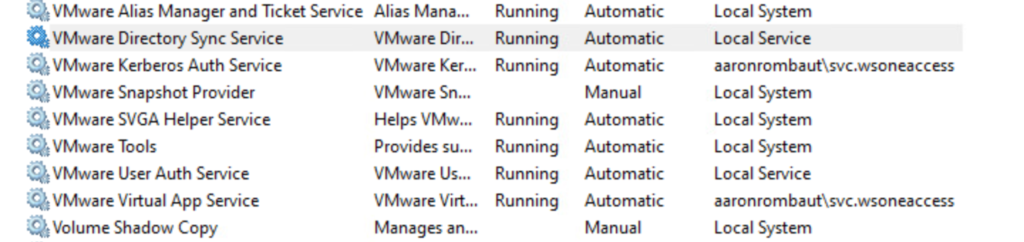
As an additional step, I check the Windows Services and verify the services are installed and running. Each Service is independent and can be started, stopped, and restarted accordingly without affecting the others.
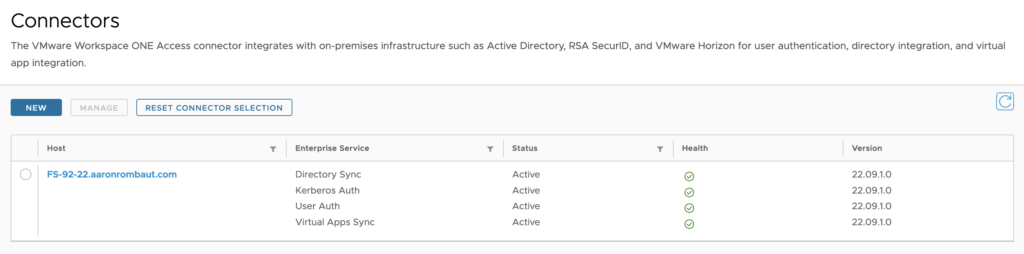
Go back to the Workspace ONE Access console and refresh the page. The connector should now be available.
Add an Active Directory Directory to Workspace One Access
Note: Before continuing, ensure that users in the domain that will be synced have a first name, last name, and email address configured, otherwise, there will be sync errors.
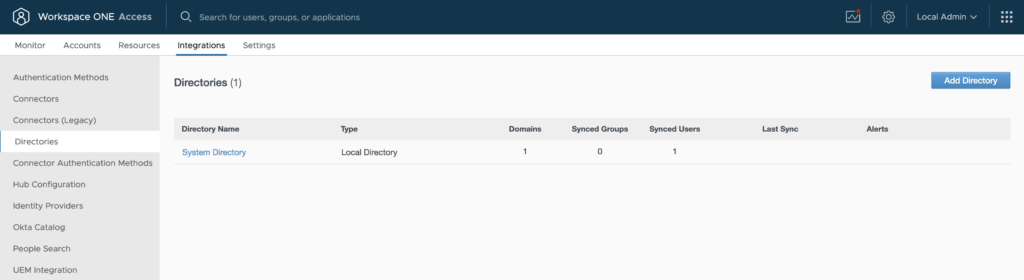
On the Workspace ONE Access appliance, select Integrations > Directories.
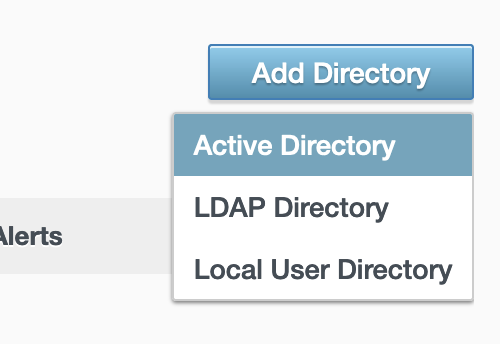
Click Add Directory > Active Directory.
Provide a name for the Directory.
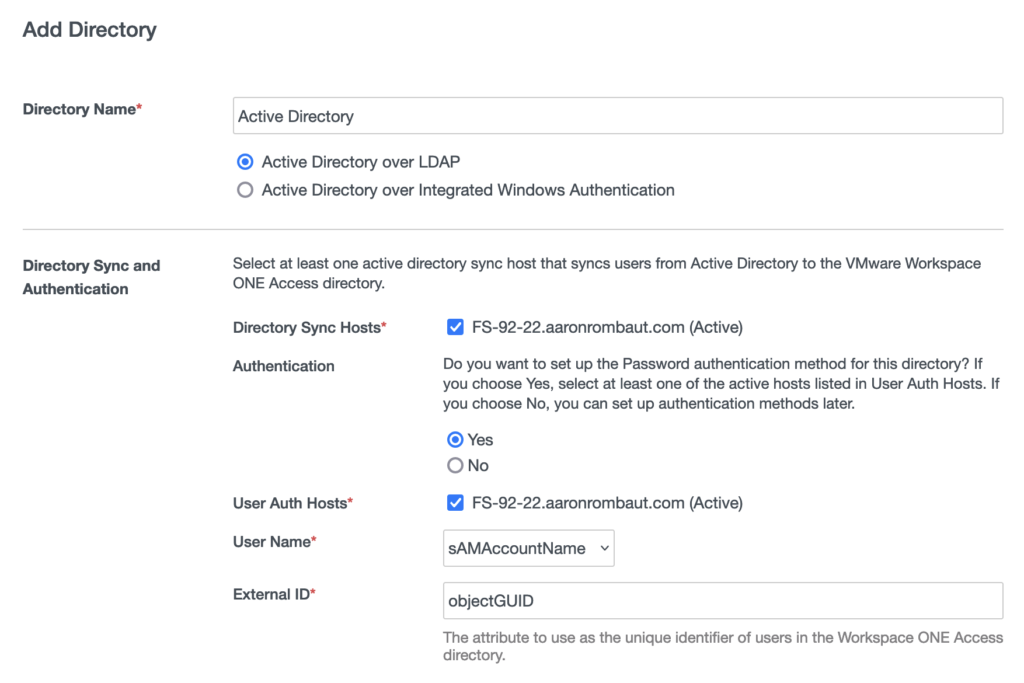
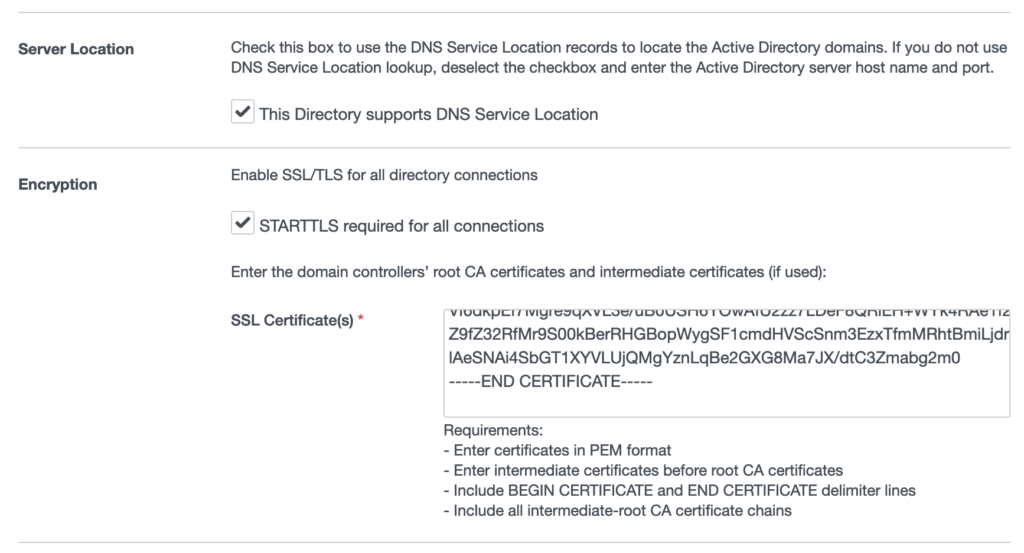
Scroll down and check the box for STARTTLS required for all connections. Provide the certificates; I used Intermediate + Root ordering like the requirements box mentions. I only have one root and intermediate in my domain, so this was fairly straightforward.
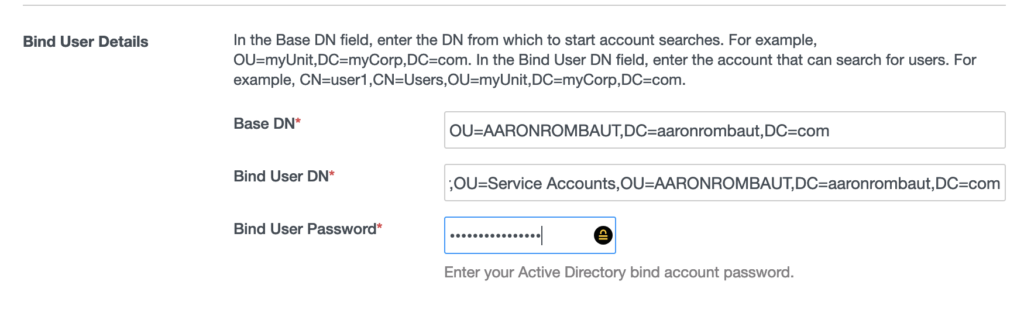
Scroll down and configure the user to bind. Details on how to find this information is below. The password is just the password for the user set in Active Directory, but the Base DN and Bind User DN use Distinguished Name LDAP attributes.
To find the necessary values, open Active Directory Users and Computers. Click on View and enable Advanced Features.
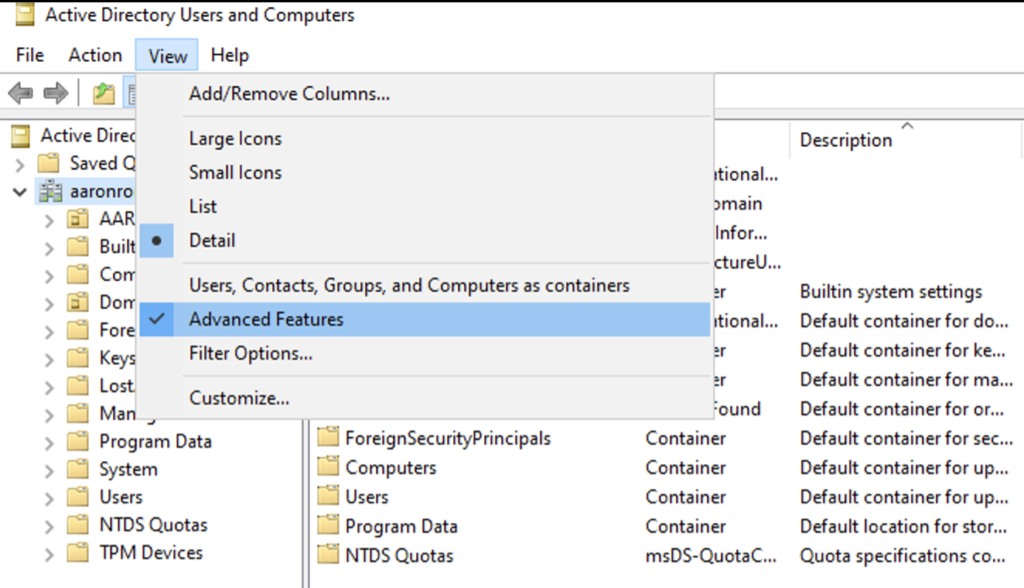
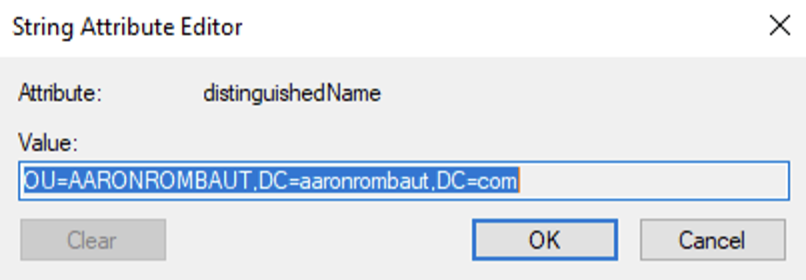
Right-click on the Organizational Unit (OU) and view the Attribute Editor. I always change the Filter to Show only attributes that have values. This makes it easier to find what I am looking for, but is only personal preference.
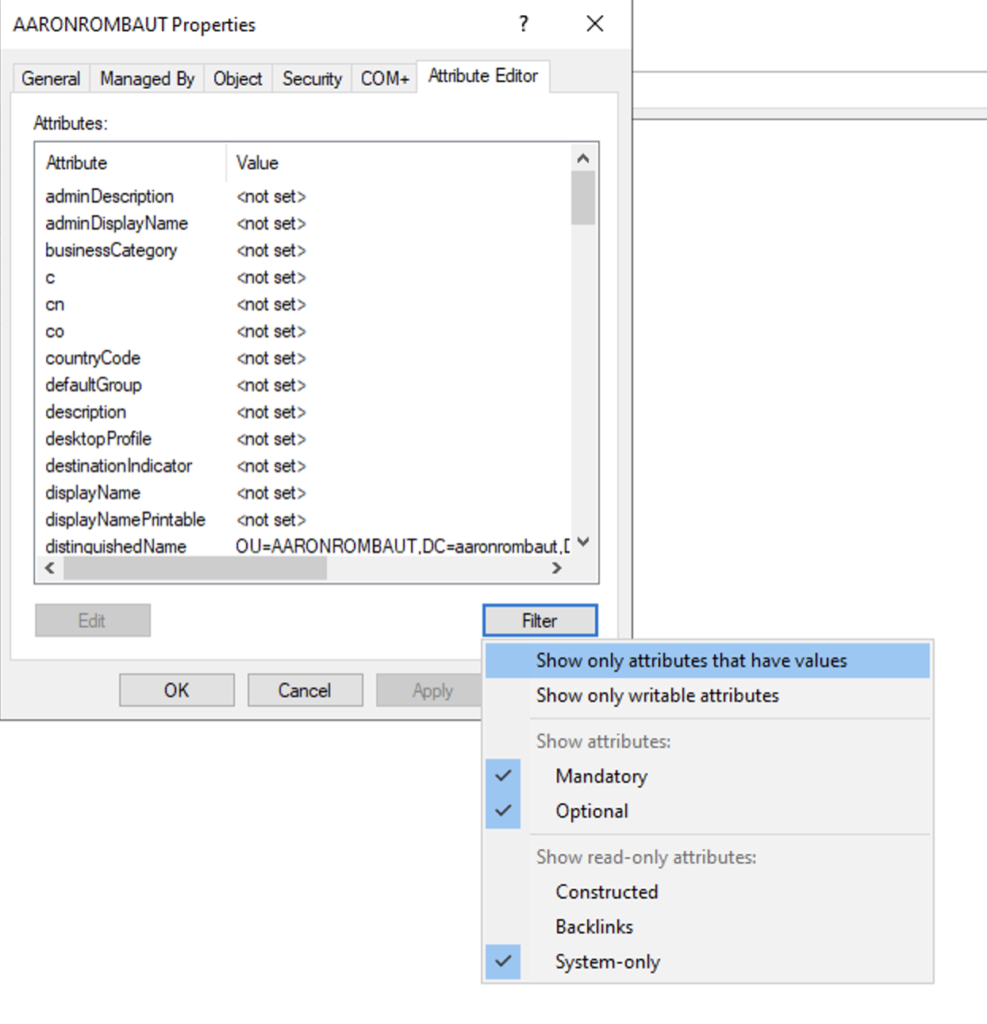
Look for the distinguishedName attribute.
When ready, click Save and Configure.
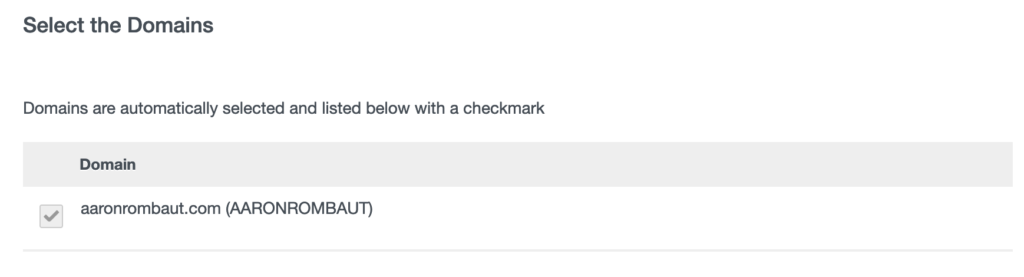
I am leaving the default since I only have one domain in a single forest.
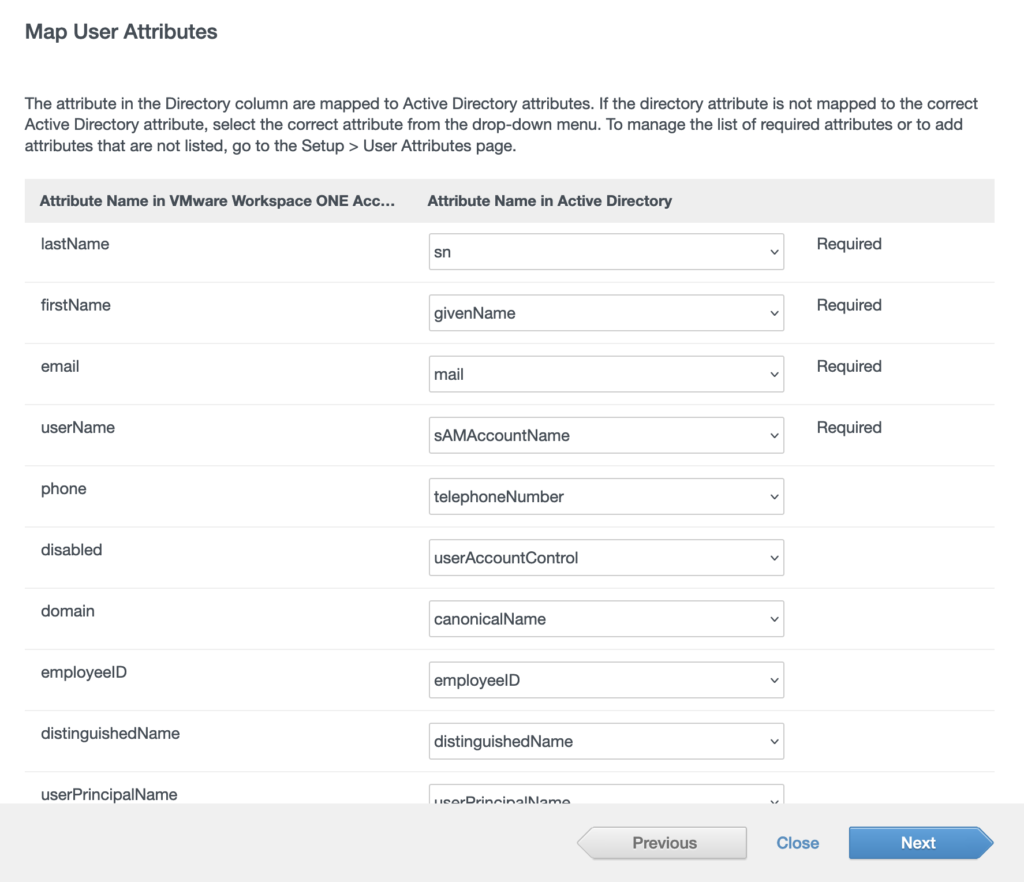
Scroll and review the attribute maps, adjust accordingly or leave default for now and adjust later, if needed.
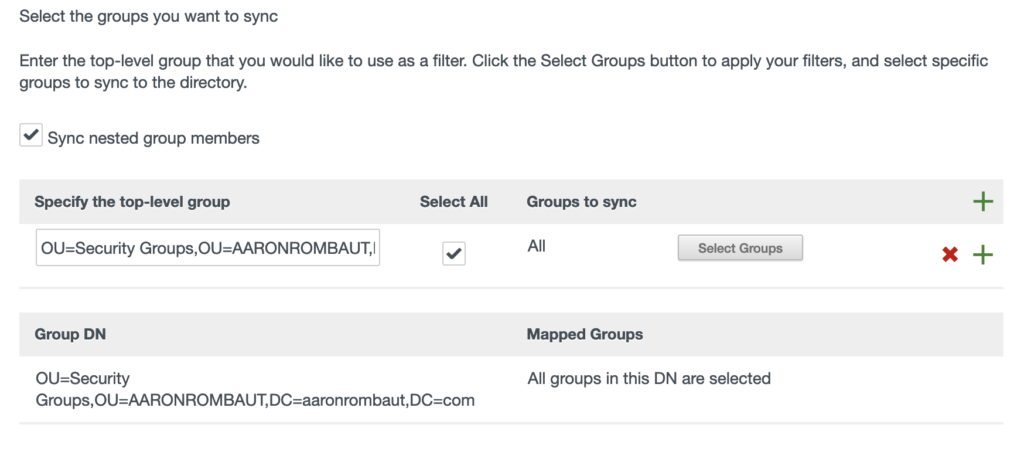
Set the Distinguished Name (DN) for the Security Groups.
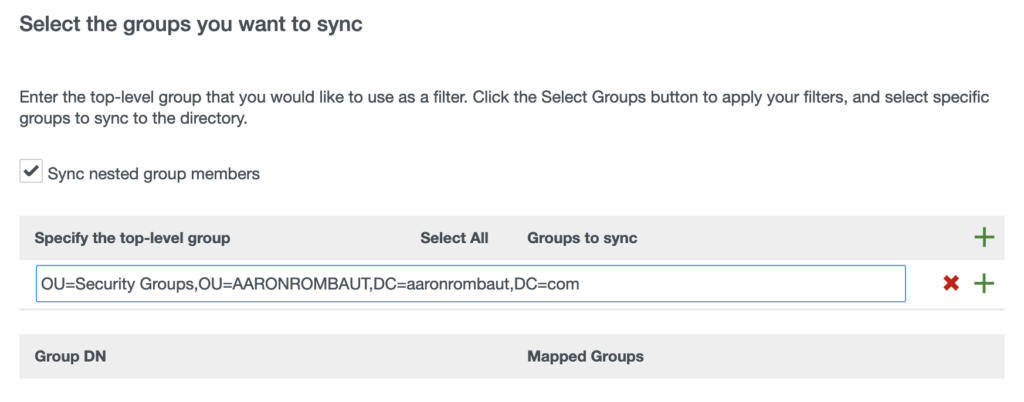
The screen will update and allow you to select all groups or only certain groups. I am choosing to Select All.
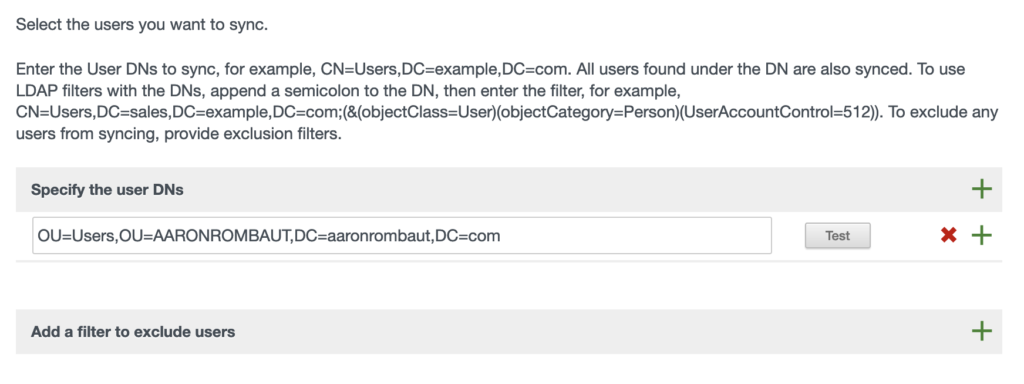
Similar to Groups, add the Distinguished Name for Users.
Here is a view of my Sync Log where it provides details on my initial sync. As users and groups are added to Active Directory, they will populate in Workspace ONE Access. If you need to use those resources sooner, the green Sync button can be used.

Leave a Reply