I use a YubiKey 5 Series security key (from Yubico) in my lab. This allows me to use strong authentication and test out security scenarios that I usually find myself in while on the job. I did use the reference material from Yubico to get this working, but am going to transcribe and document this for future use for myself.
Attaching the YubiKey
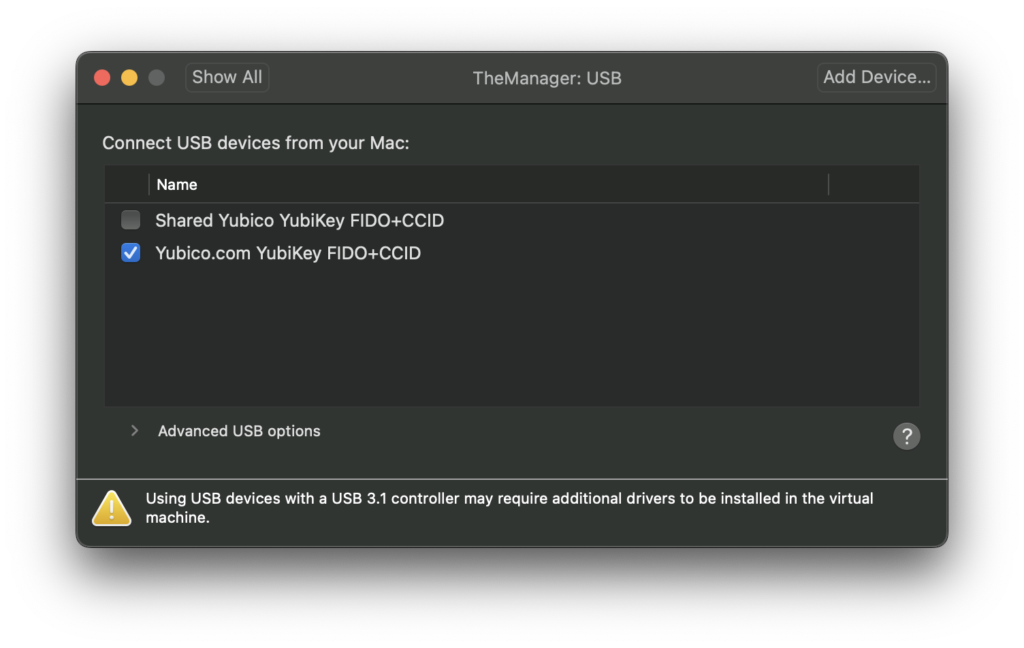
I have a Microsoft Windows virtual machine that I log into (a jump host) since my primary computer is a MacBook Pro. Unfortunately, the Microsoft Remote Desktop App on macOS does not pass the PIV credentials. When I log into the jump host, I attach the Yubico.com YubiKey FIDO+CCID device to the virtual machine. The Shared device will not be recognized by the YubiKey Manager. Attaching the non-shared device to the virtual machine will remove it from the host!
YubiKey Manager
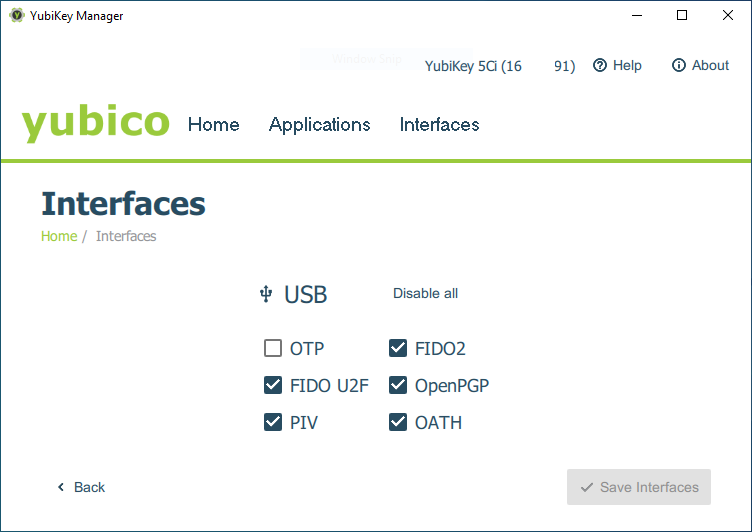
On my jump host, I have a utility installed called YubiKey Manager, downloaded from https://www.yubico.com/support/download/. This is a graphical utility that allows me to configure various Applications and Interfaces on my YubiKey.
YubiKey Smart Card Minidriver
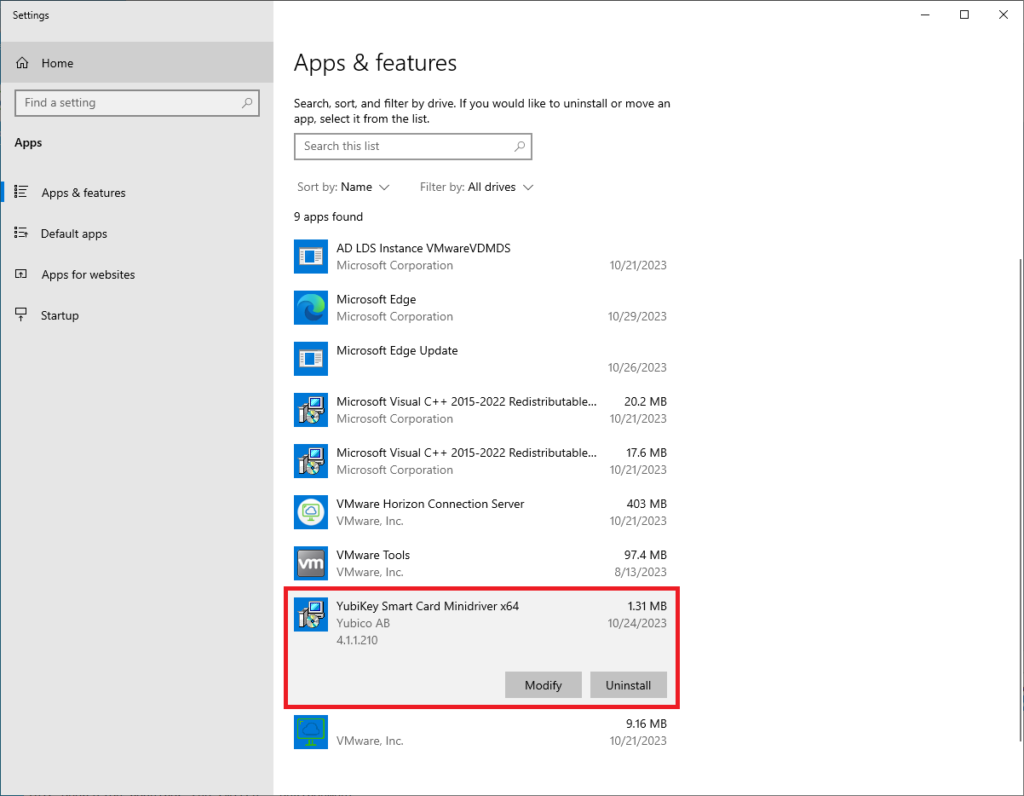
For other virtual machines (infrastructure and virtual desktop golden images) in my lab, I download and install the YubiKey Smart Card Minidriver. This can be found at https://www.yubico.com/support/download/smart-card-drivers-tools/. The MiniDriver allows Windows to use the native Windows interface for certificate enrollment.
Method of User Enrollment
ref: https://support.yubico.com/hc/en-us/articles/360015668919
The YubiKey offers three methods of user enrollment for Smart Card authentication.
- User Self-Enrollment
- Enrolling on behalf of others
- Advanced Enrollment
I opted for User Self-Enrollment as I was only concerned with getting certificates on my YubiKey. In an Enterprise or larger organization, I think Enrolling on behalf of others would be more appropriate. Dedicated staff, either IT or HR (preferably both) should be involved in the process. At the Enterprise level, Smart Card authentication is more of a policy issue (how do we do this) than a can we do this issue.
Enterprise Certificate Authority (CA)
In my lab, I use a two-tier approach for certificates. I have an Enterprise Root CA and an Intermediate CA where I actually publish and write certificates. I already have a post for establishing a Certificate Authority which can be referenced here. It is imperative that at least a Root CA be established, but recommended to at least establish a two-tiered approach. This approach better mimics Enterprise solutions and is generally more secure as long as a few best practices are followed. The biggest one is taking the Root CA offline after establishing the Intermediate.
Certificate Templates
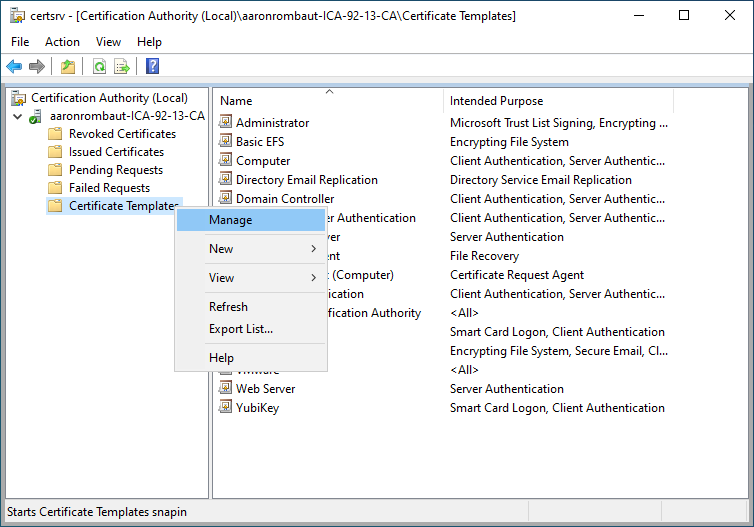
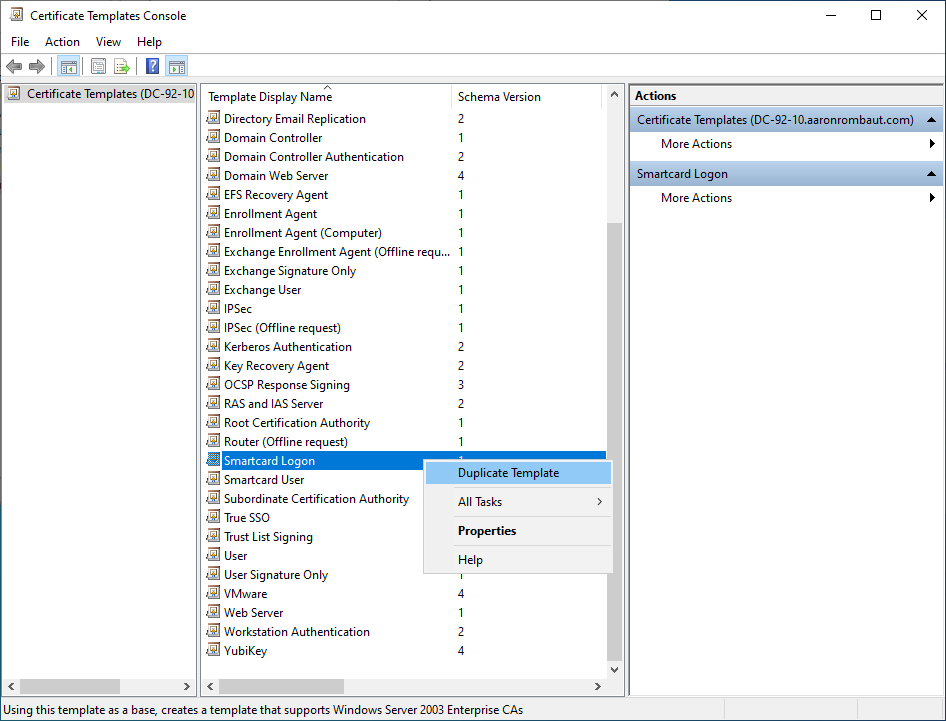
On the Certificate Authority (CA) server used to issue certificates, open Certification Authority (certsrv.msc). Expand the tree, right-click on Certificate Templates, and select Manage.
Click Certificate Templates, locate and right-click Smartcard Logon, and select Duplicate Template.
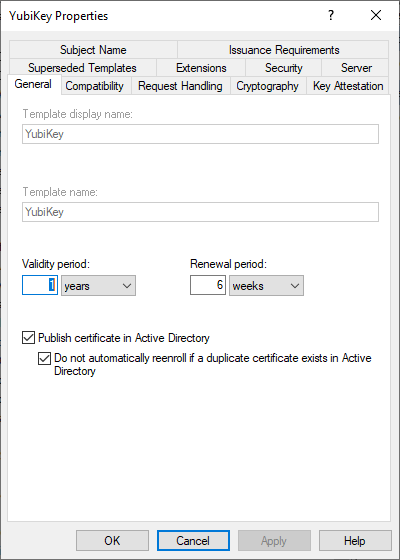
Select the General tab, and make the following changes as needed:
- For Template display name / Template name, we recommend that you choose a short name without spaces such as YubiKey or YubicoSC.
- For Validity period, ensure the timeframe you specify does not exceed the restrictions for your Certification Authority.
- Optionally, to prevent users from re-enrolling multiple certificates without Administrator approval:
- Select the option Publish certificate in Active Directory.
- Select the option Do not automatically reenroll if a duplicate certificate exists in Active Directory.
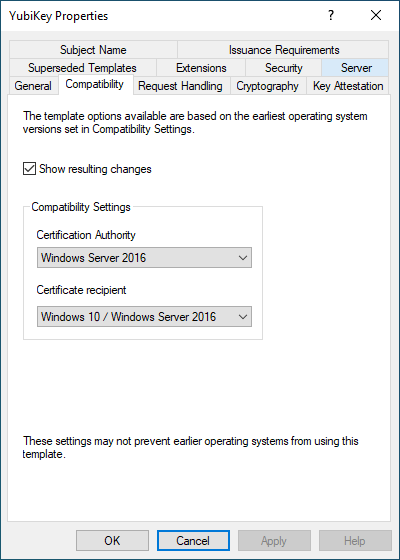
- Select the Compatibility tab, and make the following changes as needed:
- Select the operating system where the Certification Authority resides.
- For Certificate recipient, select the oldest Windows operating system in your domain environment.
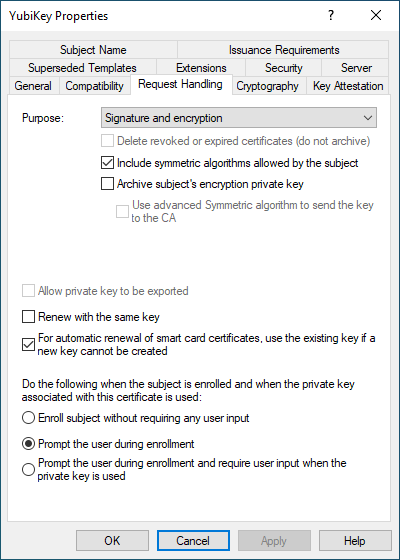
- Select the Request Handling tab, and make the following changes as needed:
- For Purpose, select Signature and encryption.
- Ensure the option for Include symmetric algorithms allowed by the subject is selected.
- Ensure the option to Renew with the same key is not selected. This option may be disabled if Windows 7 and below are included in the Compatibility settings.
- Note: If the Renew with the same key option is selected, automatic renewal of certificates will fail.
- Check the option For automatic renewal of smart card certificates, use the existing key if a new key cannot be created.
- Ensure the option to Prompt the user during enrollment is checked.
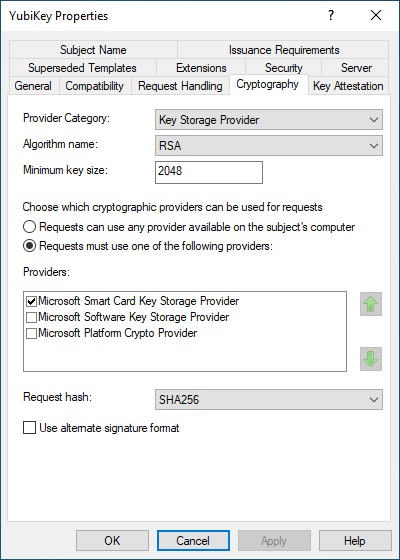
- On the Cryptography tab, make the following changes, as needed:
- Provider category: select Key Storage Provider from the dropdown.
- Algorithm name: Select either RSA, ECDH_P256, or ECDH_P384 from the dropdown. Note: ECDH_P521 is not supported.
- Note that if an ECDH algorithm is selected, the client Windows systems need to have Elliptic Curve Cryptography (ECC) Certificate Login support added using Group Policy or by editing the registry. See Adding Support for Elliptic Curve Cryptography (ECC) Certificate Login for instructions.
- Minimum key size: If you selected RSA in the previous step, enter 2048. If you selected ECDH_P256 or ECDH_P384 in the previous step, this field automatically populated.
- Select the option for Requests must use one of the following providers.
- Under Providers, select Microsoft Smart Card Key Storage Provider.
- For Request hash, click the arrow and select SHA256 from the list displayed.
- On the Security tab, make the following changes, as needed:
- Group or user names: Confirm the domain group you want to allow access to the template is listed. If not, click Add, enter the name of the group, and then click OK. (I used Domain Users in the example)
- Permissions for [group name]: If users will be auto-enrolling using the built-in Windows functionality, ensure the options are checked for Read, Enroll, and Autoenroll.
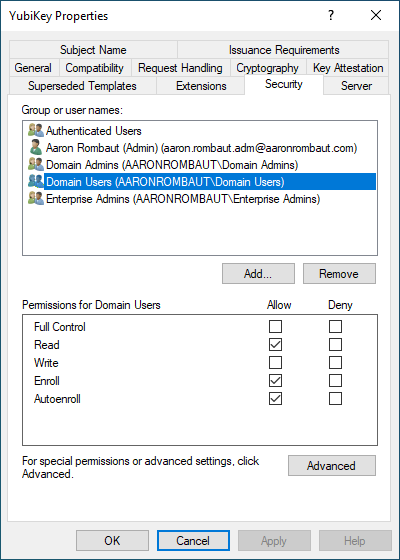
- Click Apply, and then click OK to close the template properties window.
- Close the Certificate Templates window.
Adding the Template to the Certification Authority
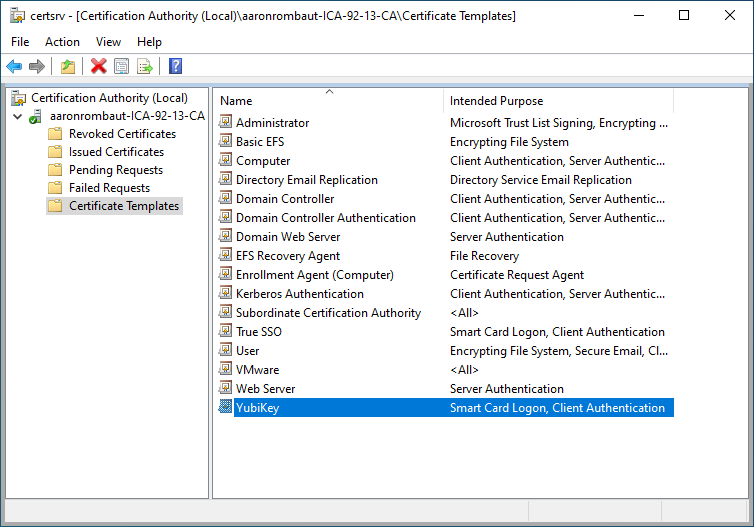
Back on the Certification Authority window, right-click Certificate Templates, point to New, and select Certificate Template to Issue.

Search for the template that was just duplicated, in my case, it is called YubiKey, and click OK.
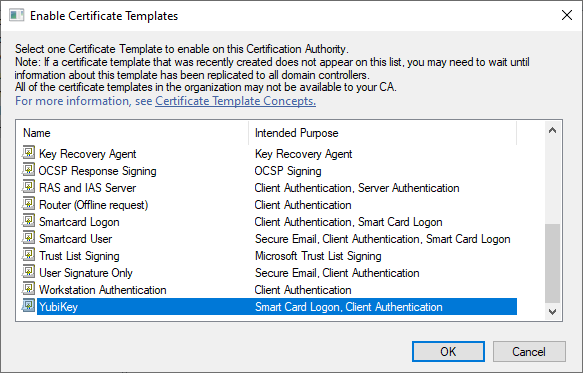
The certificate should now be in the list and ready for use.
Group Policies
The Group Policy Management (gpmc.msc) MMC is used to write the various policies.
These policies are for the certificates on the Smart Card and Public Key Policies, so I am going to create a policy titled, CU_Smart Card (YubiKey). The CU_ prefix allows me to quickly reference this policy as a Computer and User based policy. It also helps me place the policy to the correct Organizational Unit (OU) and assists me in troubleshooting in the future.
Policy: Adding Support for Elliptic Curve Cryptography (ECC) Certificate Login
Computer Configuration > Policies > Administrative Templates > Windows Components > Smart Card > Allow ECC certificates to be used for logon and authentication (Enabled)
Policy: Changing the Behavior for Your Domain When You Remove the Smart Card
Computer Configuration > Policies > Windows Settings > Security Settings > Local Policies > Security Options > Interactive Logon: Smart card removal behavior (Lock Workstation)
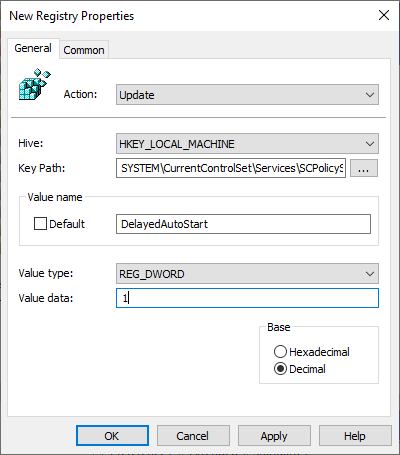
Policy: Modifying the Windows Registry to Delay the Smart Card Removal Policy Service
Computer Configuration > Preferences > Windows Settings > Registry > New – Registry Item
Action: Update
Hive: HKEY_LOCAL_MACHINE
Key Path: SYSTEM\CurrentControlSet\Services\SCPolicySvc
Value name: DelayedAutoStart
Value type: REG_DWORD
Value data: 1
Policy: Enable Relevant Smart Card Services
Computer Configuration > Preferences > Control Panel Settings > Services > New – Service
General tab
Startup: Automatic
Service name: SCardSvr
Service action: Start Service
Recovery tab
First failure: Restart the Service
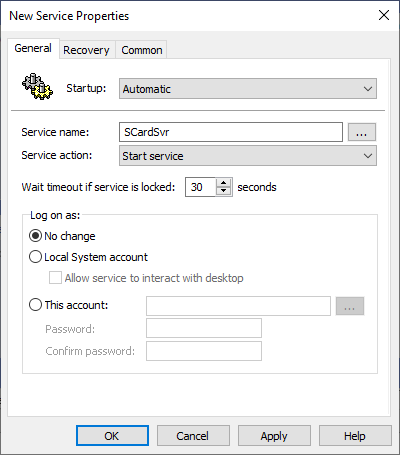
Computer Configuration > Preferences > Control Panel Settings > Services > New – Service
General tab
Startup: Automatic
Service name: SCPolicySvc
Service action: Start Service
Recovery tab
First failure: Restart the Service

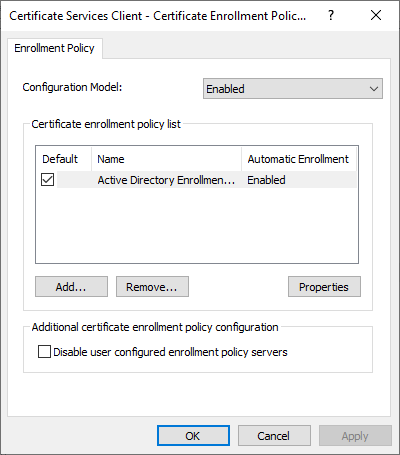
Policy: Enable Auto Enrollment
Computer Configuration > Policies > Windows Settings > Security Settings > Public Key Policies > Certificate Services Client – Certificate Enrollment Policy (Enabled)
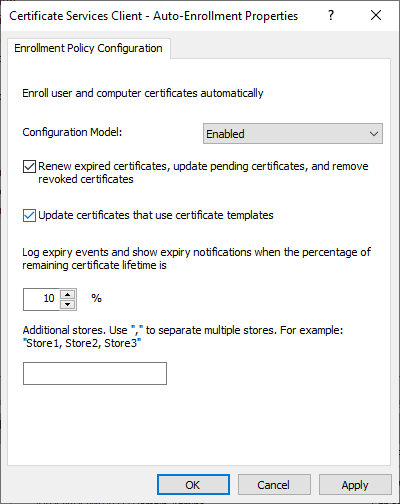
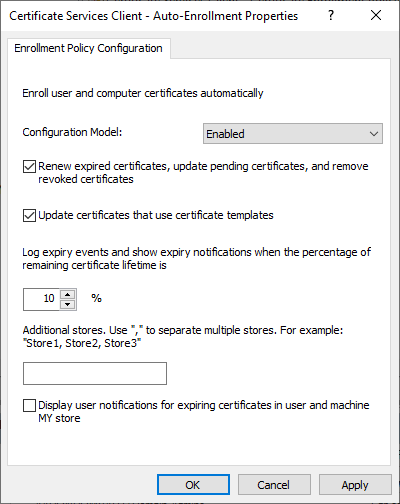
Computer Configuration > Policies > Windows Settings > Security Settings > Public Key Policies > Certificate Services Client – Auto-Enrollment (Enabled)
Select Renew expired certificates… and Update certificates…
User Configuration > Policies > Windows Settings > Security Settings > Public Key Policies > Certificate Services Client – Certificate Enrollment Policy (Enabled)

User Configuration > Policies > Windows Settings > Security Settings > Public Key Policies > Certificate Services Client – Auto-Enrollment Policy (Enabled)
Select Renew expired certificates… and Update certificates…
Using Auto-Enrollment to Enroll Users
ref: https://support.yubico.com/hc/en-us/articles/360015668979
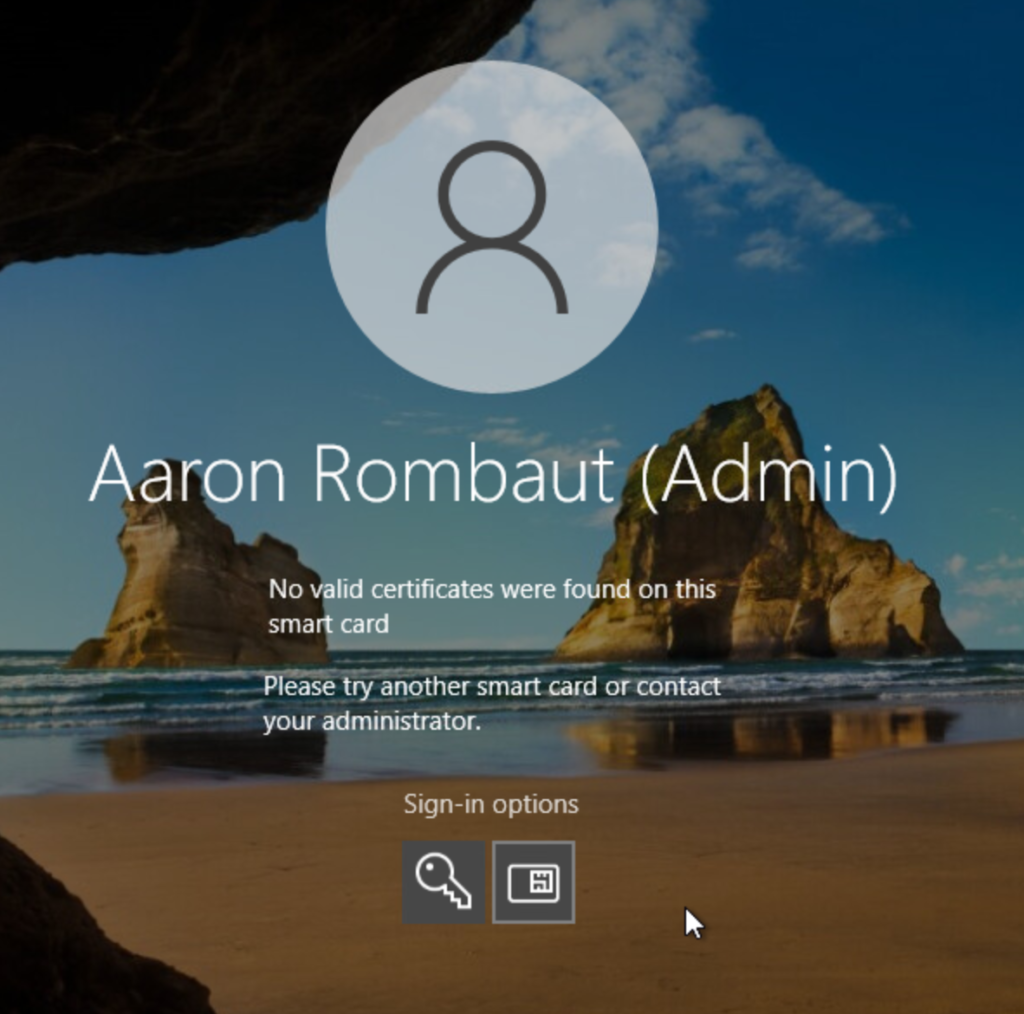
The following is pulled directly from the link above…with pictures added by me. The following screenshot shows a new YubiKey that has not yet been provisioned with user certificates.
With Auto-Enrollment enabled on the Windows Server and local systems via Group Policy, the user’s experience is straightforward. This section describes the steps your users will need to follow to auto-enroll their YubiKey for Login.
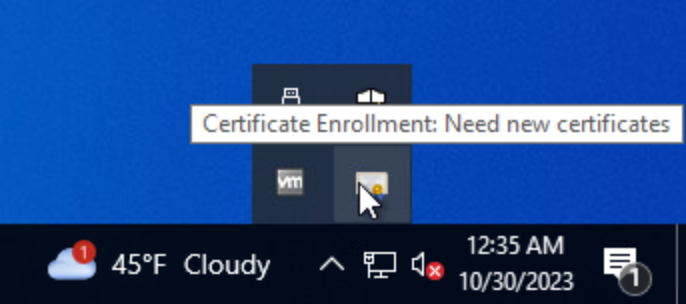
- Log into a user account on a Windows 10 PC connected to the domain. A Certificate Enrollment notification appears above the System Tray.
- Click the Certificate Enrollment notification to open the Certificate Enrollment wizard. If the popup has disappeared (or didn’t initially appear) click the arrow in the System Tray to expand the list of options and click on the certificate icon.
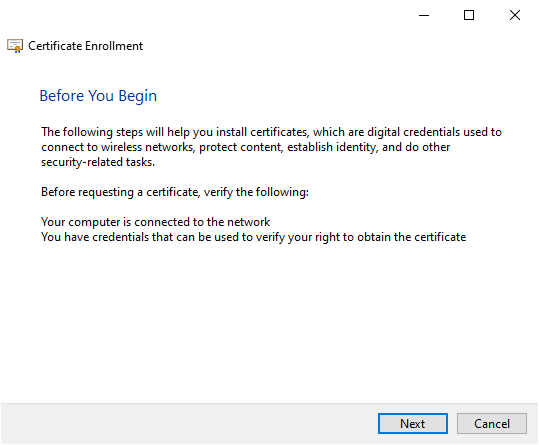
- On the initial screen, click Next.
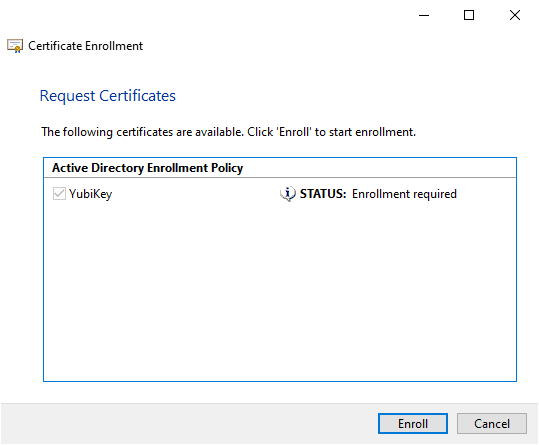
- Select the appropriate certificate template and click Enroll. If multiple certificate templates are listed, assuming the template was set up properly, “STATUS: Enrollment required” should appear next to the correct template.
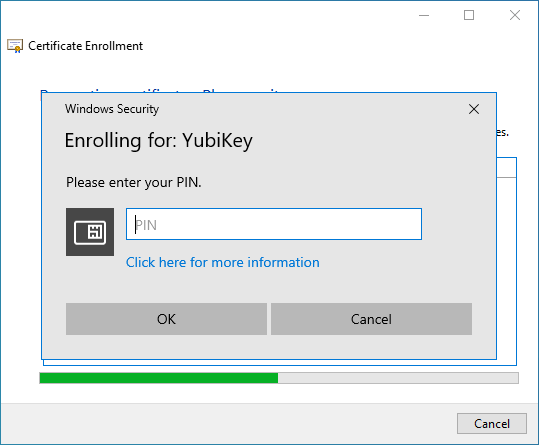
- Enter your YubiKey PIN and then click OK. If a custom PIN has not been set, enter the default PIN: 123456.
- If you are not prompted for a PIN, and the process completes successfully, double-check that you selected Microsoft Smart Card Key Storage Provider under Providers in your template’s Cryptography tab. If a setting on your template needs to be changed, it is recommended to delete it and create a new one with a unique name, to ensure that the changes made take effect.
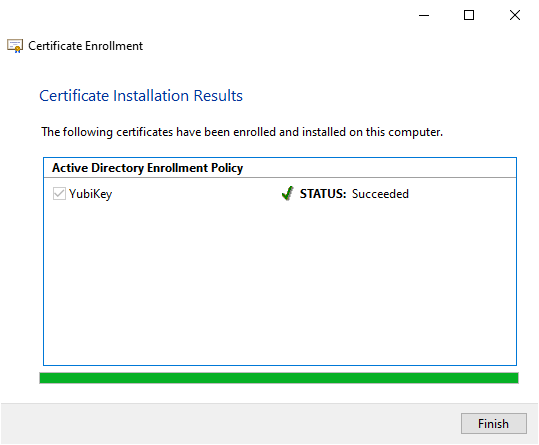
- Windows enrolls the YubiKey for Windows login. The process may take several seconds, depending on the network connection to the server running the Certification Authority. Once completed, click Finish.
Leave a Reply