Certificate Requirements
Each App Volumes Manager server needs a machine certificate. If there is going to be a load balancer in front, add the load balanced fully qualified domain name to the Common Name (CN) attribute and each server’s fully qualified domain name to the Subject Alternative Name (SAN) attribute of the certificate.
Microsoft SQL Server Database Requirements
Ensure the Microsoft SQL Server is secured with Transport Layer Security (TLS) certificates. See this page: Securing Microsoft SQL Server with Transport Layer Security (TLS) Certificates.
Ensure there is a designated database for the App Volumes Managers. See this page: Creating an App Volumes Manager Database.
Ensure each App Volumes Manager server’s Computer Account is added to the Microsoft SQL Server and the db_owner role is assigned to the App Volumes database. See this page: Adding Active Directory Computer Accounts to Microsoft SQL Server.
Installing App Volumes Manager
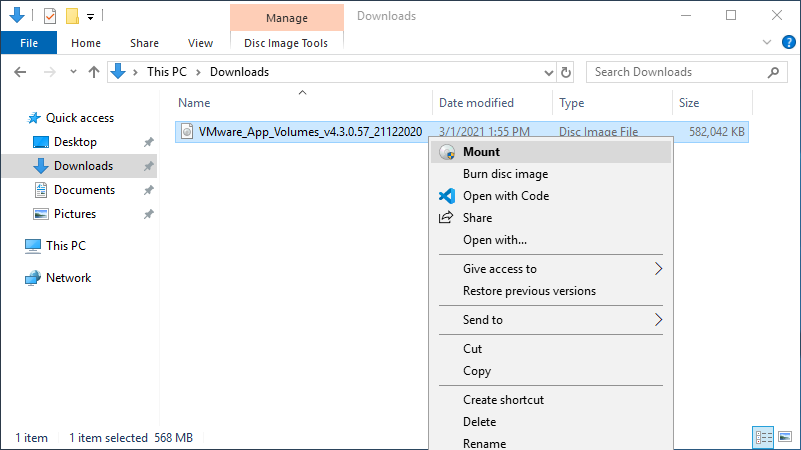
Download VMware App Volumes media from downloads.vmware.com.
Mount the App Volumes media. Right-click the downloaded file and click on Mount.
The App Volumes software media location opens.
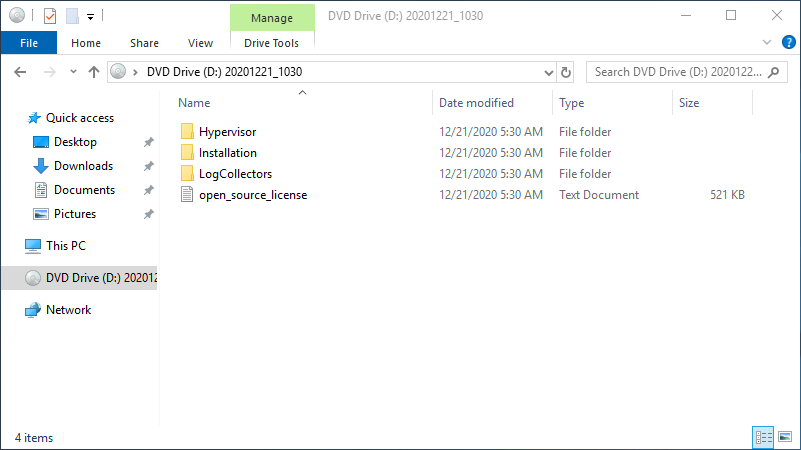
Double-click the Installation folder.
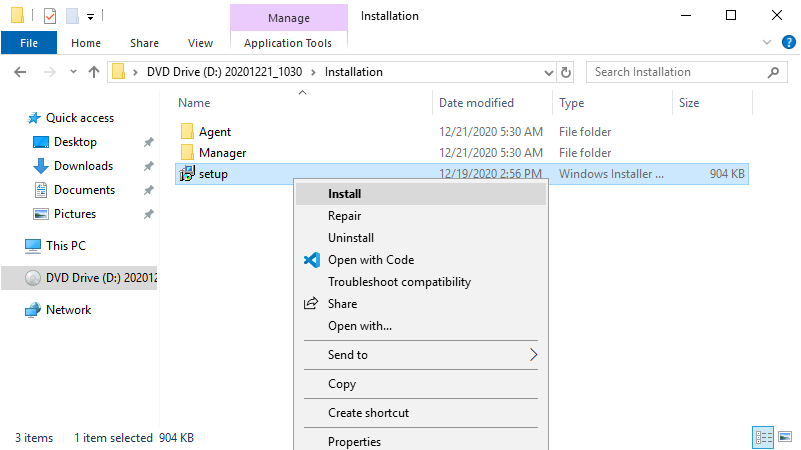
As an administrative user, right-click the setup.msi and choose Install.
Note: If you are not logged on as an administrative user, open an elevated command prompt or PowerShell window.
The App Volumes Installer Setup opens.
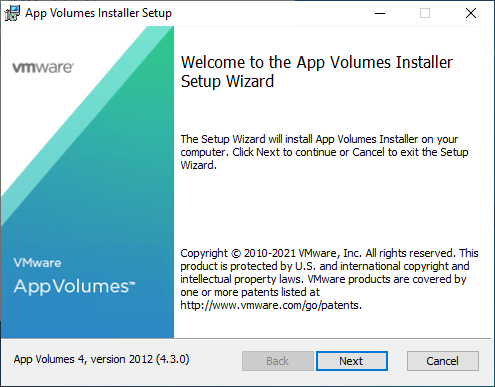
Click the Next button.
Review the End-User License Agreement.
Check the I accept the terms in the License Agreement checkbox.
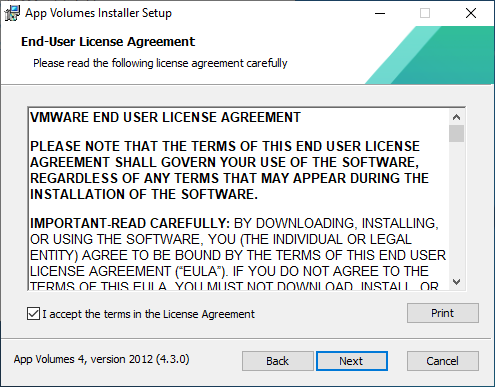
Click the Next button.
Choose the Install App Volumes Manager radio button.
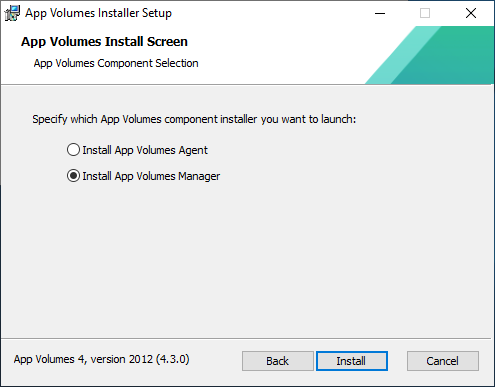
Click the Install button.
Respond to the optional User Account Control window.
The App Volumes Manager Setup window opens.

Click the Next button.
Choose the Connect to an existing SQL Server Database radio button.
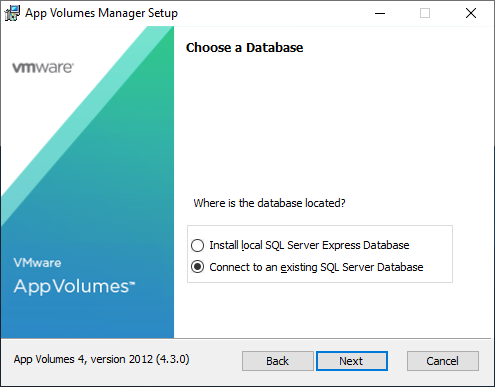
Click the Next button.
Type the fully qualified domain name of the Microsoft SQL Server or the Availability Group Listener in the Choose local or remote database server to use: textbox.
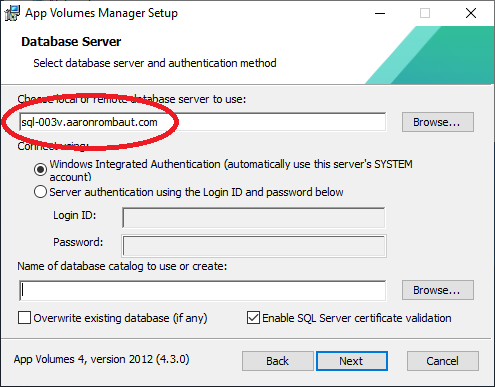
Ensure the Windows Integrated Authentication radio button is selected.
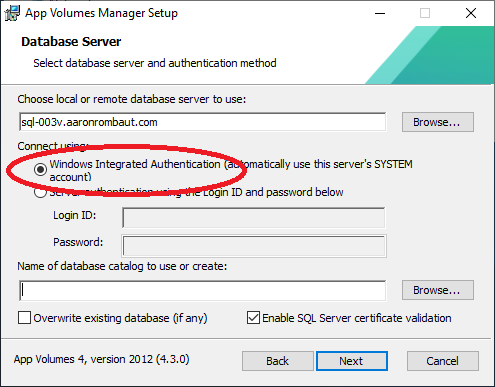
Click the Browse… button.
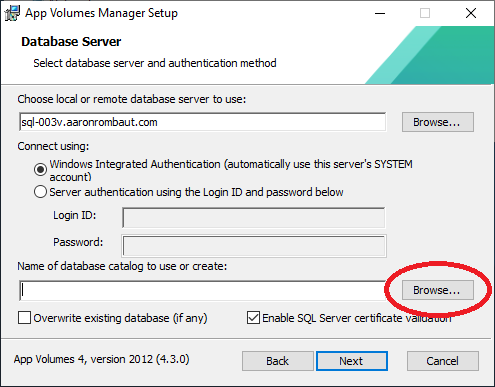
Choose the database target database.
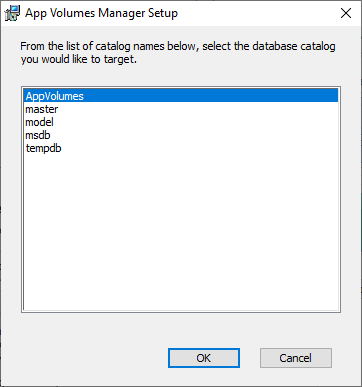
Click the OK button.
The Name of database catalog to use or create: textbox is populated with the chosen database.
Warning: Do not check the Overwrite existing database (if any) checkbox unless you are wanting to start from scratch. This will overwrite the current database and will result in permanent data loss of existing data. If you are installing additional App Volumes Managers, leave this checkbox unchecked as well. You have been warned…
Ensure the Enable SQL Server certificate validation checkbox is checked.
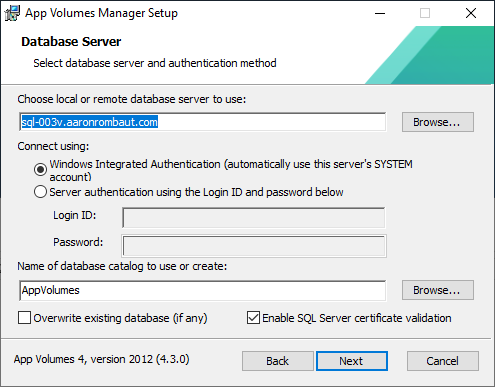
Click the Next button.
Verify the HTTPS Port: is set to 443.
Verify the Allow connections over HTTP (insecure) checkbox is not checked.
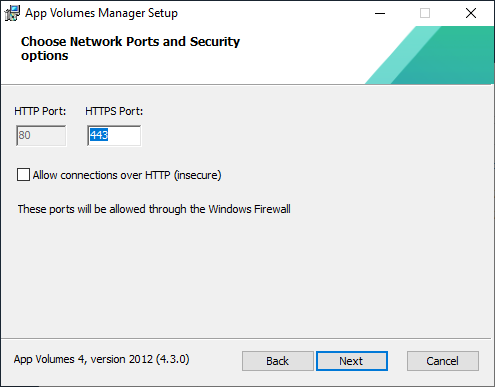
Click the Next button.
Change the Location: or leave the default.
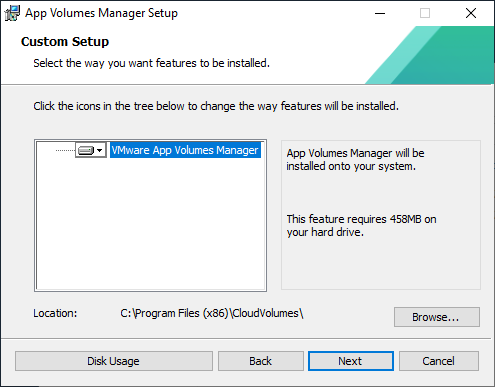
Click the Next button.
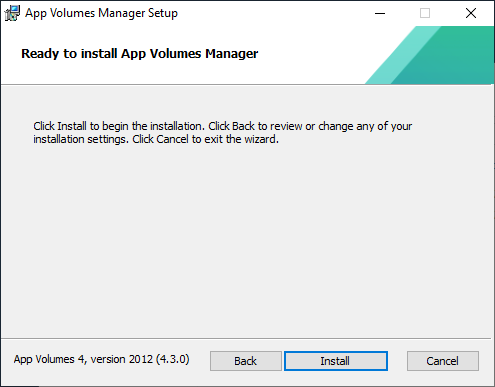
Click the Install button.
Optional: Check the checkbox to Show the Windows Installer log.
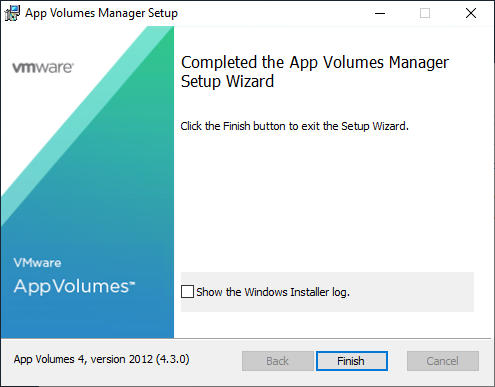
Click the Finish button.
Installation Errors and Troubleshooting

If installation errors occur, review the installation logs located at C:\Program Files (x86)\CloudVolumes\Manager\log if the default location was used during the Wizard.
A common reason is that the Private Key for the Microsoft SQL Server is not available or the permissions are not set for the service account. Review the following page for help with securing Microsoft SQL Server. Securing Microsoft SQL Server with Transport Layer Security (TLS) Certificates
References
VMware App Volumes Documentation
https://docs.vmware.com/en/VMware-App-Volumes/index.html