Prerequisites
At least one App Volumes Manager should be installed before following this page. Here is the page for Installing VMware App Volumes Manager.
Ensure Domain Name System (DNS) records exist for forward and reverse look up of all servers in the infrastructure.
Certificate Requirements
Certificates for App Volumes Managers are in Privacy Enhanced Mail (PEM) format. The following table is a quick reference to the required files with more in-depth details to follow.
| Use Case | File Name | File System Location |
|---|---|---|
| Web Interface Certificate | <user-defined>.crt | C:\Program Files (x86)\CloudVolumes\Manager\nginx\conf |
| Web Interface Key | <user-defined>.key | C:\Program Files (x86)\CloudVolumes\Manager\nginx\conf |
| Active Directory (LDAPS) | adCA.pem | C:\Program Files (x86)\Cloud Volumes\Manager\config |
| vCenter Certificate | cacert.pem | C:\Program Files (x86)\Cloud Volumes\Manager\config |
Replacing the Self-Signed Certificate with a CA-Signed Certificate
The web interface uses a self-signed certificate installed when the App Volumes Manager is installed initially. This should be replaced with a PEM certificate and key. If planning to use a load balancer, ensure the load balanced fully qualified domain name is set for the Common Name (CN) attribute with each App Volumes Manager’s fully qualified domain name added to the Subject Alternative Name (SAN) attribute of the certificate.
Add the certificate and key file to the C:\Program Files (x86)\CloudVolumes\Manager\nginx\conf directory.
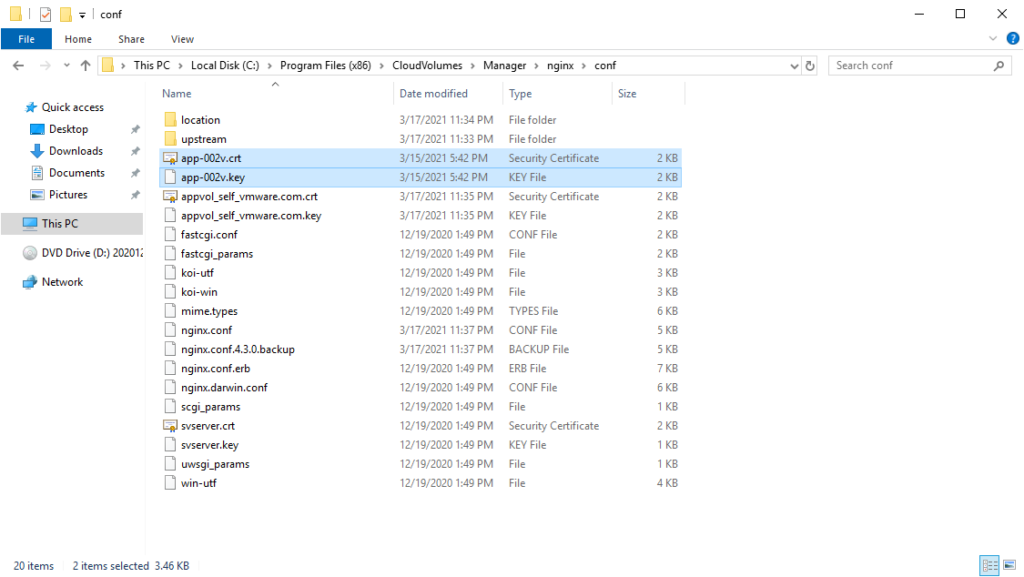
Open the nginx.conf file as an administrative user.
Edit lines 57 (ssl_certificate) and 58 (ssl_certificate_key) to reflect the names of the uploaded certificate and key.
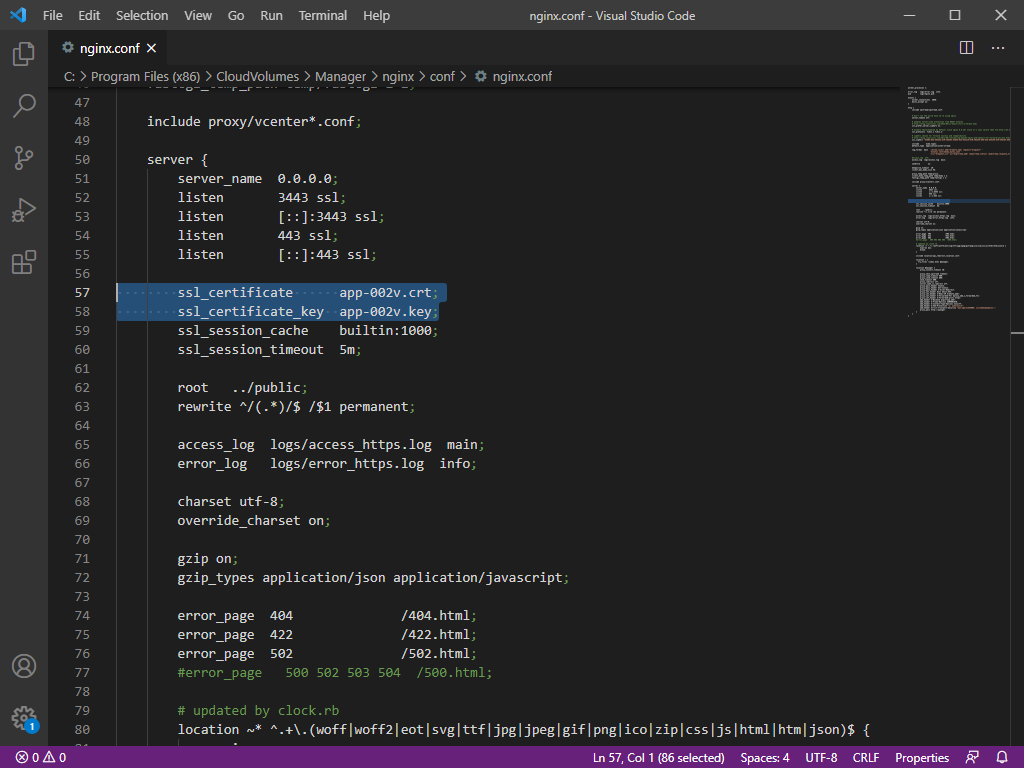
Restart the App Volumes Manager service.
Active Directory (LDAPS) Certificate
The intermediate and root certificates that signed the Active Directory Domain Controller certificate are necessary to use Secure LDAP (LDAPS). The order of the certificate chain I found that works is root + intermediate. The certificate chain is named adCA.pem and located at C:\Program Files (x86)\CloudVolumes\Manager\config.
Open each file individually, starting with the root certificate, select all (ctrl + a) the contents, copy all (ctrl + c) the contents, including the —–BEGIN CERTIFICATE—– and —–END CERTIFICATE—–, and paste (ctrl + v) into a new file. Continue pasting intermediate certificates after the root certificate, without adding extra spaces, if there is more than one intermediate certificate. See below for example of a certificate chain.
-----BEGIN CERTIFICATE-----
root certificate details removed for brevity
-----END CERTIFICATE-----
-----BEGIN CERTIFICATE-----
intermediate certificate details removed for brevity
-----END CERTIFICATE-----
Save this file as adCA.pem into the C:\Program Files (x86)\CloudVolumes\Manager\config directory.
vCenter Certificate
The vCenter certificate is needed in order to trust the vCenter Server when setting up a Machine Manager. The order of the certificate chain I found that works is root + intermediate + machine. This file is saved as cacert.pem into the C:\Program Files (x86)\CloudVolumes\Manager\config directory.
Open each file individually, starting with the root certificate, select all (ctrl + a) the contents, copy all (ctrl + c) the contents, including the —–BEGIN CERTIFICATE—– and —–END CERTIFICATE—–, and paste (ctrl + v) into a new file. Continue pasting intermediate certificates after the root certificate, without adding extra spaces, if there is more than one intermediate certificate. Continue pasting the machine certificate after the intermediate certificates, without adding extra spaces. See below for example of a certificate chain.
-----BEGIN CERTIFICATE-----
root certificate details removed for brevity
-----END CERTIFICATE-----
-----BEGIN CERTIFICATE-----
intermediate certificate details removed for brevity
-----END CERTIFICATE-----
-----BEGIN CERTIFICATE-----
machine certificate details removed for brevity
-----END CERTIFICATE-----
Save this file as cacert.pem into the C:\Program Files (x86)\CloudVolumes\Manager\config directory.
Converting PKCS#12 Format Certificates into PEM
Extract the certificate.
openssl pkcs12 -in mycaservercert.pfx -nokeys -out mycaservercert.pem
Extract the key.
openssl pkcs12 -in mycaservercert.pfx -nodes -nocerts -out mycaservercertkey.pem
Convert the key to RSA.
openssl rsa -in mycaservercertkey.pem -check -out mycaservercertkeyrsa.pem
Service Accounts
You will likely want to create a service account to use with App Volumes Manager to connect to Active Directory.
Another account is required to connect App Volumes Manager into vCenter Server. This can be the same account as above, another Active Directory account, or a local vCenter user account. The user can be assigned the Administrator role in vCenter or a custom vCenter Server role can be created with a subset of permissions. (https://docs.vmware.com/en/VMware-App-Volumes/2009/app-volumes-admin-guide/GUID-505624F3-F3EB-428C-BEA0-5BD7F6095A1F.html)
Security Groups
You will likely want to create various security groups; at a minimum, a security group for App Volumes Manager Administrators. I would suggest other groups for placing end-users into, though. This will make assigning applications much easier and aide in license tracking.
Configuring App Volumes Manager
Open a web browser and type the fully qualified domain name for the App Volumes Manager you are configuring.
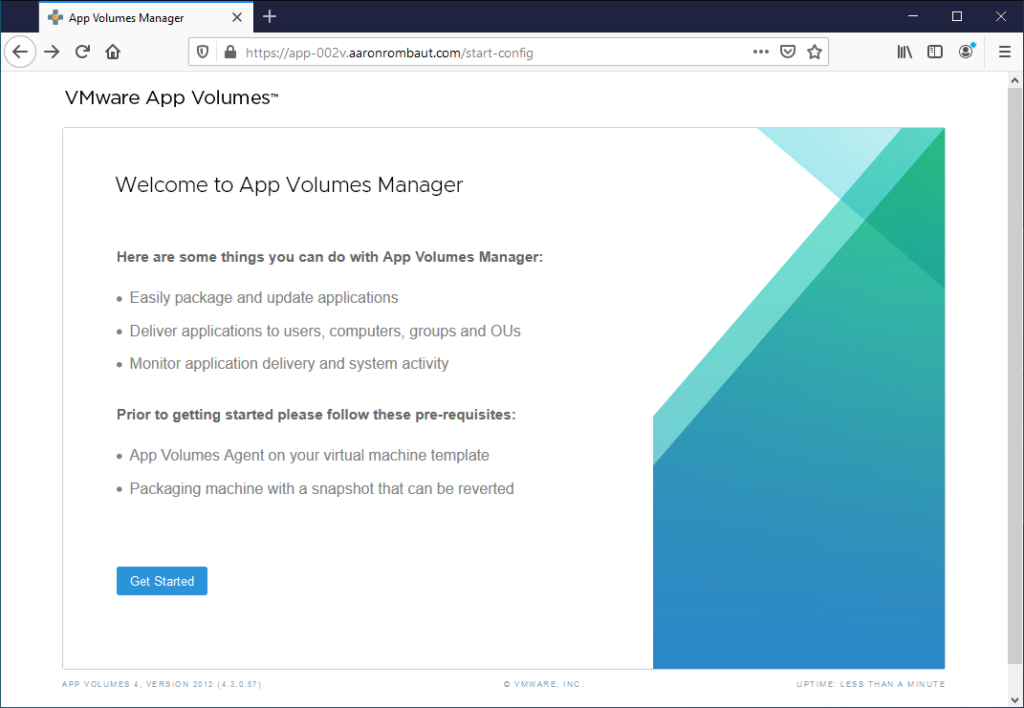
A Welcome to App Volumes Manager window displays.
Click the Get Started button.
License
Update the license to the license obtained when purchased. This will allow you to attach more than three App Volumes to a virtual machine.
[No screenshot]
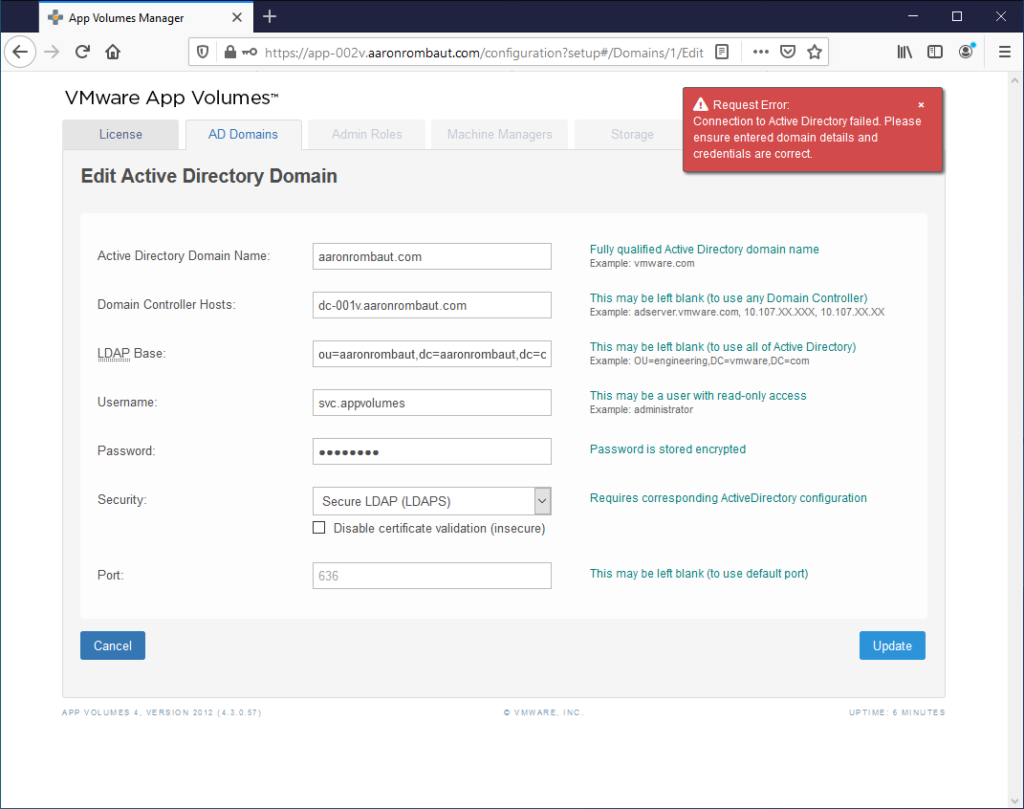
AD Domains
Fill in the details to register an Active Directory domain on the AD Domains tab.
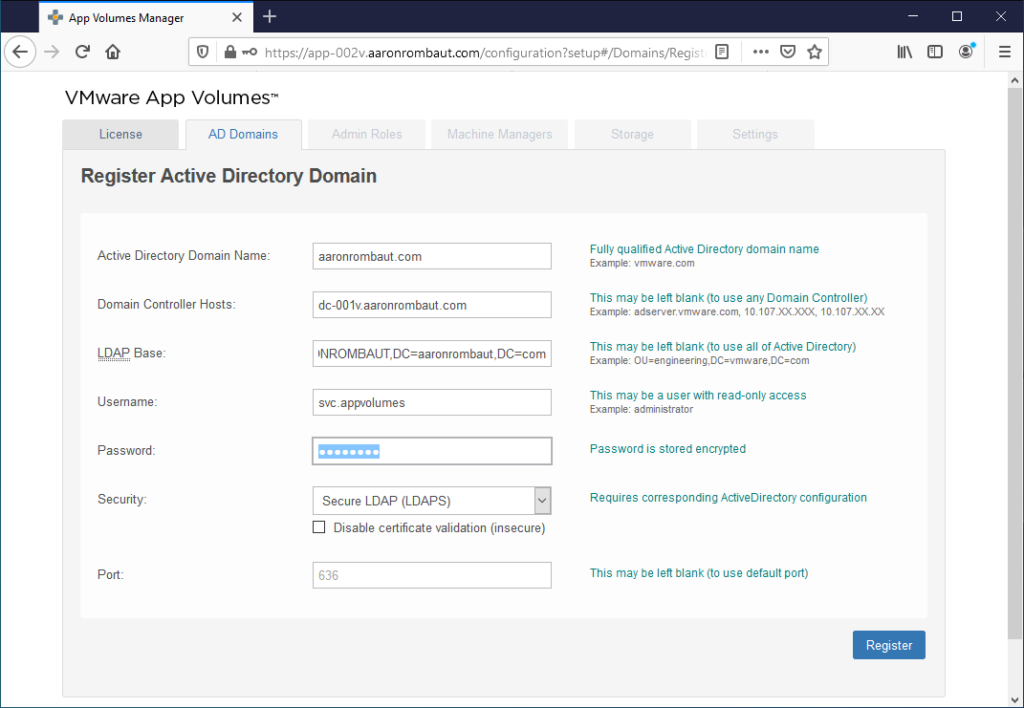
Click the Register button.
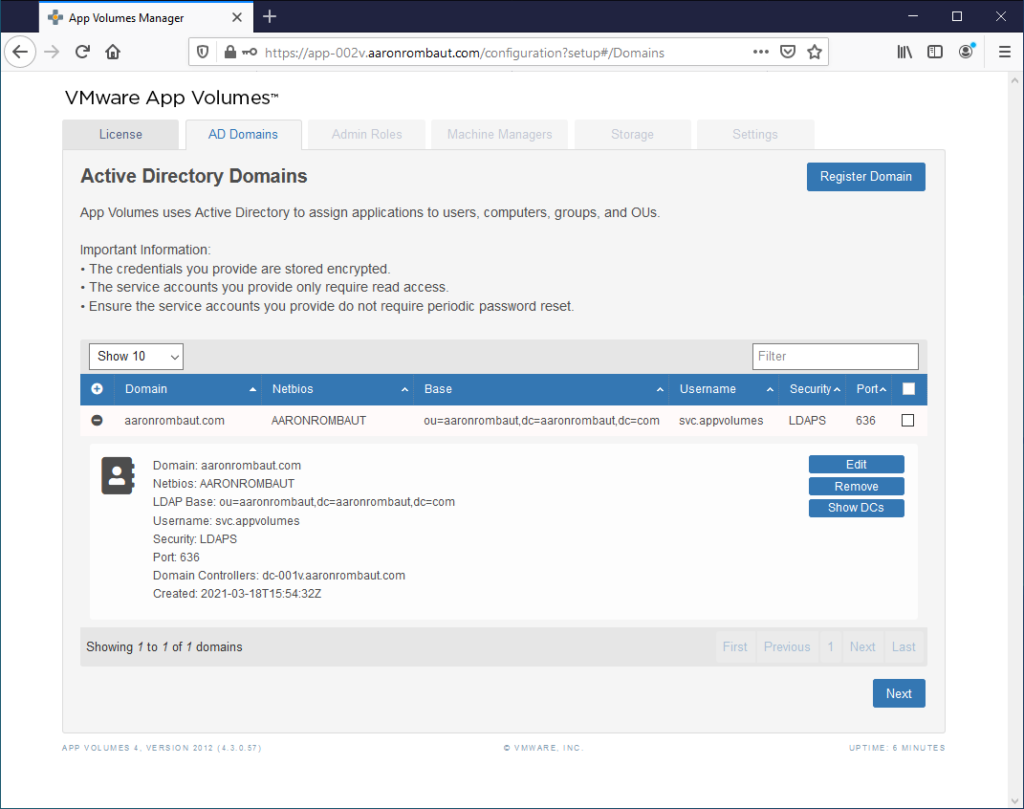
Click the Next button.
Admin Roles
Add users or security groups to permit administration activities in the Choose Group: text box.
Click the Search button.
Ensure the correct group populates in the Choose Group: drop-down selection.
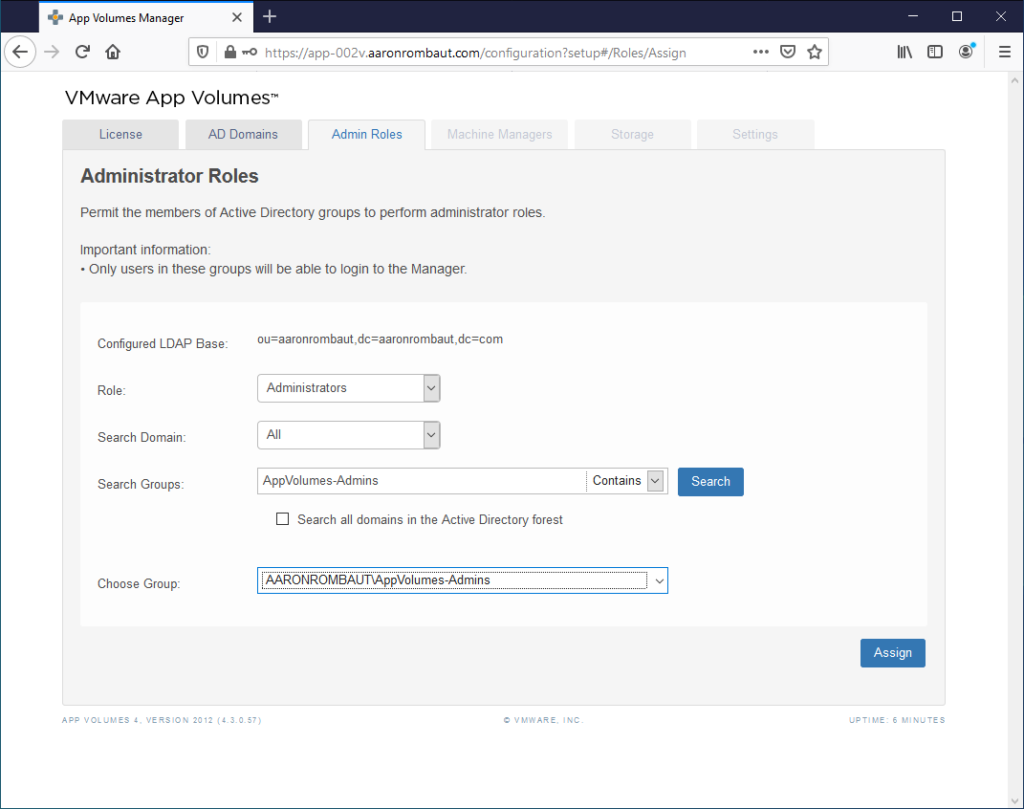
Click the Assign button.
Confirm the group you added is assigned the Administrators role. Note: One thing here is that if your administrative users only have Smart Card login, this will not work with App Volumes. A username and password is the only method, right now, to log in. The service account can be used or alternate accounts can be created that use username and password authentication.
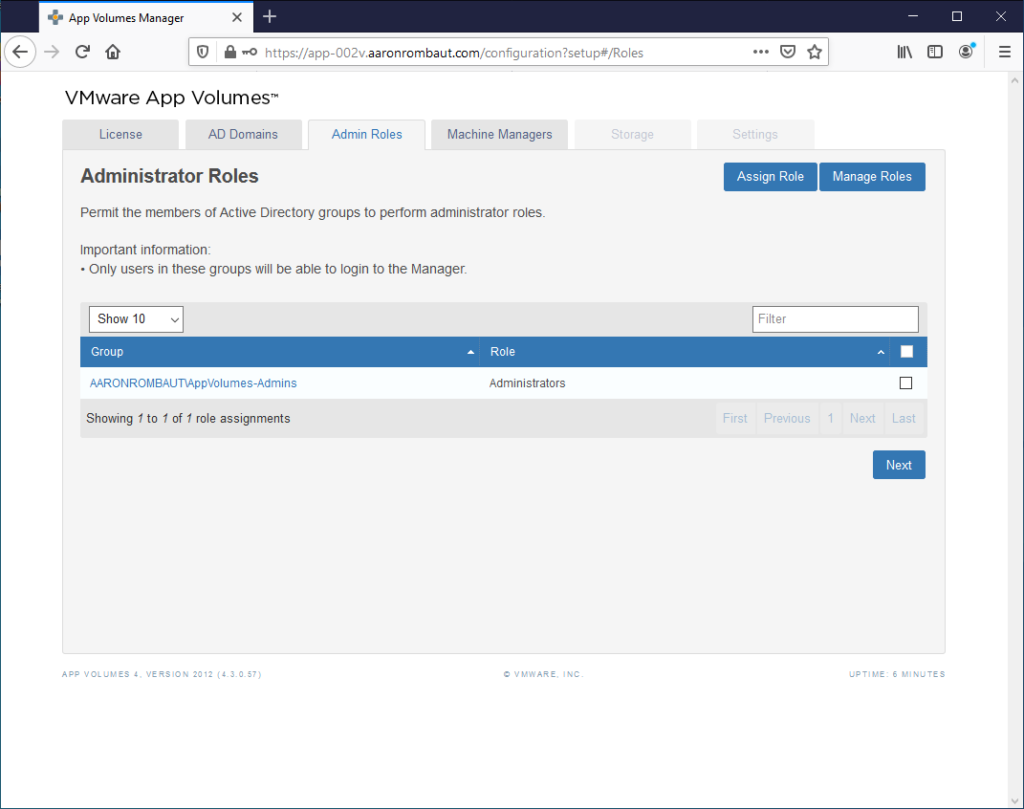
Click the Next button.
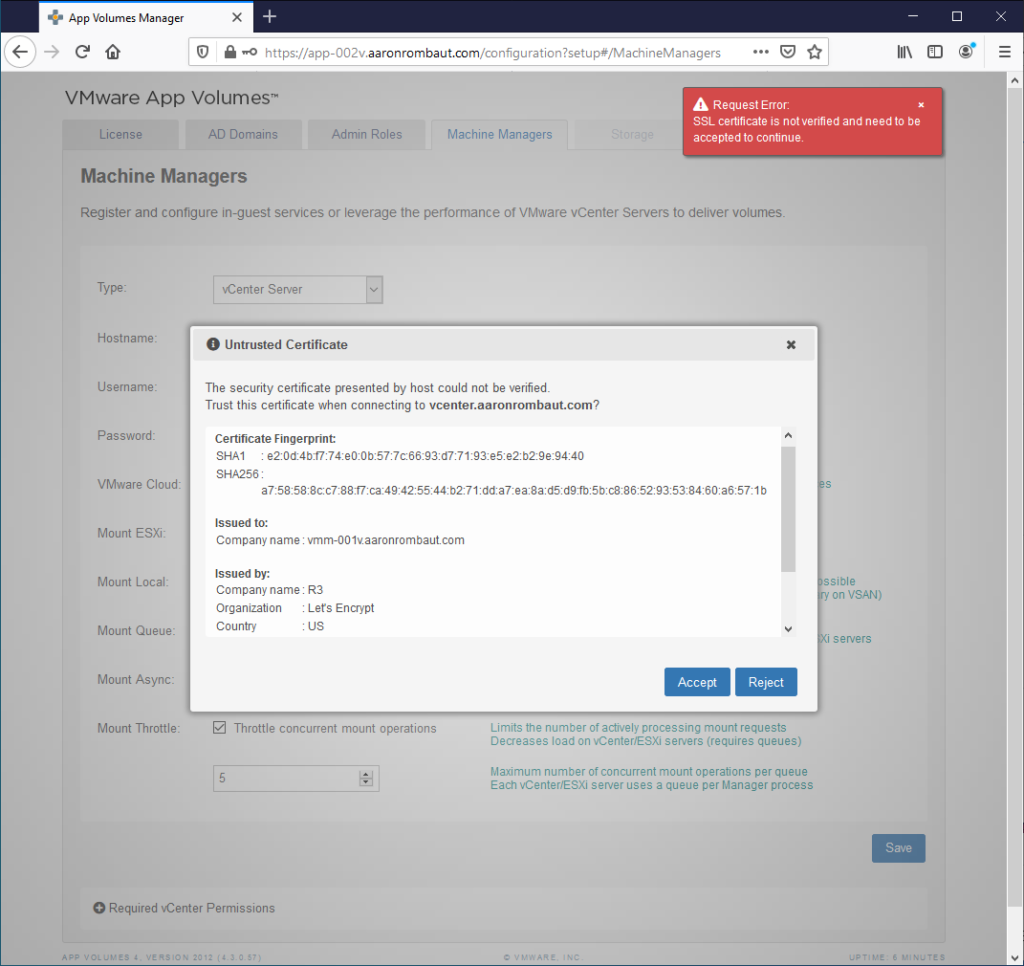
Machine Managers
Fill in the details for the machine managers on the Machine Managers tab.
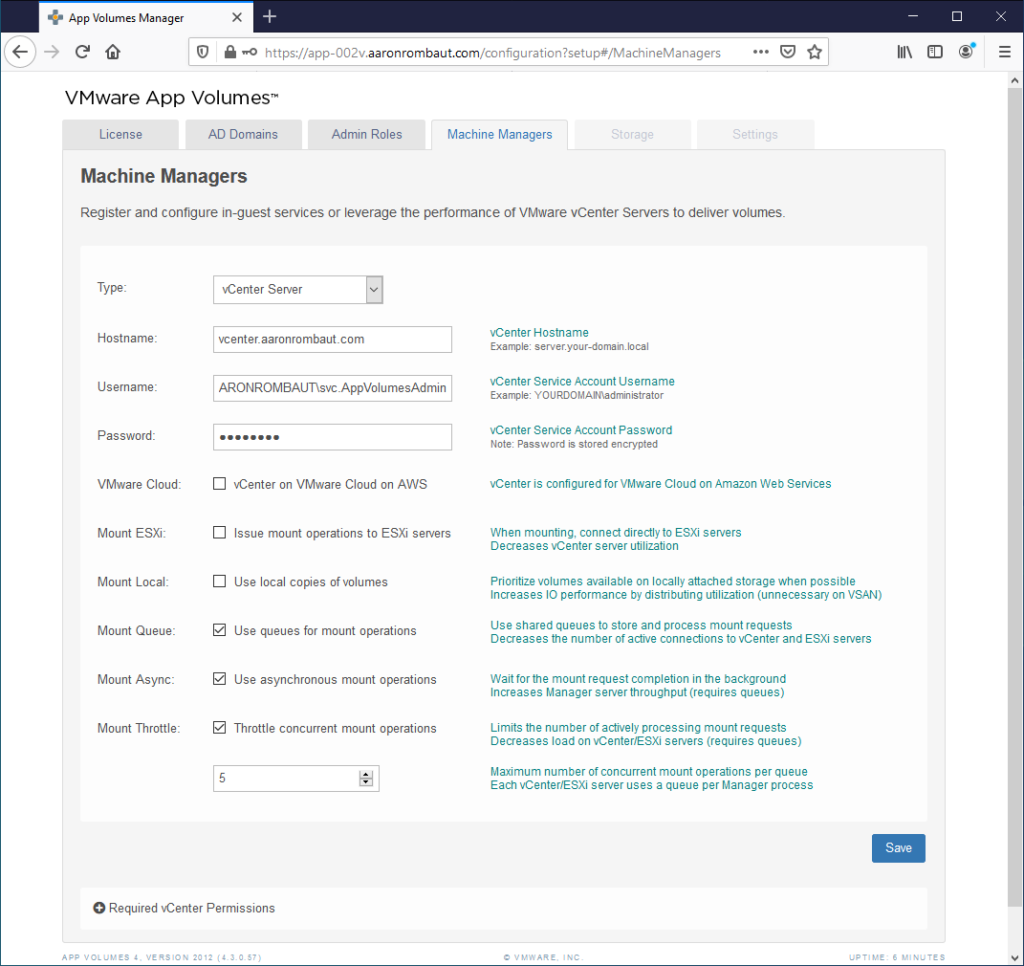
Click the Save button.
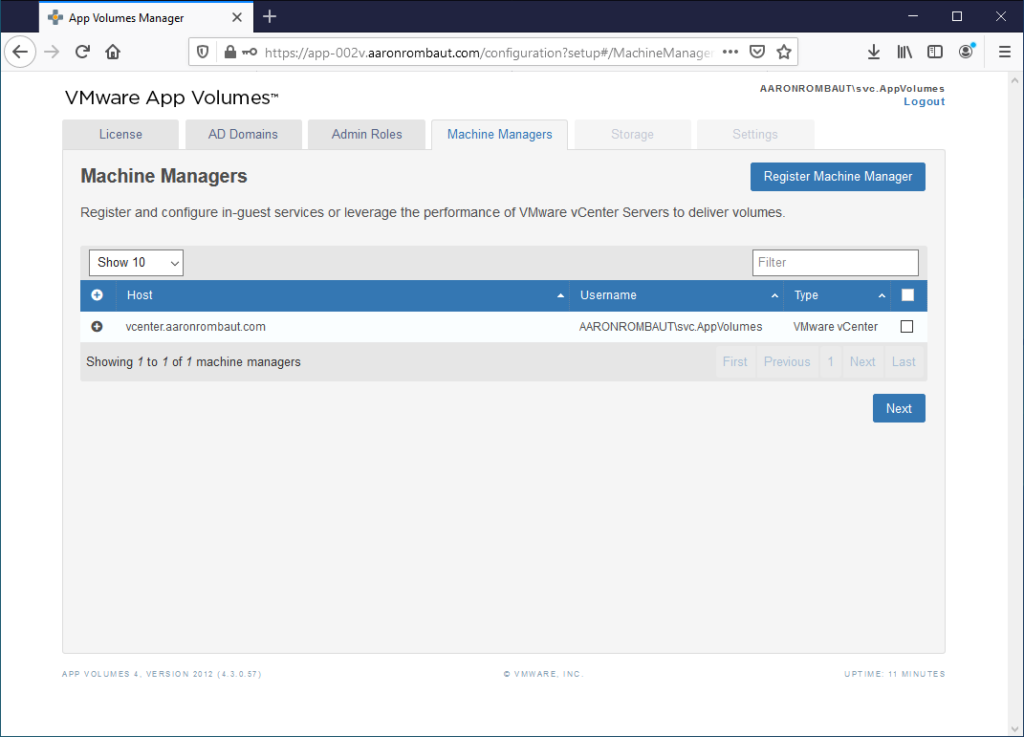
Click the Next button.
Storage
Choose the Default Storage Location from Packages and Writable Volumes panes.
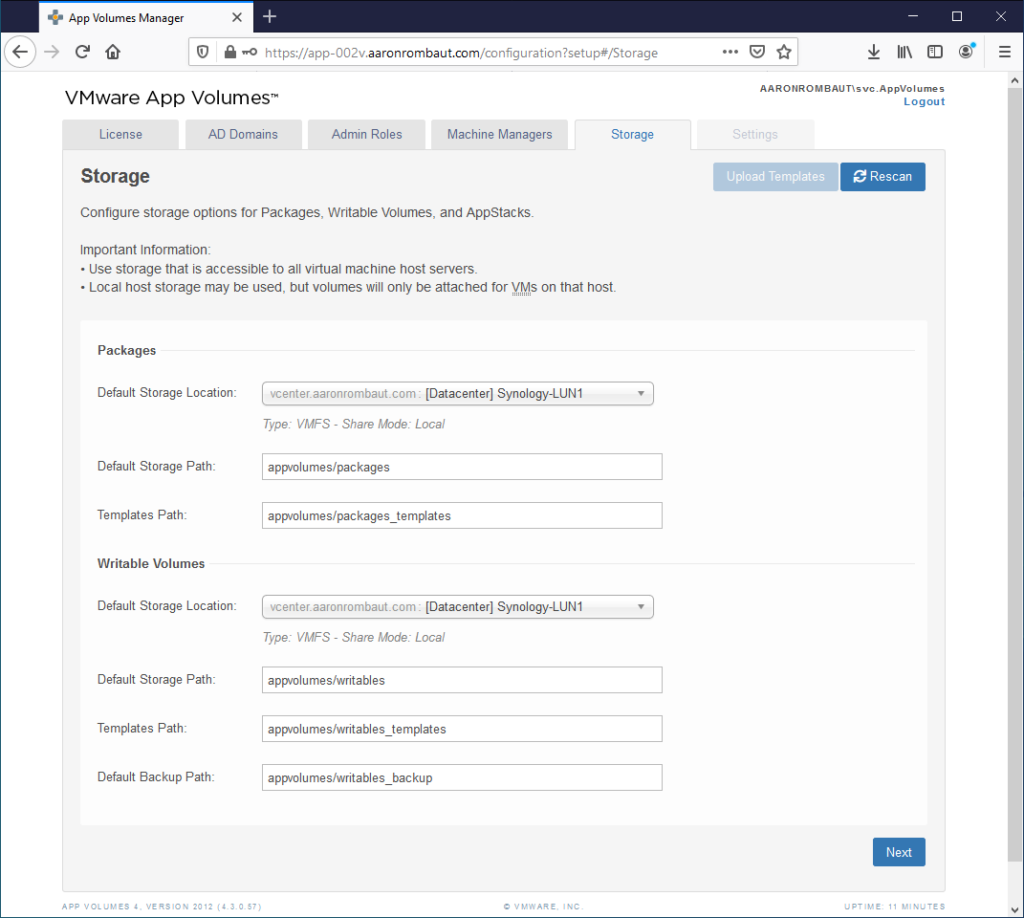
Click the Next button.
Choose the Import volumes immediately radio button.
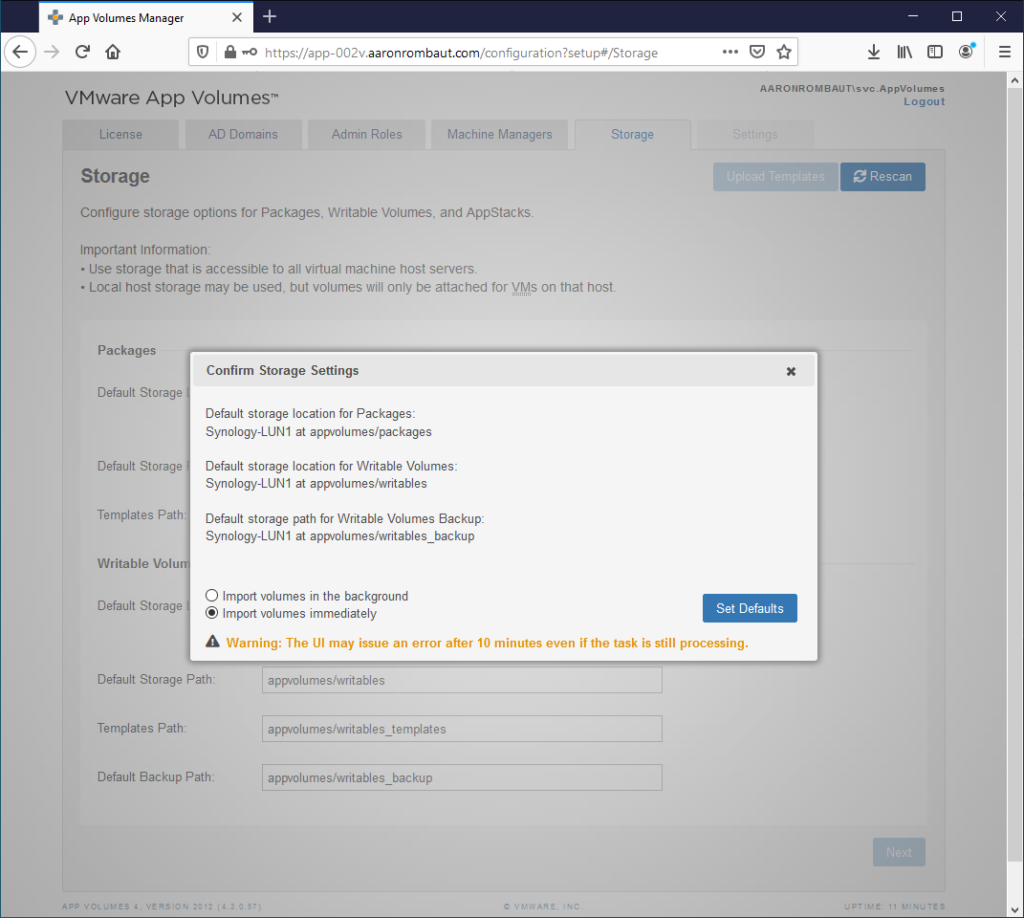
Click the Set Defaults button.
Click the checkboxes according to your needs or the checkbox in the table header to select all.
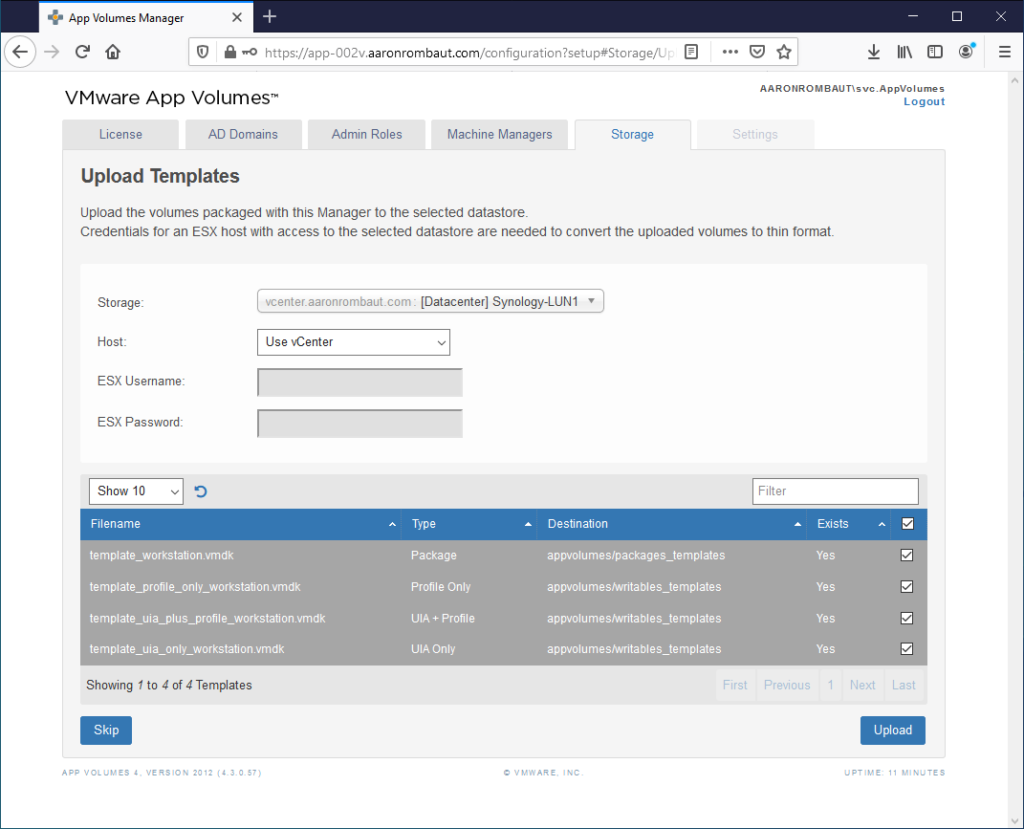
Click the Upload button.
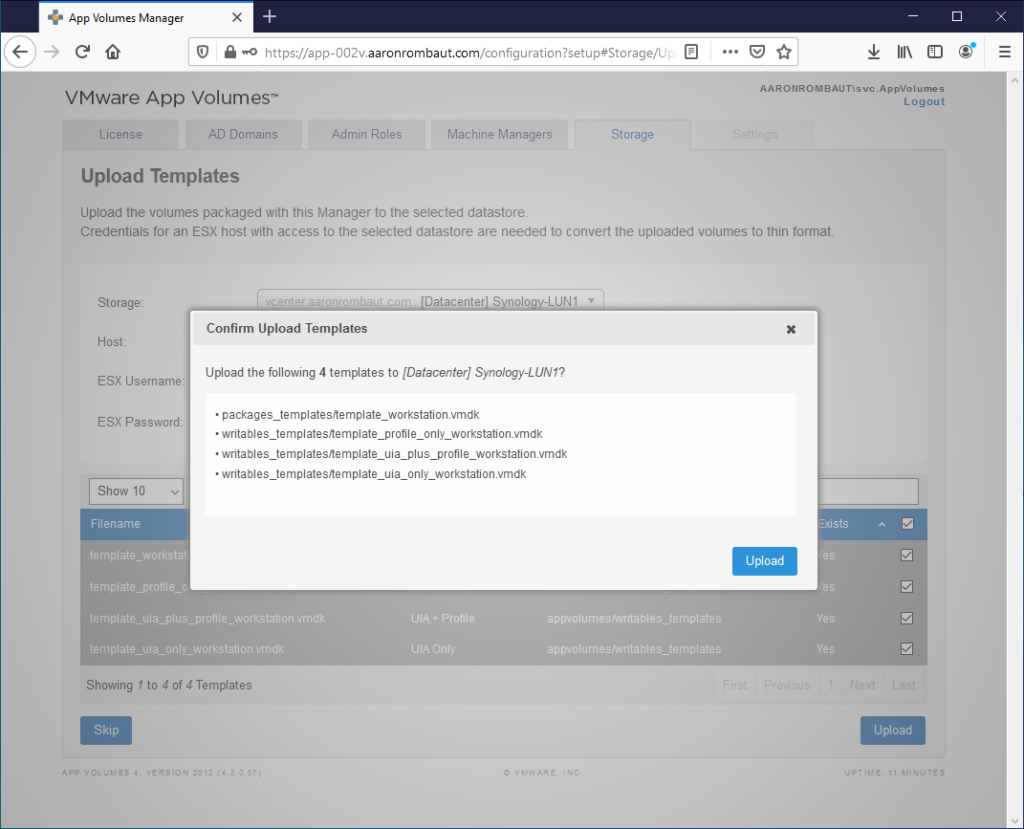
Click the Upload button in the Confirm Upload Templates window.
Settings
Review the settings here. One setting I change is in the Active Directory section. I change the Non-Domain Entities to Allow so that non-domain joined computers are visible and available for provisioning.
If you make any changes, be sure to click the Save button.
[No screenshot]
Troubleshooting
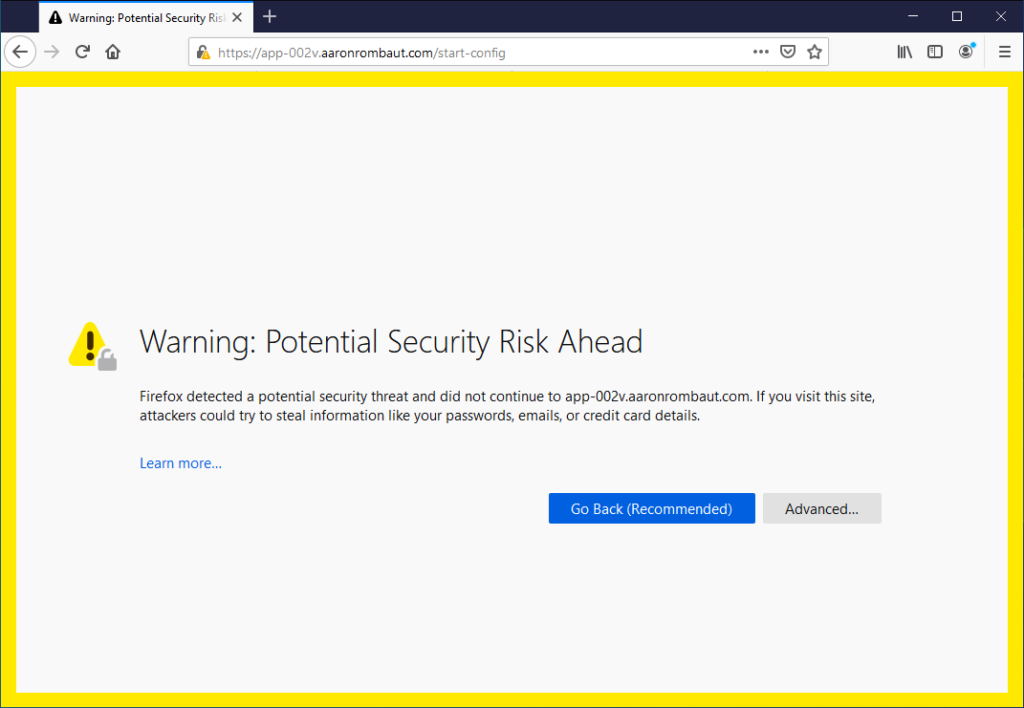
Web Interface Not Trusted: See Replacing the Self-Signed Certificate with a CA-Signed Certificate
Active Directory Domain Not Trusted: See Active Directory (LDAPS) Certificate
vCenter Server Certificate Not Trusted: See vCenter Certificate
References
Replace the Self-Signed Certificate with CA-signed Certificate: https://docs.vmware.com/en/VMware-App-Volumes/4/com.vmware.appvolumes.admin.doc/GUID-EFCC36A2-1609-4B47-969E-2A0CF9BC9B68.html
Configure CA Certificates in App Volumes Manager: https://docs.vmware.com/en/VMware-App-Volumes/4/com.vmware.appvolumes.admin.doc/GUID-4EA6EF73-7800-4241-9162-2C407AC4AA7A.html
App Volumes 2.12.1 – vCenter Certificate becomes unverified. (2150281): https://kb.vmware.com/s/article/2150281