Introduction
The following post is very long and will contain updates as the technology changes and I figure out better ways to accomplish these tasks. VMware Cloud Foundation, or VCF, requires at least four nodes for the Management Domain. Unfortunately, I do not have hundreds of thousands of dollars for physical hardware to test and learn VCF.
Since this is a nested lab, there are a few things that will need to be set up to make this work. These items, in particular networking, have to be configured in a way to allow the nested virtual machines to communicate. This is not applicable in production where the physical hosts are cabled into Top of Rack switches.
Revision History
December 2023 – Major edits to text, added section on importance of Planning and Preparation workbook. Also added supplemental posts below.
Supplemental Posts
Nested VCF Lab: Virtual Machines
First Things, First
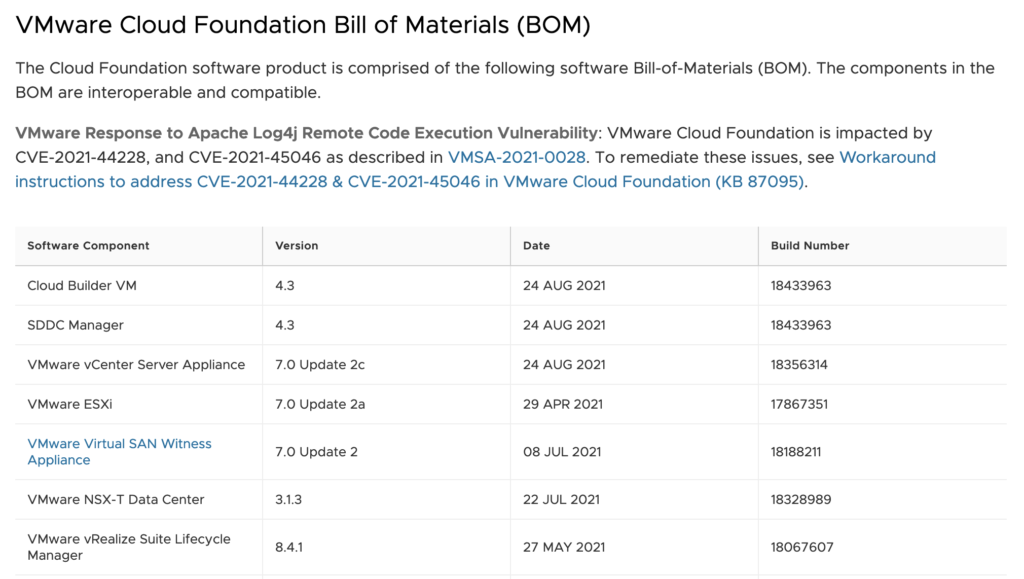
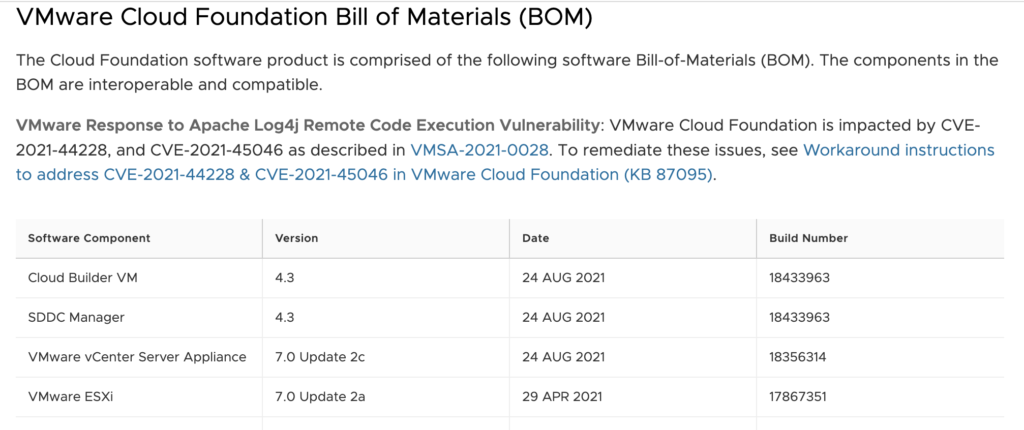
First things, first, RTFM. In this case, the Release Notes for VCF are extremely important and contain a section known as the Bill of Materials, or BOM. This prescribes the exact component versions that must be installed for success.
Prerequisites
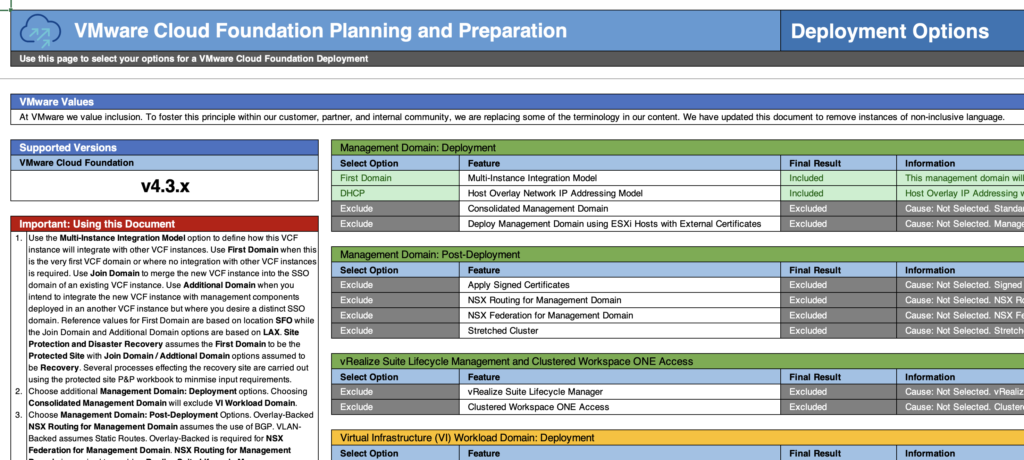
Navigate to docs.vmware.com for the most up-to-date documentation. In the case of this post, I chose to use a slightly older version on purpose. I wanted the ability to perform an upgrade without waiting for the next release. After consulting the release notes, (you did review the release notes, right?) the next important guide is the VMware Cloud Foundation Planning and Preparation workbook. This is an all encompassing (and self-documenting) workbook that will get all the deployment details captured in one place. Some of the information captured in the workbook will also be needed for the VMware Deployment Parameter Workbook.
Physical Network Preparation
Supplemental post: Nested VCF Lab: Networking
As mentioned in the Introduction, since this is a nested lab, there are things that must be configured here that would normally not be.
The physical switch Maximum Transmission Unit (MTU) should be set to at least 1700 Bytes (1600 is the bare minimum, but 1700 is the recommended minimum). However, Jumbo frames, 9000 Bytes, is the best option. Just ensure all the devices, end-to-end, are configured with this speed. In my case, my firewall, a Firewalla Gold, does not have a native means to adjust the MTU as this is not a common use case for the home user. Instead, I built a single Management VLAN (different from the VCF management later on) on the Firewalla and tagged it to the physical ESXi host. On the physical ESXi host, I have a pfSense firewall configured with my VCF VLANs and a standard vswitch configured with an MTU of 9000. The pfSense firewall will be the firewall used in the nested lab.
Speaking of VLAN and MTU, at least four networks will be needed to get a bare-minimum installation.
- Management (1500 Byte MTU)
- vMotion (9000 Byte MTU)
- vSAN (9000 Byte MTU)
- NSX-T (Tunnel Endpoint or TEP) (9000 Byte MTU)
Critical Infrastructure
Supplemental post: Nested VCF Lab: Virtual Machines
My physical ESXi host has a few virtual machines that provide critical infrastructure. I have:
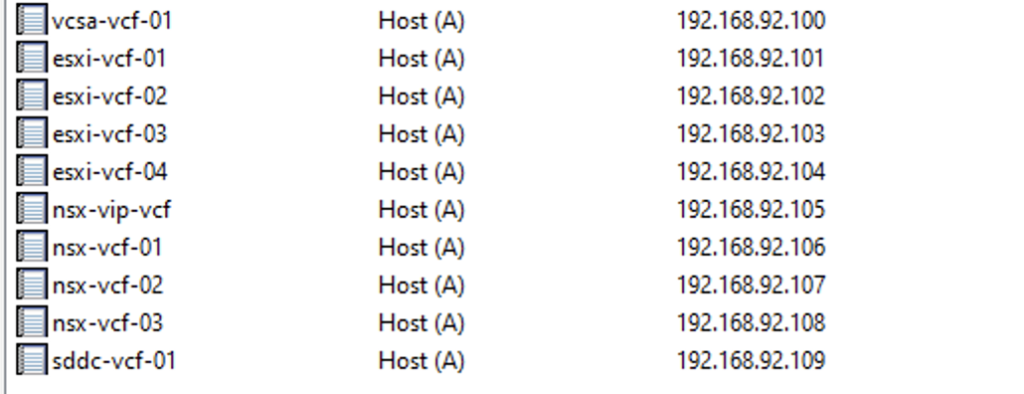
- A DNS server configured with forward (A/AAAA) and reverse (PTR) records containing all devices as called out in the VMware Deployment Parameter Workbook
- A general purpose file server for holding configuration items and ISO files and also serves as an NTP server (if using Windows, do not configure as an NTP source)
- A pfSense firewall to proved me with nested networks – the WAN is my home lab network (uses a portgroup with lab VLAN ID) and the LAN networks are for the nested hosts (uses portgroup with the 4095 VLAN ID so that the guests have to be tagged)
- A VMware Cloud Builder appliance configured on the same subnet as the four nested ESXi nodes
- Four ESXi virtual machines configured identically and patched to the build number version called out in the BOM
- A management virtual machine – Windows or Linux – that can be used to manage the lab network or the nested networks
Research the Bill-of-Materials (BOM)
It’s worth repeating…the very first thing to do is research the Release Notes for the Bill-of-Materials (BOM) for the particular version of VCF to be installed. The Release Notes can be found at https://docs.vmware.com/en/VMware-Cloud-Foundation/index.html. For this particular installation, I am going to install a slightly older version of ESXi so that I can apply an update later.
Prepare for the Nested ESXi Hosts
Option 1: Download or Make a Custom ISO Image
Refer to the Version and Build Number fields for VMware ESXi from the BOM. In my case, I am going to need an ESXi image with Build Number 17867351. It doesn’t matter what version to use as long as the BOM is matched. I am using a Dell PowerEdge server, so my physical host includes the vendor add-on. The nested ESXi hosts will be using virtualized hardware, so the vendor add-on will just make the virtual machines bloated with unnecessary drivers. A plain vanilla ESXi image can be used for the nested hosts.
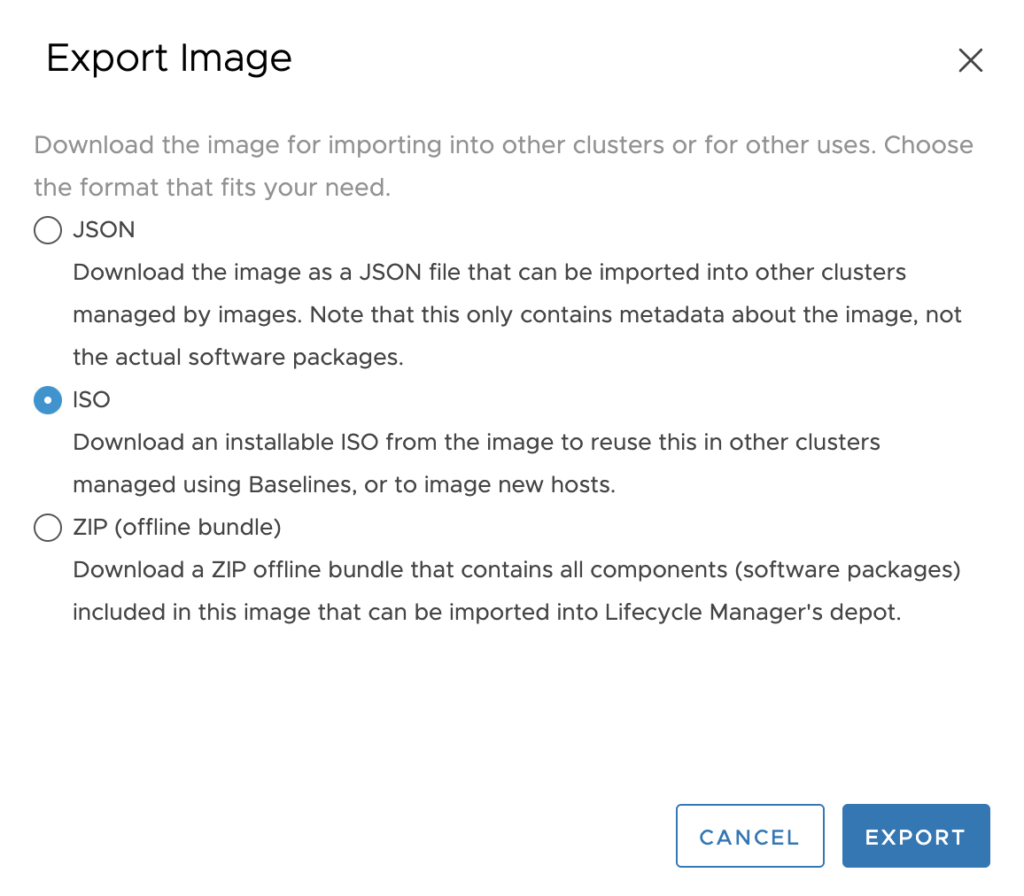
If you already have an available vSphere 7 environment, you can use the vSphere Lifecycle Manager in an empty cluster to make the custom ISO. This is by far the easiest and fastest method to getting the correct ESXi image. Documentation for this procedure can be found at https://docs.vmware.com/en/VMware-Cloud-Foundation/4.3/vcf-deploy/GUID-1B9AAE1E-7C55-4A7A-A921-9F84F248AF68.html.
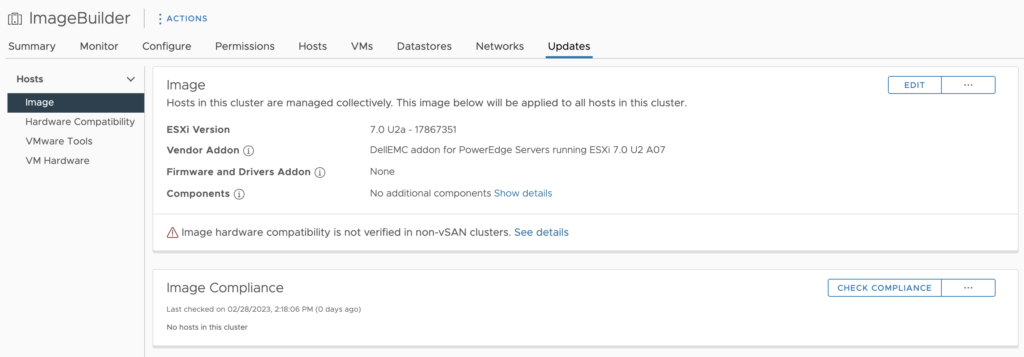
Once the image is created and checked, I used the ellipsis to export an ISO file.
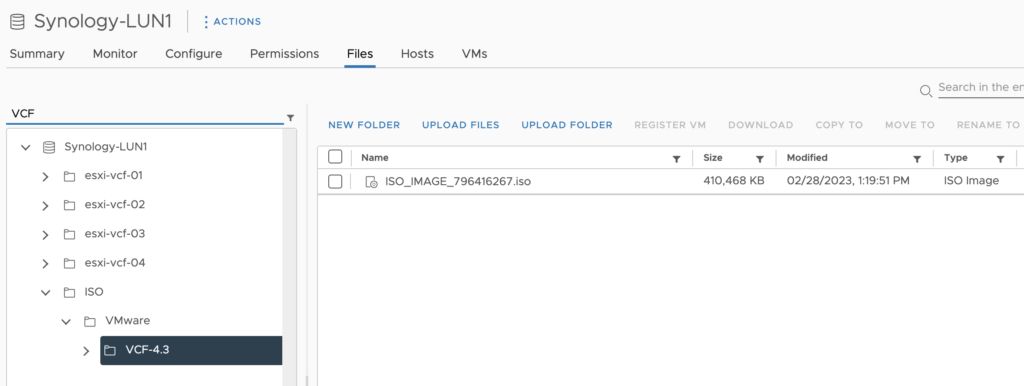
Upload the ISO file to an available vSphere Datastore.
Option 2: Obtain the ESXi Base version and Patch
If necessary, the base version of ESXi can be installed and then manually patched to the required build number. Remember the ESXi versions have to be installed and patched in the same update version. If installed ESXi 7U2, patches for ESXi 7U3 will not work. The ESXi host would have to be upgraded to ESXi 7U3, first.
This is the more time consuming way to configure, but will work nonetheless. One thing to note is that when uploading the patch, upload to the tmp in the OSDATA drive, not the root /tmp.

The following command is used to install the patch. Remember to use the full path and not the relative path!
esxcli software vib update --depot=/path/to/update/file
Add a Virtual Machine Port Group
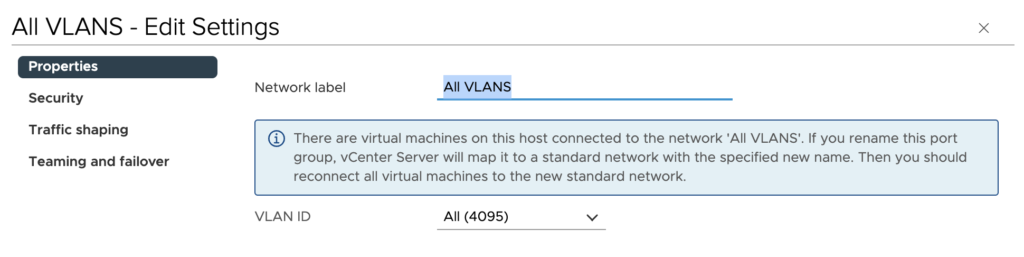
I am going to use a Standard Switch for my nested ESXi hosts, so I am going to add a Virtual Machine Port Group for a Standard Switch that passes all VLANs.
On the Standard Switch, I need to make a few adjustments to the Properties. First, I ensure the Maximum Transmission Unit (MTU) is set to 9000 Bytes.
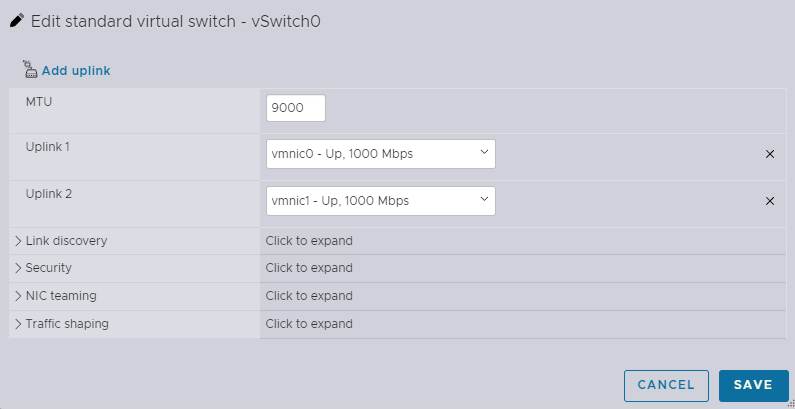
Next, I adjust the Security. Change all of the settings to Accept from the default. This allows the nested traffic to traverse the switch.

The port group that was built above for all VLANs should inherit the settings from the switch. Port groups inherit the MTU of the switch. VMkernel NICs can adjust the MTU independent of the vSwitch, however, if the vSwitch cannot accommodate the MTU (it is set lower), there will be issues.
Add the DNS Entries
Ensure there is a forward and reverse record for each of the entries that VMware Cloud Foundation will require while filling out the Deployment Parameter Workbook.
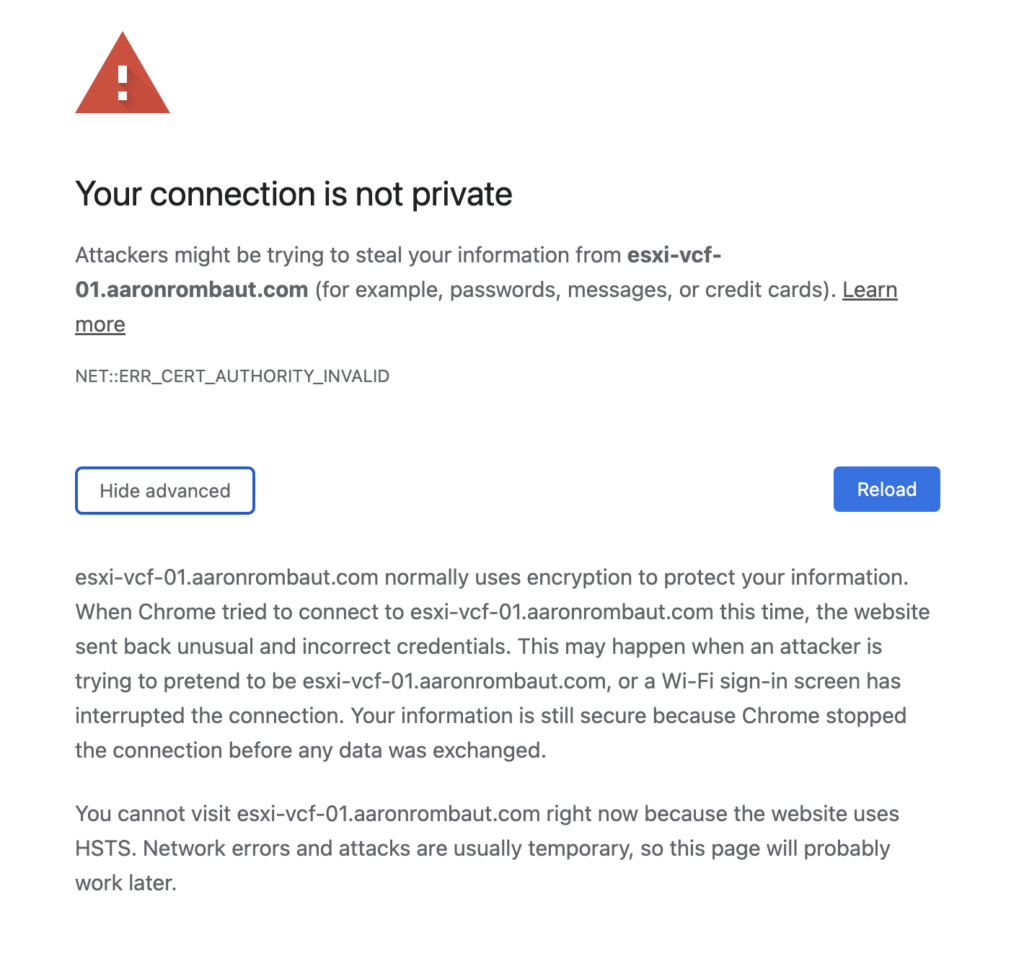
Additionally, you can try to navigate to the URL in a browser, now. Depending on your browser and browser version, you are likely to receive a security warning about this web page. This is to be expected as there are no trusted certificates installed. Navigate past this warning and ensure you are on the host that was configured.
Note that if you are using HTTP Strict Transport Security (HSTS) with Google Chrome and do not have a proceed to <ip/fqdn> (unsafe) link, like the picture below, click in the white space on the page and type the following, thisisunsafe, to advance.
Continue configuring the additional three nested ESXi hosts following the steps above.
Configure the Network Time Protocol Daemon (NTPD)
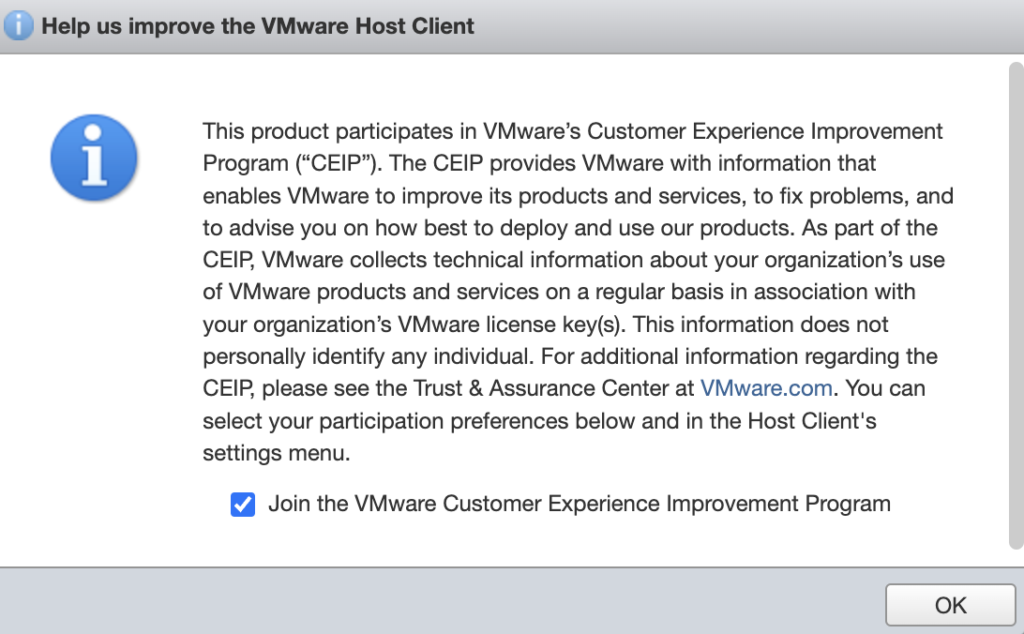
Using a web browser, log in to all four nested ESXi hosts. Choose to Join the VMware Customer Experience Improvement Program (CEIP) or not, click OK.
Navigate to Manage > System tab > Time & date.
Click Edit NTP Settings.
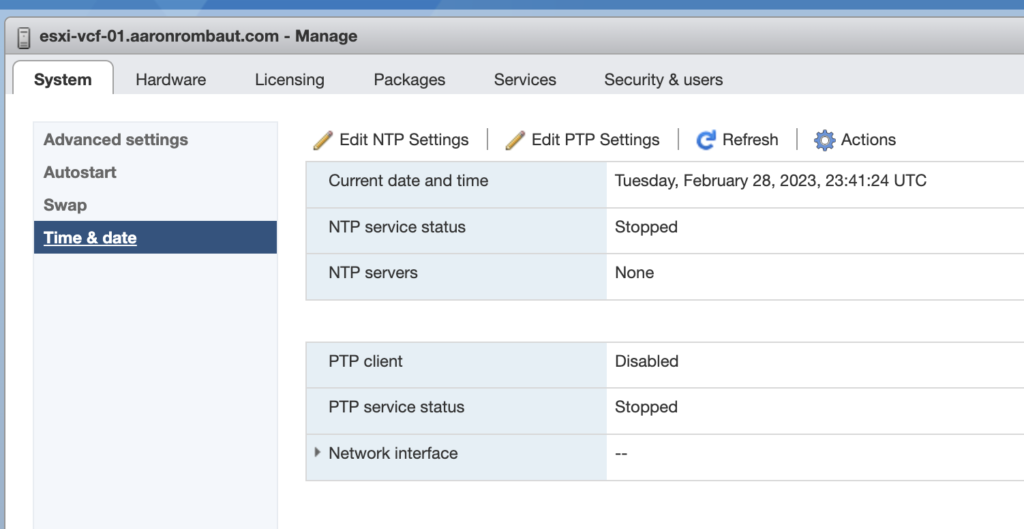
Select the option to Use Network Time Protocol (enable NTP client).
Change the NTP service startup policy to Start and stop with host.
Add one or two individual NTP servers in the text box or a pool address.

Click Save.
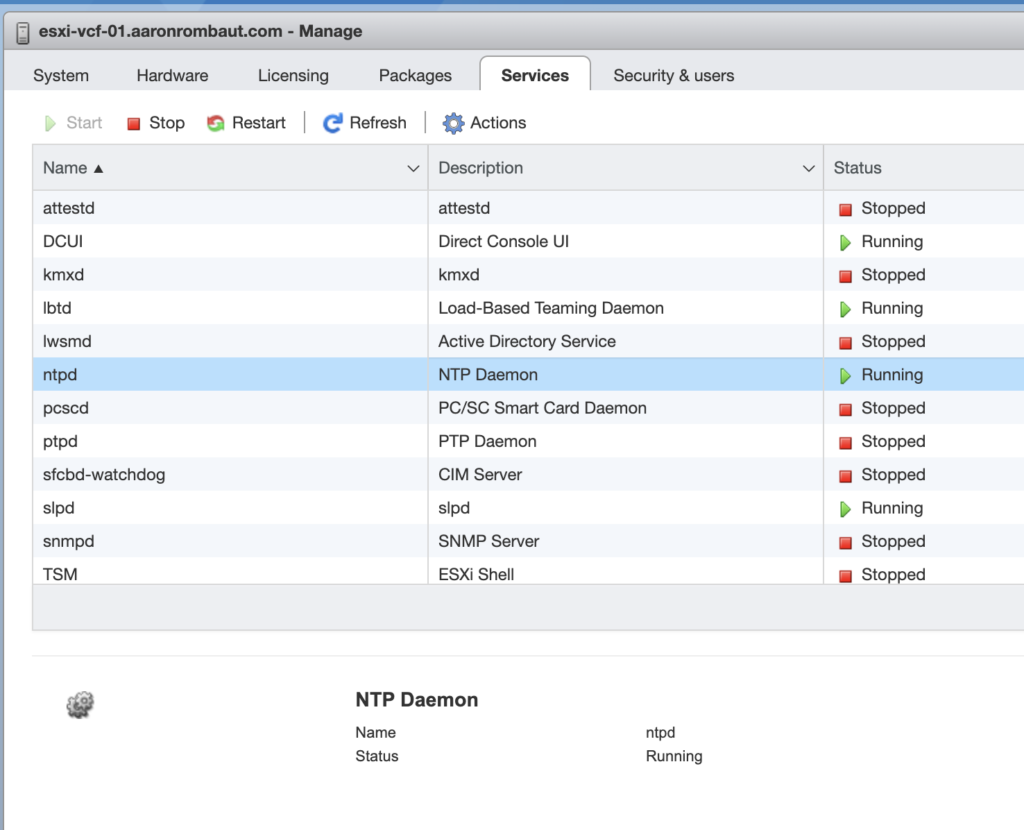
Navigate to Manage > Services tab.
Locate and select the ntpd service.
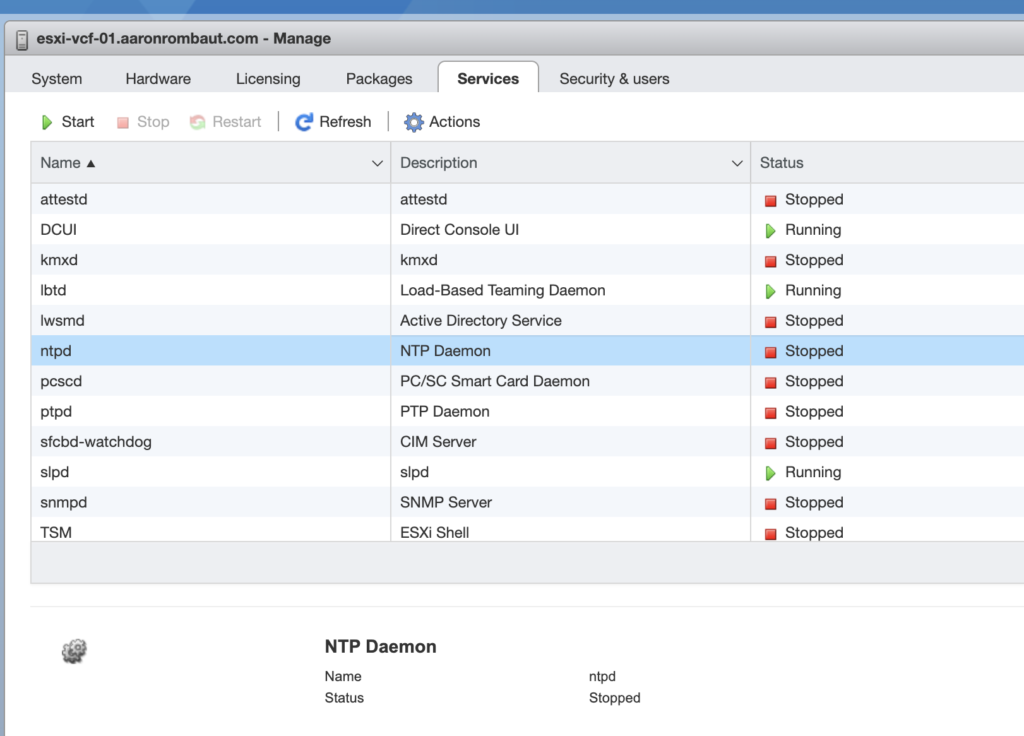
Click the icon marked Start to start the service. Wait a moment (you may have to refresh the services pane or the browser window) and you should see the ntpd service is running.
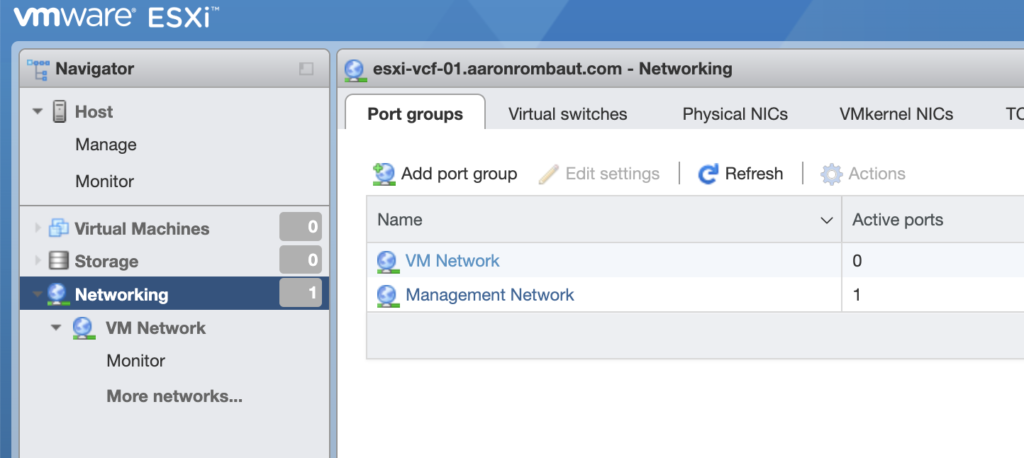
Change the VLAN for VM Network
VMware Cloud Foundation expects the VM Network port group VLAN to match the Management Network VLAN.
Choose the Networking tab in the navigation column. Select the VM Network port group.
Click Edit Settings.
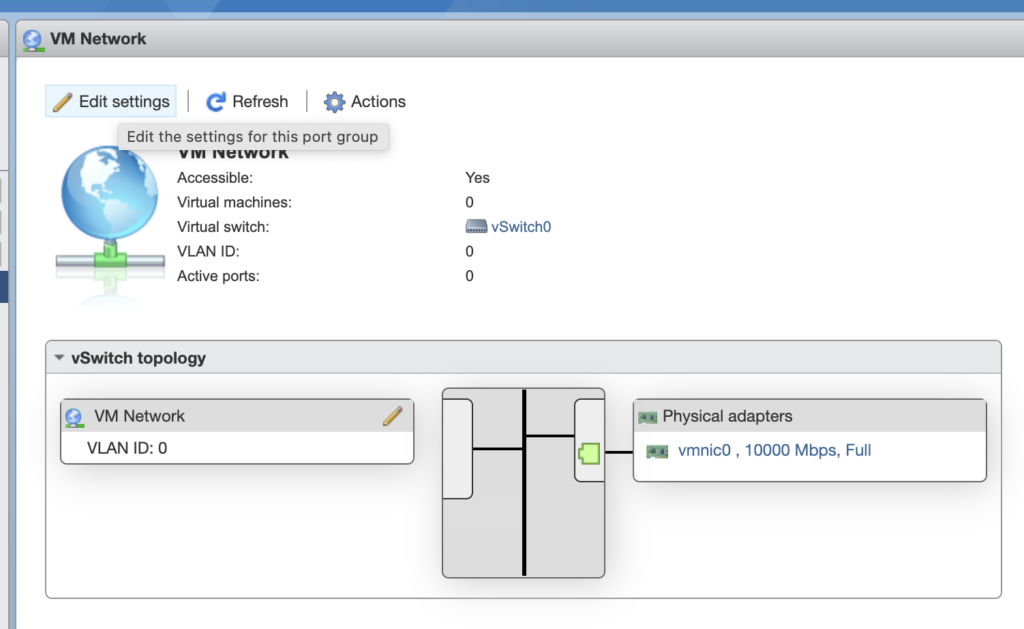
Change the VLAN to match the Management Network VLAN.
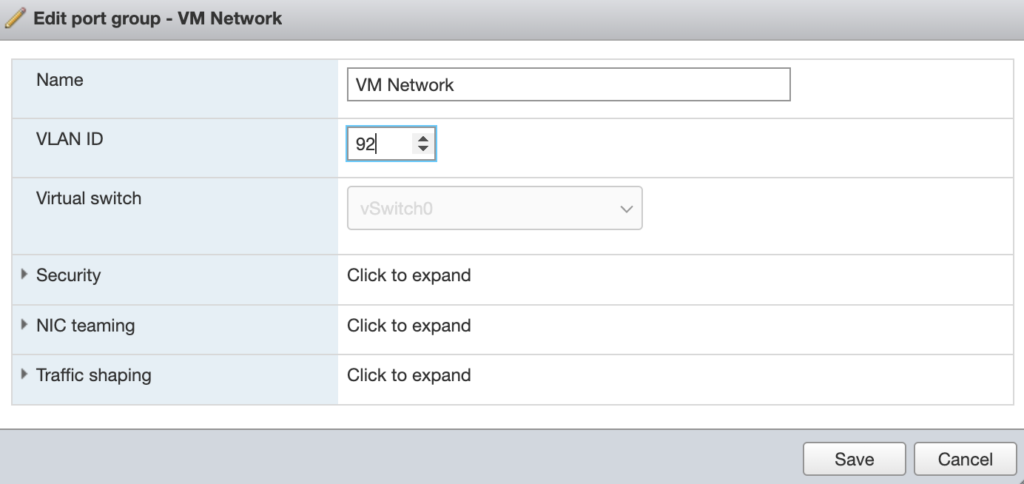
Click Save.
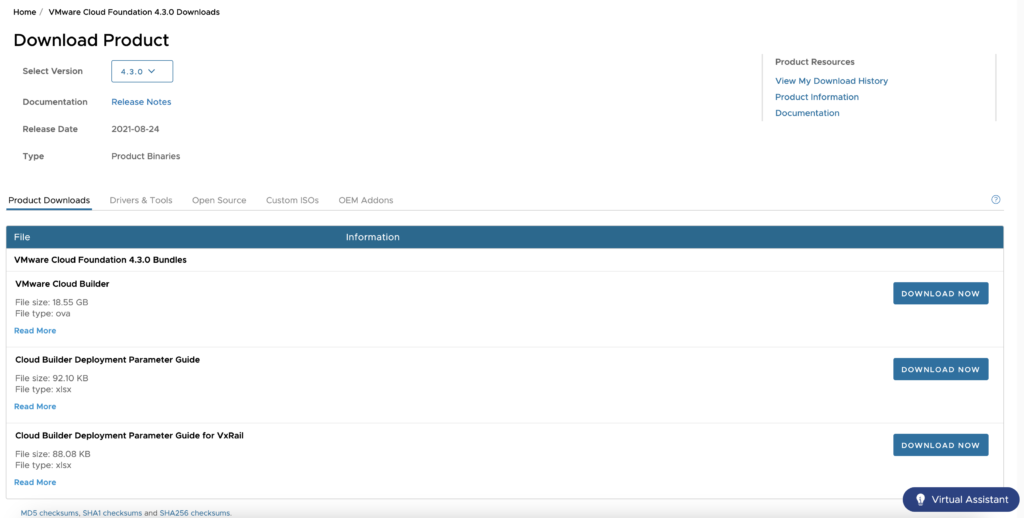
Download the Cloud Builder Appliance and Parameter Guide
Navigate to https://customerconnect.vmware.com/ and log in. Download the VMware Cloud Builder appliance and the Cloud Builder Deployment Parameter Guide.
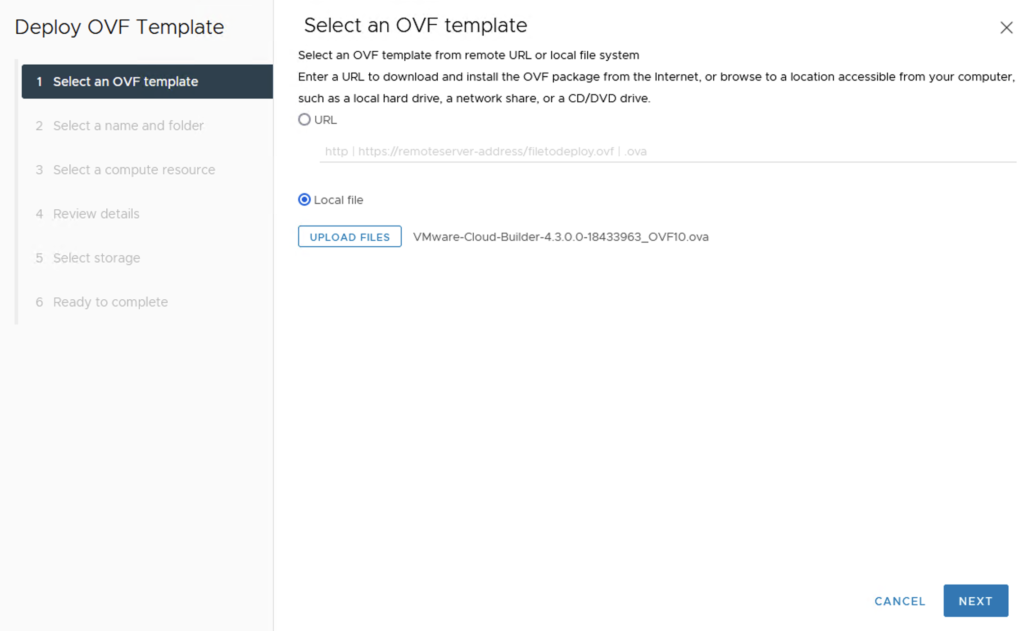
Deploy the OVF Template
Using the vSphere Client, deploy the OVF Template.
Log in to the Cloud Builder Appliance
Use a web browser and navigate to the Cloud Builder appliance. You will likely be presented with the End User License Agreement (EULA). Read through and select the checkbox.
Click Next.
For this build I am going to leave the default of VMware Cloud Foundation.
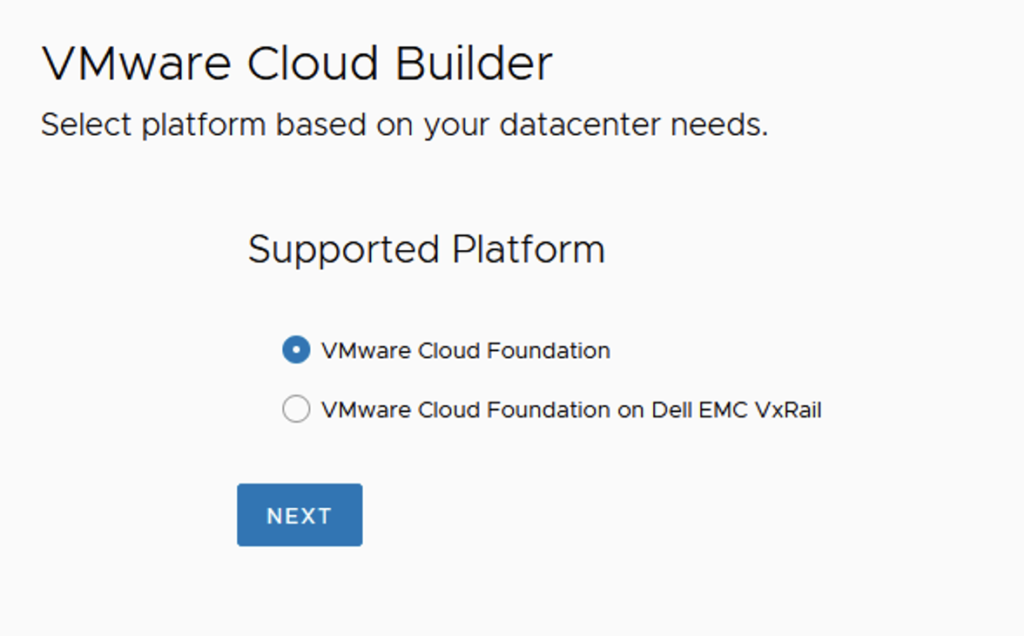
Click Next.
Review the prerequisites and select the checkbox.
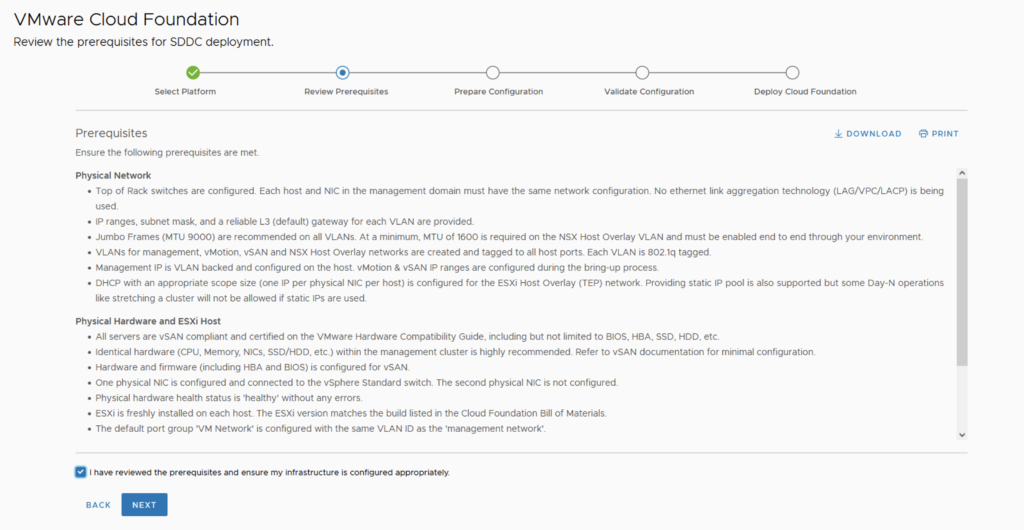
Click Next.
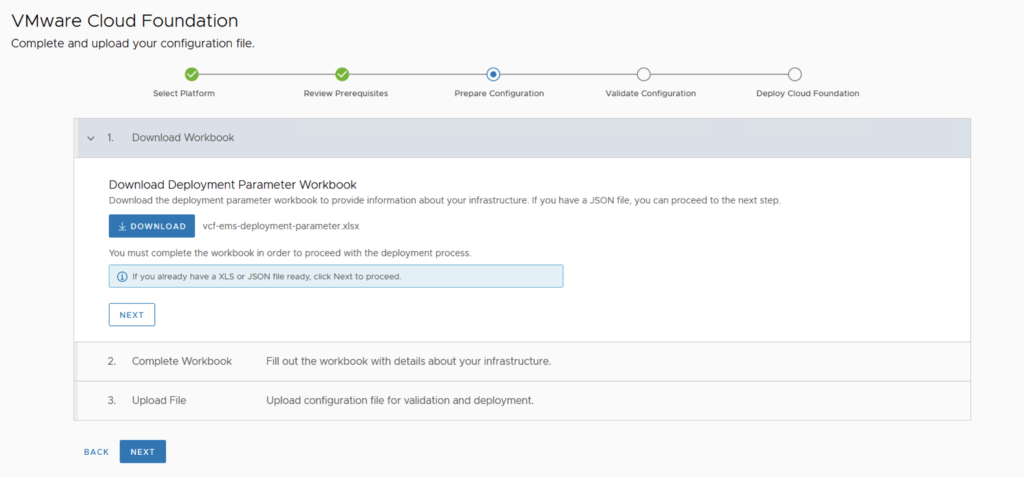
There are a few possible ways to proceed. If you have not already downloaded and filled in the Deployment Parameters Workbook, you can do that here by clicking Download.
If you have already downloaded a copy and have it filled out, proceed to step 3 by clicking Next.
When you get to step three, click Select File and unload a filled in copy of the Deployment Parameters Workbook. After a few moments, there should be a green banner that displays.
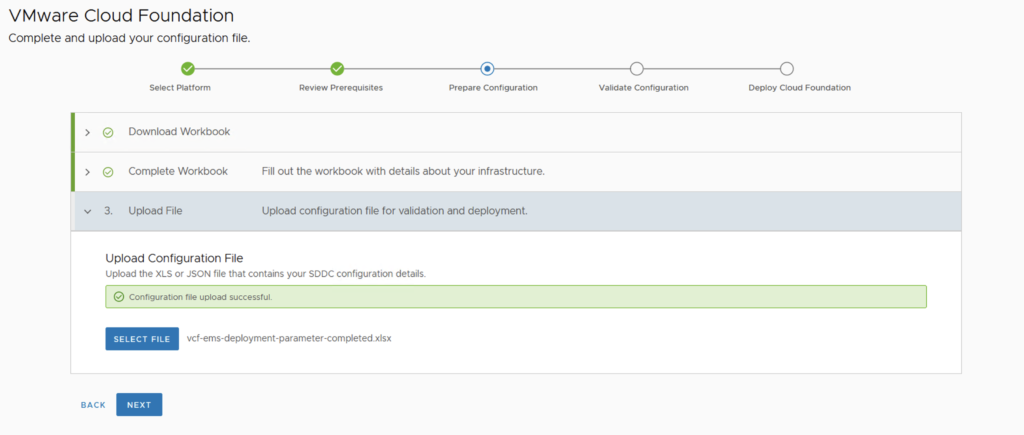
Click Next.
A verification process will take place and could take a bit of time. The following validation completed in about 10 minutes.
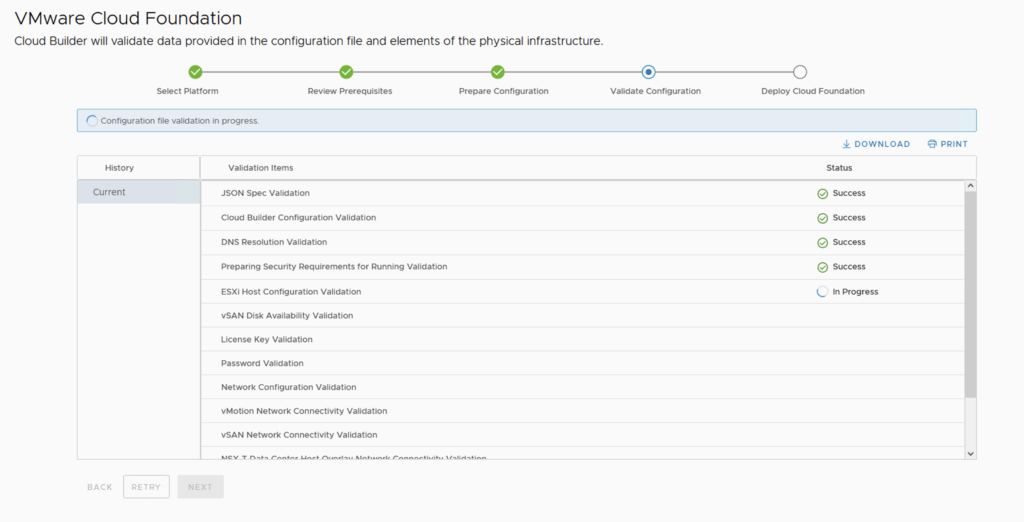
Once the validation is complete, you should see a green banner across the top.
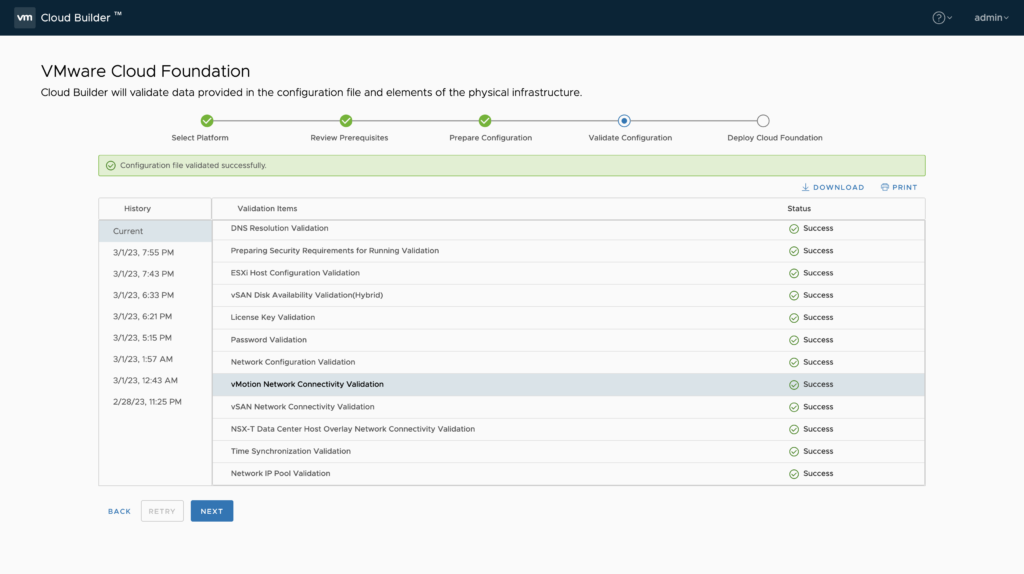
Click Next.
Snapshot the Nested ESXi Hosts
The nice thing about having a nested lab like this is that the nested ESXi hosts are nothing more than virtual machines! Take plenty of snapshots! If the SDDC deployment fails, the snapshots can save you time building new virtual machines and configuring again.
Deploy the Software Defined Data Center (SDDC)
The SDDC is now ready to be installed.
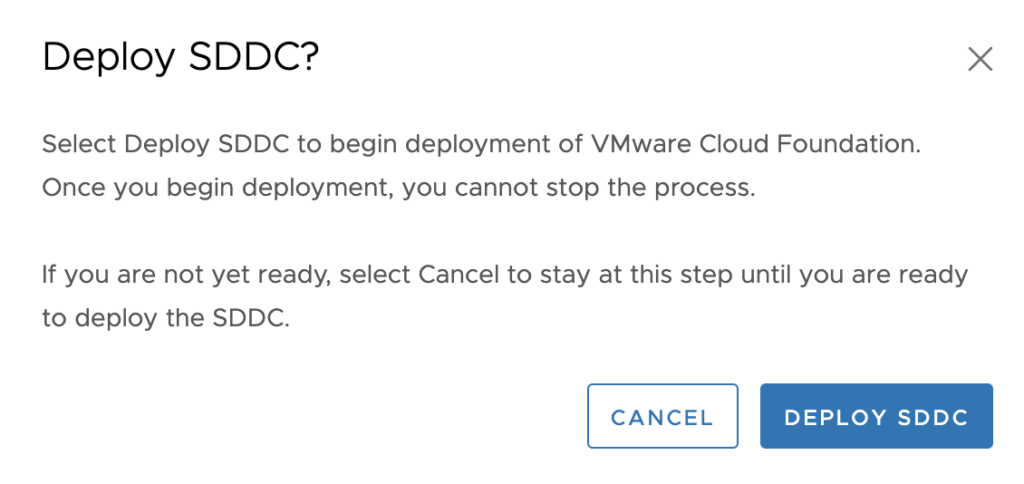
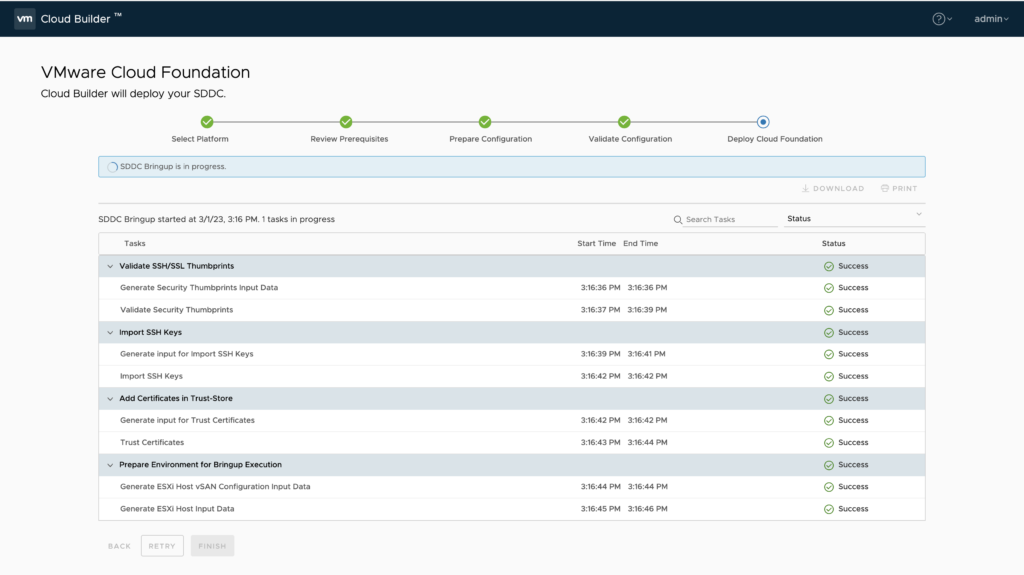
Click Deploy SDDC to start the deployment. This is called Bringup, and will likely take quite awhile. You can monitor the progress of each step.
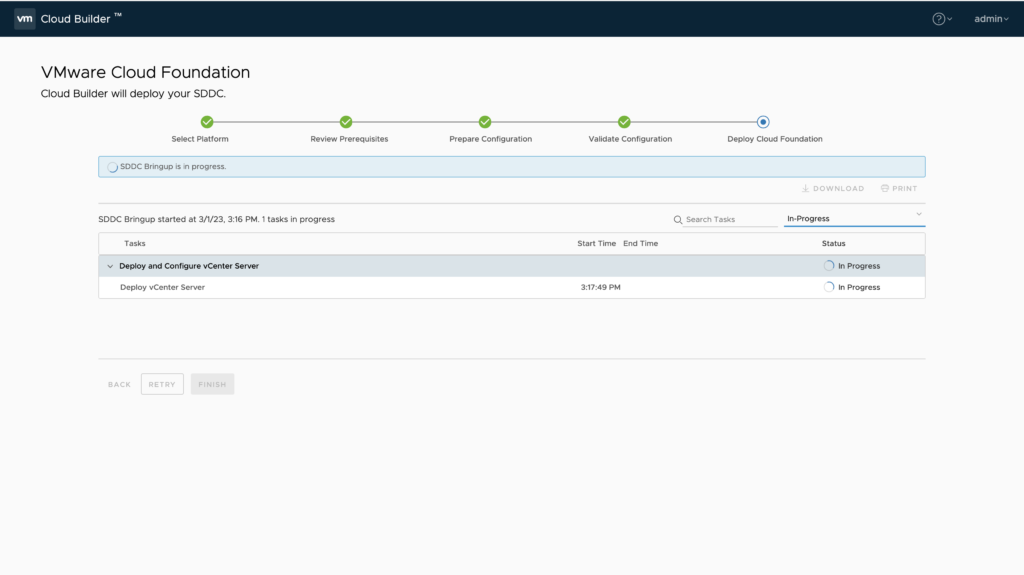
You can change the Status to display only In-progress if desired. This will then display just the tasks occurring now.
Eventually, the Cloud Builder will complete and you should see Deployment of VMware Cloud Foundation is successful.
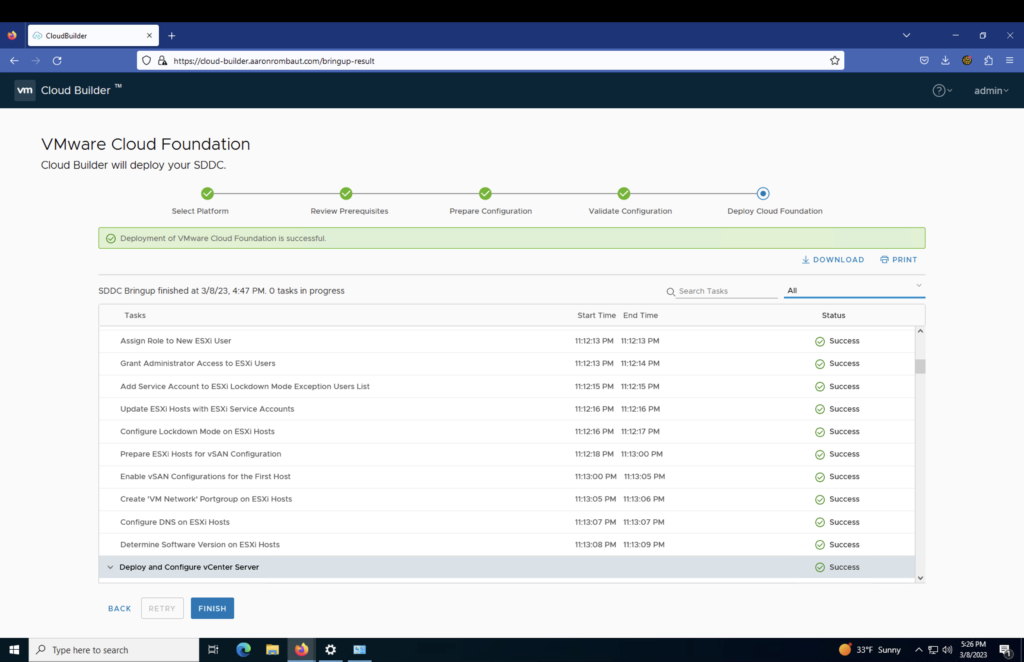
Click Finish.
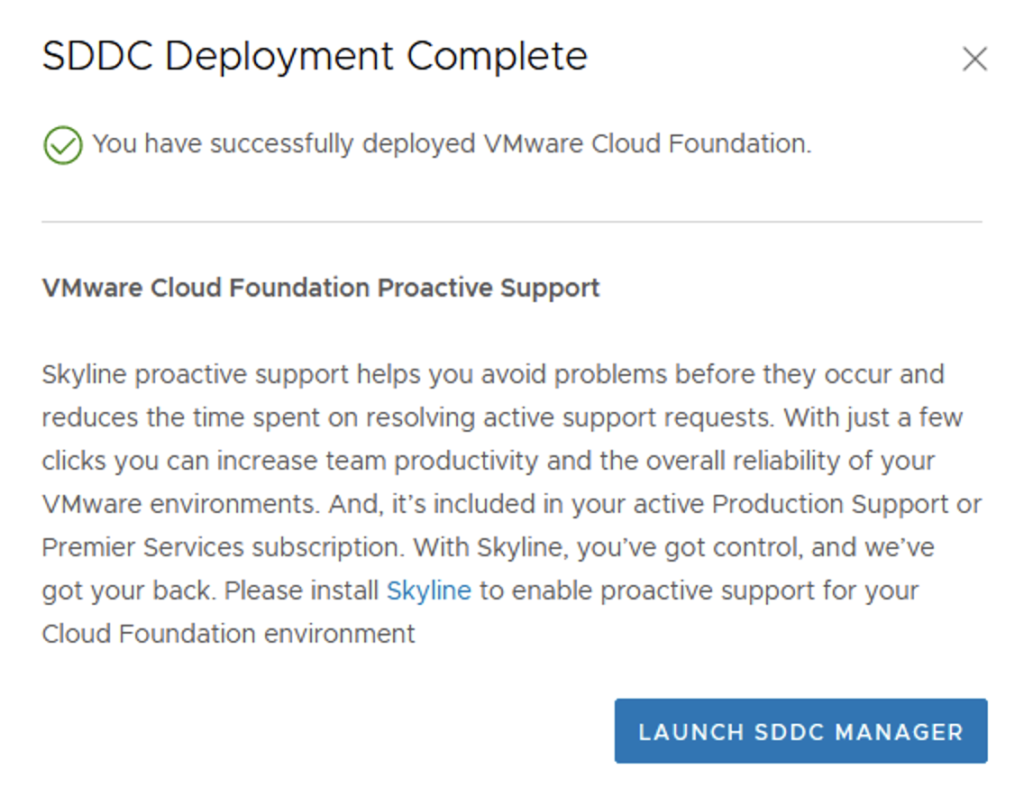
Click Launch SDDC Manager.
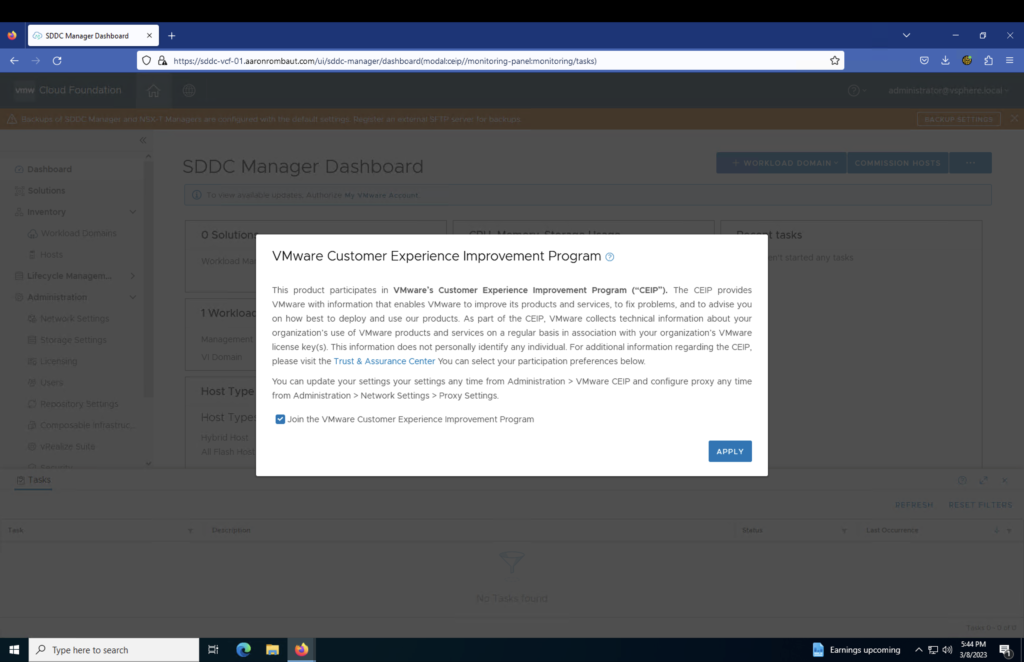
This concludes this post. I am sure there will be additional posts for other specific information. At this point, you can follow along in VMware training courses or just play around with the features of VCF.
Leave a Reply