Overview
I am choosing to install VMware Unified Access Gateway (UAG) 23.09 (current at the time of writing) so that I can access my Virtual Desktop Infrastructure (VDI) without the hassle of using a Virtual Private Network (VPN).
Deploy the OVA
ref: https://docs.vmware.com/en/Unified-Access-Gateway/2309/uag-deploy-config/GUID-537BD936-73B4-4902-A15D-5723295BA29E.html
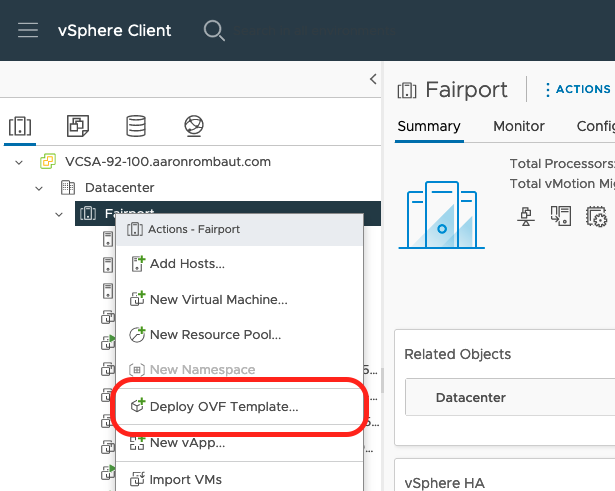
For the deployment, I am going to use the vSphere Client. From either the Datacenter or Cluster, right-click and select Deploy OVF Template…
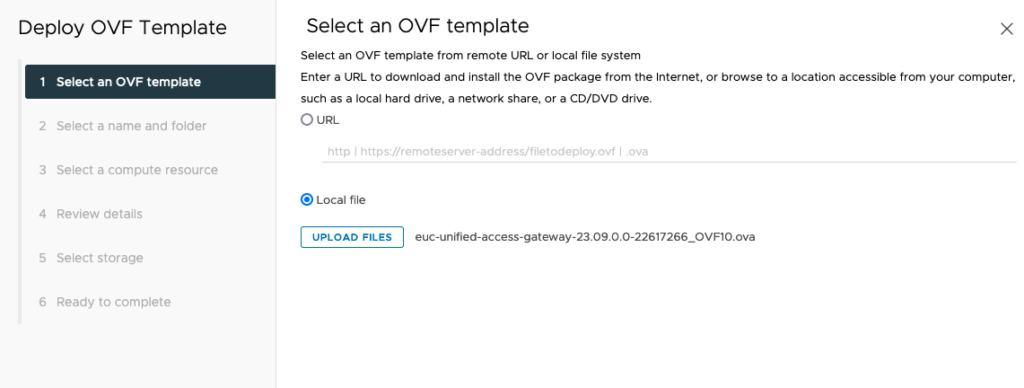
Select Local file and select Upload Files to select the OVA file.
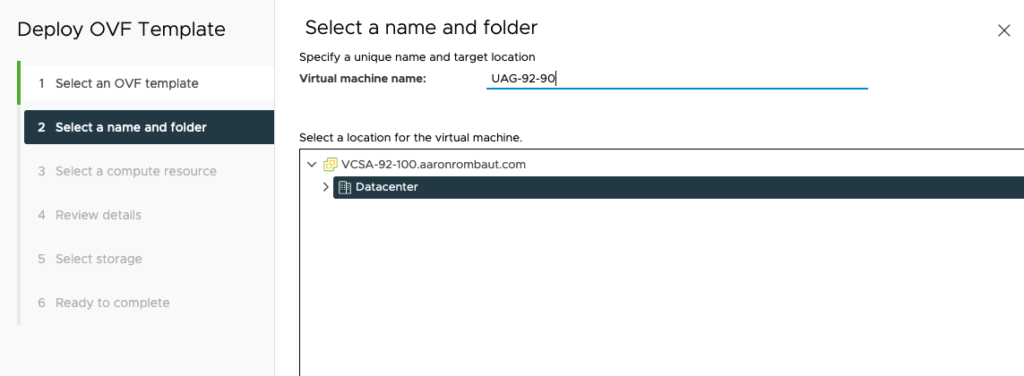
Provide a virtual machine name and select a location for the virtual machine.
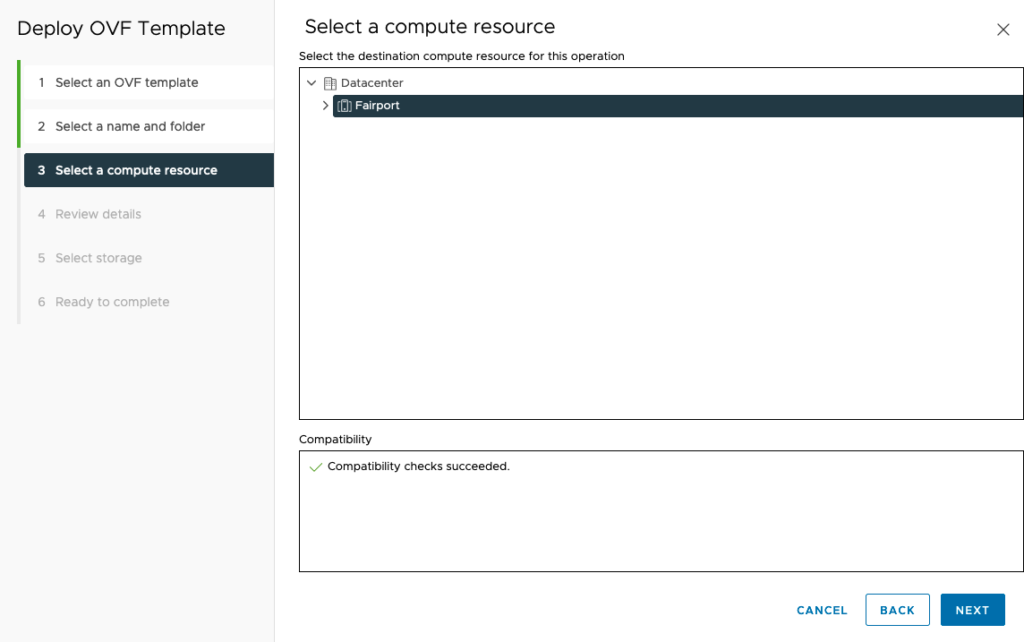
Select a compute resource. I am going to allow DRS to choose for me, so I am going to select the cluster.
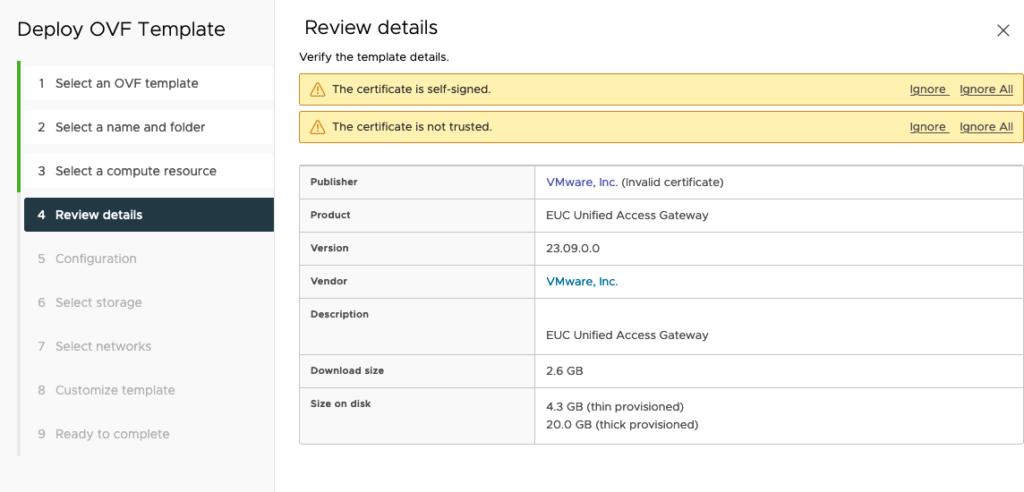
In this version, there are self-signed certificates. These must be acknowledged before proceeding.
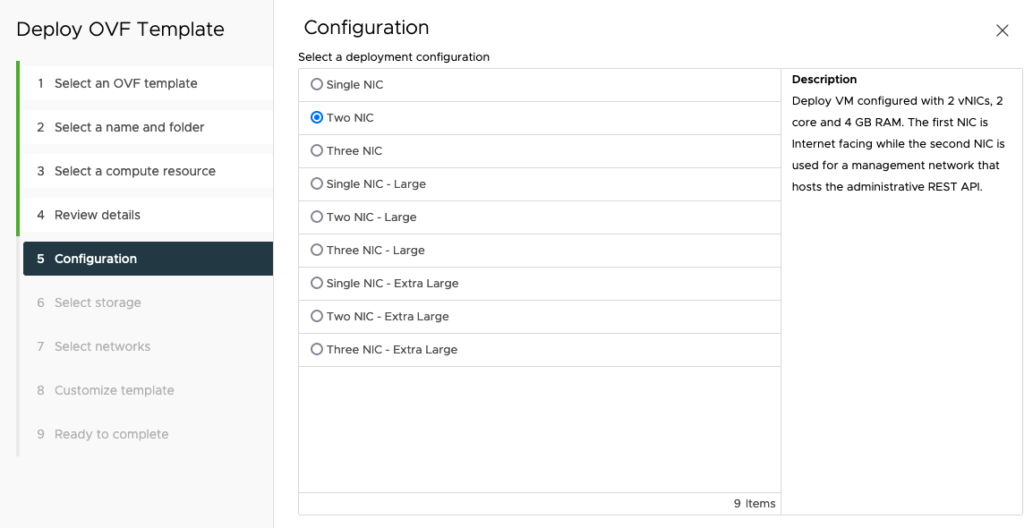
I usually deploy a Two NIC configuration in my lab an in production. The eth0 interface will be assigned to the DMZ VLAN while the eth1 will be assigned an internal VLAN.
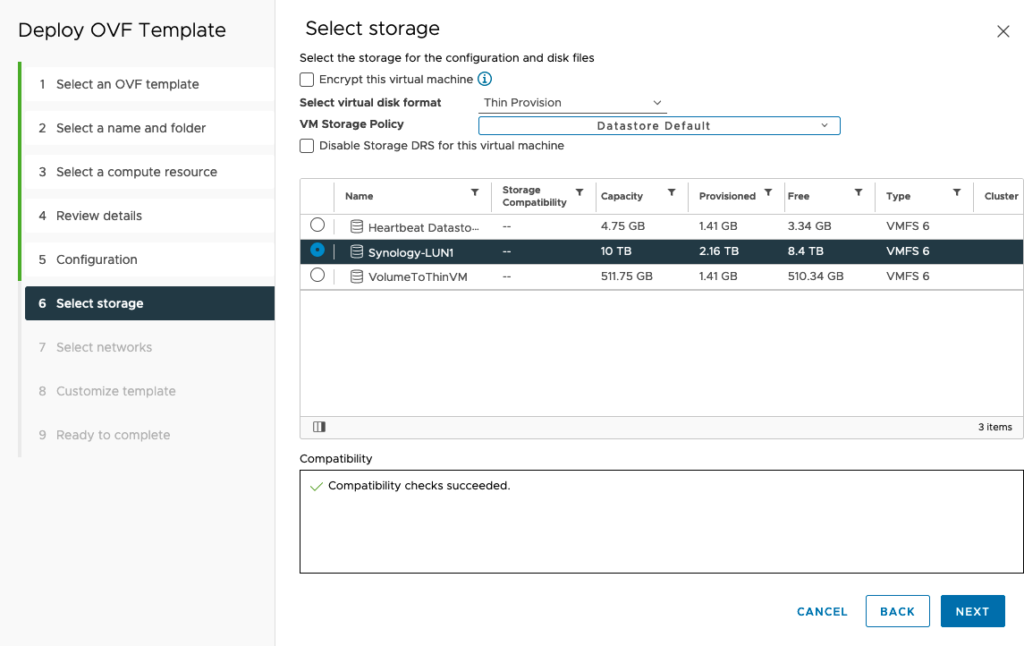
I select my datastore and change the virtual disk format to Thin Provision in my lab. In Production, leave the default.
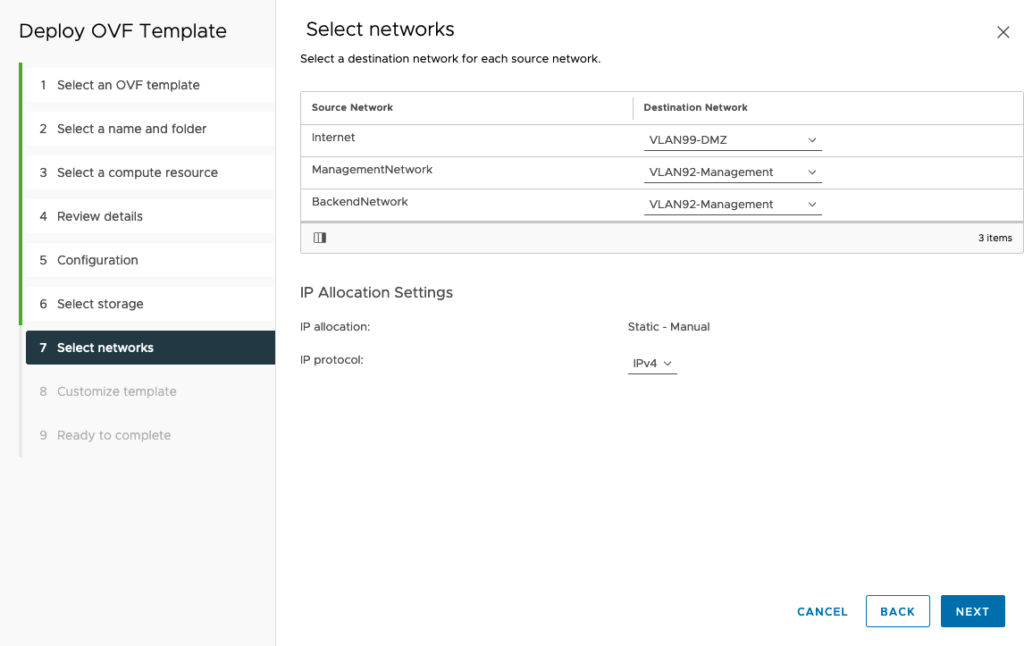
On the Select networks page, change the Destination Networks accordingly. Because I am deploying a Two NIC configuration, I choose two destination networks. Refer to the screenshot for reference.
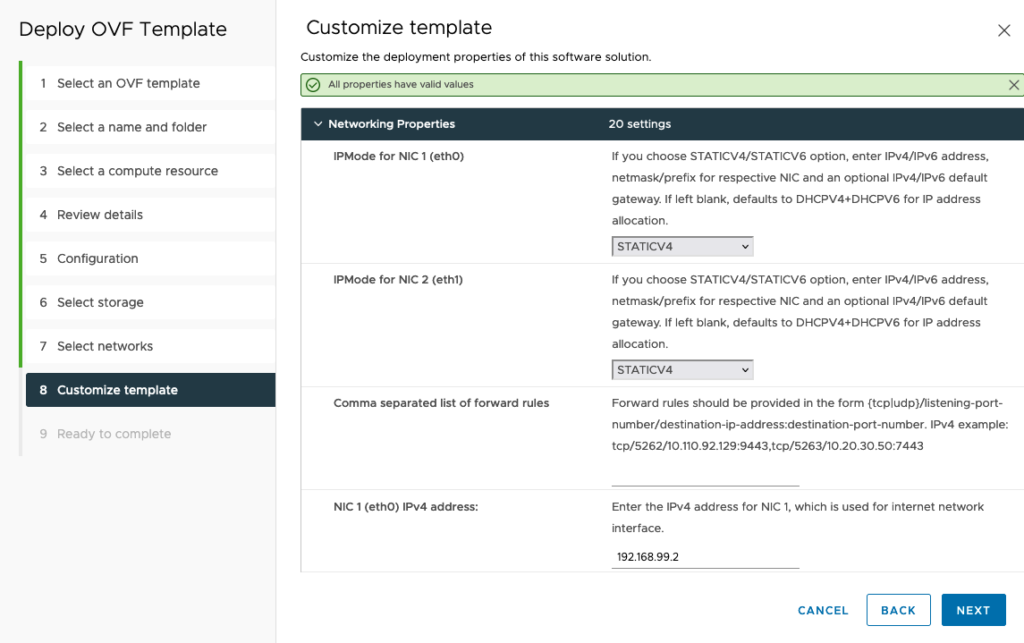
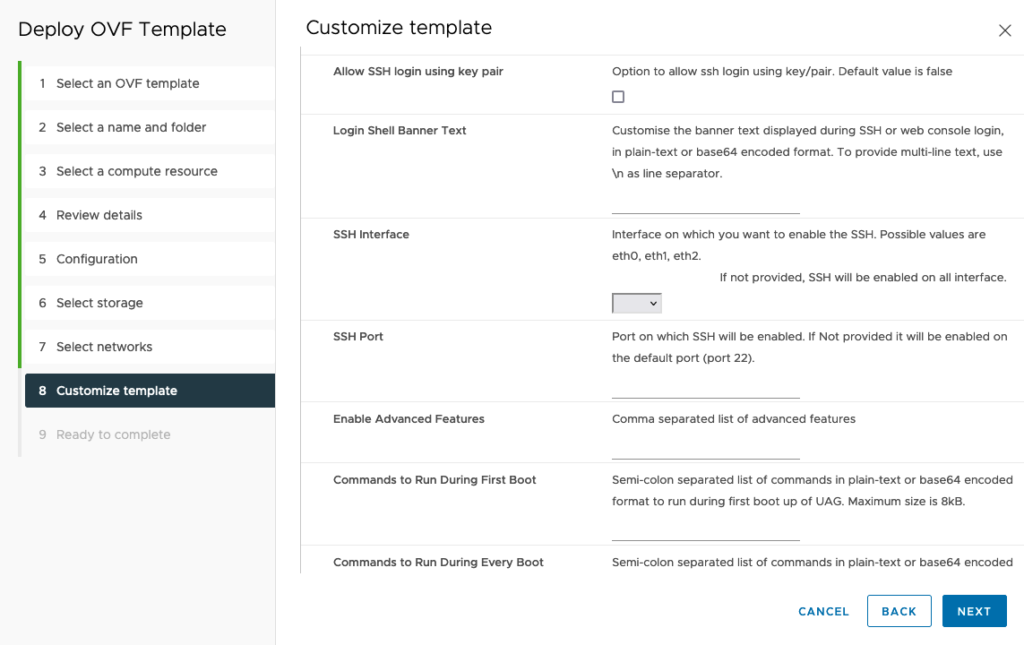
The Customize template page is a little tricky, the documentation is sparse on details from what I could find.
Under Networking Properties, choose the IPMode for the NICs (this depends on the configuration chosen in a previous step). I am choosing to use a STATICV4 address for both interfaces.
I do not have any forward rules, so I am leaving that blank.
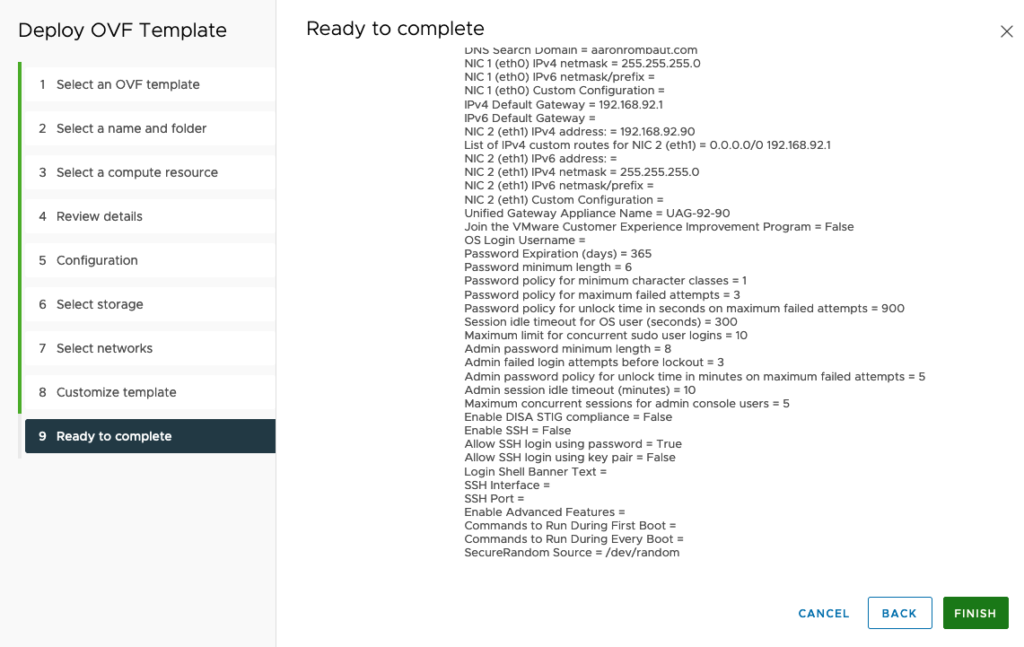
The NIC 1 (eth0) address is for the external interface, in my case this is the DMZ network.
For the List of IPv4 custom routes, I need to add the following in order to use the correct network interface.
0.0.0.0/0 192.168.99.1
I add my DNS server addresses, DNS Search Domain, and NIC 1 (eth0) IPv4 netmask. I am not using IPv6 in this deployment, so I will leave these blank.
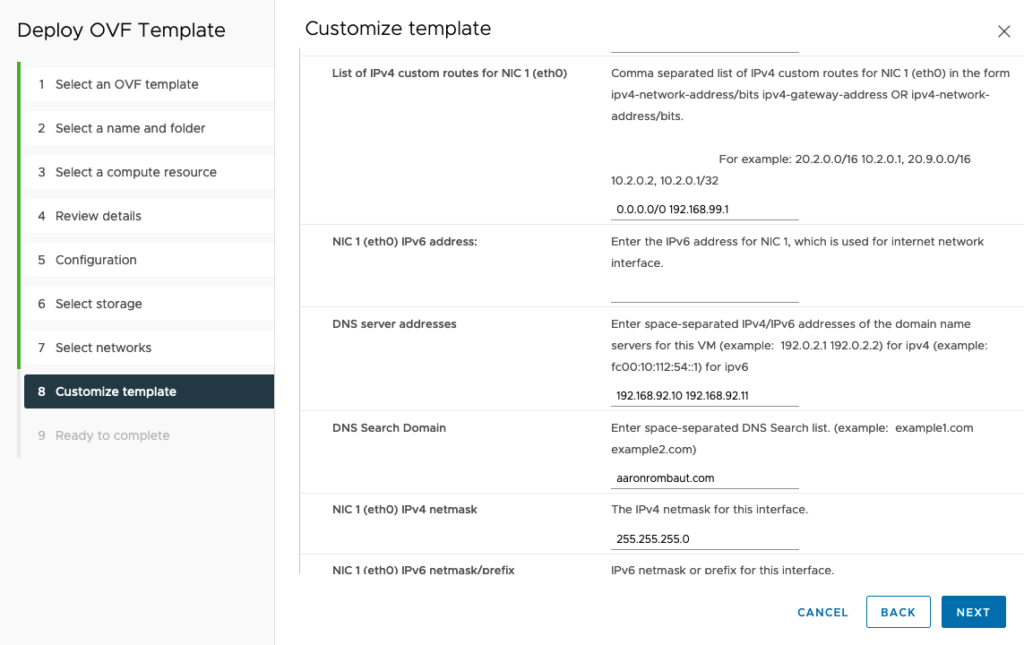
I am not using IPv6 in this deployment, so I will leave these blank. There is no Custom Configuration.
Add the IPv4 Default Gateway. This is one of the pieces of information that is not clearly documented in the documentation. I add the gateway for the internal interface.
The NIC 2 (eth1) interface is for the internal management interface, so I add an IP address.
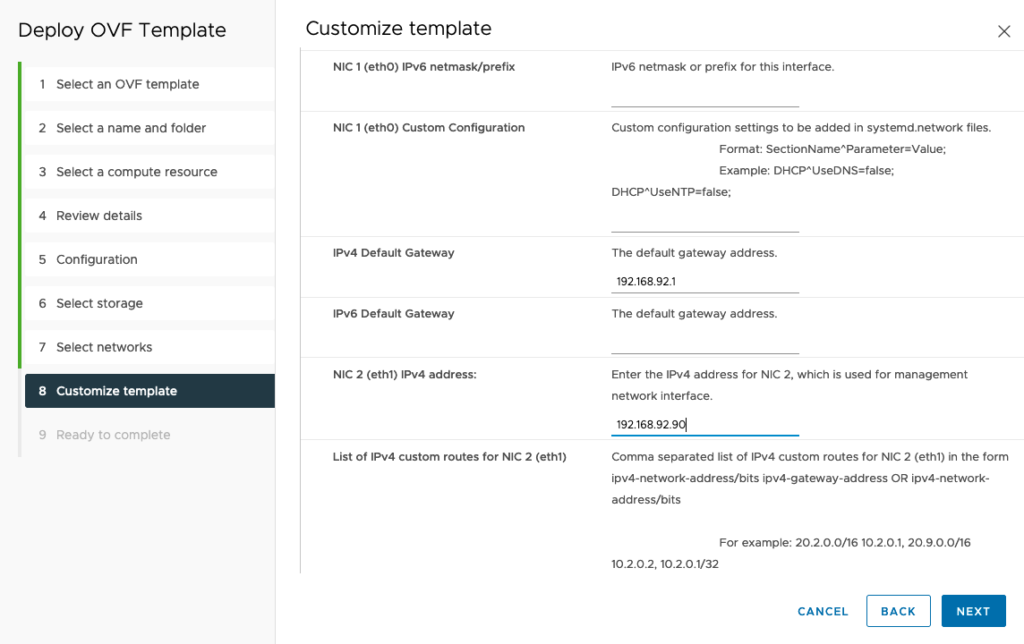
I found that I did need to add a List of IPv4 custom routes for NIC 2 (eth1). I am assuming because I am using two separate NICs and VLANs. For this setting, I am using the following:
0.0.0.0/0 192.168.92.1
I am not using IPv6 for this deployment, so I will not fill those settings in. I am using /24 network addresses so I add the appropriate subnet mask.
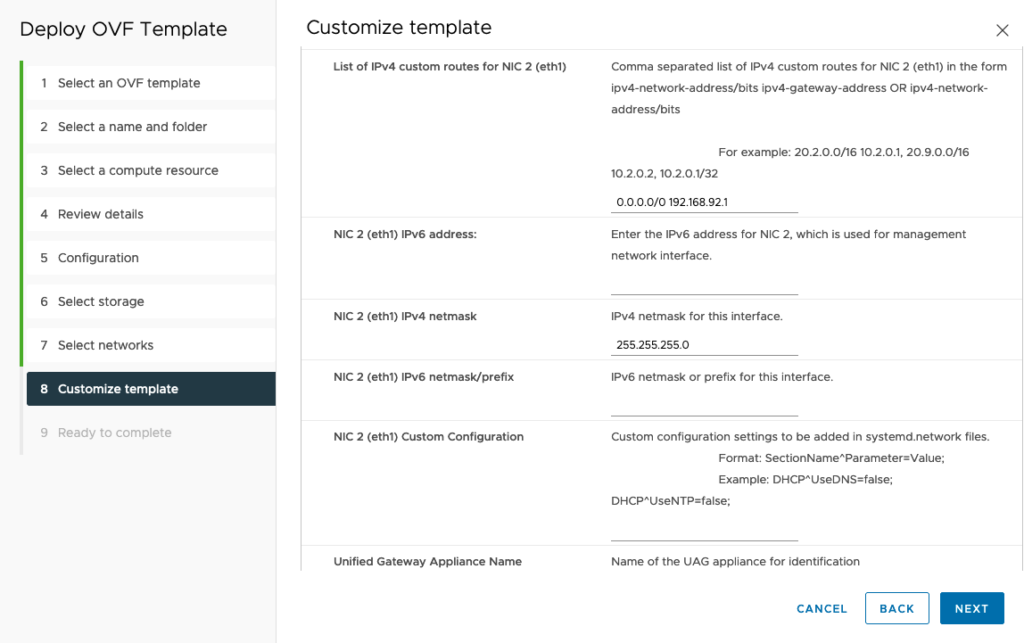
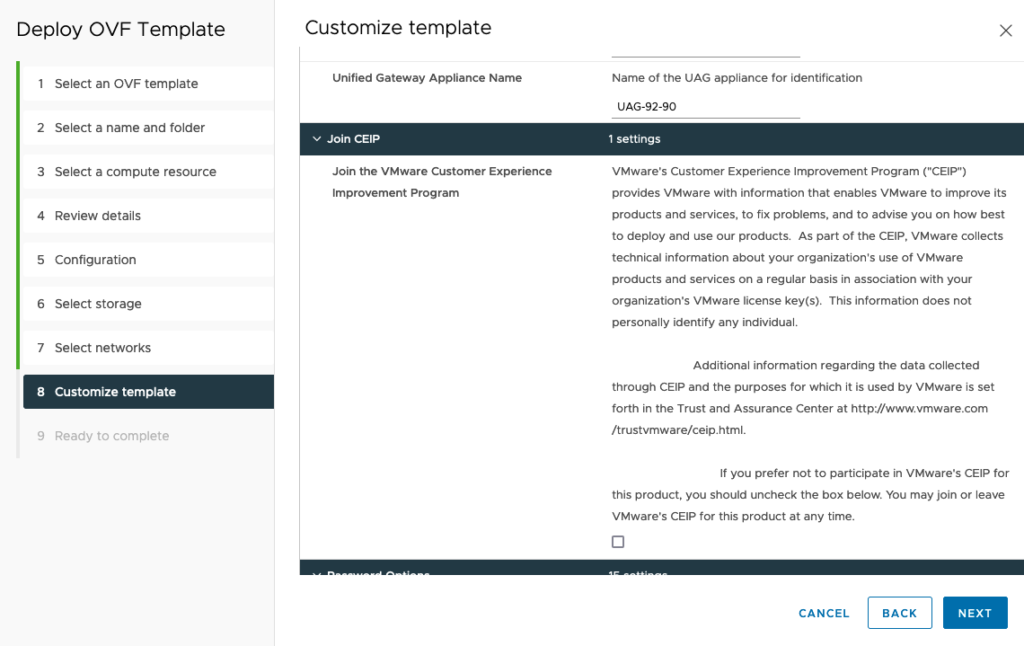
Provide a name for the Unified Gateway Appliance Name. For this deployment, I am choosing to not select the CEIP checkbox.
For Password Options, I chose to only fill in the password for Password for OS login…

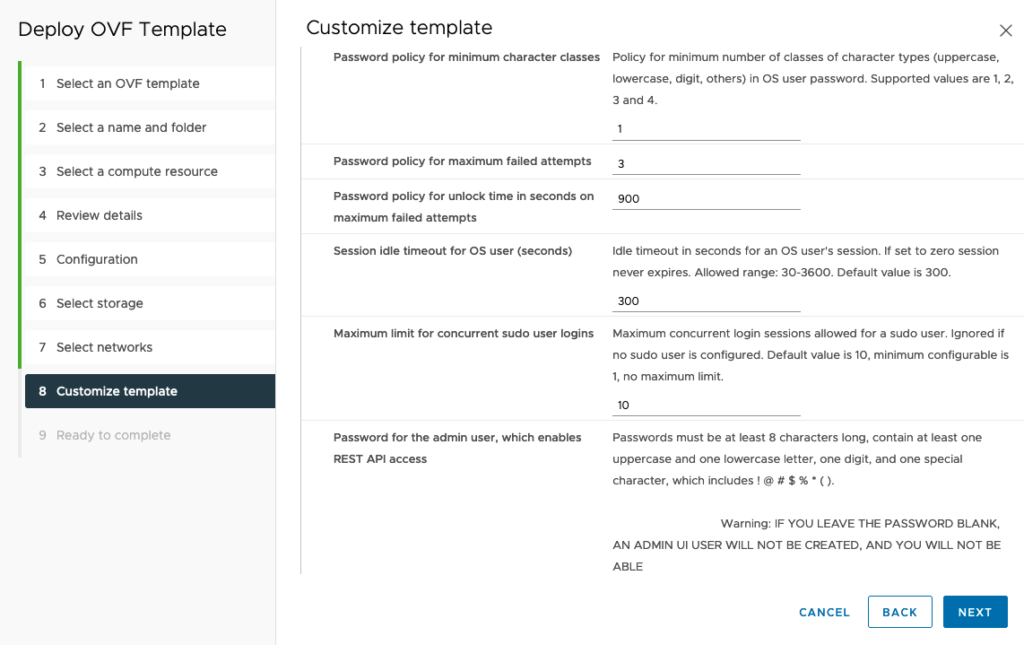
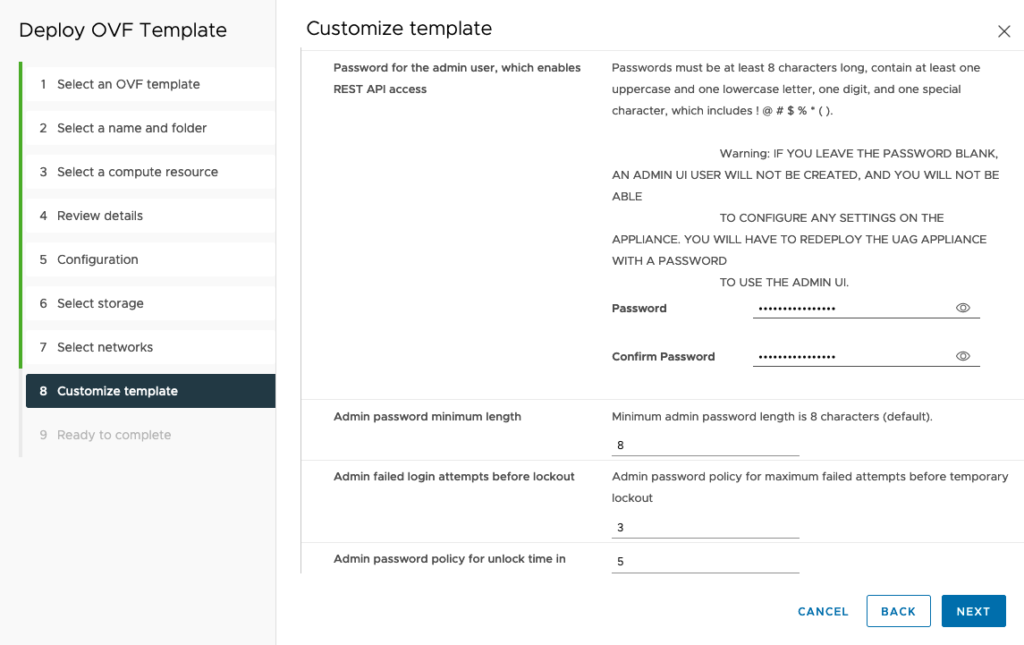
and Password for the admin user, which enables REST API access. The rest of the settings are left default.
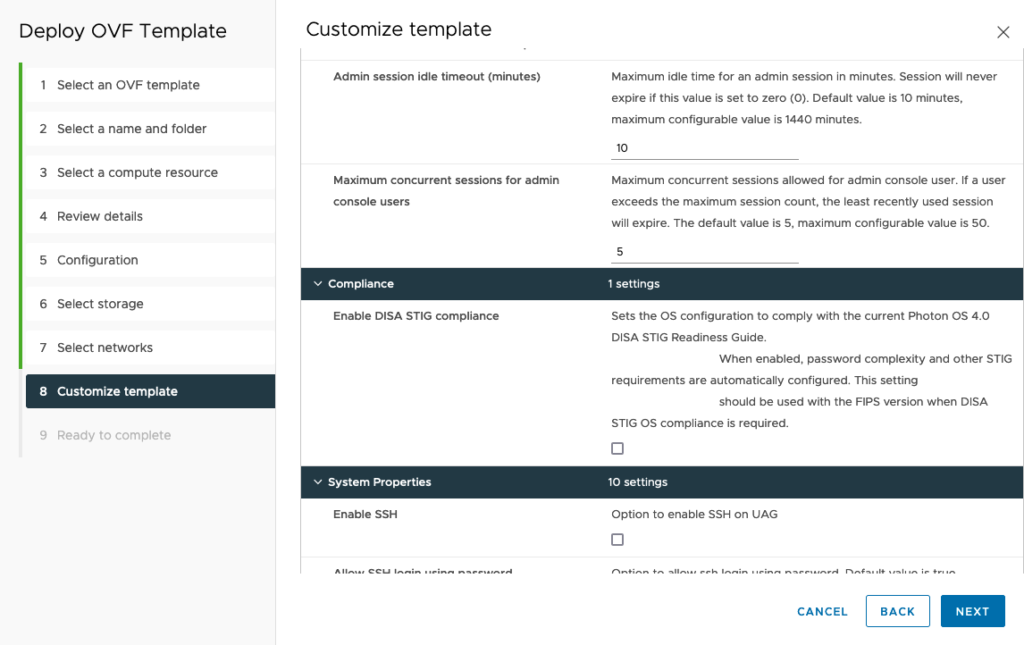
The next few settings are left at the default. I am deploying a non-FIPS verison so I am not going to select the Enable DISA STIG compliance setting at this time.
The final setting I change is the SecureRandom Source to /dev/random.

Finally, on the Ready to complete page, review the numerous settings and click Finish.
Settings Confirmation
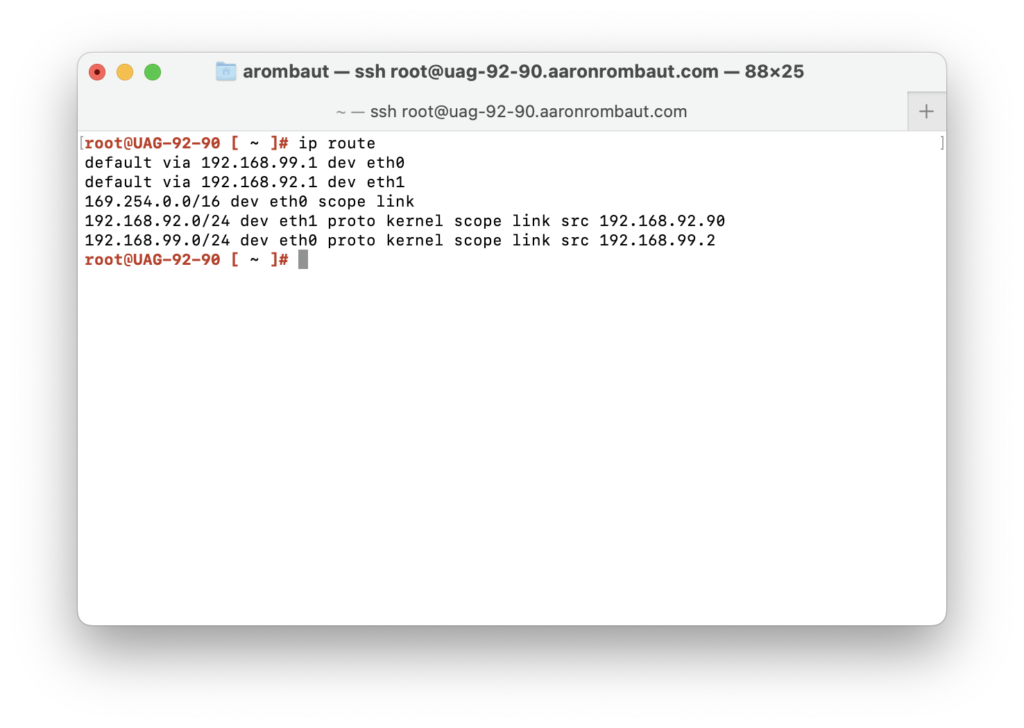
I am going to SSH in to the appliance and check a few settings.
IP Addresses – ip a
The first setting I am going to check is the static IP addresses that were set. Remember, eth0 is the external interface and eth1 is the internal administrative interface.

Default Routes – ip route
The second setting is to check the default routes.
Configuring the VMware Unified Access Gateway
The configuration of the VMware Unified Access Gateway (UAG) takes place using the web interface for now. Later in this post, I will explain the process to deploy the appliance through PowerShell. This will deploy and configure the Unified Access Gateway and is the recommended deployment method in Production.
Navigate to the following URL to access the appliance settings. Make sure to access the admin interface from an internal address. The admin interface is not accessible from the external interface.
https://<fully qualified domain name>:9443/admin/index.html
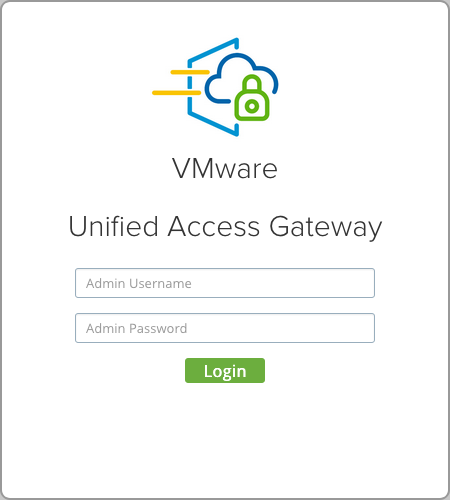
Log in with the admin user name and password assigned during the deployment.
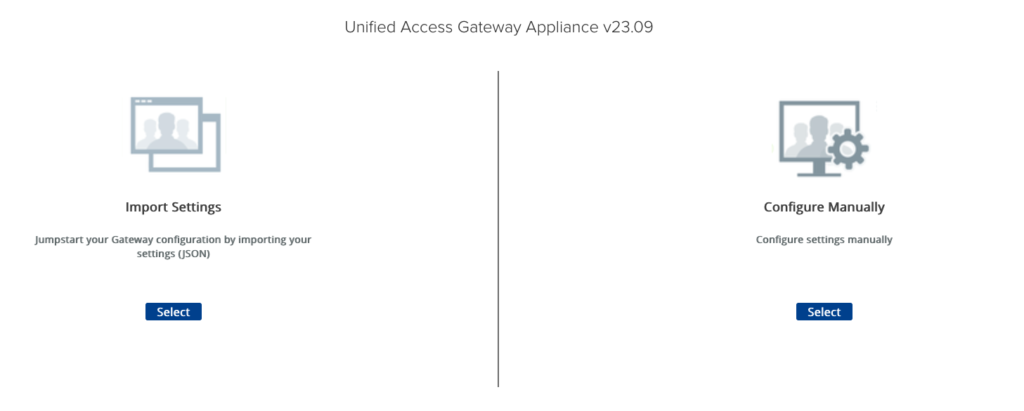
Select Select on the Configure Manually side.
Configure the TLS Server Certificate Settings
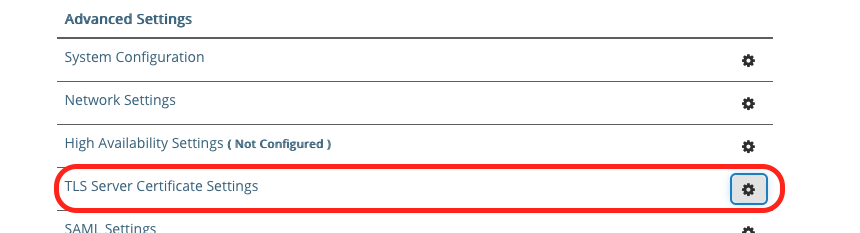
Under Advanced Settings, select the gear to the right of TLS Server Certificate Settings.
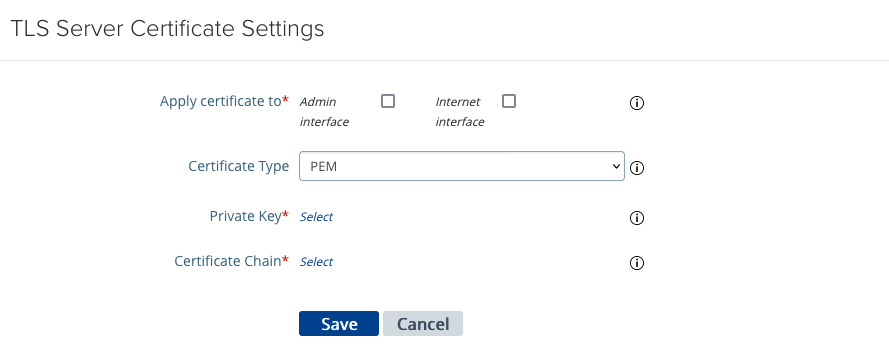
There are two interfaces, one is for the Admin Interface, the other is for the Internet Interface. Two separate certificates should be used for security.
If using a PEM file, the extension must be .cer.
If using a PFX file, the extension can be .p12 or .pfx.
For the Internet Interface, be sure to add the high availability address if used. For example, if there are going to be two VMware Unified Access Gateway appliances and they are going to be accessible by a load balancer or the internal High Availability Settings, the following names would be in the certificate Subject Alternative Name (SAN).
horizon.fully-qualified-domain-name.com
uag-1.fully-qualified-domain-name.com
uag-2.fully-qualified-domain-name.com
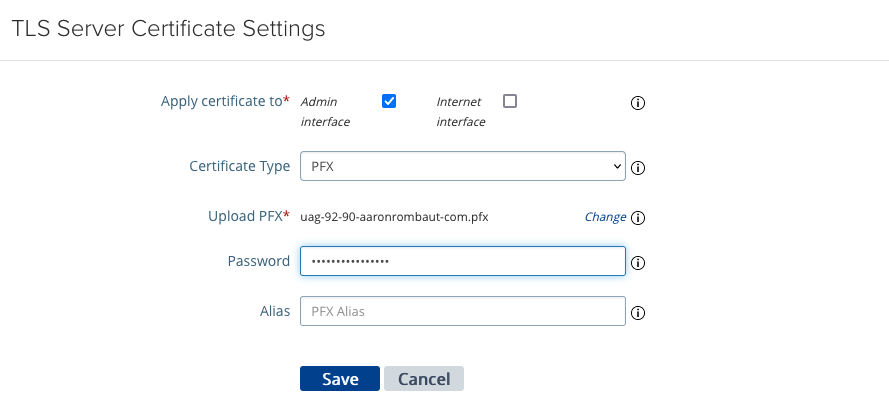
Admin Interface
Select Admin interface, the Certificate Type, and upload the certificate file. Depending on the file type will affect the rest of the UI. I am using a PFX file, so I need the password that was set when it was exported.
When saving the setting, the appliance will restart the web interface and display the following message:

After a few moments, refresh the browser and return to the configuration settings to further configure the appliance.
Internet interface
Select Internet interface, the Certificate Type, and upload the certificate file. Depending on the file type will affect the rest of the UI. I am using PEM files for this as this is how I get my external facing certificates.
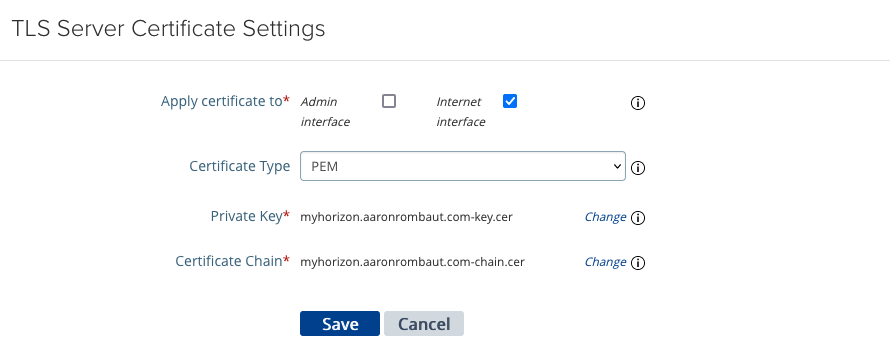
When saving the setting, there will only be a little banner that displays for a few moments regarding the success.
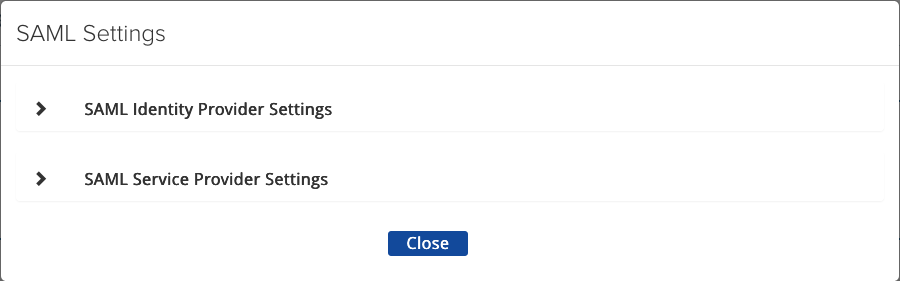
Add Certificate to SAML Identity Provider (IdP) Settings
Navigate to Advanced Settings > SAML Settings.
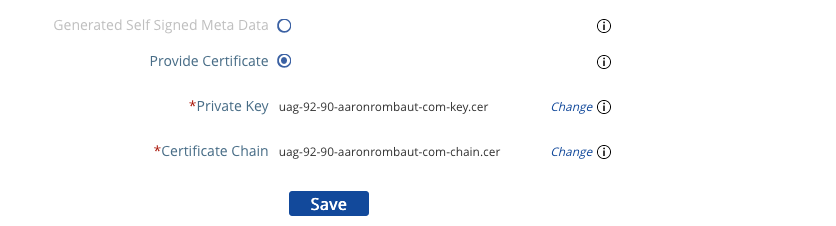
Expand SAML Identity Provider Settings and select Provide Certificate. Add a Private Key and Certificate Chain. The private key and chain should be PEM and have a .cer extension. After the certificates are added, click the Save button.
Under Download Identity Provider Settings, provide the Hostname of the connection point, externally.
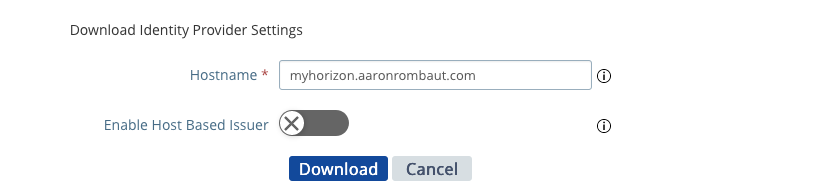
Click the Download button and copy the text in the Identity Provider Settings textbox.

Save the text in a text document for later use.
Configure NTP Servers
Log in and navigate to Advanced Settings > System Configuration. Scroll down to the bottom of the pop-up and add the NTP servers.

Leave a Reply