Overview
A database is required for quite a few components used in VMware Horizon. For this Service, I am going to install Microsoft SQL Server 2019 Standard Edition as this is compatible with both VMware Horizon and VMware App Volumes.
To ensure compatibility in the future, check the VMware Product Interoperability Matrix.
Install Microsoft SQL Server 2019 Standard Edition
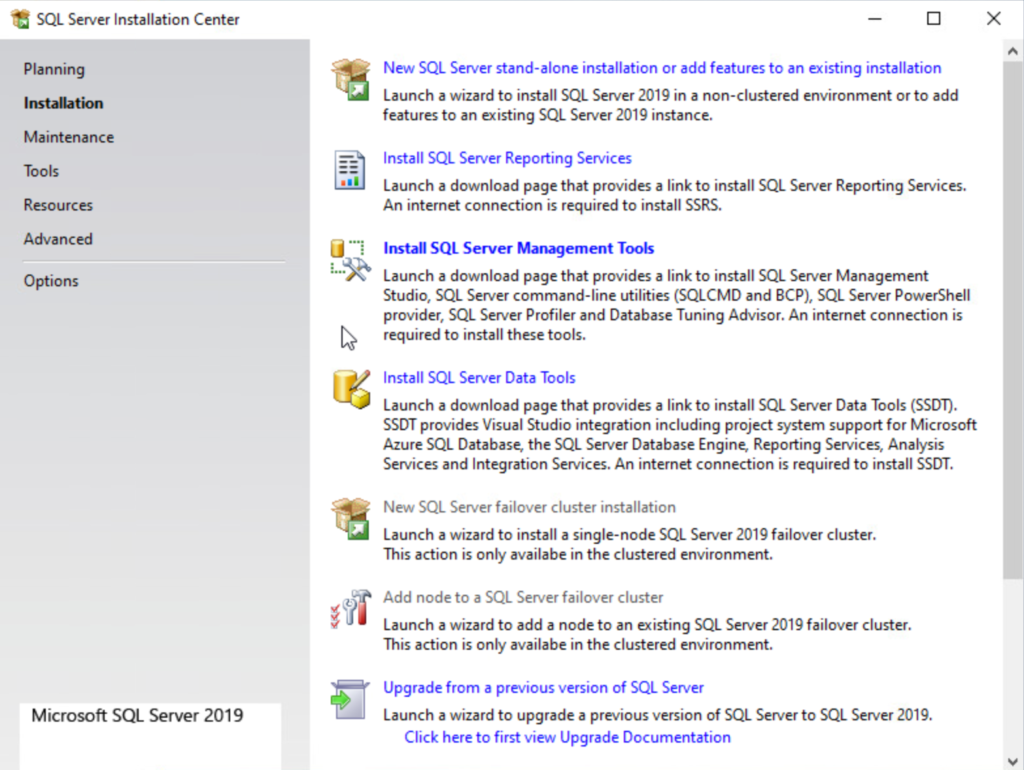
Load the Microsoft SQL ISO for the virtual machine and double-click setup.

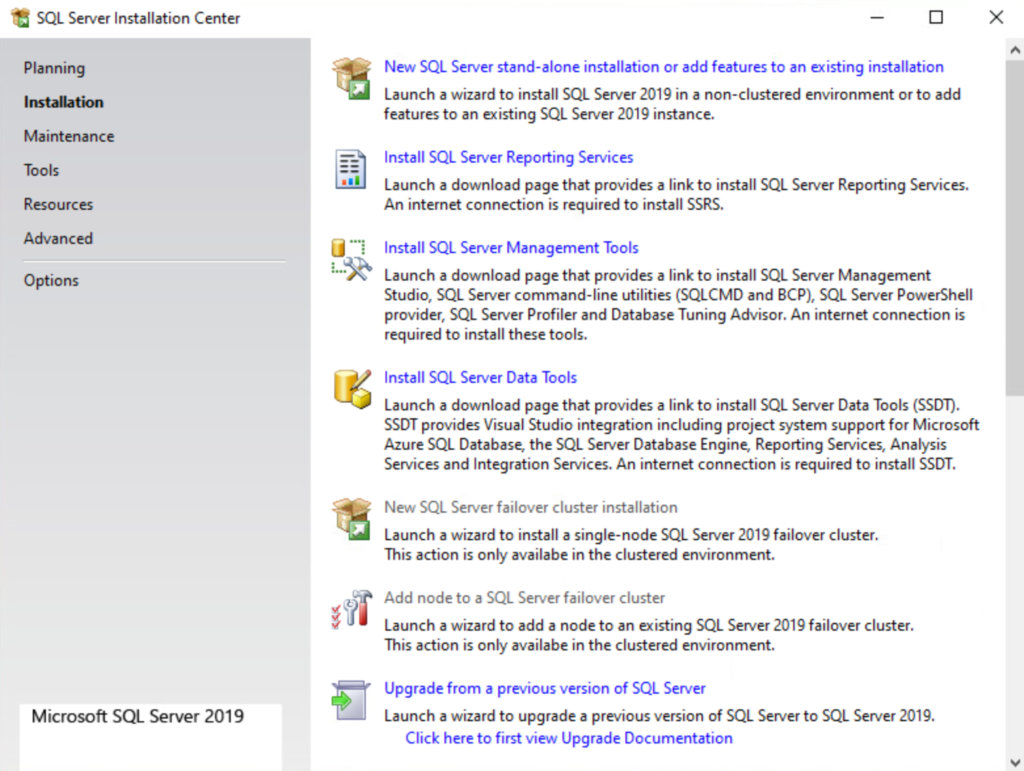
Choose Installation from the menu on the left and click New SQL Server stand-alone installation or add features to an existing installation.
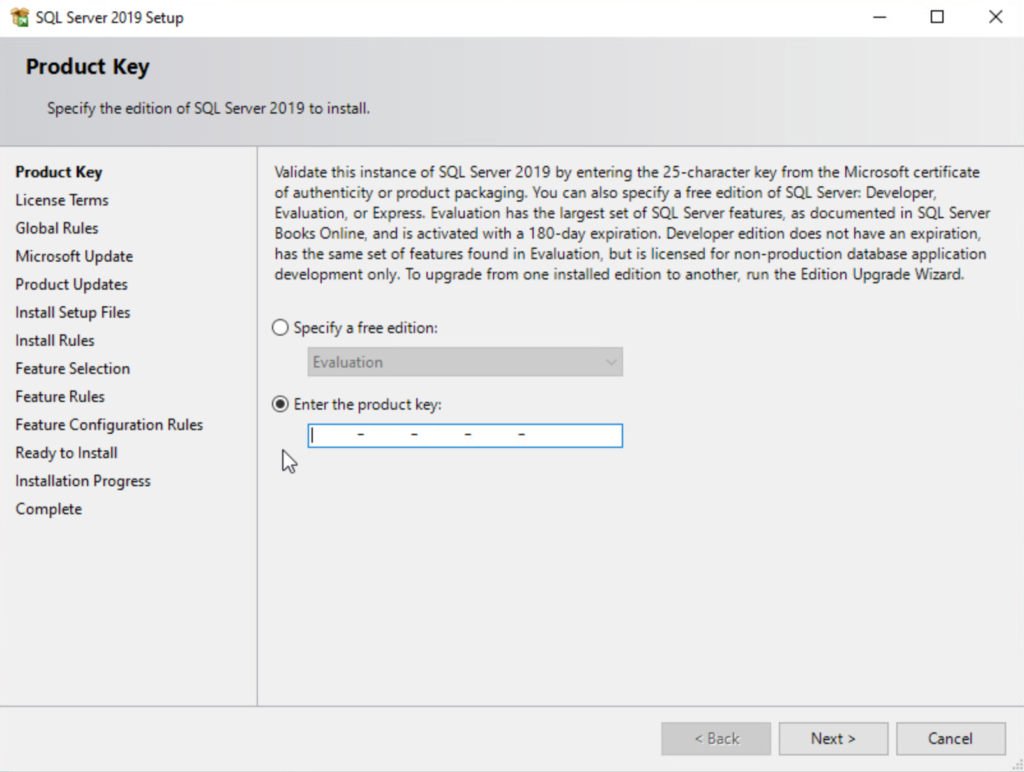
The Product Key window opens. Add or ensure the product key is populated.
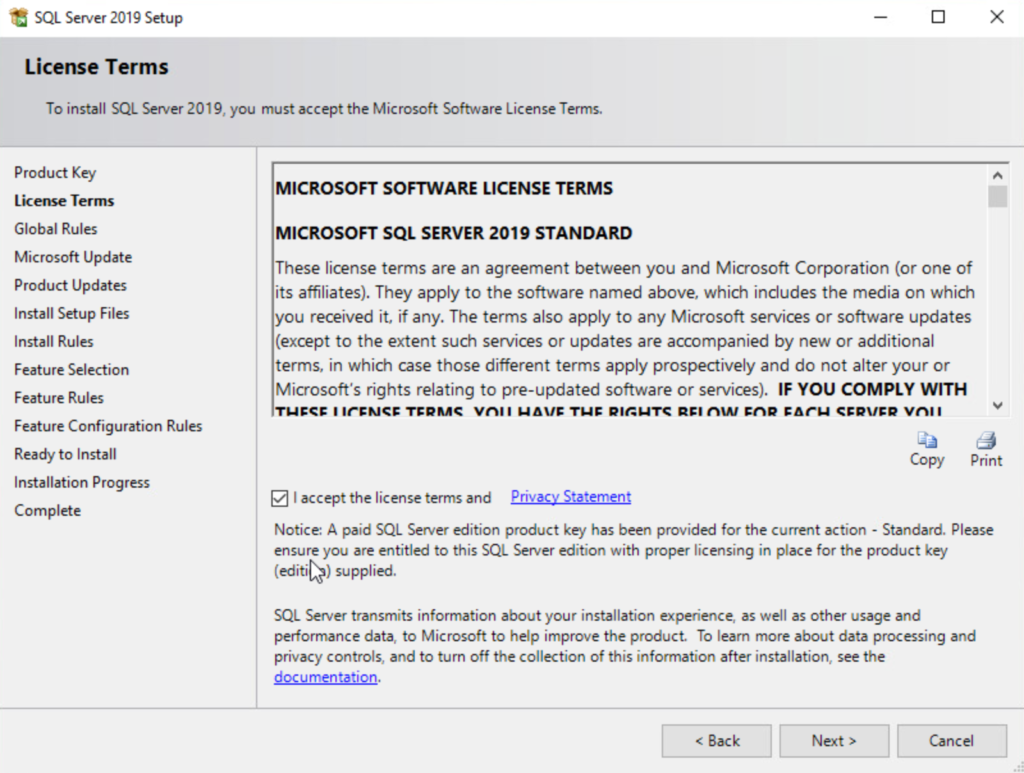
Accept the license terms.
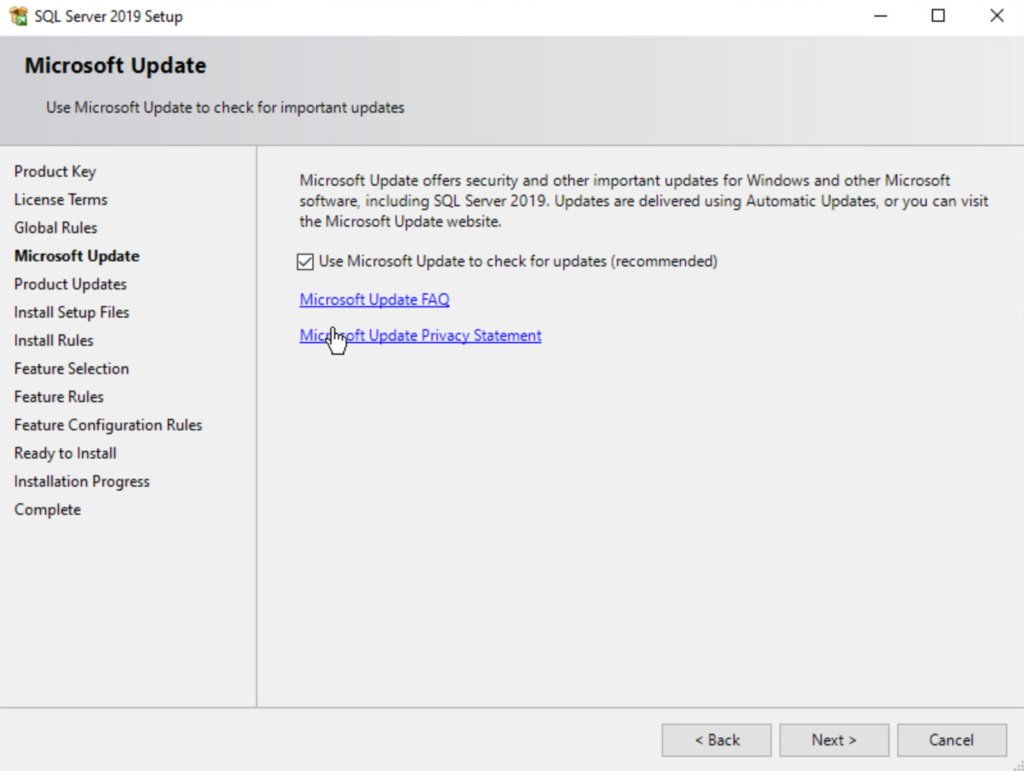
I opt to Use Microsoft Update to check for updates (recommended).
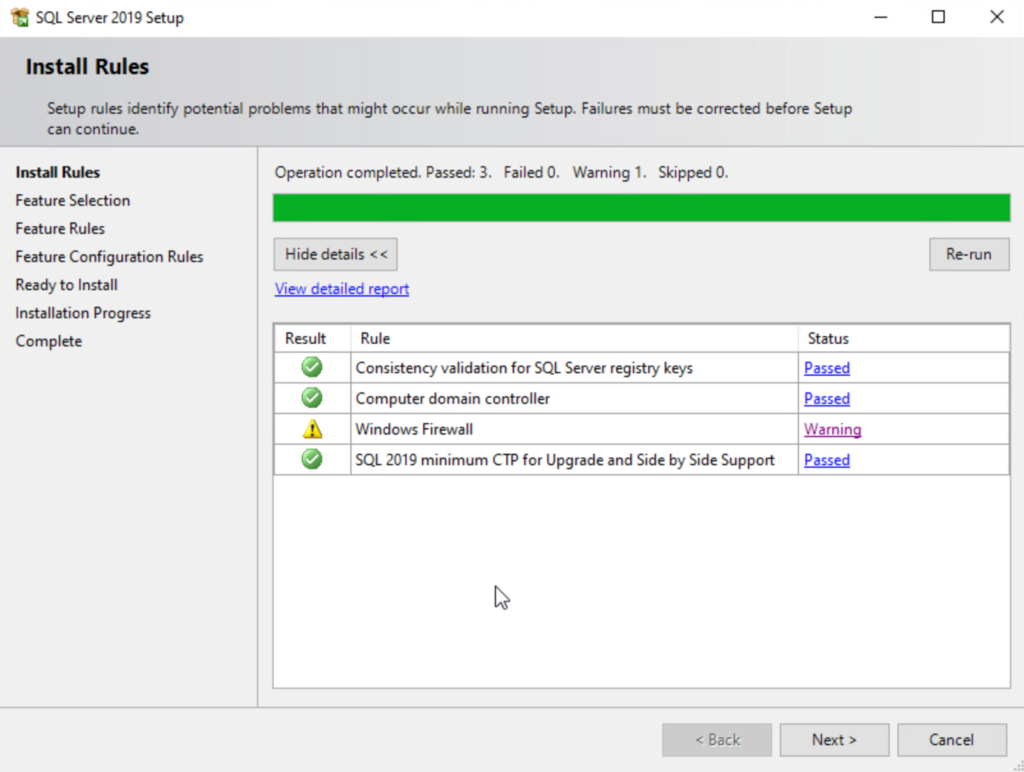
The installation will do a test and will likely report a Warning regarding the Windows Firewall. This can be safely disregarded as the rule can exist prior to installation or be configured after installation.
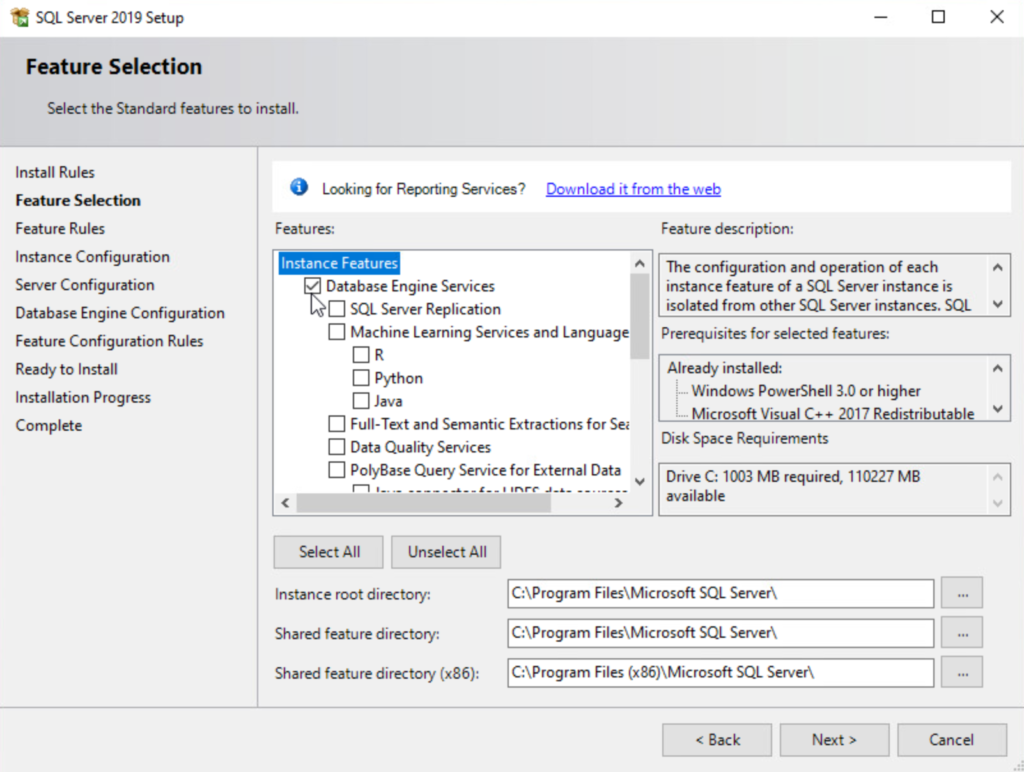
Select Database Engine Services.
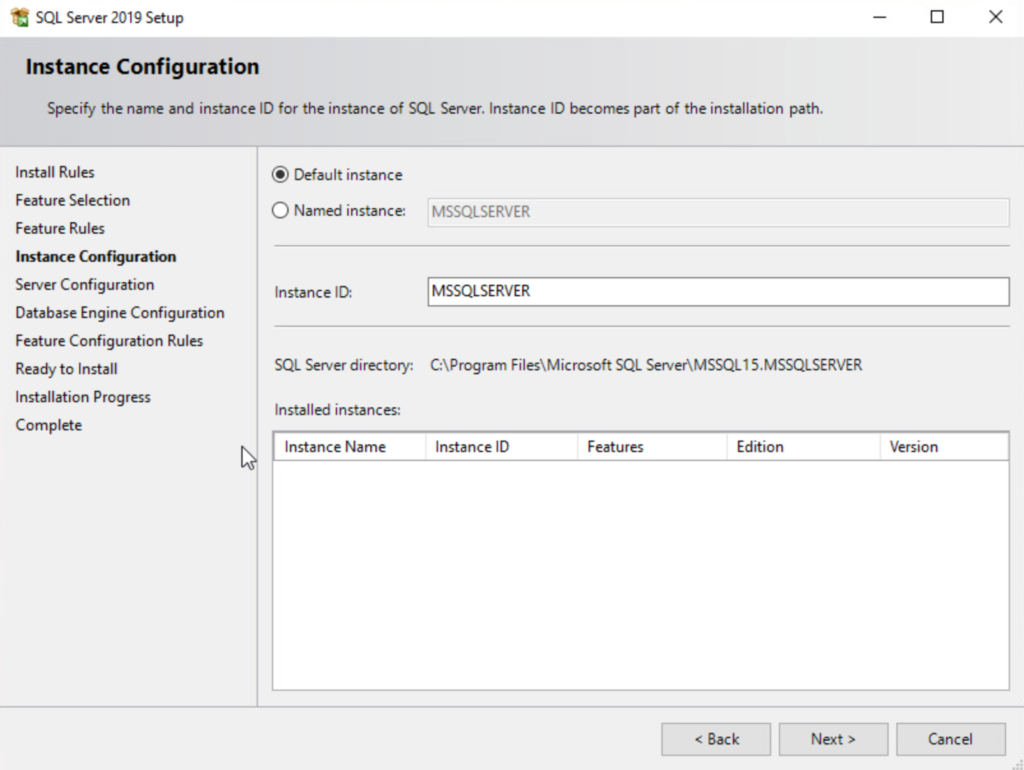
I leave the default Instance Configuration.
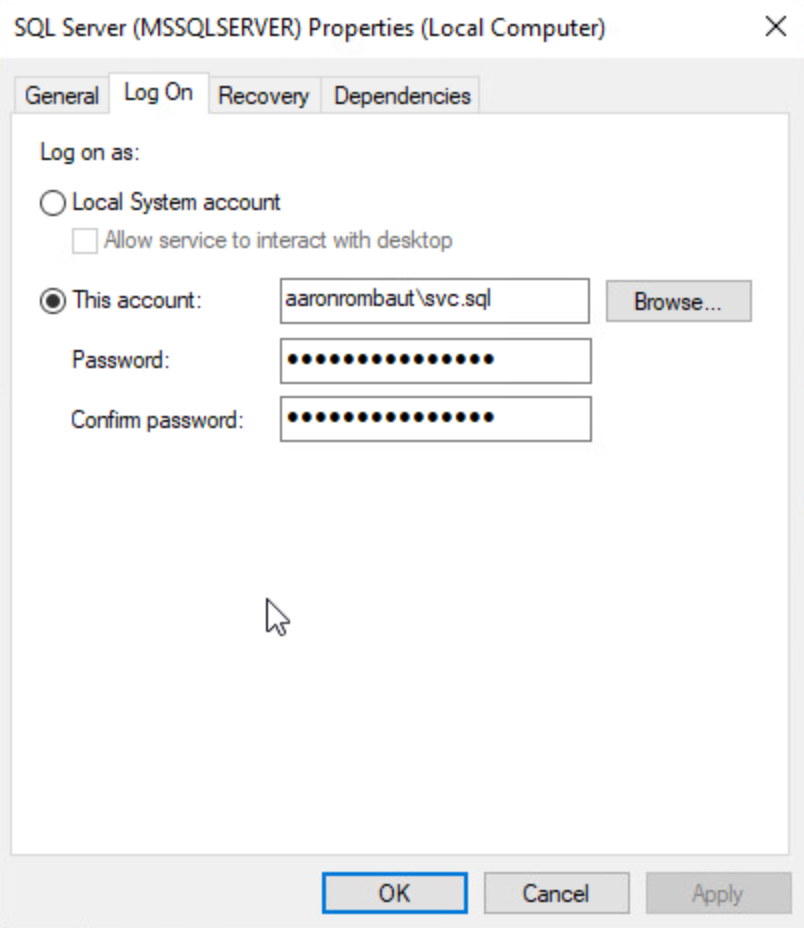
By default, the SQL Server Database Engine service will be configured with NT Service\MSSQLSERVER Account Name.
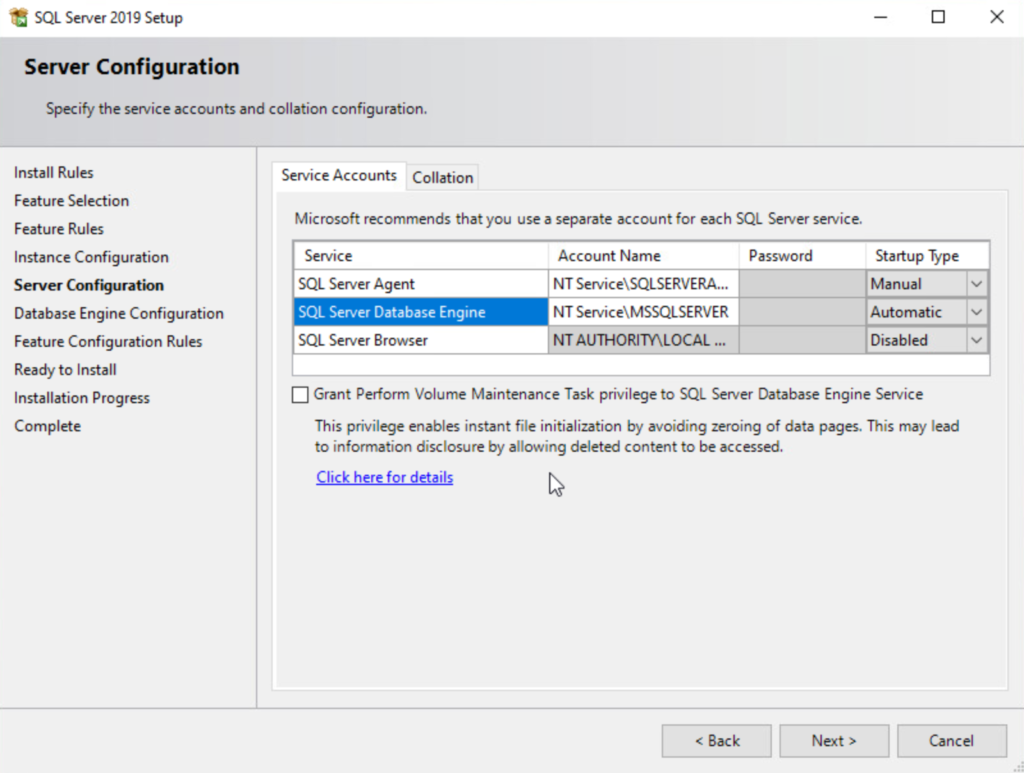
If a service account (i.e. svc.sql) has been configured, which is recommended, this can be configured, here.

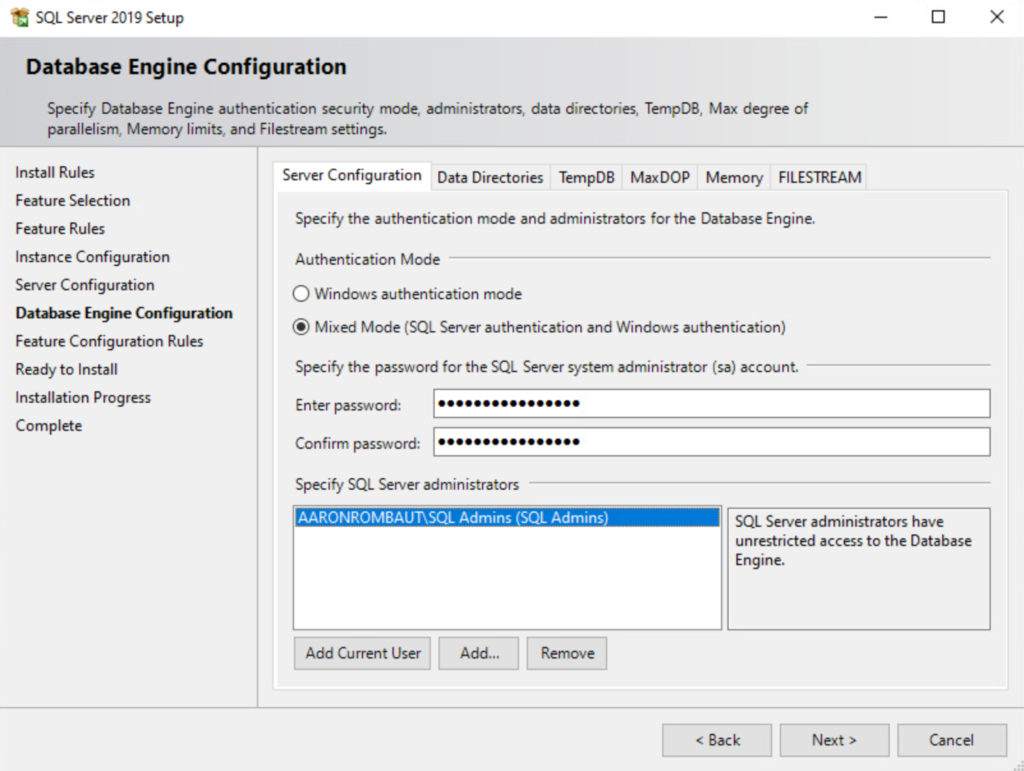
Choose Mixed Mode (this is required because VMware Horizon Events cannot use Windows authentication mode at the time of this writing). This can be configured after SQL Server 2019 Setup completes if it was missed in the past.
Provide a password for the sa account.
I also add a security group here for SQL Server administrators. I would recommend a security group (Microsoft SQL Admins or SQL Admins) over an individual to aide in Role Based Access Control (RBAC).
I leave the rest of the tabs at their default settings.
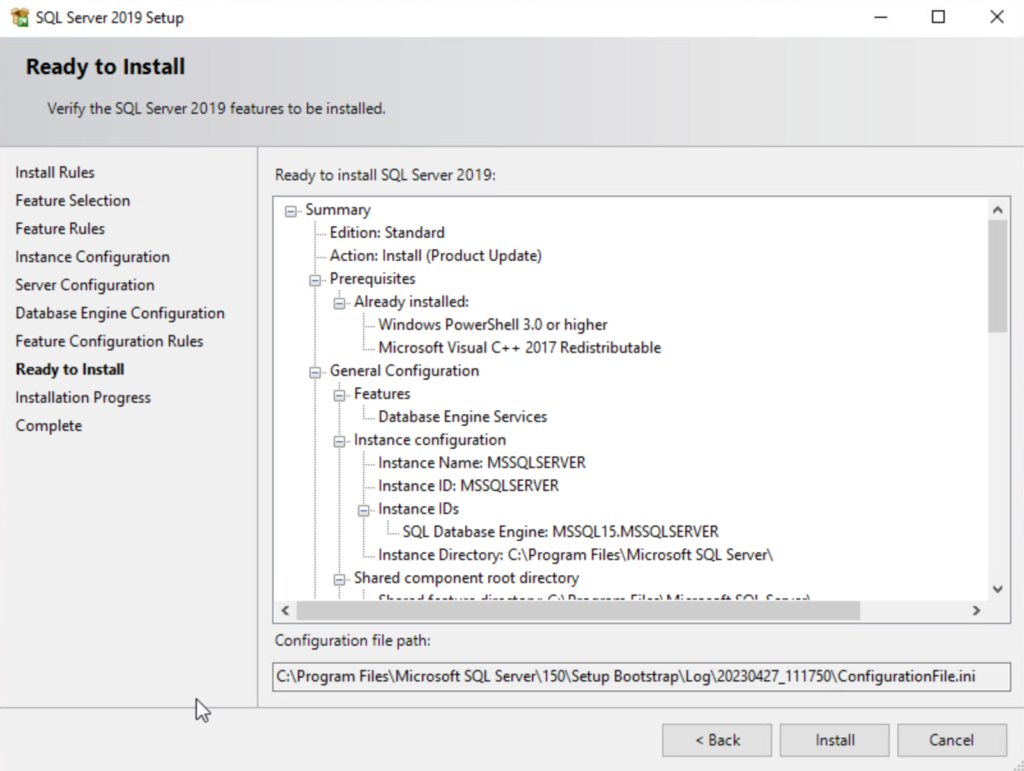
Review the configuration details and when ready, click Install.
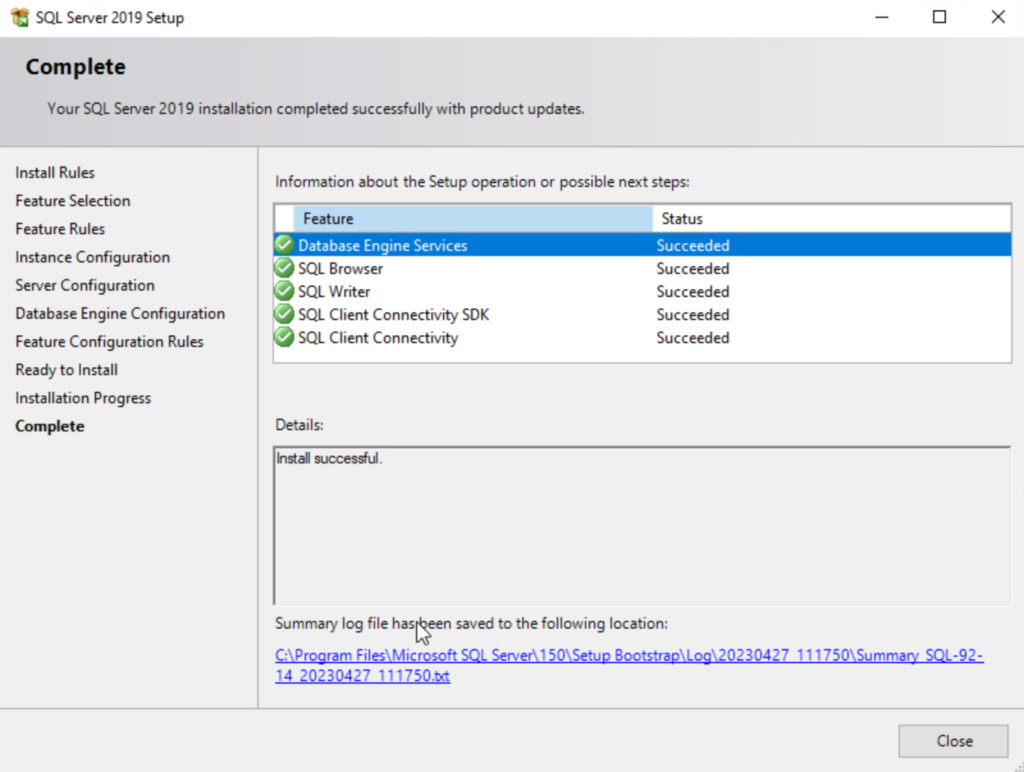
When the installation is complete, a window will open and show if all the components succeeded.
Prepare the Microsoft SQL Server Certificate
Note: the following section is going to assume that a valid certificate or valid certificates are accessible, either from an internal Certificate Authority (CA) or public CA. There is more information later in this post on how to request a certificate from an internal CA. If planning an Always On Availability Group, make sure the group name is the Common Name (CN) in the certificate and add all the nodes in the cluster to the Subject Alternative Name (SAN).
Import the certificate, if necessary, into the Personal Certificates store.

Add the service account or NT account to the private key of the certificate.
Configure Microsoft SQL Server Network Configuration – Certificates
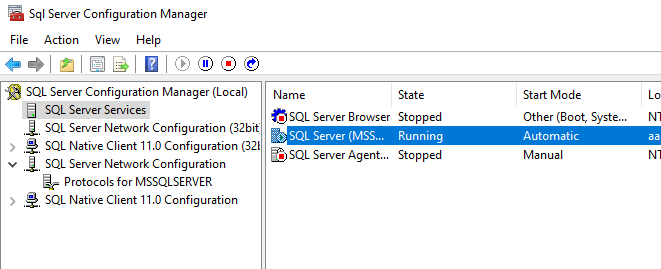
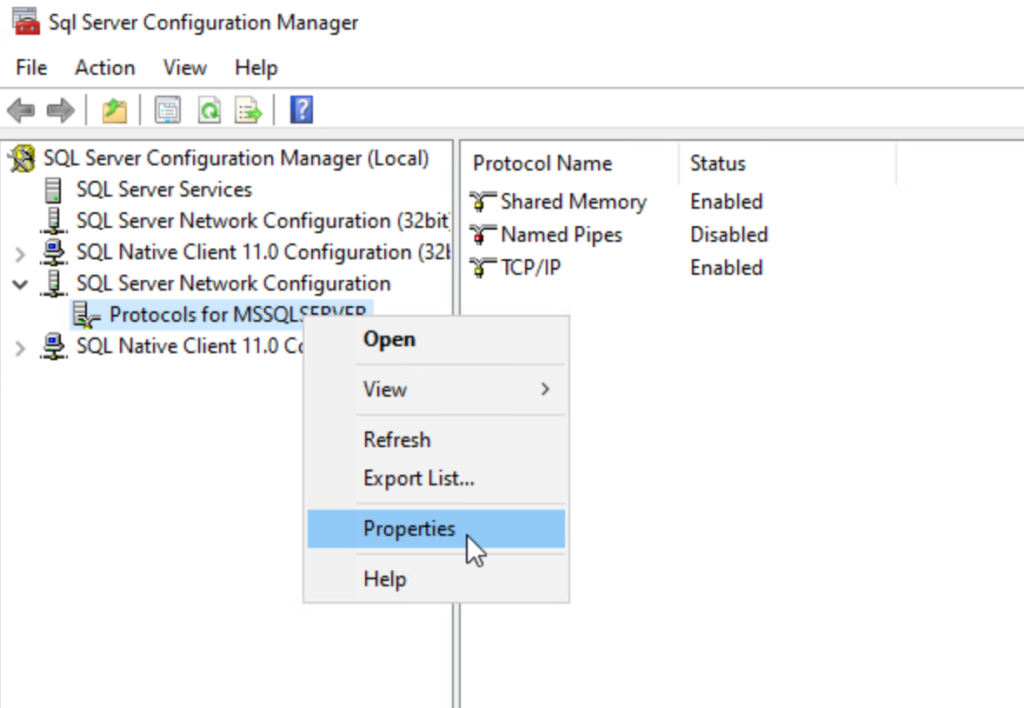
Open SQL Server 2019 Configuration Manager.
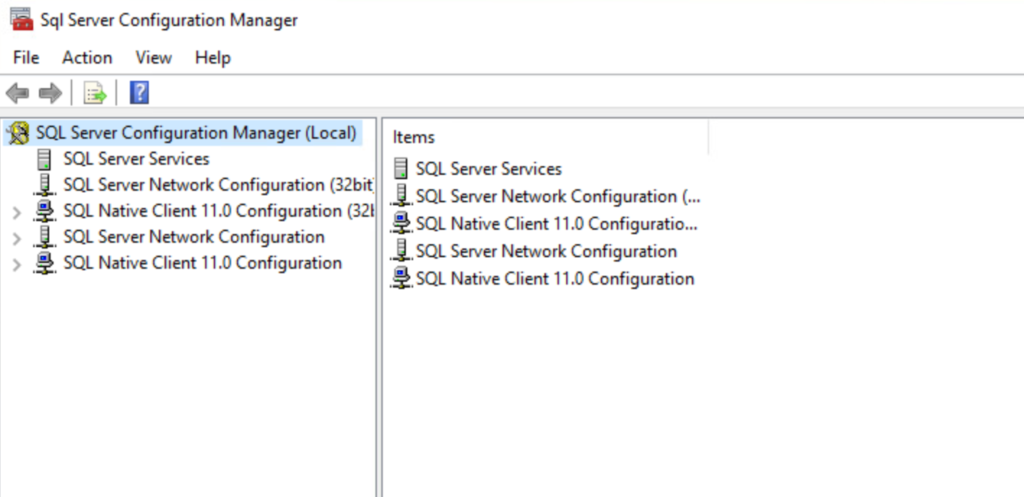
Expand SQL Server Network Configuration > right-click Protocols for MSSQLSERVER > Properties > Certificate > Choose the correct certificate.
Restart the SQL Server Service.
SQL Server Services > SQL Server (MSSQLSERVER) > Restart
Note that if the service does not restart, it is likely the private key permission is not set. See the section prior to this for how to configure the private key permissions.
Install SQL Server Management Tools
The installation media does not contain the installer for the SQL Server Management tools. When you click on the link, it will redirect you to the website (assuming there is internet access) where the installation file can be downloaded.
The website.
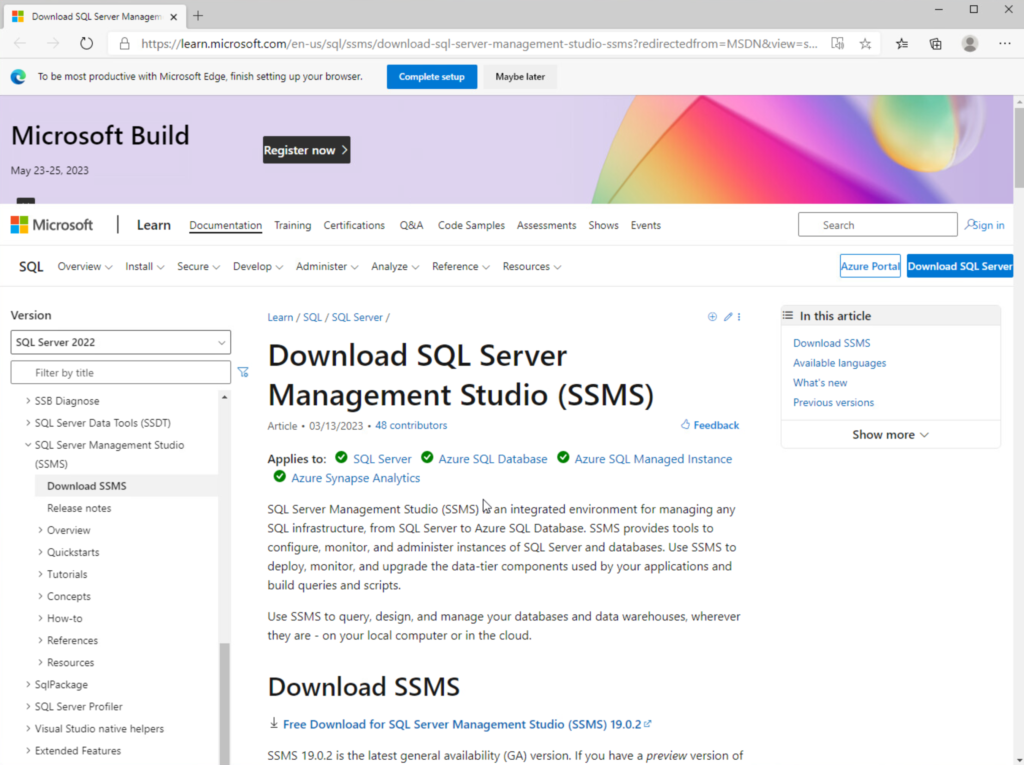
Under the Download SSMS section, click Free Download for SQL Server Management Studio (SSMS).
The installer is a standard click-through installer. Find the downloaded file and run the installer. There are no configuration items worthy to note. At the end of the installation, click Close.

Create Databases
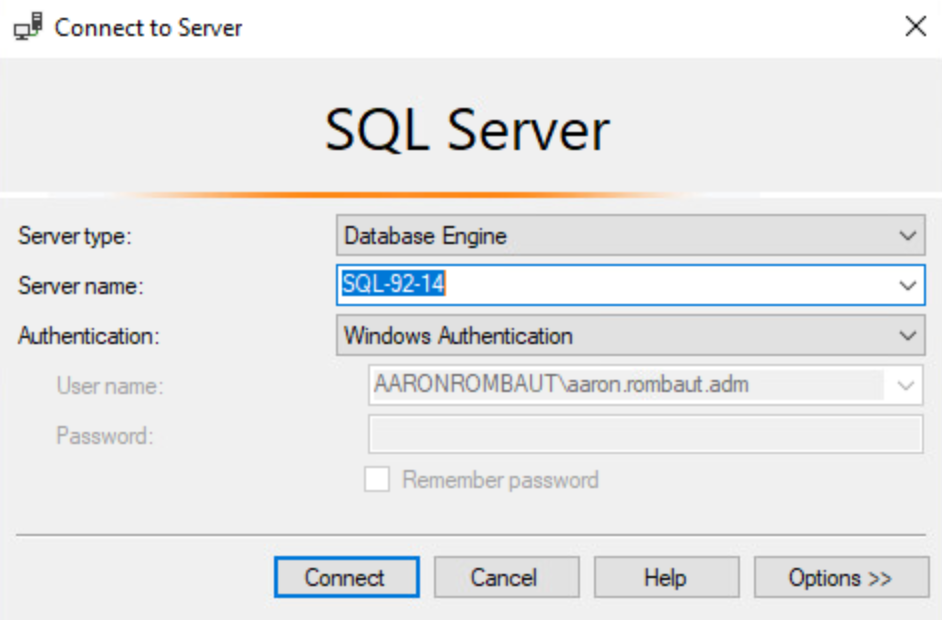
Launch SQL Server Management Studio (SSMS). During the installation, if the SQL Admins Security group was selected for SQL Server administrators, then log in as a user in that group.
If you forgot to add an admin user to the security group before logging into the Windows Server, add the user to the security group and make sure you log off and back on to the SQL server before trying to log in with SSMS (this is a Windows Security feature and not a flaw of Microsoft SQL Server). Otherwise, the following message will probably display.

Note: The following process should be repeated for each database that is to be created.
Expand Database and choose New Database…
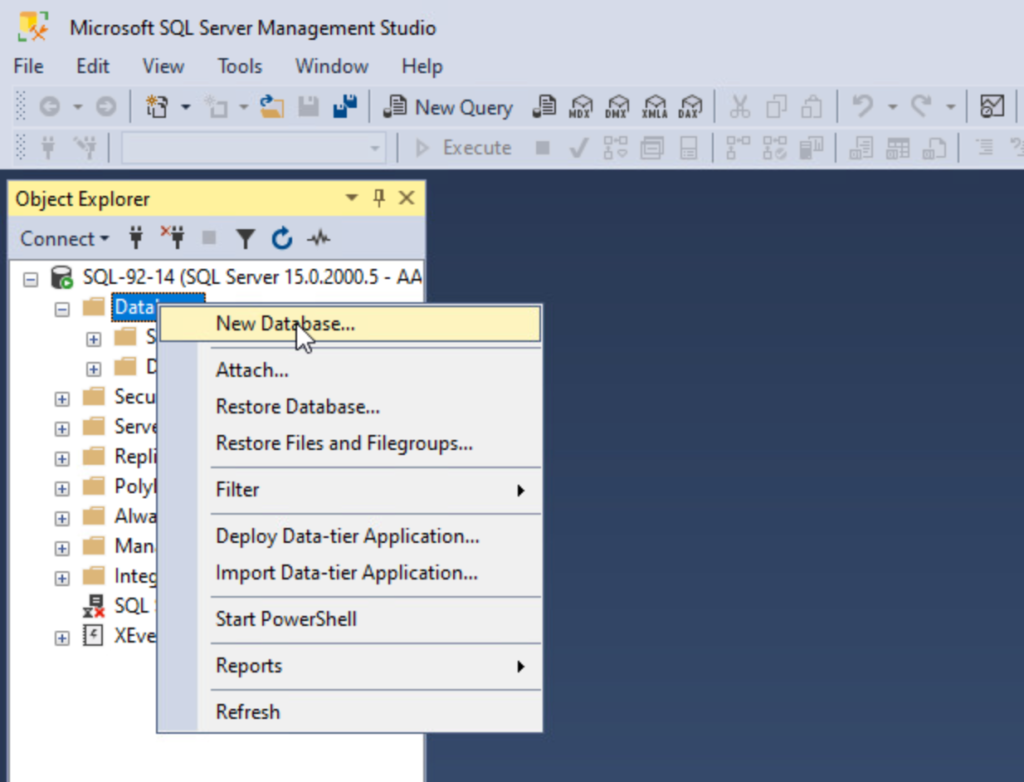
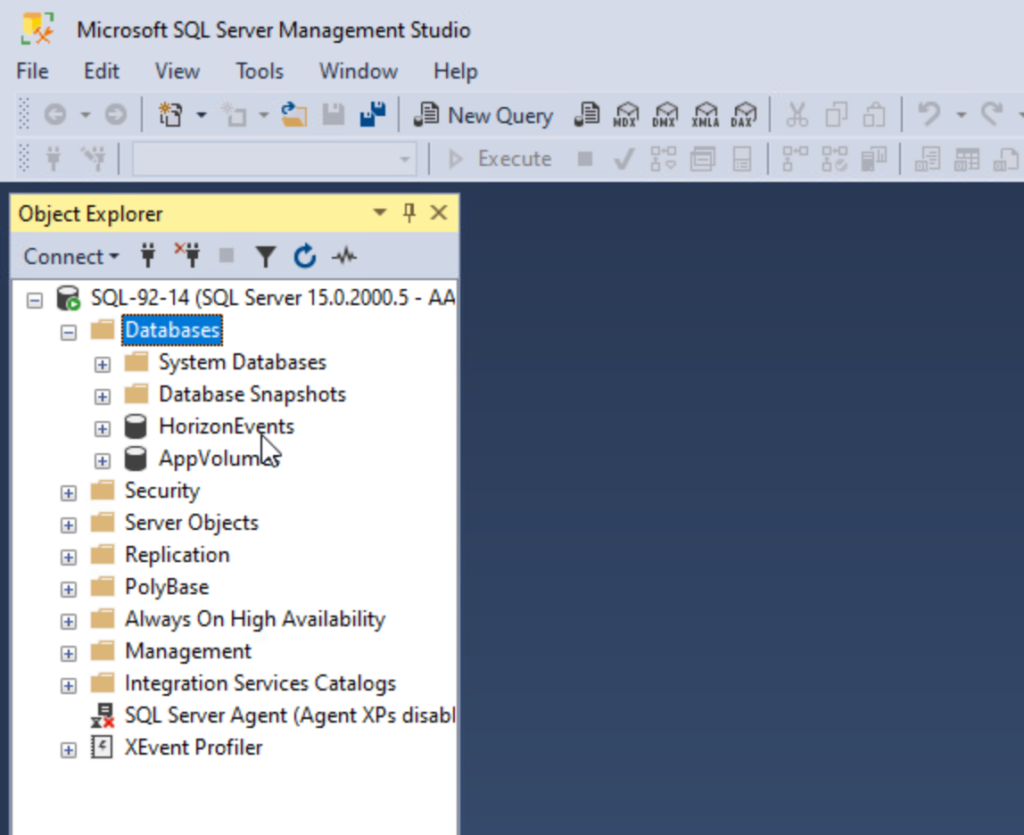
I am creating two databases for now.
- HorizonEvents
- AppVolumes
Create Security Logins
Launch SQL Server Management Studio (SSMS). (See above if you run into issues logging in.)
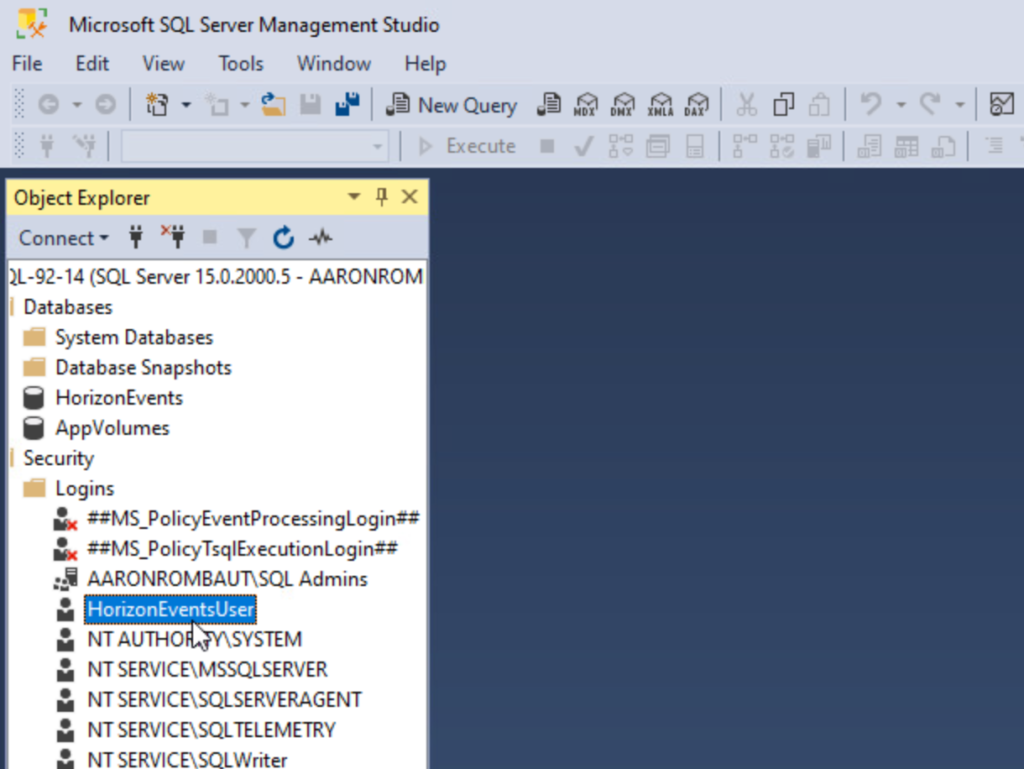
Expand Security > Logins and click New Login…
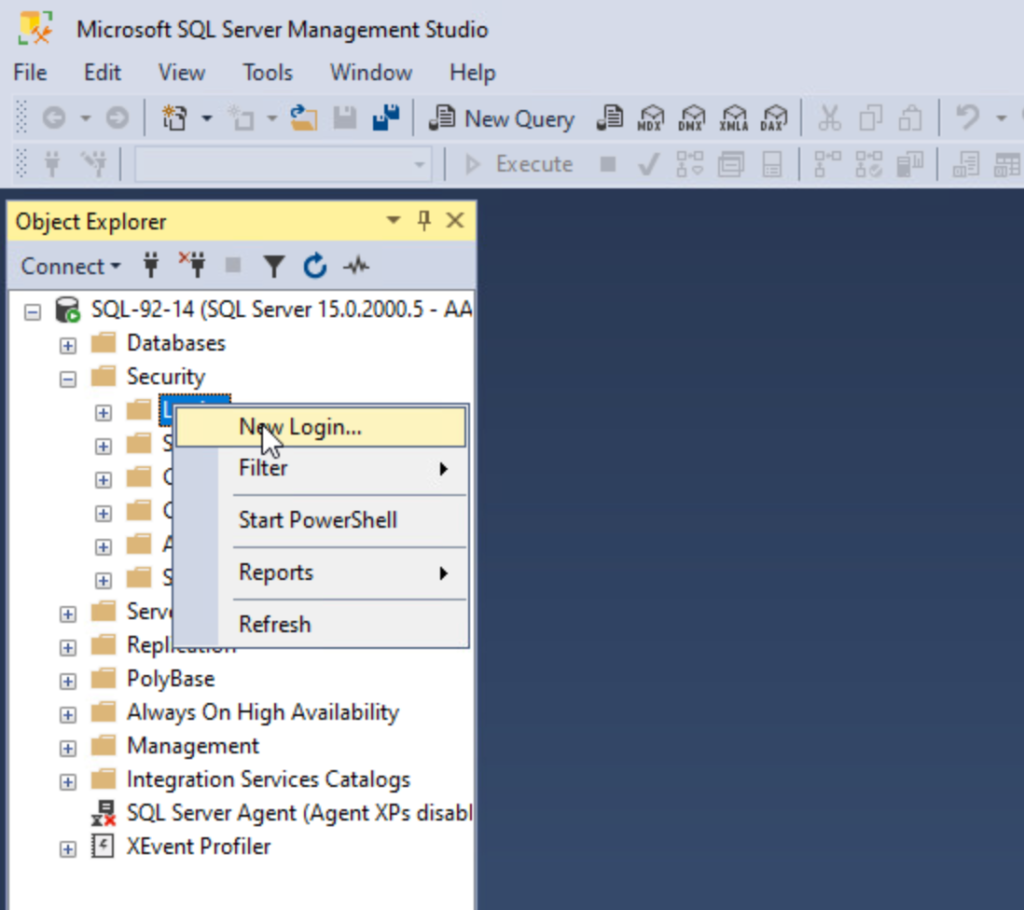
I need two different logins. One will be a local SQL user for VMware Horizon and the other will use a Microsoft Active Directory Computer object.
Choose either scenario and repeat, as needed, for any databases created and where logins are needed. Be sure to change the information specific for each database.
Local SQL Login
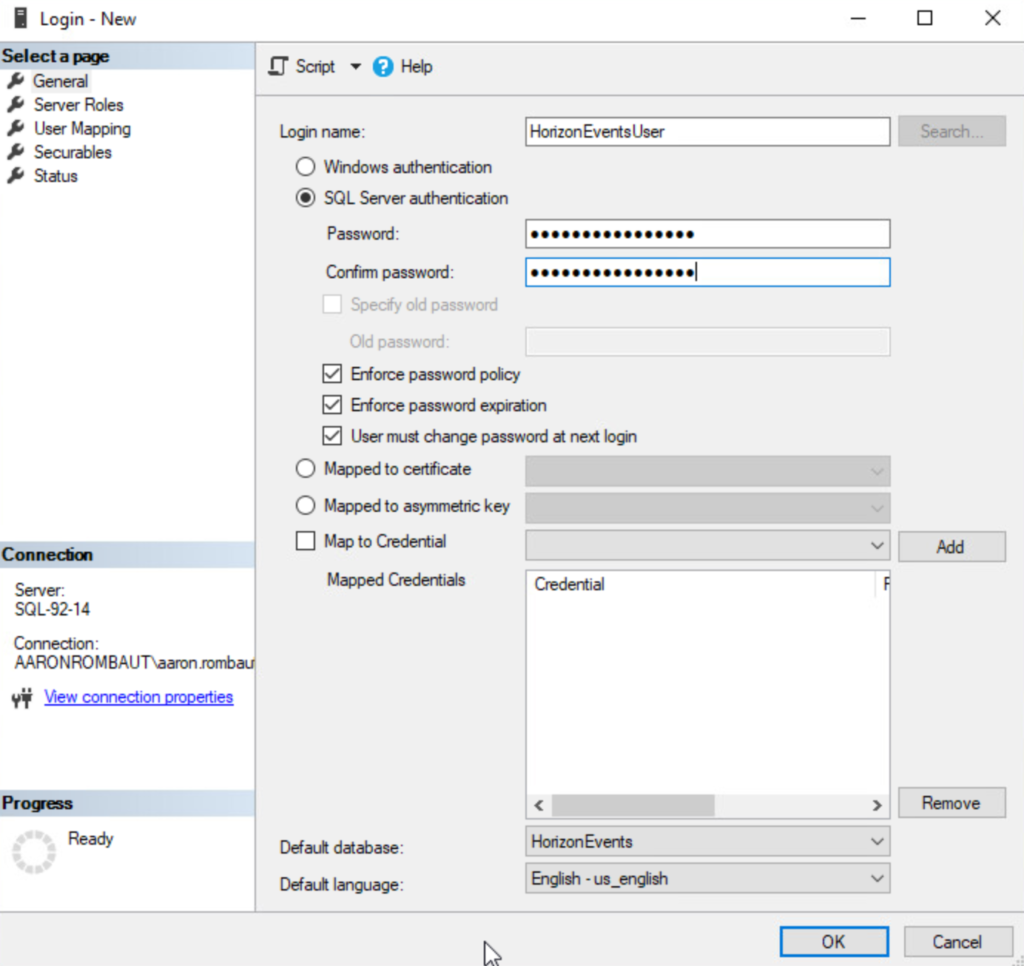
On the General page:
Choose a Login name.
Select SQL Server authentication and provide a strong password (the Enforce password policy prevents easy or weak passwords).
Change the Default database to name of the database and, optionally, the Default language.
On the User Mapping page:
Choose the name of the database you are associating this user with.
Choose the db_owner role for database.
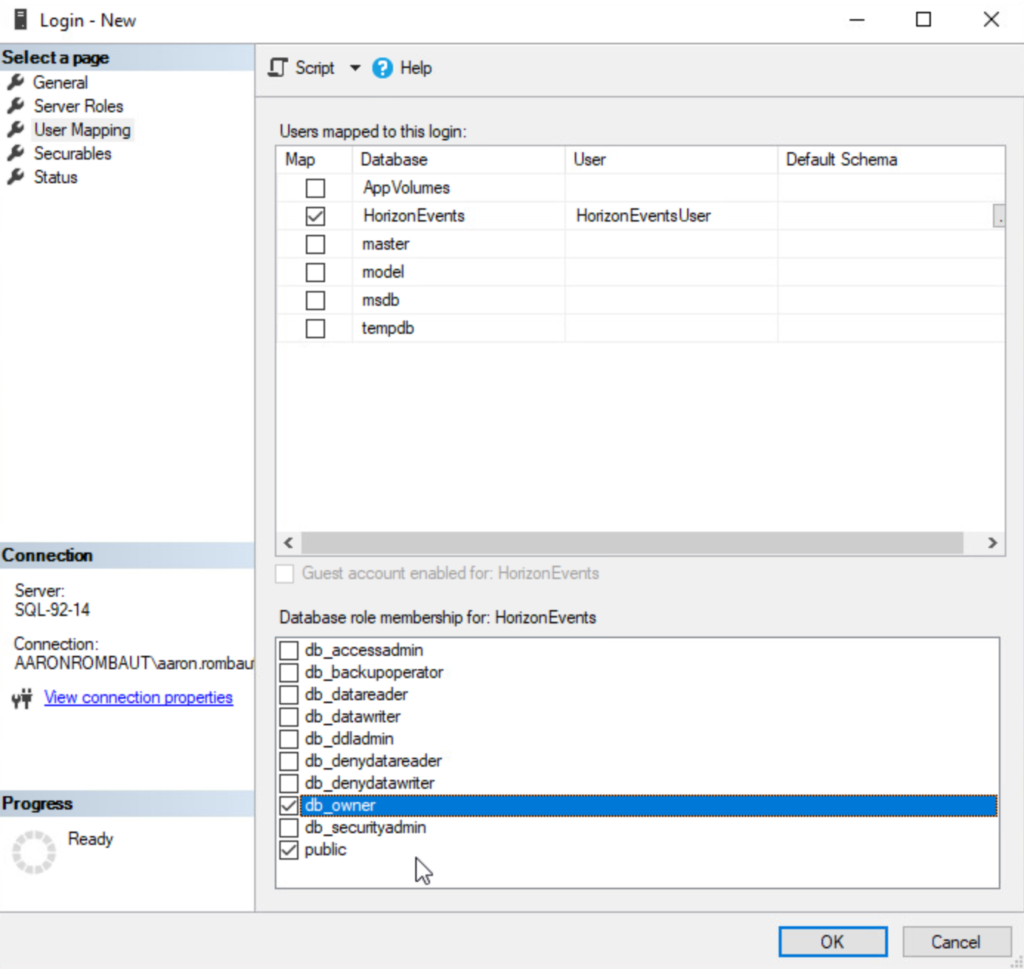
Ensure the user is displayed in the Logins.
Windows Authentication – Computer Object
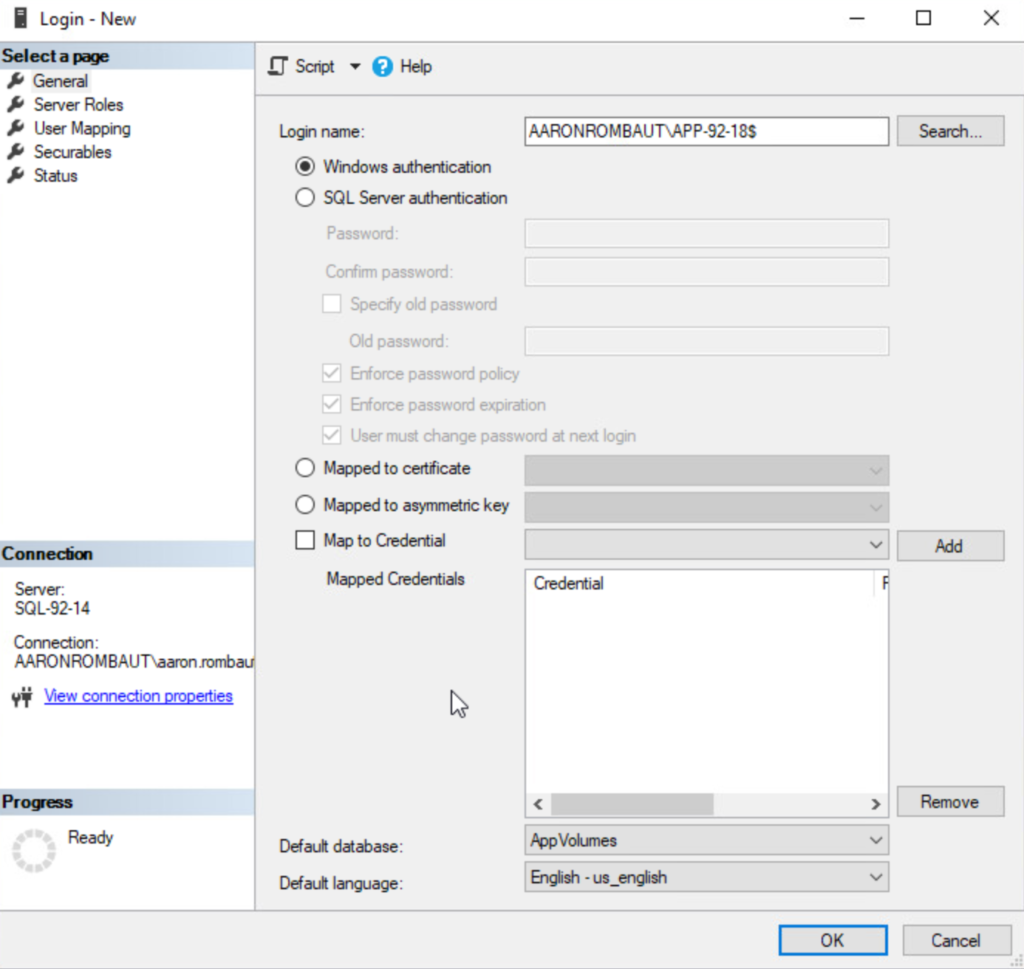
Adding a computer object requires the computer object to exist in Active Directory. This can be a pre-populated computer object or be an existing server (computer object associated with a server).
On the General Page:
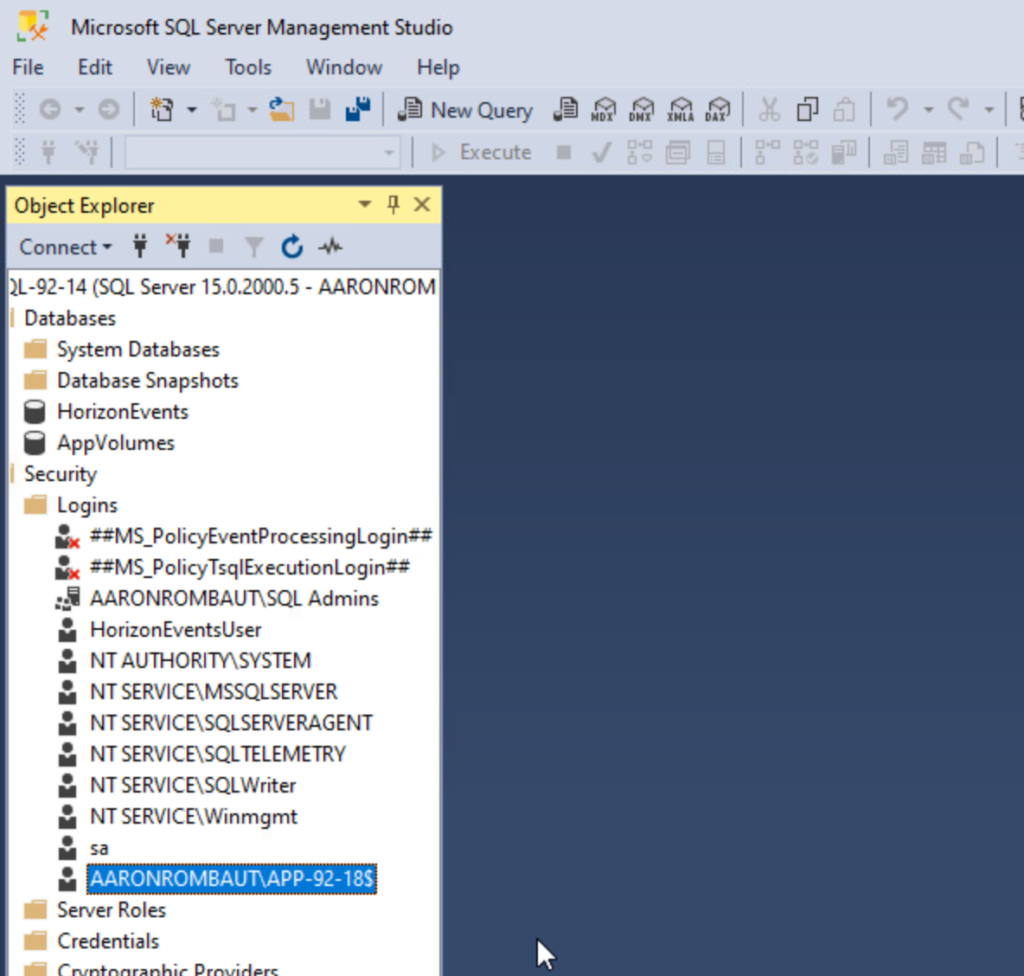
Add a computer object by typing the <domain name>\<computer object>$. See the image below for reference.
Change the Default database to the database this computer account is being configured for and optionally configure the Default language.
On the User Mapping page:
Choose the database to associate this computer object to and choose the role.
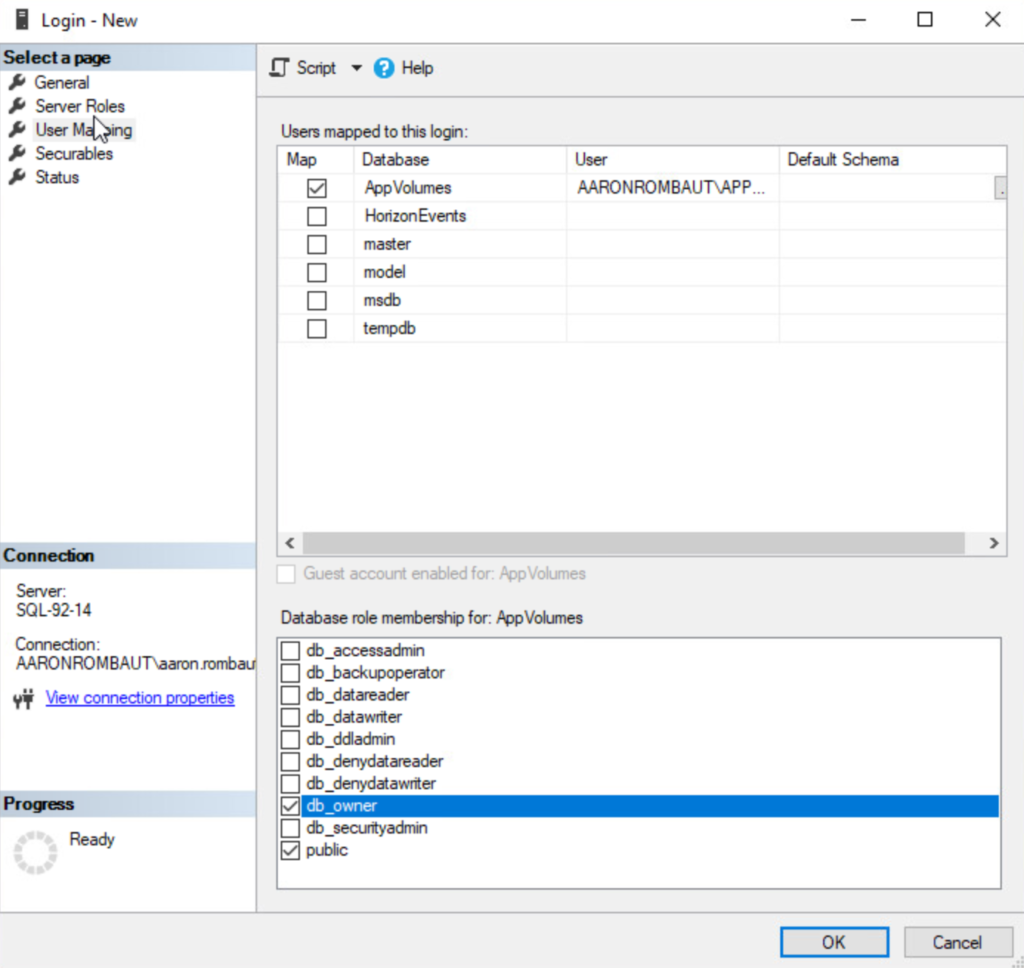
Ensure the account is displayed in the Logins.
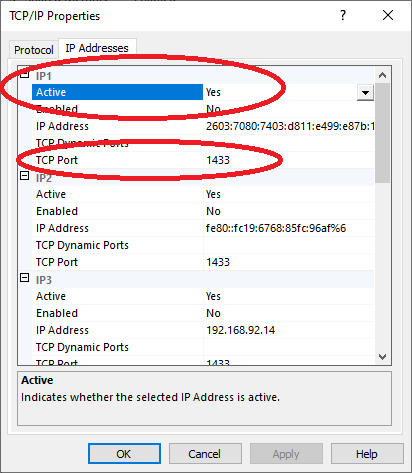
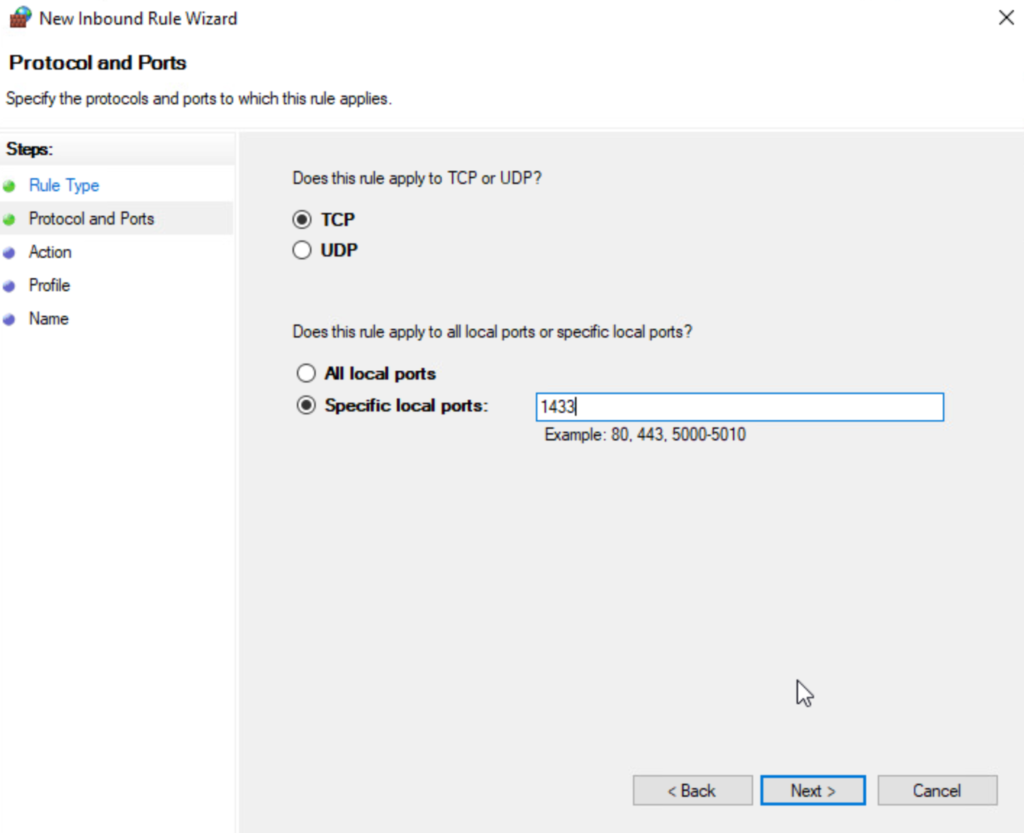
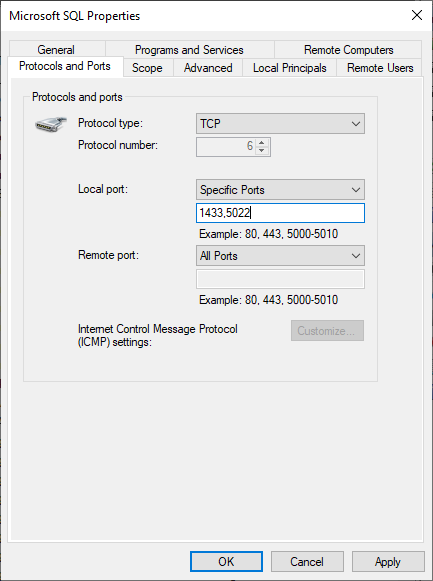
Allow TCP 1433 on Windows Defender Firewall
If you followed the other posts on my blog, you might be aware that I have set general Windows Defender Firewall with Advanced Security settings as part of Group Policy. For this server, though, it requires an additional port (TCP 1433) that is standard for Microsoft SQL Server. This can be confirmed in the TCP/IP Properties section of the Sql Server Configuration Manager window.
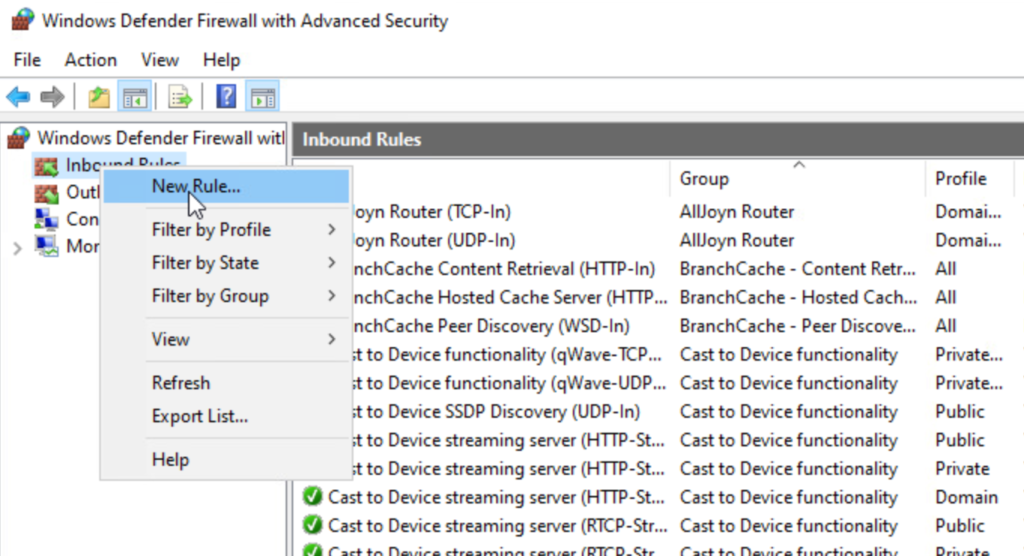
Open Windows Defender Firewall with Advanced Security (WF.msc).
Add a New Rule…
Select Port.
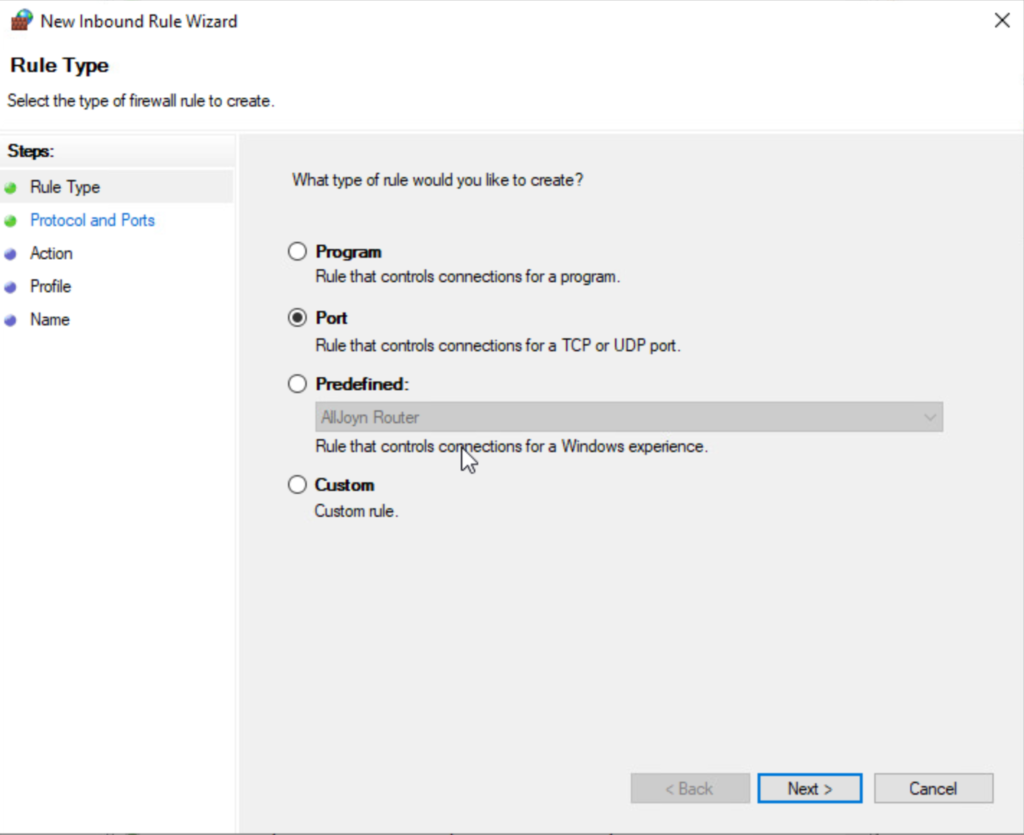
Leave the TCP option selected. Choose the Specific local ports: and type in 1433.
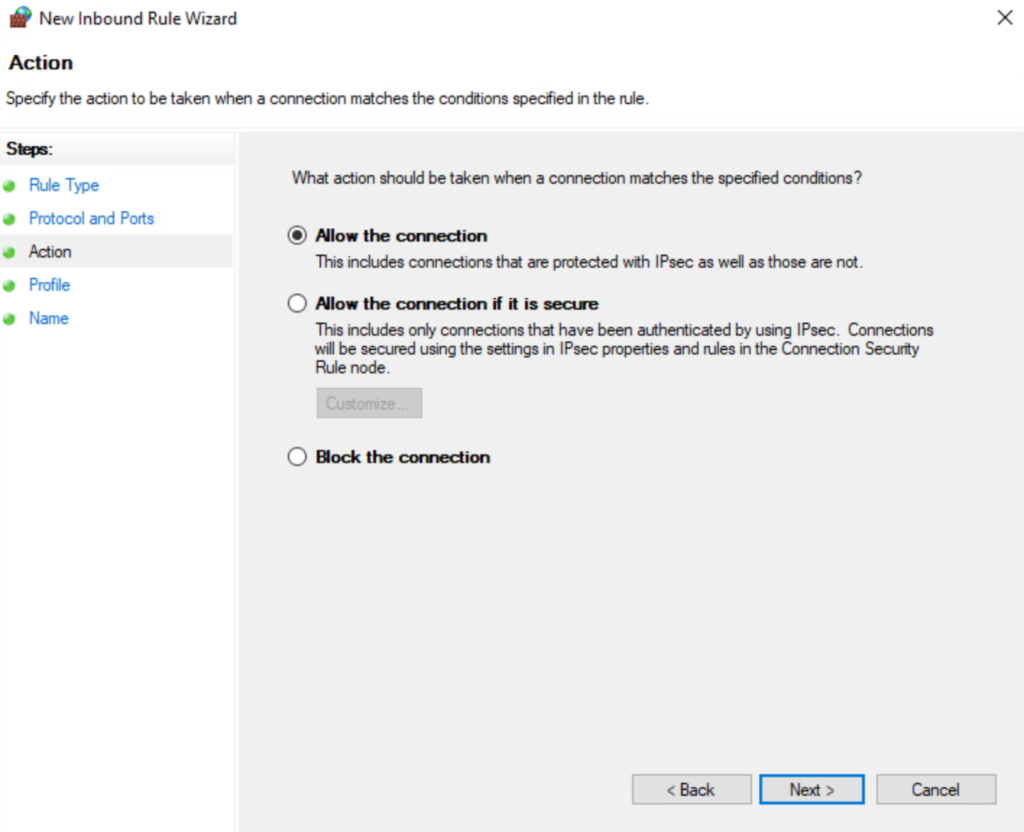
Leave the default, Allow the connection.
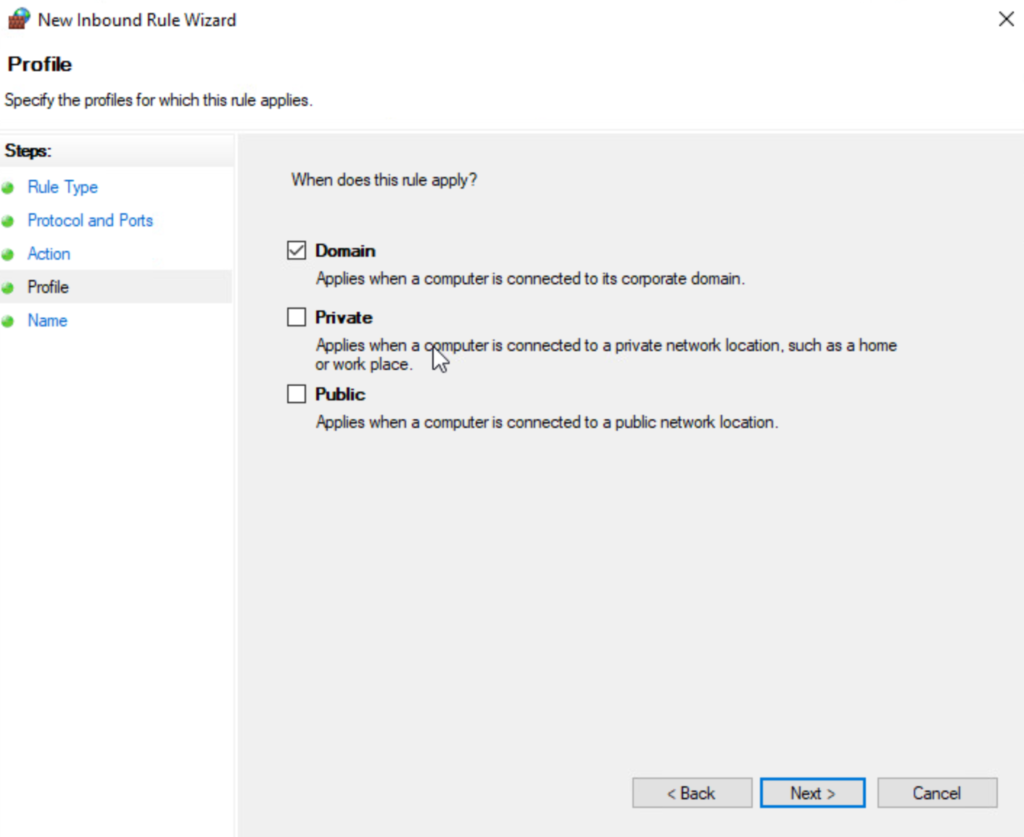
I generally uncheck the Private and Public profiles. I want to ensure that only Domain devices are allowed to communicate with the database server.
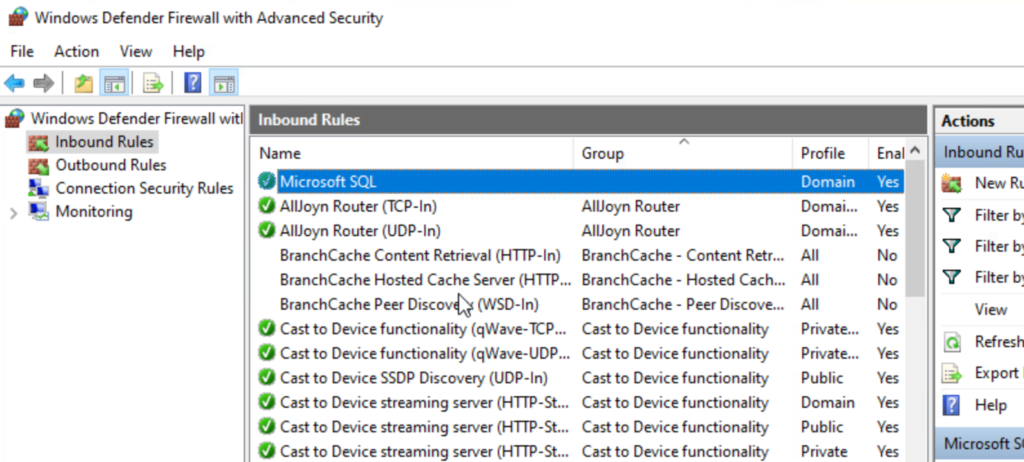
Provide a name to identify the rule, such as Microsoft SQL.

Click Finish, the rule should now be present and have a green check mark indicating it is an allowed and active rule.
Request a Transport Layer Security (TLS) Certificate
From the SQL Server, open the Local Computer Certificates MMC (certlm.msc) as a user in the Certificate Admins security group (you may have to log into the Windows Server as this user) and expand the Personal store. Right-click in the white-space, expand All Tasks, and choose Request New Certificate…

The Certificate Enrollment wizard starts.
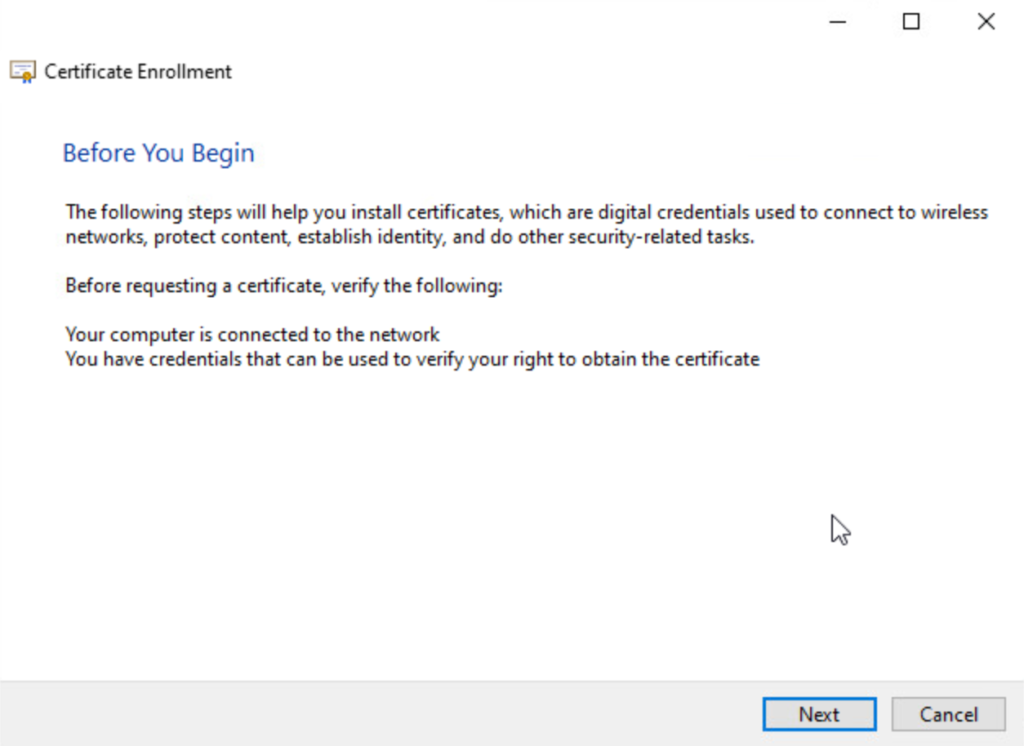
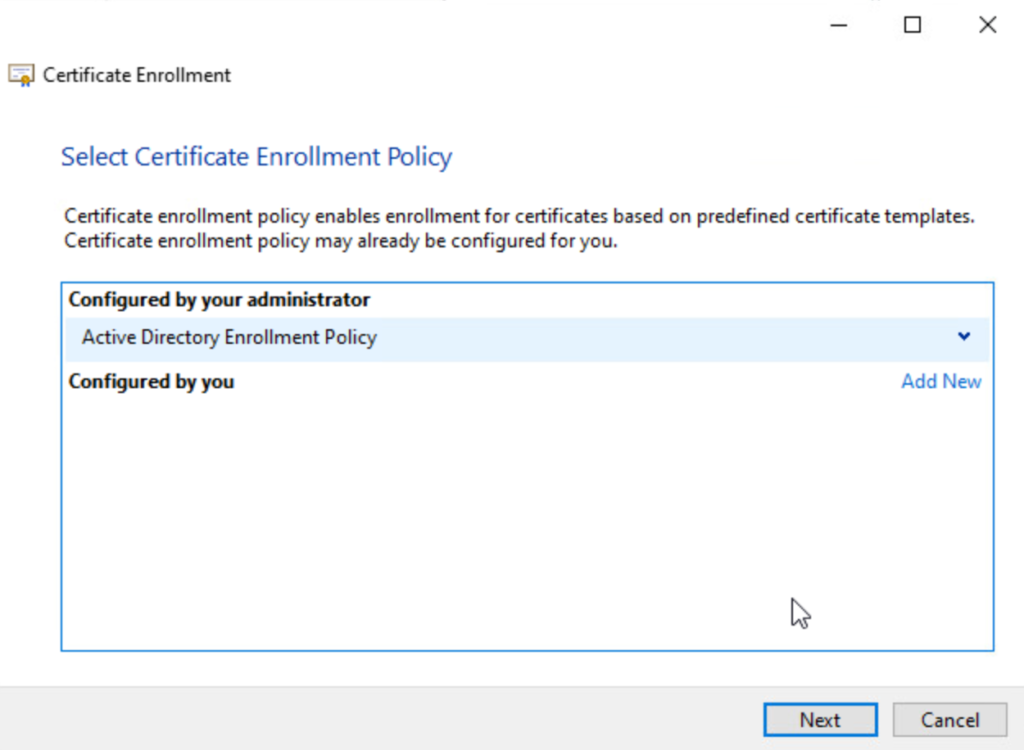
Leave the default Enrollment Policy selected and click Next.
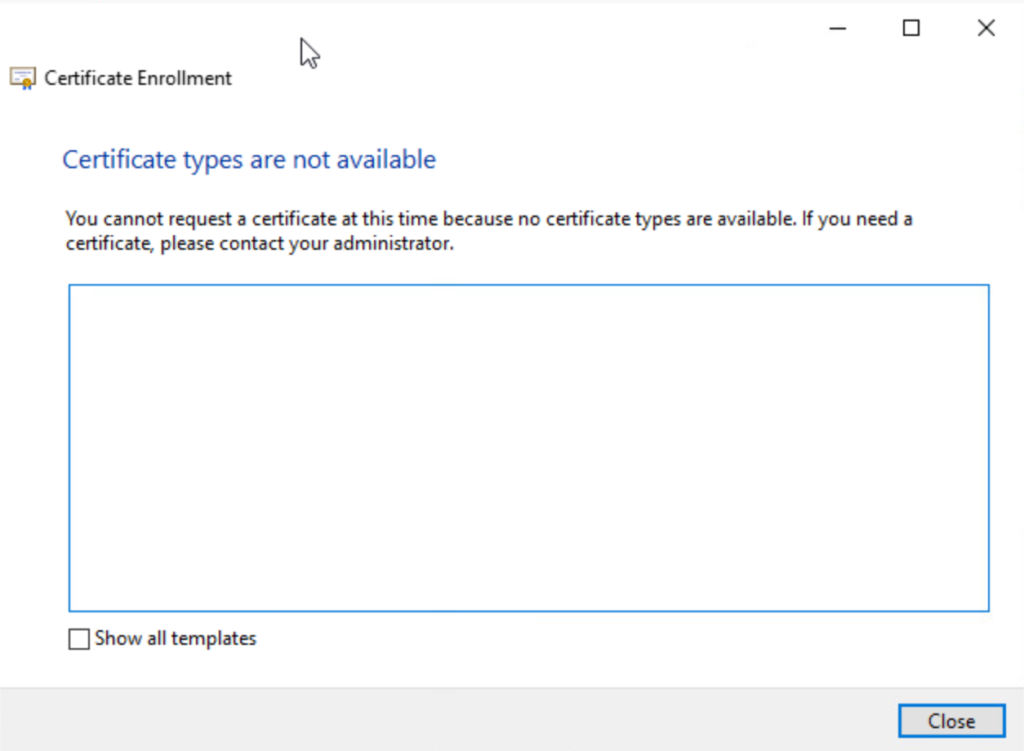
When you get to the screen where certificate templates should be and you do not see any (see below), this is likely a permissions issue. You may be an administrative user, but the certlm.msc is using the account of the computer. The computer, therefore, must have permissions specified on the Certificate template. If you are following along in my blog, a security group was added to the certificate template we need, called Certificate Admins. Make sure the Domain Computers security group is added to this security group and reboot the computer. The reboot will pick up the new security group. Try to issue the certificate again.
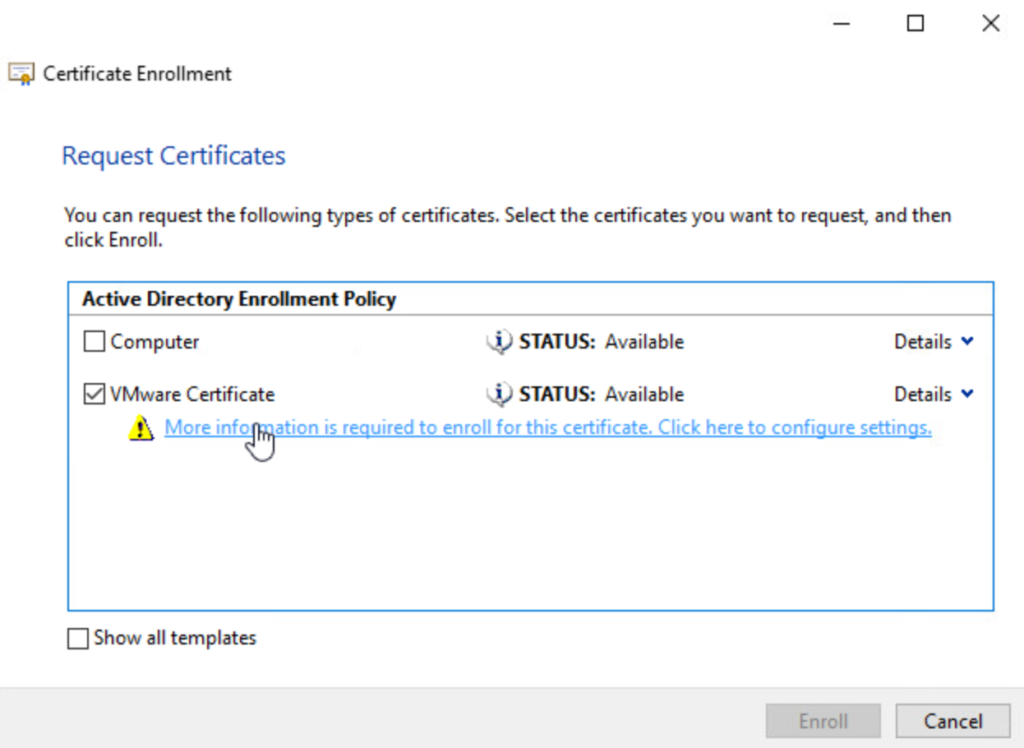
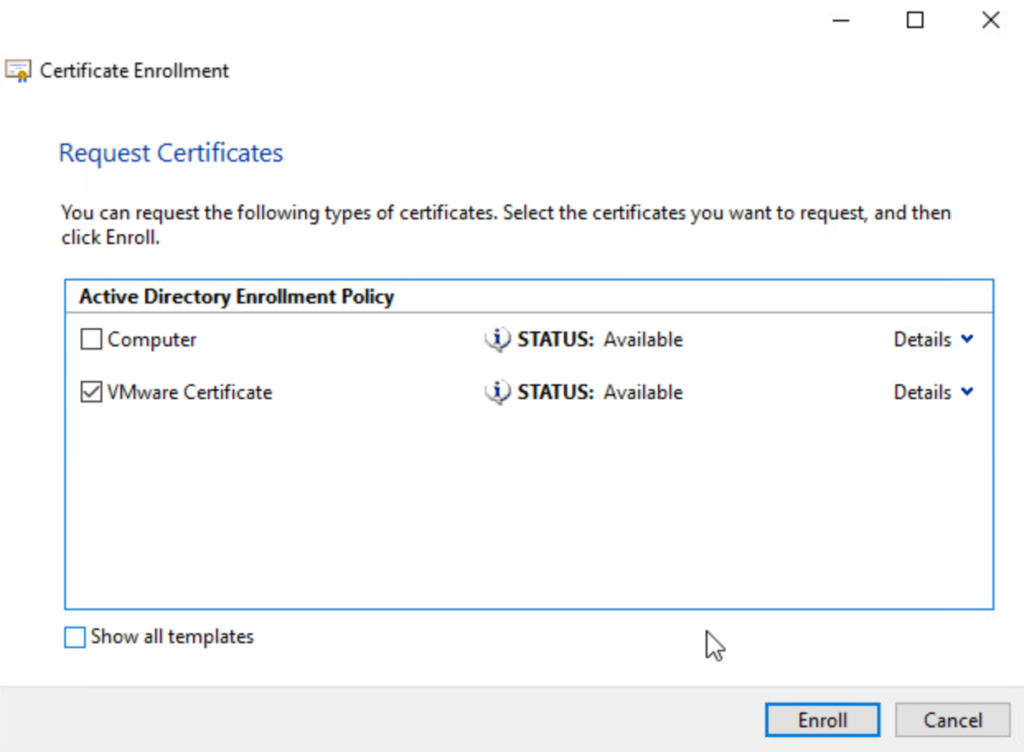
What you should see when the permissions are correct. Even though this is a Microsoft SQL server, the VMware Certificate template will work and should be used, here. Select the checkbox for the certificate and click the lick to start configuring the details.
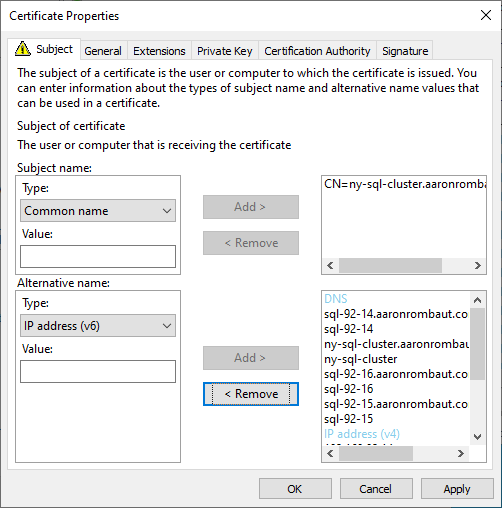
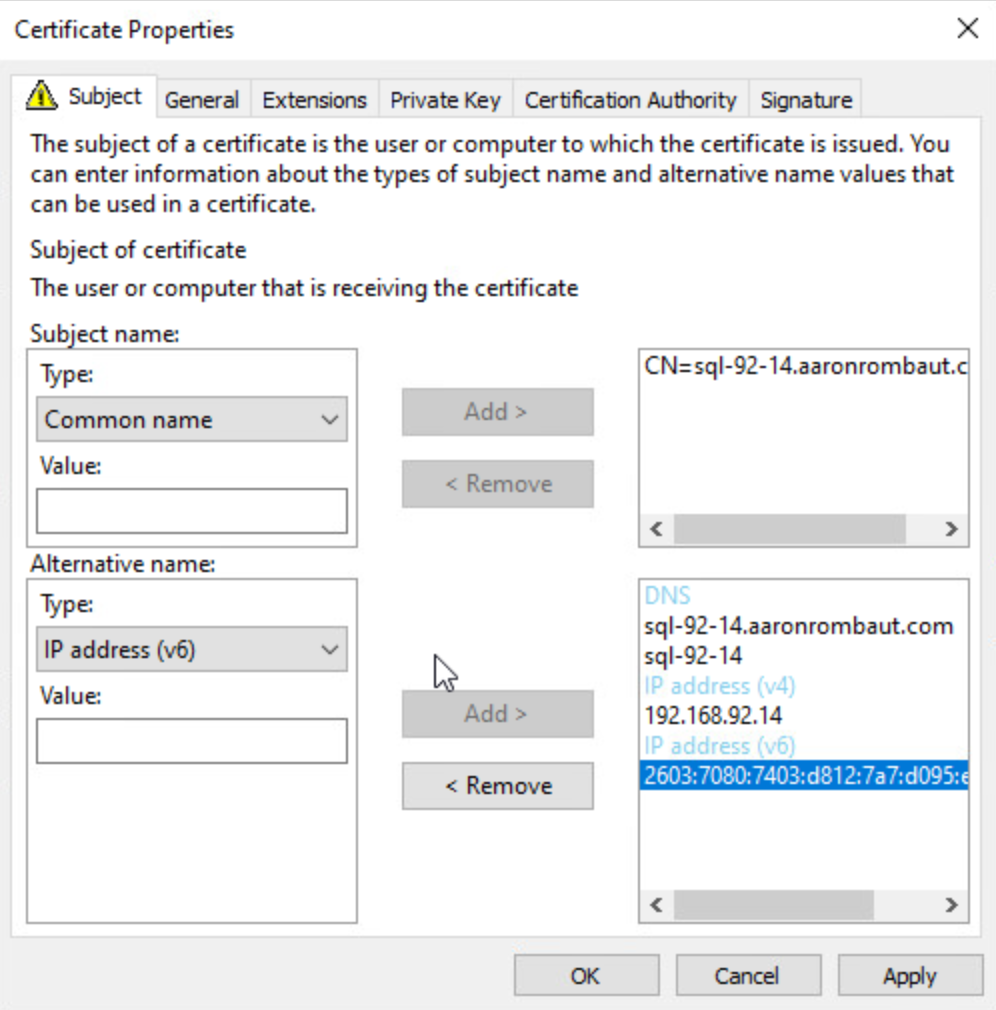
On the Subject tab, add the fully qualified domain name (FQDN) for the Subject name. For the Alternative name (Subject Alternate Name) add the FQDN again. In addition, add the short name and IPv4 and IPv6 addresses. If there are more than one server, add the Virtual IP host name as the Subject name (Common Name) and all the supporting servers in the Alternative name. This ensures that no matter how you connect to the server, it should be able to be securely connected to.
The Private Key is exportable by the template so this window can now be closed. You should be returned to the Request Certificates window and the Enroll button can now be clicked.
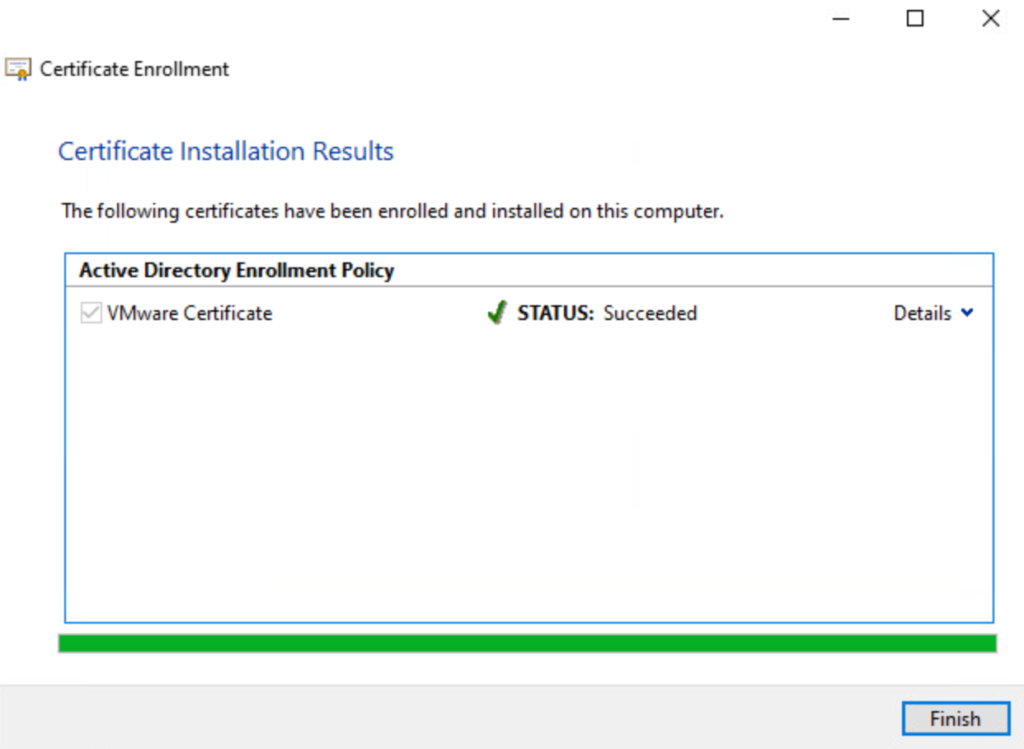
When successfully enrolled, a results window will display. Click Finish.
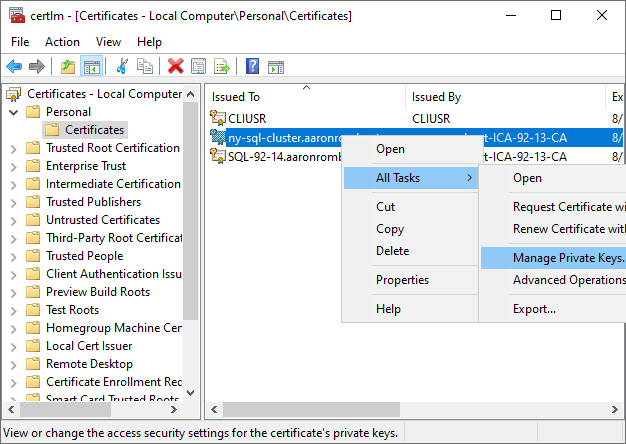
Configure the Private Key to be Trusted by the SQL Service Account
Open the Local Computer Certificate manager (certlm.msc) and expand the Personal store. Find the certificate that was previously requested. Right-click the certificate, expand All Tasks, and click Manage Private Keys…
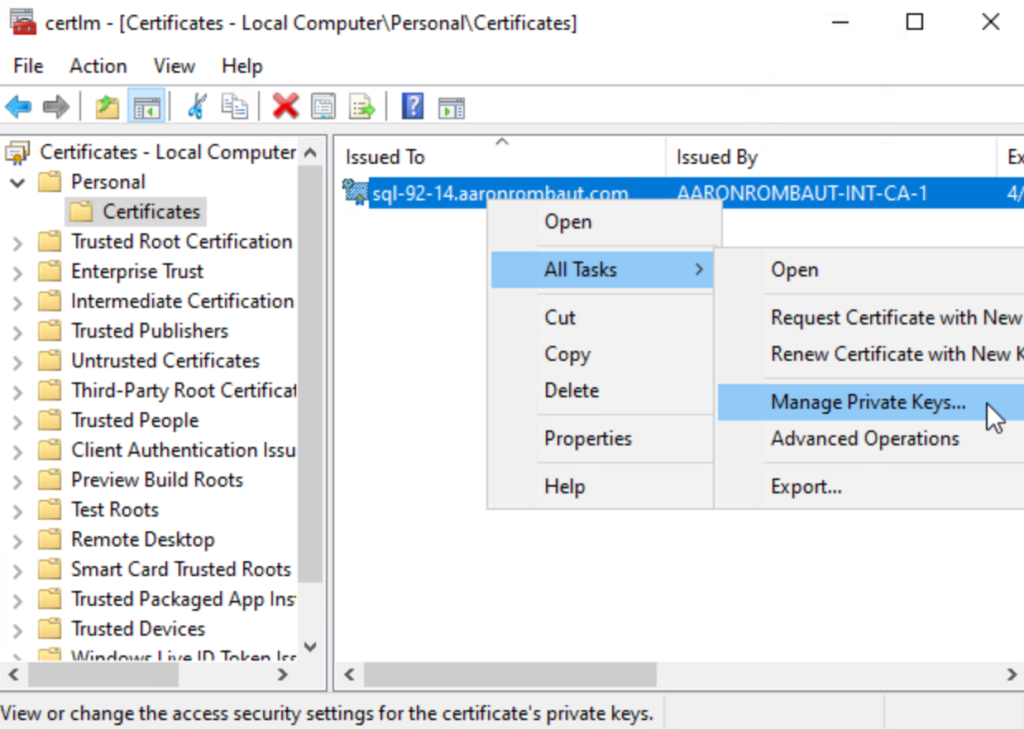
Add the Microsoft SQL Service Account and select the Read permission.

This could be a configured Service Account or the default account. If you are unsure, open the system Services console (services.msc) and find the SQL Server (Instance Name) Properties window and look at the Log On tab. This user needs to be able to read the Private Key otherwise the service will not start.
Configure the SQL Server Certificate Trust
Make sure you have requested a certificate and it is available in the Personal Cert store for the Computer before proceeding.
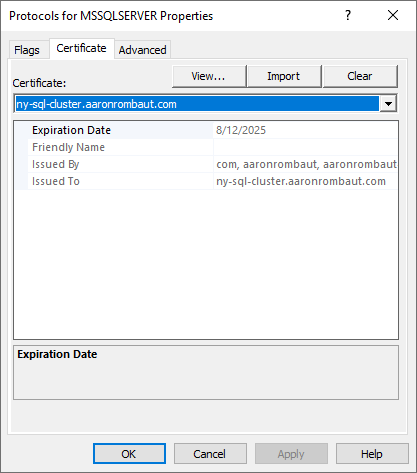
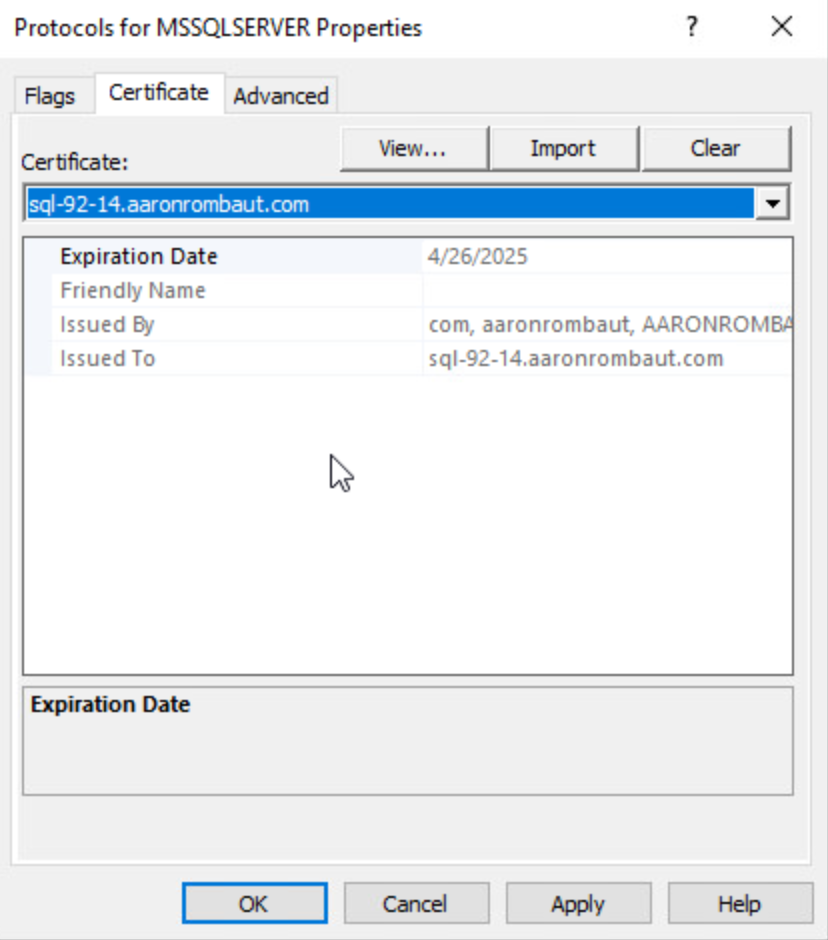
Open Sql Server Configuration Manager and expand SQL Server Network Configuration. Right-click Protocols for MSSQLSERVER (or whatever the Instance name is) and choose Properties.
On the Certificate Tab, use the drop down and find the certificate intended on securing the SQL server. Click Apply and OK. You should be prompted to restart the SQL Service so that this takes effect.
Back in the Sql Server Configuration Manager, select SQL Server Services.
Find the SQL Server service in the main window and restart the service. If the service does not start, review this page, above for fixes. Common issues I encounter are that the certificate Private Key is not exported, the service account does not have read permissions on the Private Key, the password on the service account has expired or is not correct, or the information in the certificate is not configured correctly.

Note: The following content is a work in progress and not tested, fully!
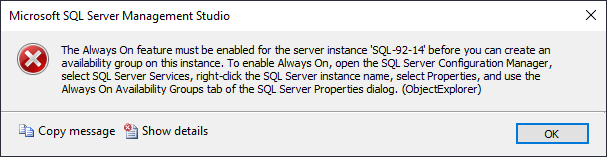
Configure an Always on High Availability Group
Prerequisites:
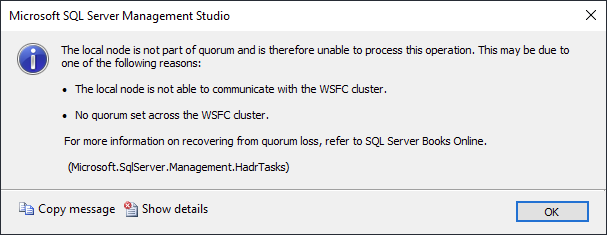
- Ensure two or more Microsoft SQL servers are installed and configured in a Windows Server Failover Cluster (WSFC). Here is a post to assist in setting up a WSFC. The following screenshot shows that this SQL server is not part of a quorum.
- Ensure the database that is being configured for Always On is only configured on the server where the group is being configured.
- Ensure that a full backup and log backup have been made and are accessible by both SQL servers. This is documented in the workflow below.
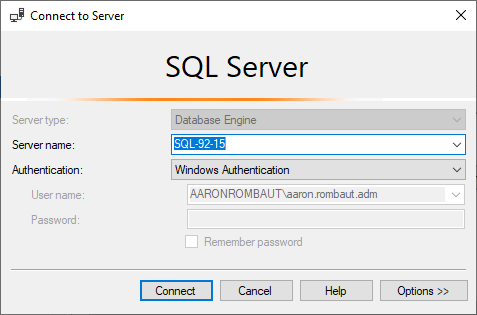
Open Microsoft SQL Server Management Studio (SSMS) and log in to the first SQL Server.
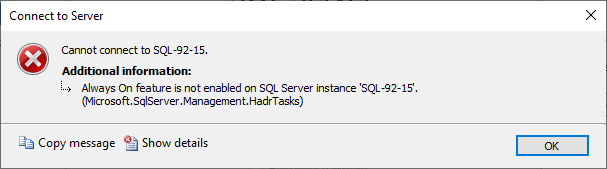
Click Always On High Availability from the left menu. If the service is not already running, we should get a message like below.
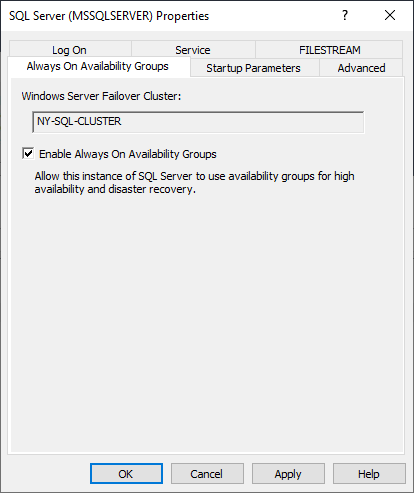
Here is what the SQL Server Properties window looks like with the Enable Always On Availability Groups checkbox selected.
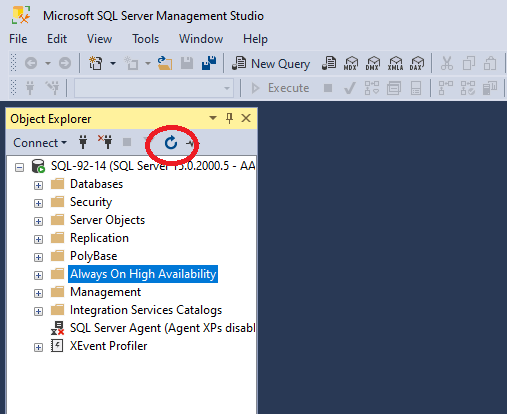
Restart the SQL Server service and return to SSMS. Refresh the Object Explorer.
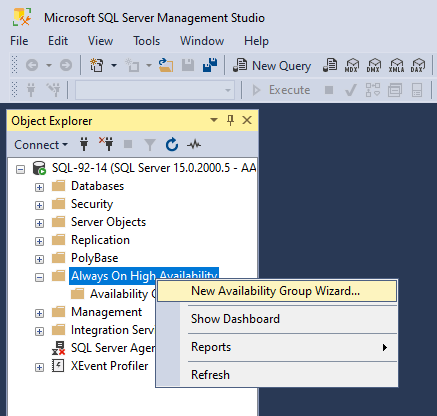
Right-click on Always On High Availability and choose New Availability Group Wizard…
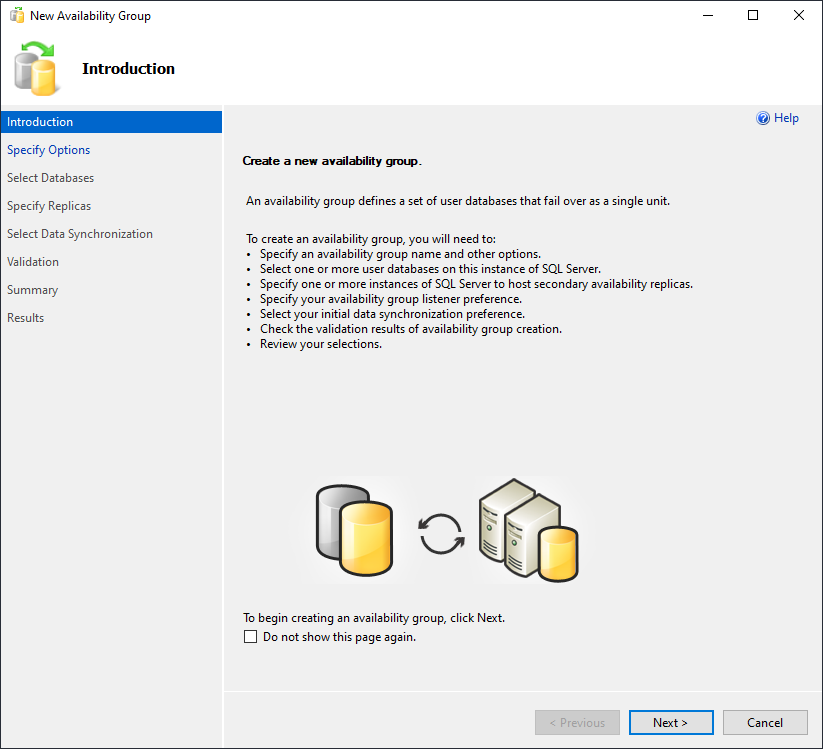
The Introduction opens. Click Next to continue.
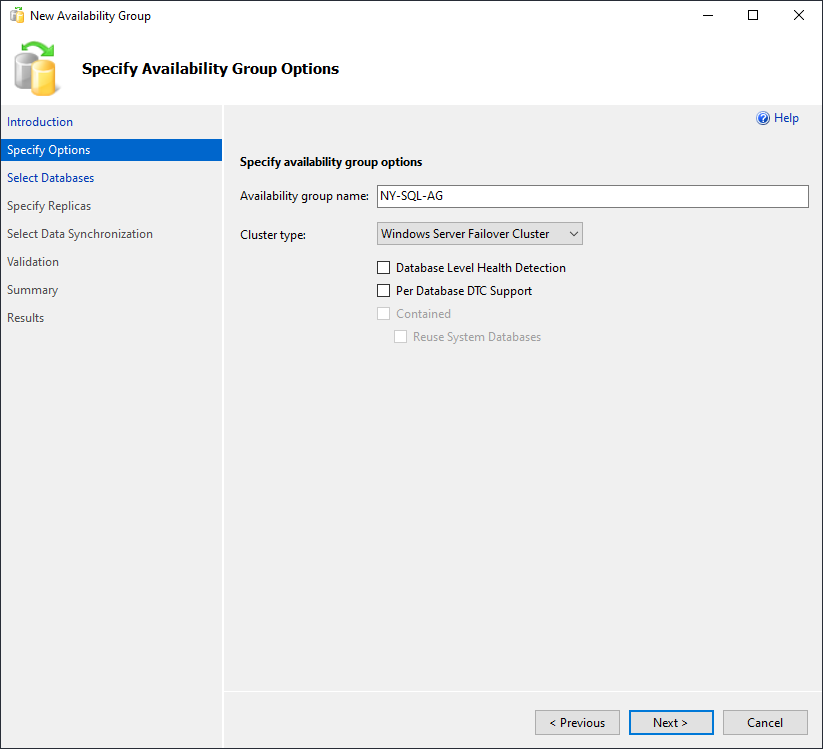
Provide a name for the Availability Group. For the cluster type, ensure Windows Server Failover Cluster is selected. If it is set to EXTERNAL and the Windows Server Failover Cluster is not in the list…
* close the current wizard window
* open Sql Server Configuration Manager
* right-click the SQL Server from SQL Server Services, choose Properties
* Uncheck the Enable Always On Availability Groups checkbox
* Restart the SQL Server service
* Repeat the above and this time do check the Enable Always On Availability Groups checkbox
* Restart the SQL Server service, again
* Go back to SSMS and refresh the Object Explorer
* Try to open the New Availability Group Wizard again
* This time, the Cluster type, Windows Server Failover Cluster, should be available
Note that this is not the name that will be used to connect to the SQL service. This name is only naming the SQL Availability Group. The name that was chosen during the Windows Server Failover Cluster wizard is the name that can be used to connect to.
Click Next to continue.
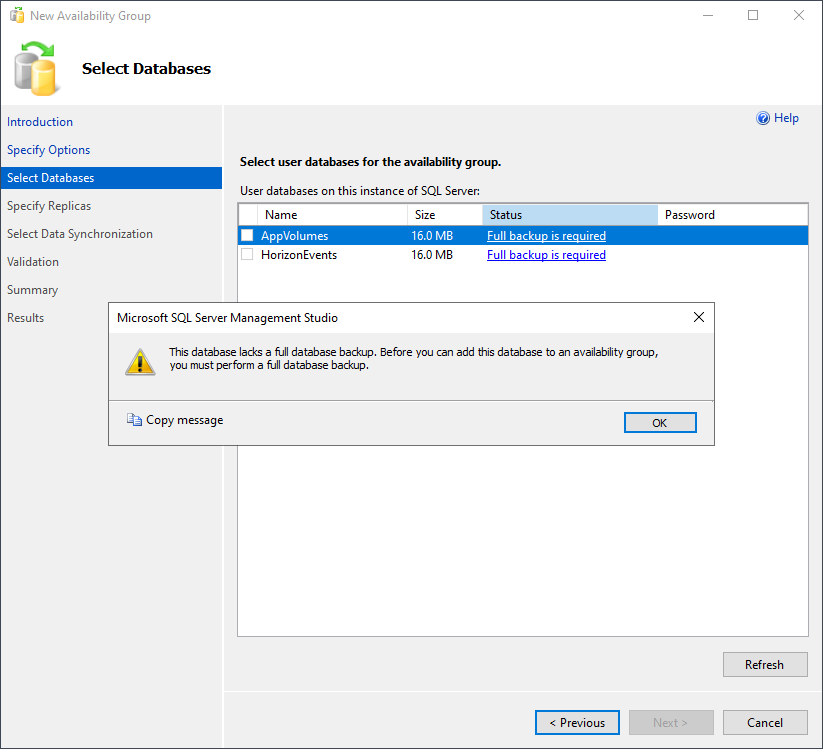
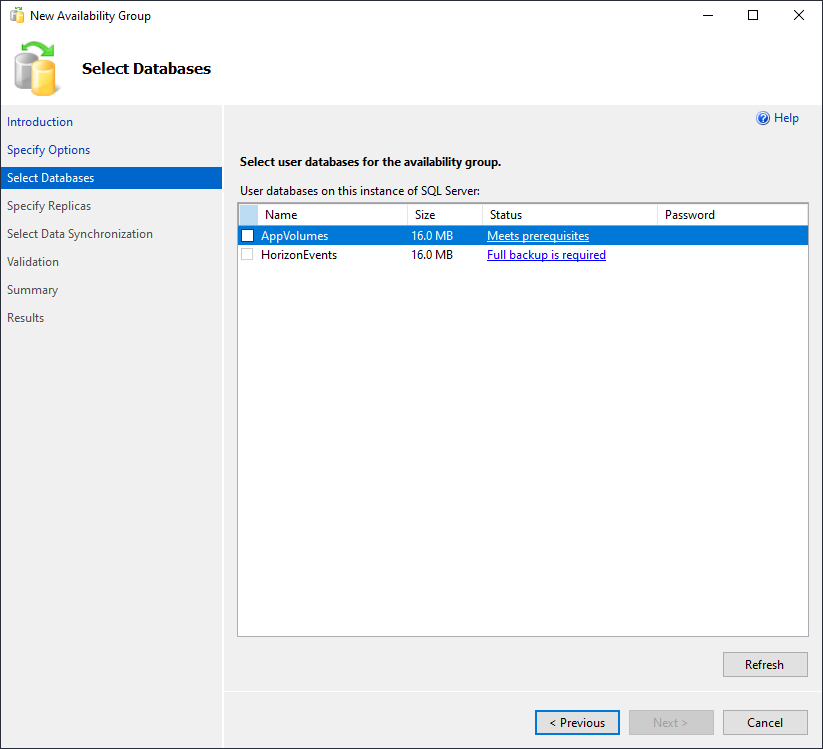
If a backup has not yet been made, the following window will display Full backup is required as the status and a window will pop up with a warning message.
Let’s make the necessary backups. Note this can be done without closing the New Availability Wizard window.
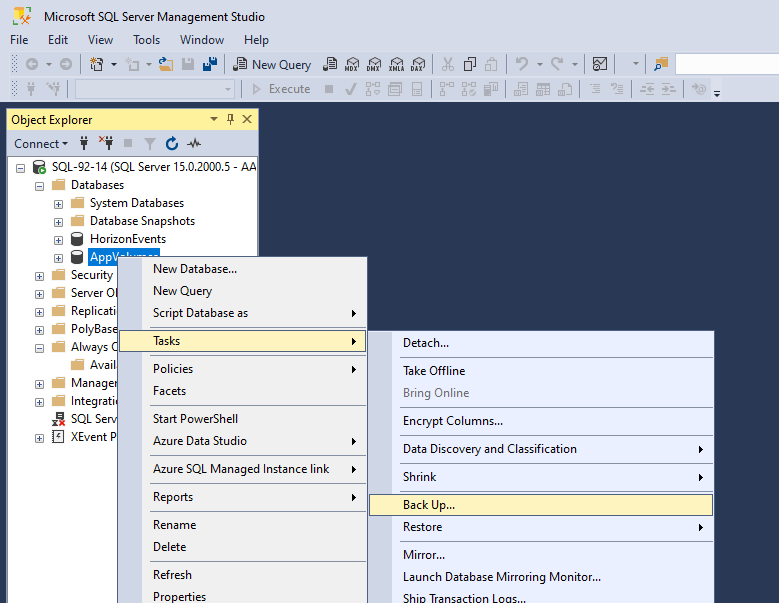
Right-click the database, AppVolumes in this case, point to Tasks, then Back Up…
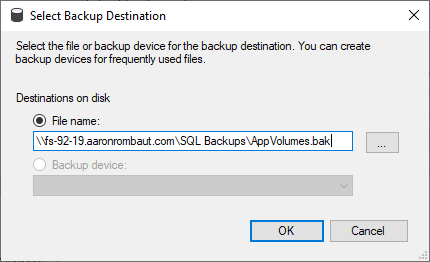
We need to take two backups. This first one will be a Full backup type. I am also going to change the location that I back up to. I want to use a file share that both SQL servers have access to. The screen shot below has the original location, but subsequent screen shots will have the file share location.
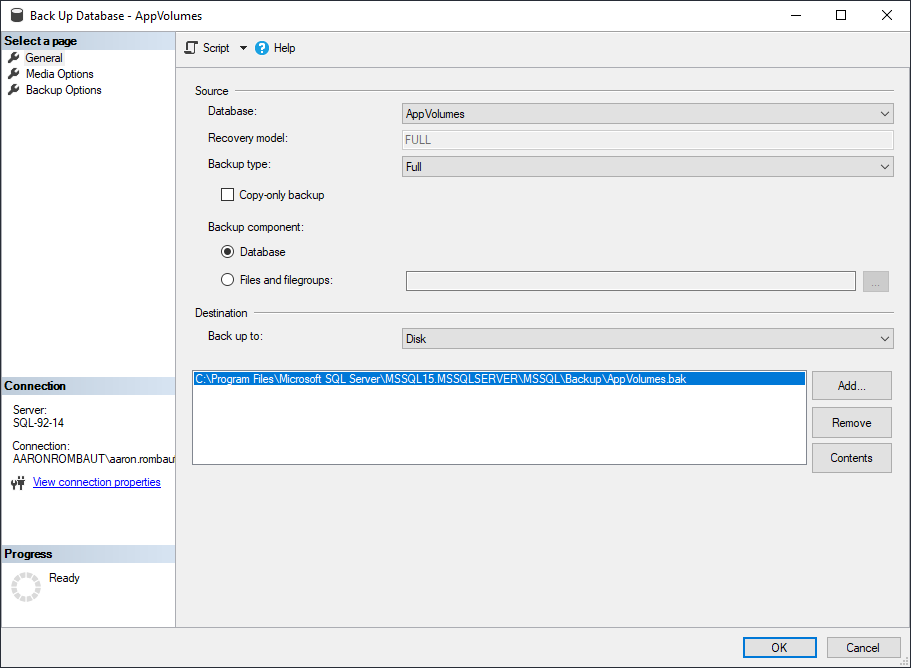
Click OK and allow the backup to take place.

Repeat the backup, but this time choosing Transaction Log backup type.

Again, we should receive a successful backup.

Return to the New Availability Group wizard and click Refresh. Notice the Status now shows Meets prerequisites. Select the database and click Next to continue.
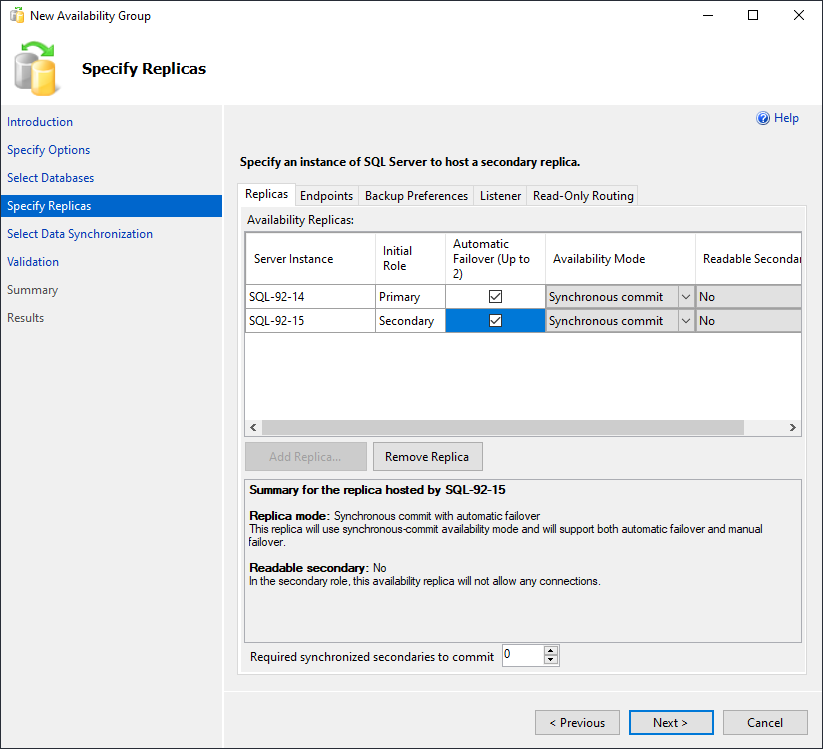
On the Replicas page, click Add Replica… and add the additional nodes.
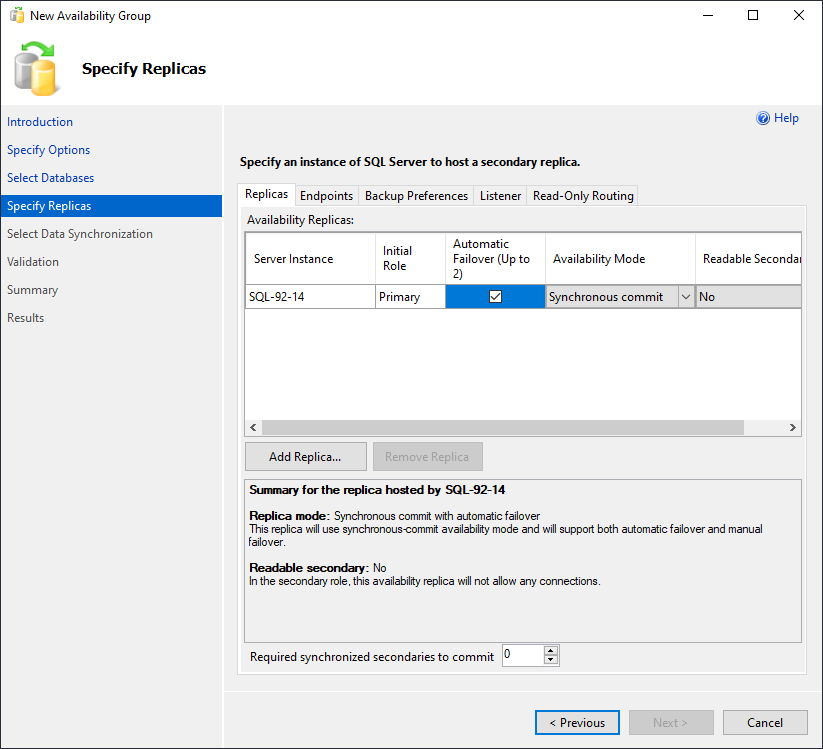
Add the other SQL Server in the Server name box.
Follow the earlier procedure on the other nodes to enable the Always On feature if the Always On feature is not enabled and the following message is received.
Select the Automatic Failover checkbox on all nodes.
On the Endpoints tab, notice the Port Number is listed as 5022.
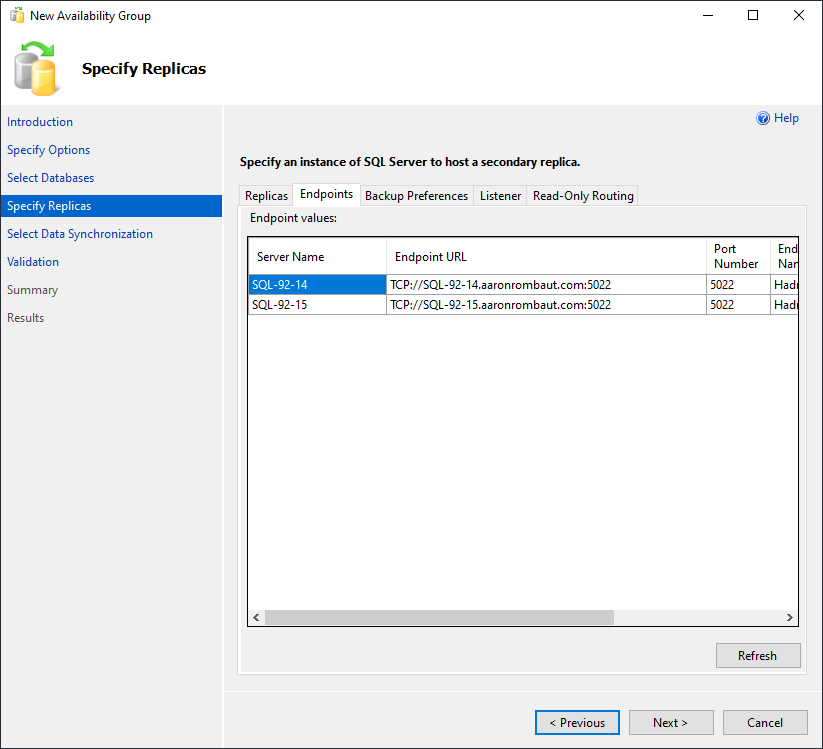
This port needs to be added to the Windows Defender Firewall with Advanced Security (wf.msc) rule we set up earlier. I prefer to add it to this rule to keep them together.
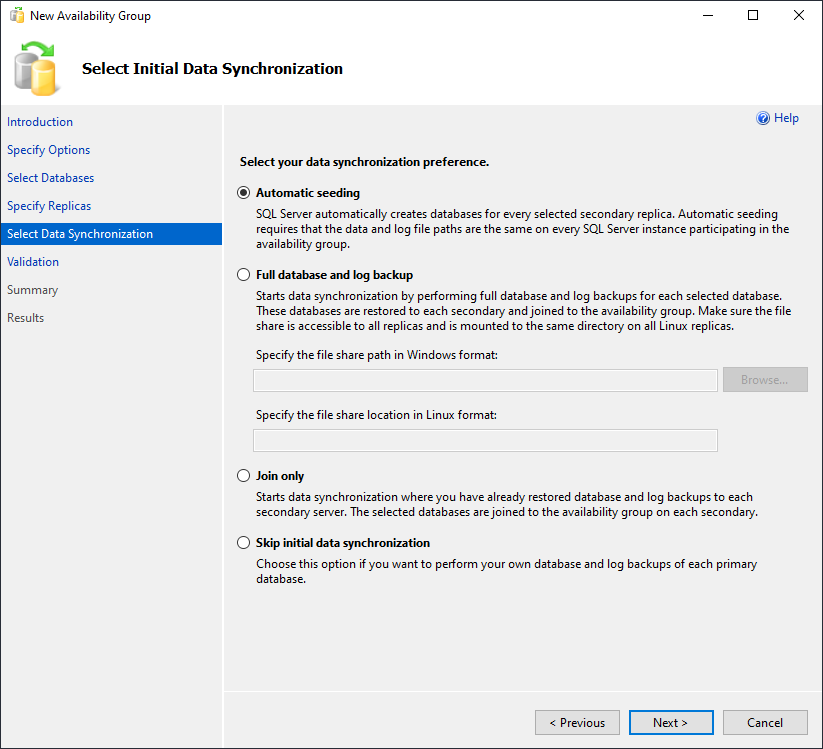
Click Next on the New Availability Group wizard to Select Initial Data Synchronization. For this, we are going to leave the default, Automatic seeding, selected.
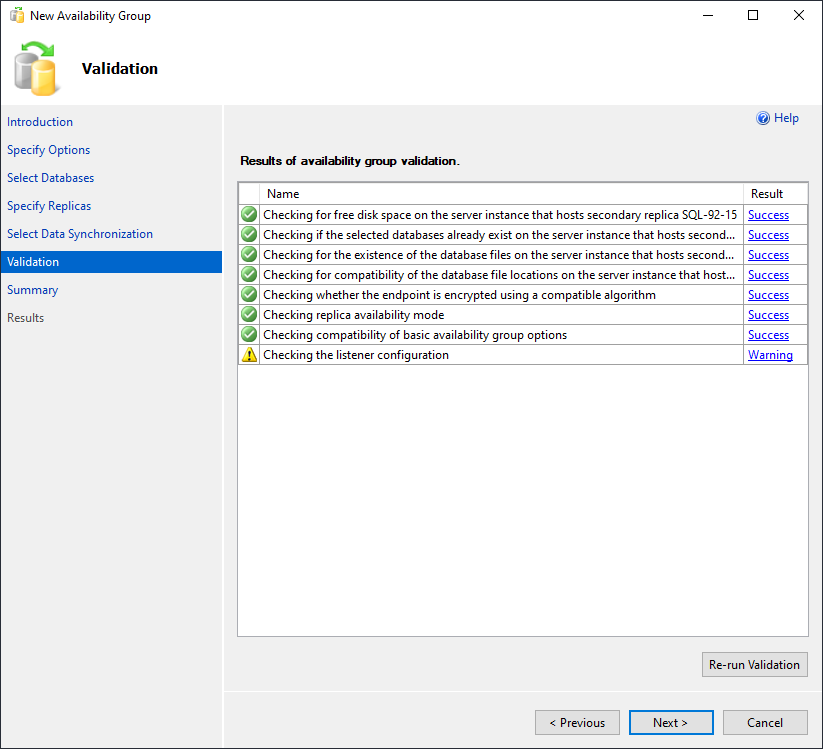
The Validation screen displays Successes and a Warning. This is because we do not have a listener configured.
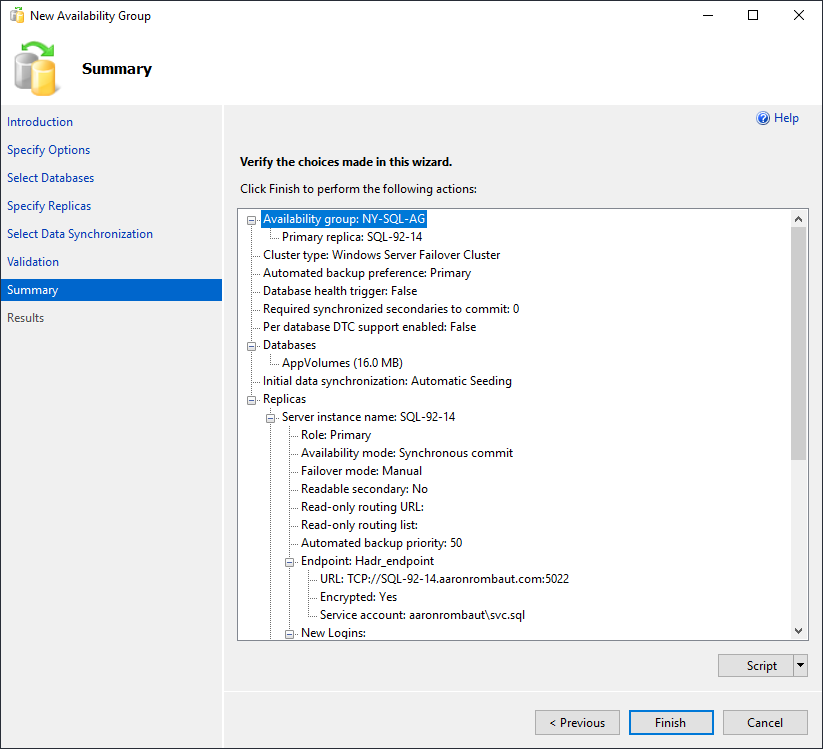
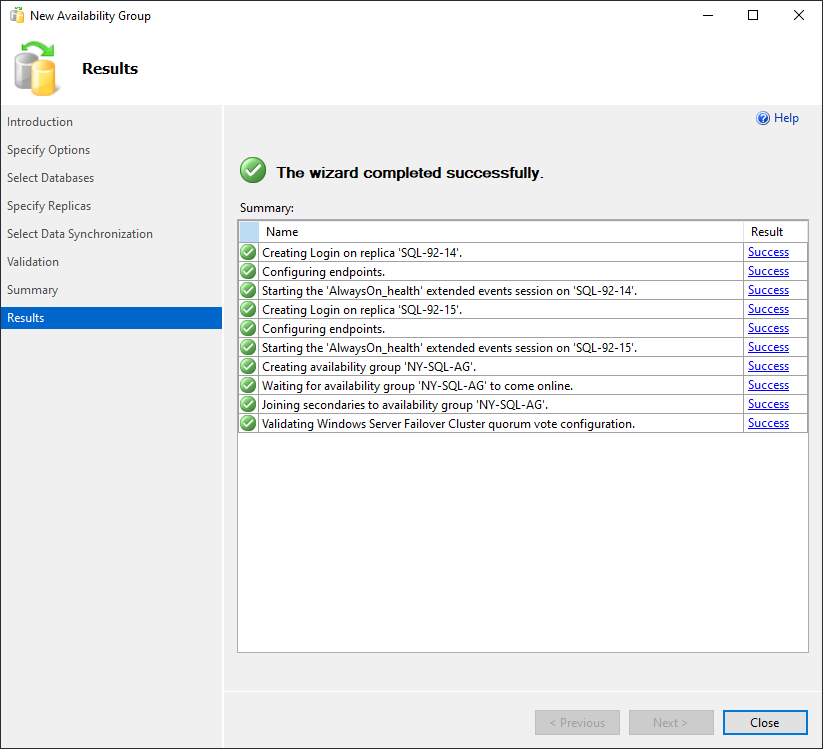
The Summary screen displays. Review and go back to alter any settings as needed. Click Finish when ready.
After a few moments, the Results window will display. Click Close when ready.
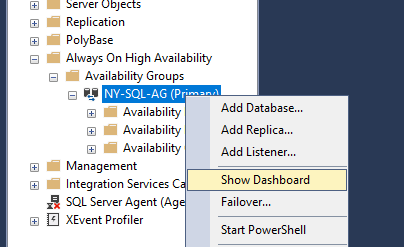
Right-click on the database under the Always On High Availability menu item and choose Show Dashboard. Review the information and make changes if necessary.
Always On High Availability – Database Permissions
When trying to add computer permissions to a database that is participating in an Always On Availability Group as the replica, the following message may pop-up.

This is due to the database being in a read-only state. Only the Primary node in the group will have the active permissions.
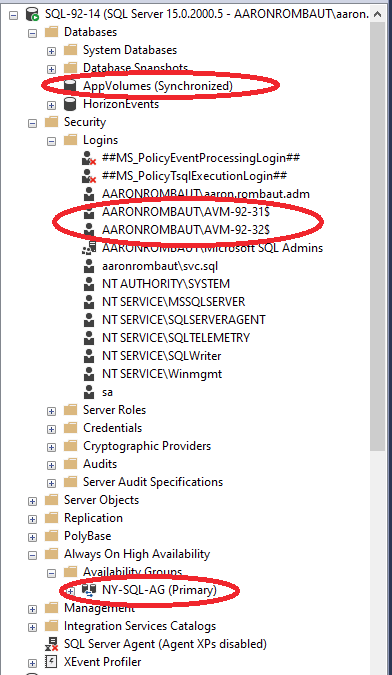
The Secondary in the group will not have active permissions on the objects. The account objects will have to be added to the Secondary node while it is active. This means a failover must take place! Only the Login objects have to be created, though. The database security table will already be aware of the permissions set for the login object, assuming the same object is used. (i.e. AARONROMBAUT\<computer name>$ exists on all Availability Group nodes)
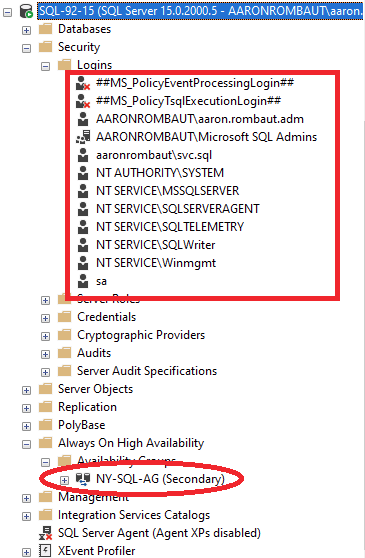
If the Availability Group gets failed over (only use SSMS to failover a SQL Server Always On High Availability group, not the Failover Cluster Manager) and the security objects are present on both node, then the database will be accessible.
Leave a Reply