While I was standing up VMware Cloud Foundation 9 in my lab, I was trying to configure it according to the layout in the Planning & Preparation Workbook. Unfortunately, I quickly realized that mapping the workbook to the UI required significant navigation due to nested and distributed settings. The screens are buried in the UI and some are multiple layers deep. This post provides a 1:1 mapping so the configuration can be achieved with less stress.
Scope
This post maps key items from the VCF 9.0.2 Planning & Preparation Workbook to their exact UI locations in VCF Operations and other components.
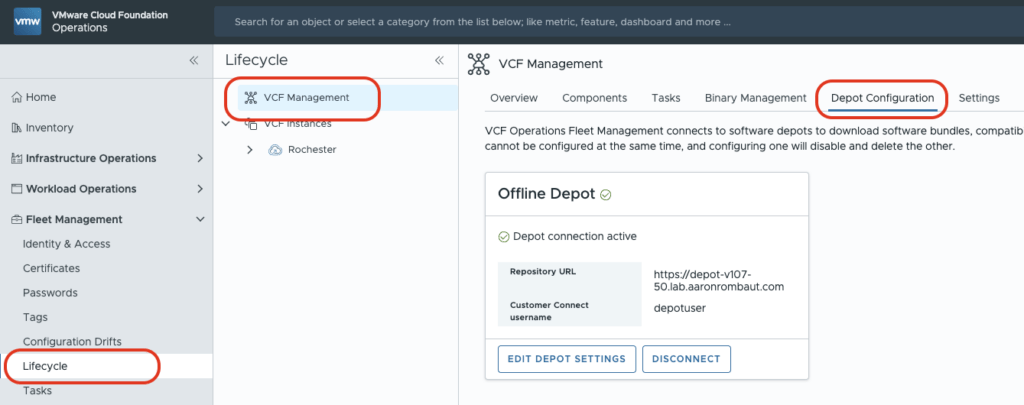
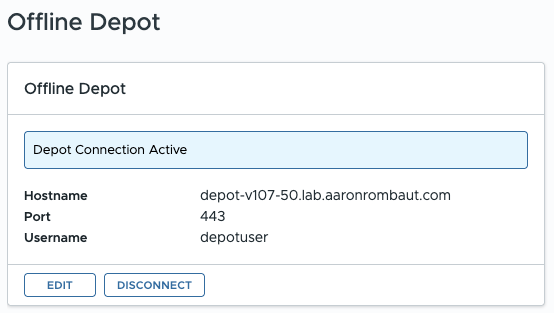
This is what an active configured depot will look like after configuring an Offline Depot.
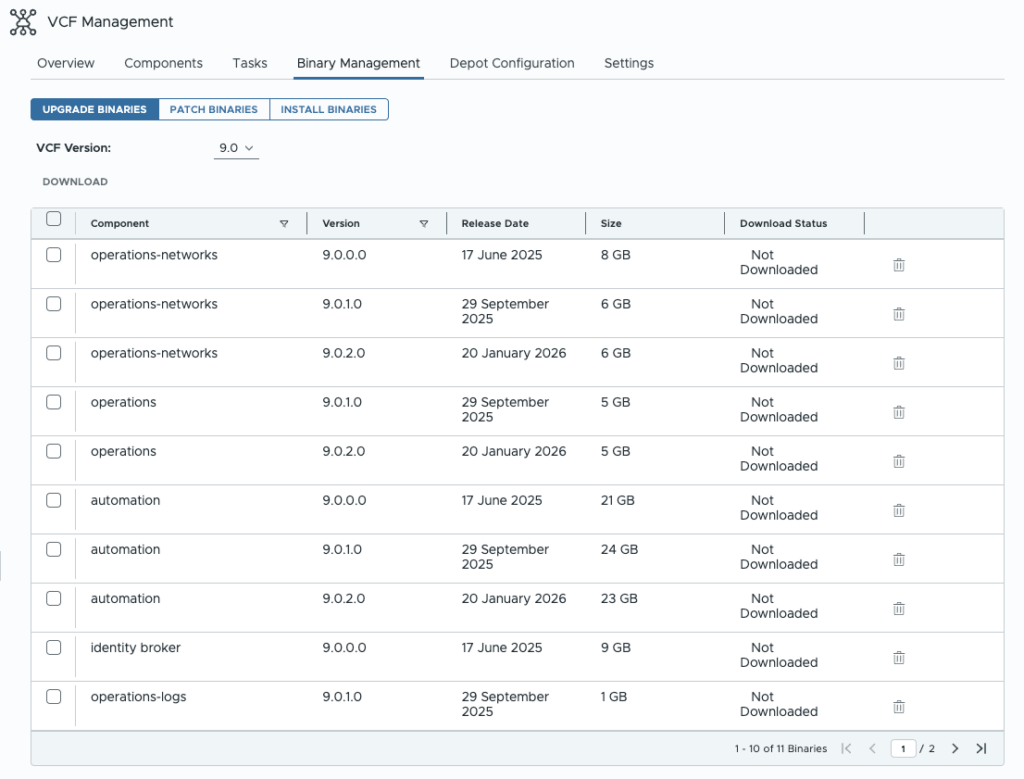
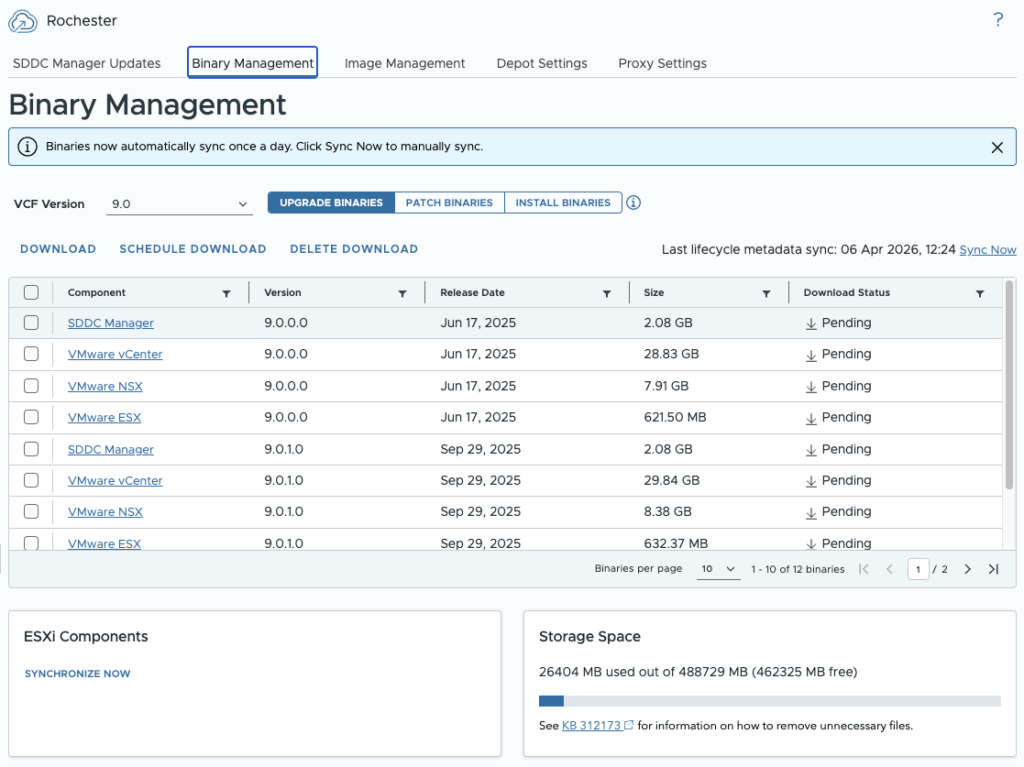
Now, the Binary Management tab will be populated. Upgrade Binaries, Patch Binaries, and Install Binaries can now be managed.
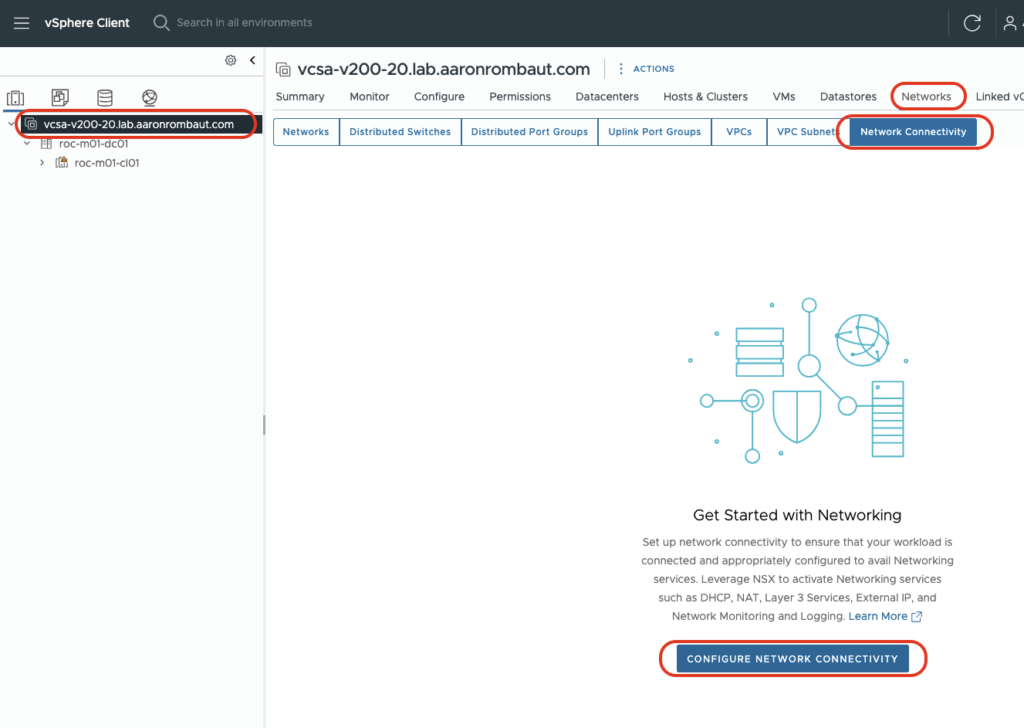
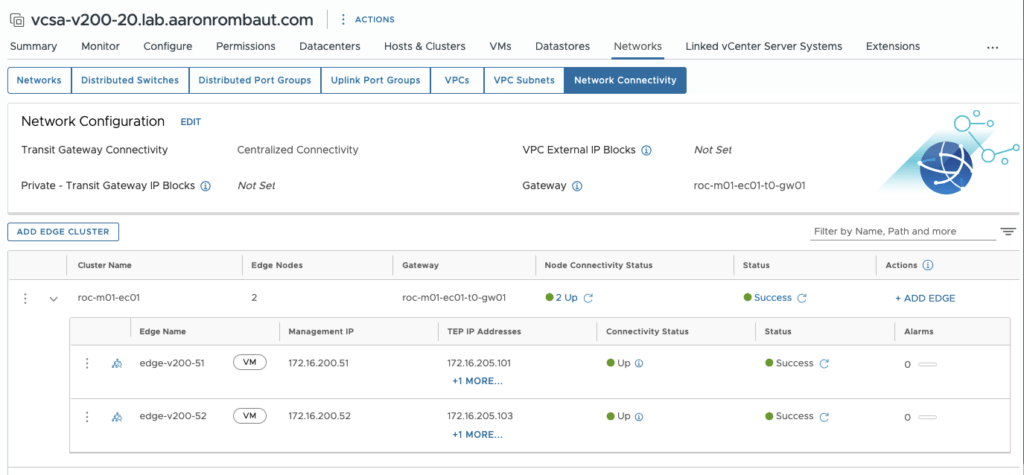
NSX Routing for Management Domain {vCenter}
This is a drastic change from previous versions of VCF where SDDC Manager accomplished this. I was also surprised to see this was integrated into vCenter and not part of an NSX Manager workflow.
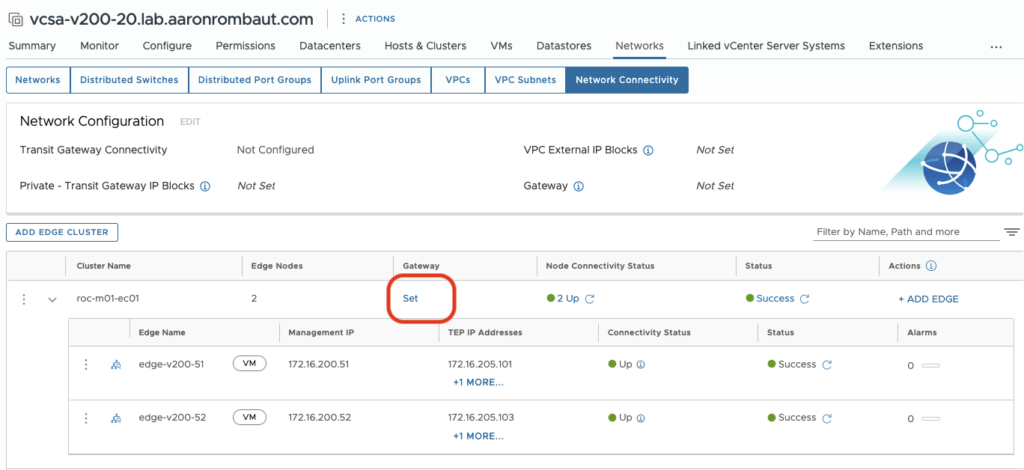
If the gateway and routing configuration was skipped, the edge nodes can still be deployed. In this case, the next screen shows where an Edge Cluster has been configured, but the gateway and routing has not. This can be configured even if upstream BGP has not been configured yet. Select Set to get a new wizard to complete.
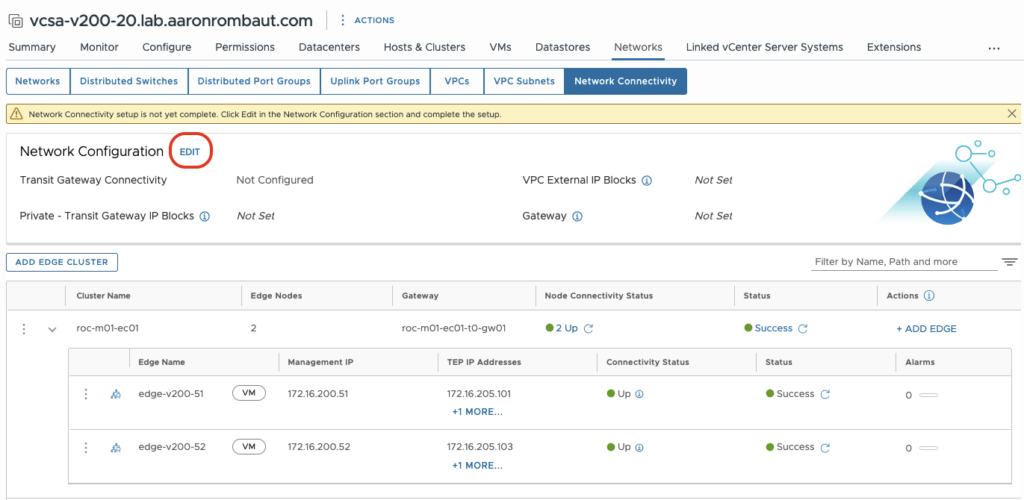
Now that the Edge Node gateway and uplinks have been prepared, the last step is to actually configure the gateway for use. Select Edit to set the gateway.
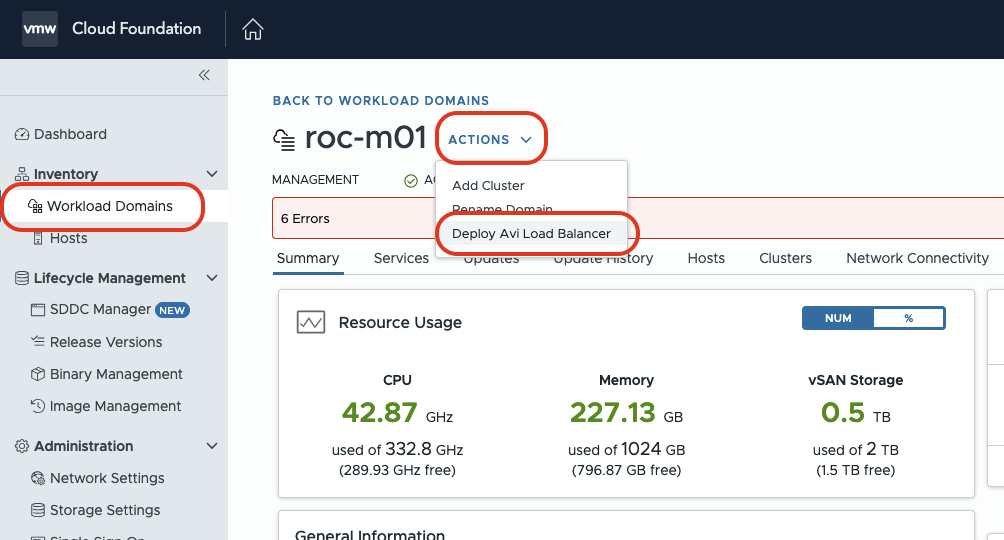
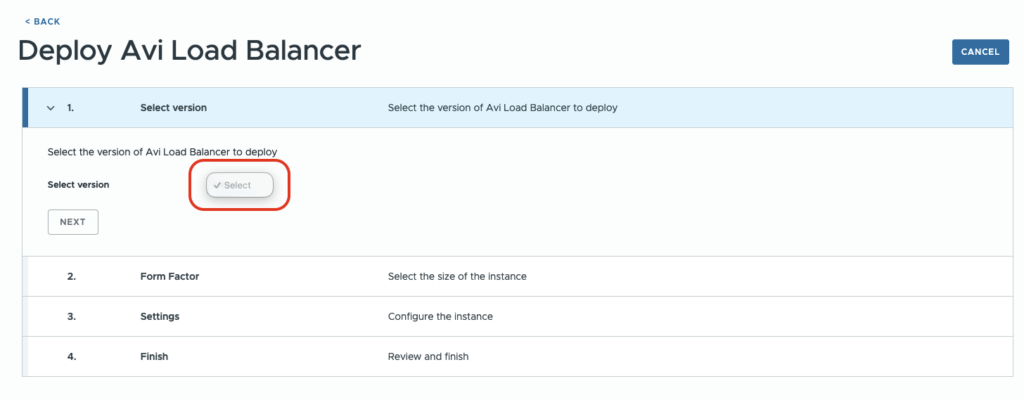
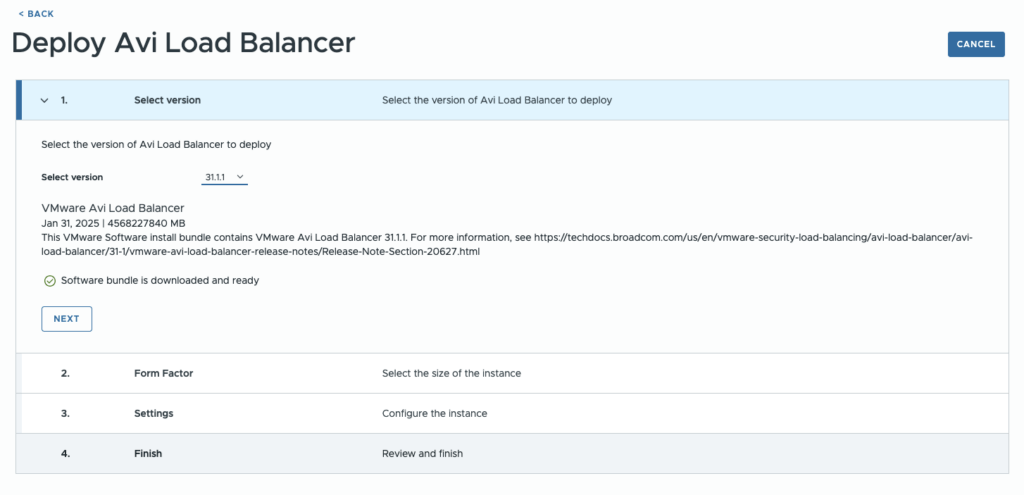
If your installation is like mine, this workflow will likely appear incomplete. For instance, just trying to select the version to install is blank and there is no quick help to resolve.
According to the documentation:
The Avi bundle must be uploaded before Avi deployment can proceed.
Uploading the bundle is a manual CLI process. However, you can use a helper script to assist with the manual steps. You should run either the helper script or the manual tasks, but not both.
The acceptable versions of the Avi Controller can be found in the pvc.json file. As of this writing, the acceptable versions from the file are listed below. The version highlighted is the only compatible version with VCF 9.
controller-22.1.6-9191.ova
controller-22.1.7-9093.ova
controller-31.1.1-9122.ova
controller-31.1.2-9193.ova
controller-31.2.1-9148.ova
Just because a version is available, however, doesn’t mean it can be used. The version still has to be compatible with the other solutions that are deployed. Be sure to check out the Product Interoperability Matrix, otherwise you may encounter this:
The following files need to be downloaded from the Avi Networks GitHub (yes, I am serious):
pvc.json – Product Version Catalog file
pvc.sig – Product Version Catalog signature file
vcf_tools.sh – A helper script
If you are not on a system that can run BASH shell scripts, then you will need to move the files to an appropriate system; the helper script method likely will not work for you. In that case, you can manually upload the files.
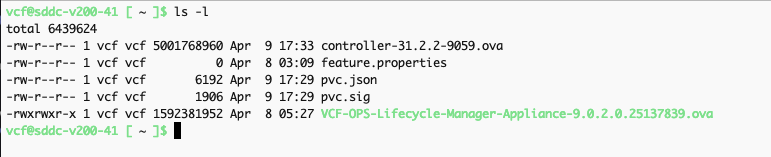
First, use SCP to copy the pvc.json, pvc.sig, and controller-<version>.ova files to the SDDC Manager appliance:
Next, create an SSH session on the SDDC Manager appliance with the vcf account.
Make a new avi directory and move the three files into it.
mkdir avi
mv controller-<version>.ova pvc.* avi/
The next steps are done on the CLI of the SDDC Manager appliance, but they are just API calls. If you are more comfortable using another tool, like Postman, it will accomplish the same thing.
You can monitor the upload from the Tasks pane in SDDC Manager.
Once the Task shows Successful, it is safe to remove the files from the /home/vcf/ directory.
rm -rf /home/vcf/avi
Unfortunately, there won’t be a way to verify that the product binary was uploaded or is available from the UI that I could find. However, when going back to deploy the load balancer, there is now something there to select! Dang, that was a lot of work to get a usable product binary!
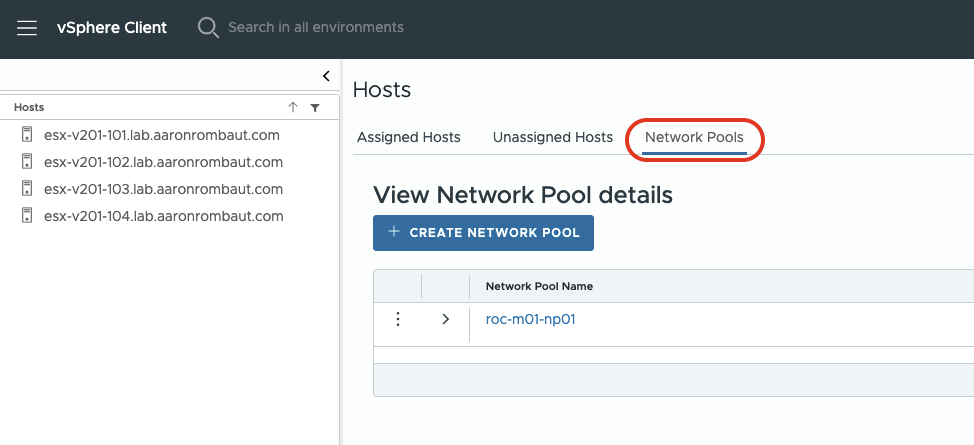
Create Network Pool {vCenter}
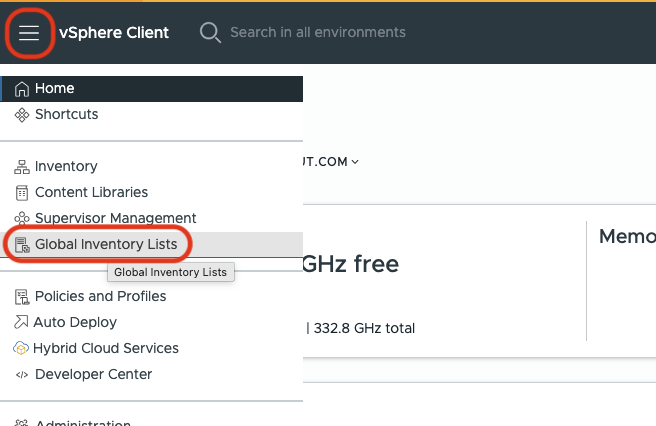
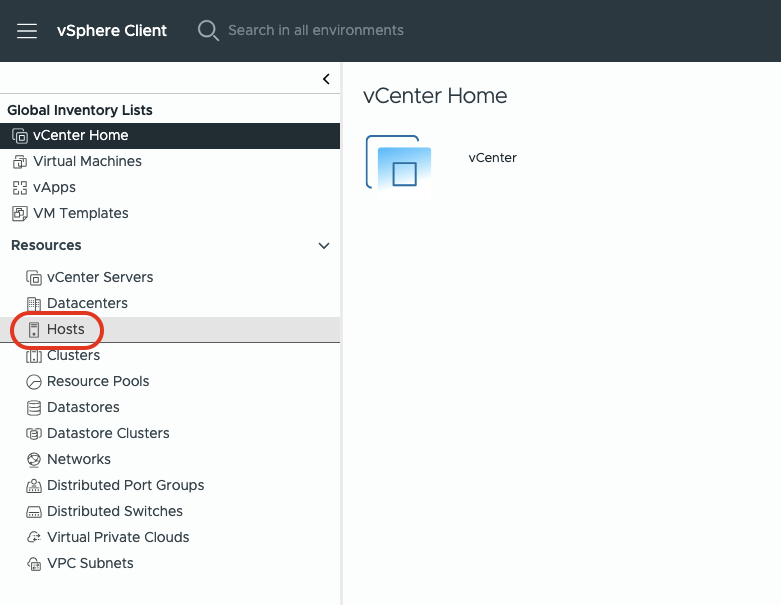
UI Location: vCenter > Menu > Global Inventory Lists > Resources: Hosts > Network Pools
Conclusion
The Planning & Preparation Workbook defines the what, but not always the where.
Bridging that gap is where time is often lost—especially in a UI that spans multiple components and layers. By mapping each workbook item directly to its UI location, the process becomes far more predictable and repeatable.
This approach reduces guesswork, shortens deployment time, and makes the transition from lab to production far more efficient.





Leave a Reply