Overview
While VMware by Broadcom is a thing and Workspace ONE Access is supposedly the new name for VMware Identity Manager, you will find the Easy Installer still refers to it as VMware Identity Manager. So while there are many identity crises happening, the one crisis this post will illustrate is how to deploy the Lifecycle Manager as well as a clustered VMware Identity Manager instance.
Prerequisites
First thing to mention, I am running HAProxy on my pfSense firewall for my load balancer. A load balancer is required before trying to build out the VMware Identity Manager cluster, but not for an individual appliance. So if you are starting a project and want to hit the ground running before having a clustered VMware Identity Manager, you can deploy a single node during the initial install. Speaking of cluster, five addresses in the same subnet will actually be required for this cluster.
Address 1: Virtual IP (VIP) Address
Address 2: Node 1
Address 3: Node 2
Address 4: Node 3
Address 5: Delegate IP (for PostgreSQL database)
So yes, you are probably asking, “Where does it say they have to be in the same subnet?” Well, that’s a great question! While it does not say that in the documentation, it does provide the following…
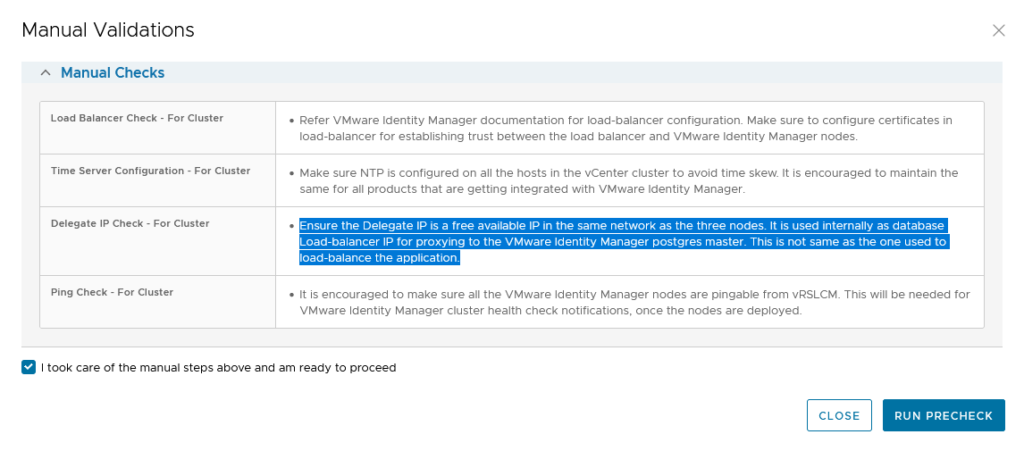
The delegate IP address is used internally as a proxy to postgres master (primary). It should be a free or an available IP address. This is not same as the IP address used to load-balance the application.
Since there is only one network interface card (NIC) attached to the virtual machines, a delegateIP address will be assigned to the eth0 network interface of the primary node. There will still be a load balanced IP address as well, for the actual load balancer.
When deploying the Identity Manager cluster, a Manual Validations window will open up. This is the only place I have found where there is any mention of the Delegate IP having to be on the same network.
HAProxy
Going back to the load balancer, obviously mileage may very on usage and configuration. In my lab, I chose to use HAProxy since it is cheap (free) and effective. I will paste the configuration here for reference.
# Automaticaly generated, dont edit manually.
# Generated on: 2024-04-09 05:21
global
	maxconn			50
	stats socket /tmp/haproxy.socket level admin  expose-fd listeners
	uid			80
	gid			80
	nbthread			1
	hard-stop-after		15m
	chroot				/tmp/haproxy_chroot
	daemon
	server-state-file /tmp/haproxy_server_state

listen HAProxyLocalStats
	bind 127.0.0.1:2200 name localstats
	mode http
	stats enable
	stats refresh 5
	stats admin if TRUE
	stats show-legends
	stats uri /haproxy/haproxy_stats.php?haproxystats=1
	timeout client 5000
	timeout connect 5000
	timeout server 5000

frontend vidm-frontend
	bind			172.30.1.150:443 name 172.30.1.150:443
	mode			tcp
	log			global
	timeout client		30000
	default_backend vidm-backend_ipvANY

backend vidm-backend_ipvANY
	mode			tcp
	id			100
	log			global
	stick-table type ip size 50k expire 30m
	stick on src
	balance			roundrobin
	timeout connect		30000
	timeout server		30000
	retries			3
	load-server-state-from-file	global
	server			vidm-1 172.30.1.151:443 id 101 ssl check inter /
1000  verify none
	server			vidm-2 172.30.1.152:443 id 102 ssl check inter /
1000 disabled verify none
	server			vidm-3 172.30.1.153:443 id 103 ssl check inter /
1000 disabled verify none
I have the virtual IP (VIP) address configured on my DNS server, as well as the three individual nodes. The delegateIP address does not need to be in DNS. Basically, what is going to happen is when the user requests the VIP, DNS will point to the load balanced address and then the load balancer will proxy the traffic to an available node depending on policy (Round Robin, Static, Least Connections, etc.) For my implementation, I did not need to add a certificate on my front end; that is being handled by the appliance itself. Your load balancer may (likely will) require a different configuration. However, the traffic from my front end (the VIP) was sent to the backend (the individual nodes) and was instructed to encrypt.
Install VMware® Aria Suite Lifecycle
Start the installer by mounting the ISO and navigating to the appropriate folder for your architecture. The following images show the installation from Windows.
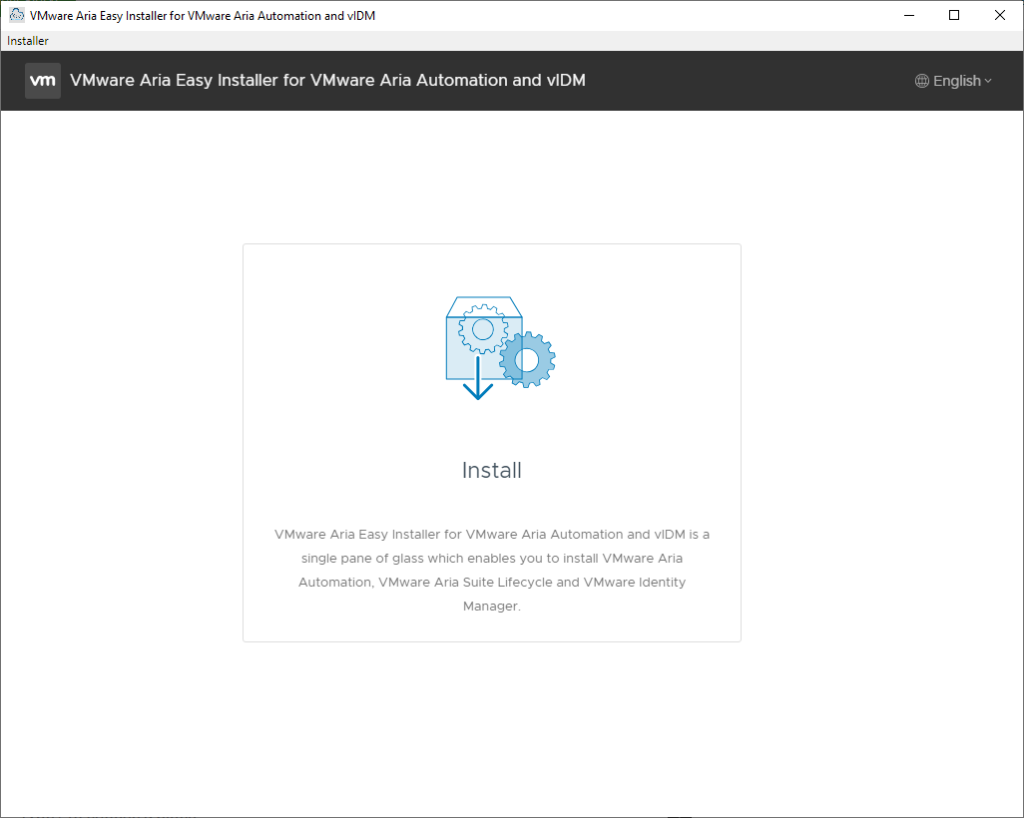
Click Install.

Click Next.

Select I accept the terms of the license agreement and decide whether to Join the VMware Customer Experience Improvement Program or not.
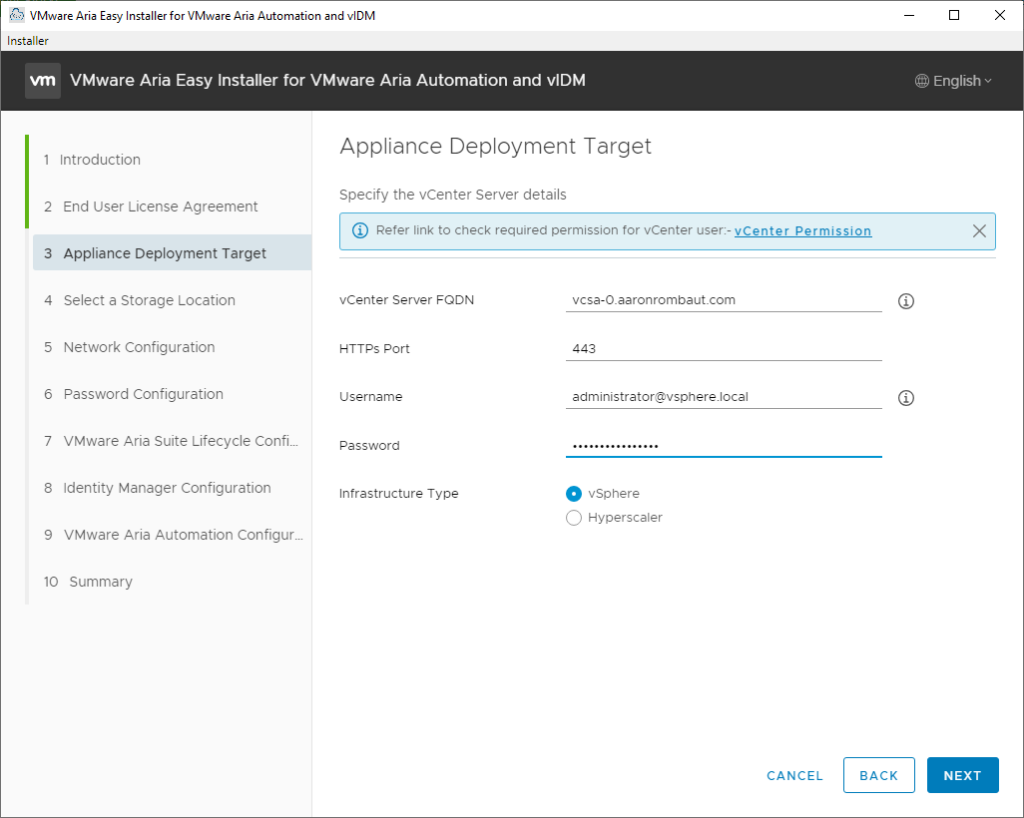
Provide the Appliance Deployment Target details as appropriate.

Click Accept to accept the Certificate Warning.

Select a Location to deploy to.

Select a Compute Resource to deploy to.

Select a Storage Location that will store all the appliances.
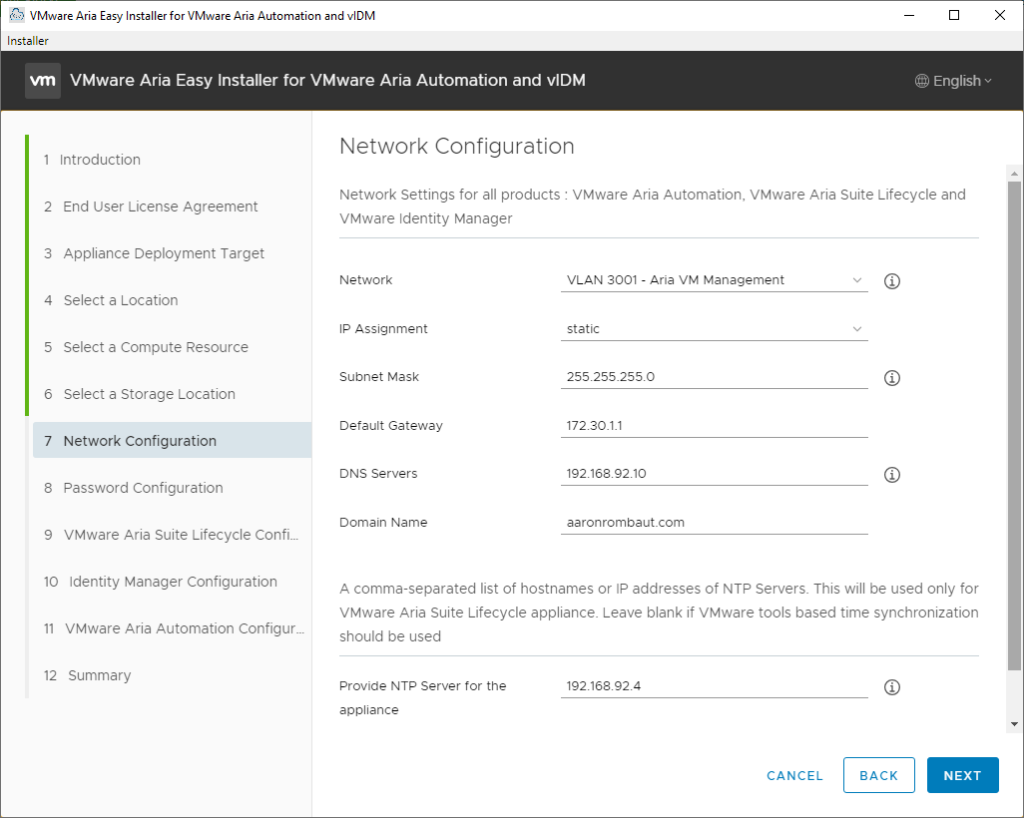
Provide appropriate Network Configuration details for your network. These settings are common for all the products.
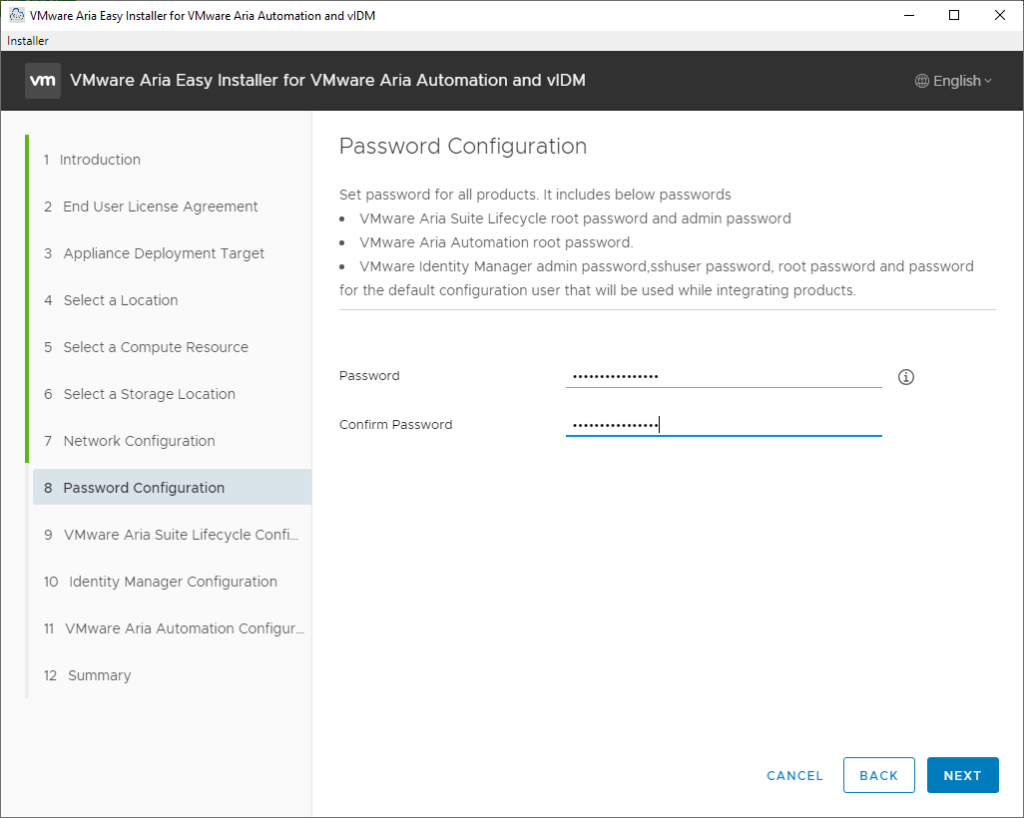
Provide a strong Password Configuration. This password will be used for the following accounts (depending on what gets installed):
Aria Automation – root
Aria Suite Lifecycle – admin; root
Identity Manager – default configuration manager user; admin; root; sshuser
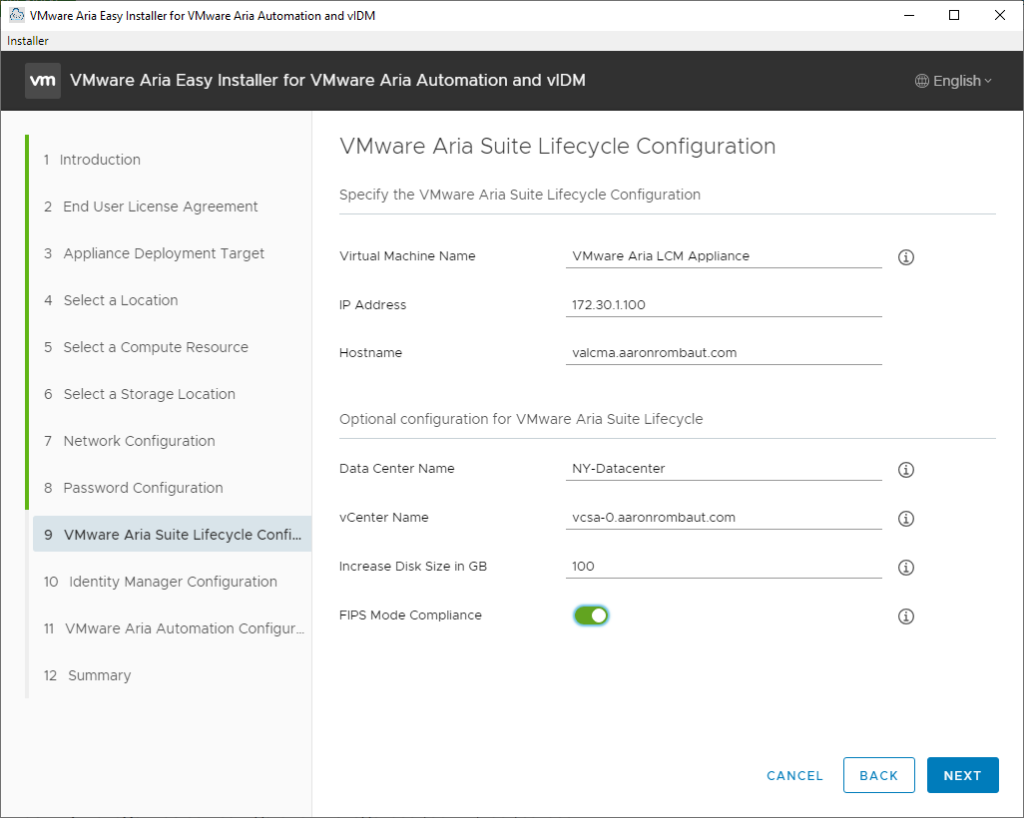
Provide details for the VMware Aria Suite Lifecycle Configuration. Additionally, Increase Disk Size in GB up to 100 GB and toggle FIPS Mode Compliance.
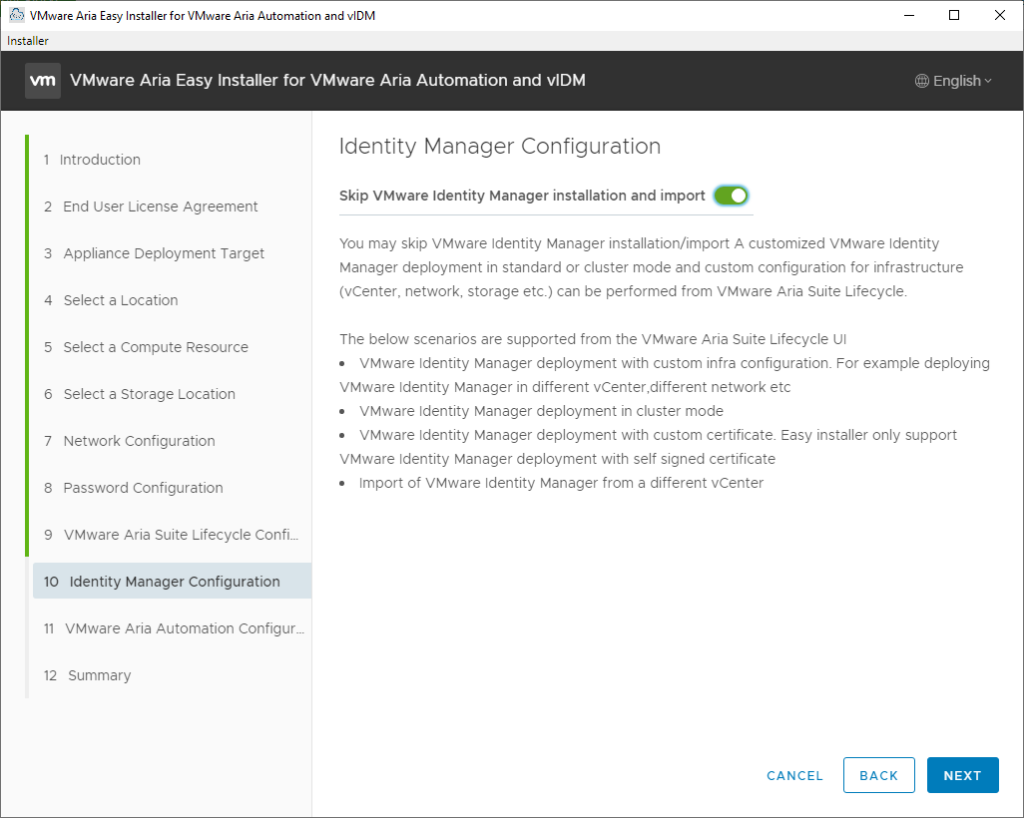
Toggle on Skip VMware Identity Manager installation and import. This will bypass the installation of a new appliance or import of an already existing appliance. We will build this out later.
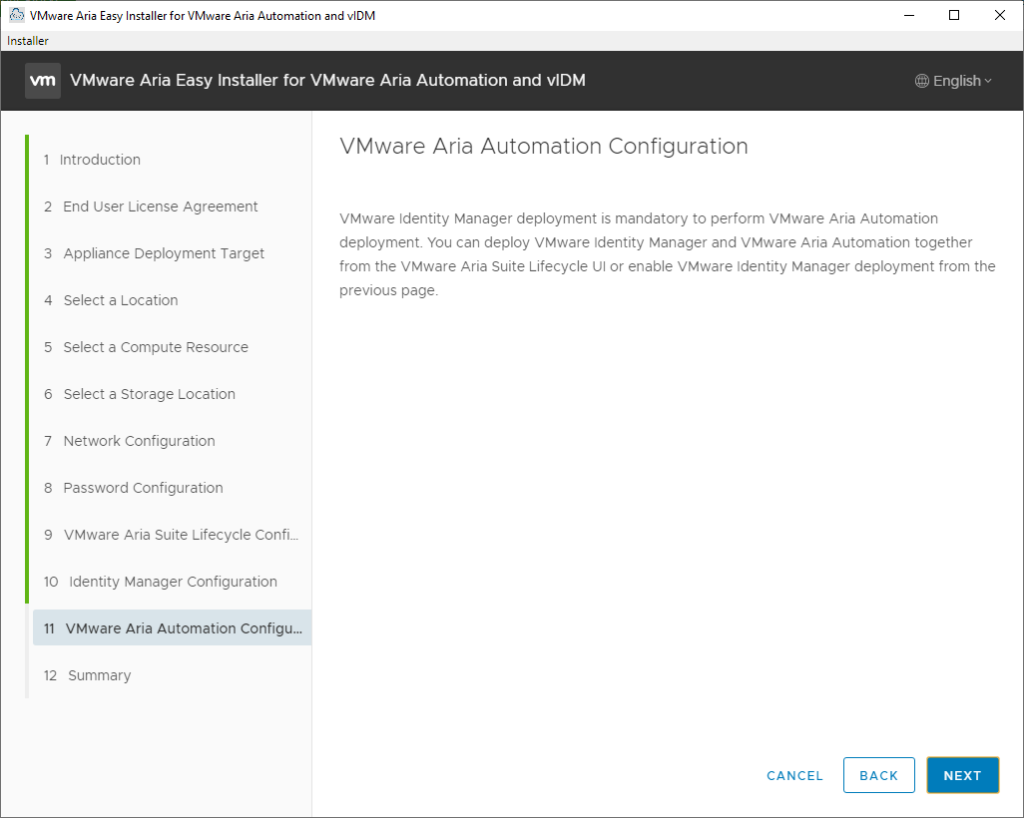
Since skipping the deployment of VMware Identity Manager previously, we are not able to deploy VMware Aria Automation. This can also be configured later, but will not be discussed in this post.

Review all the settings in the Summary. When ready, click Submit to start the deployment.
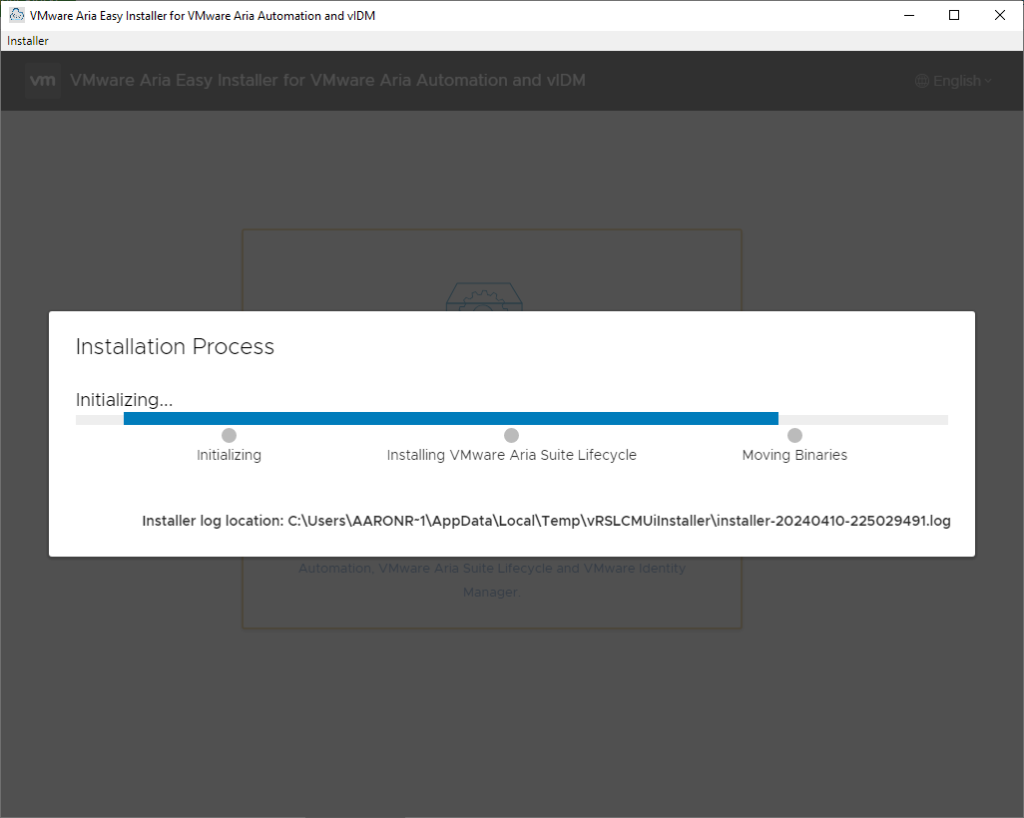
You can monitor the Installation Process and also view the log at the provided location.
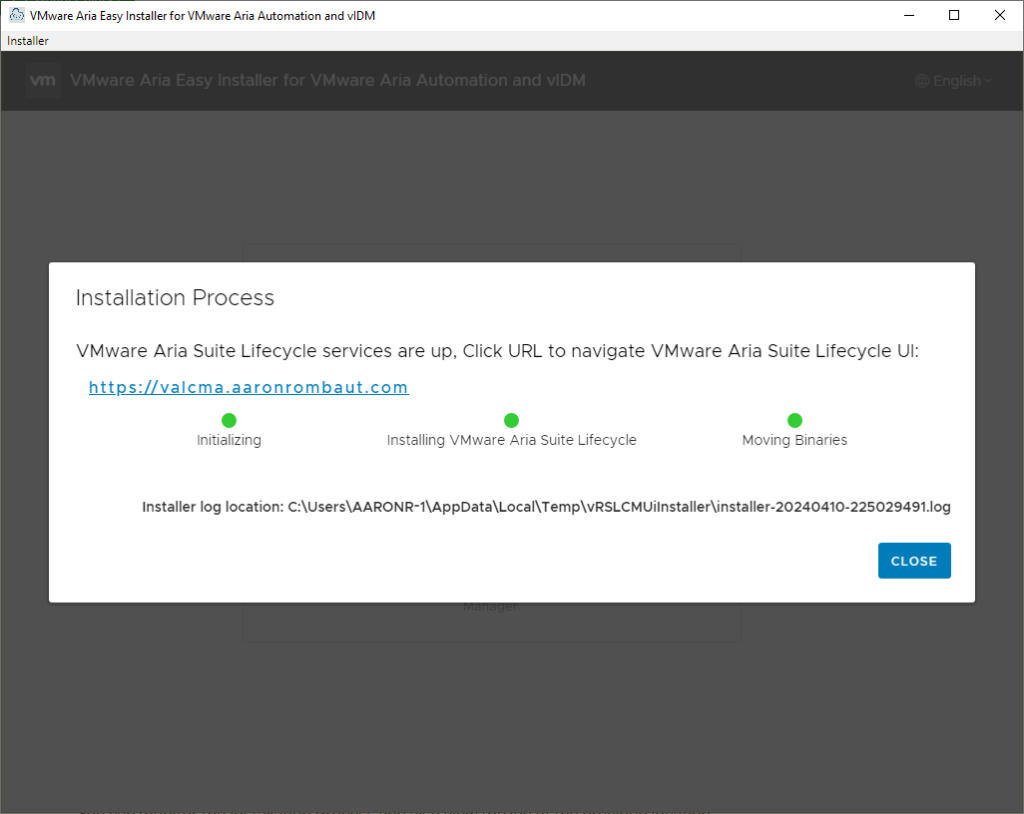
Click Close when the installation is complete.
Configure VMware® Aria Suite Lifecycle
Log into the Aria Suite Lifecycle appliance using the configured URL and navigate through the browser security.
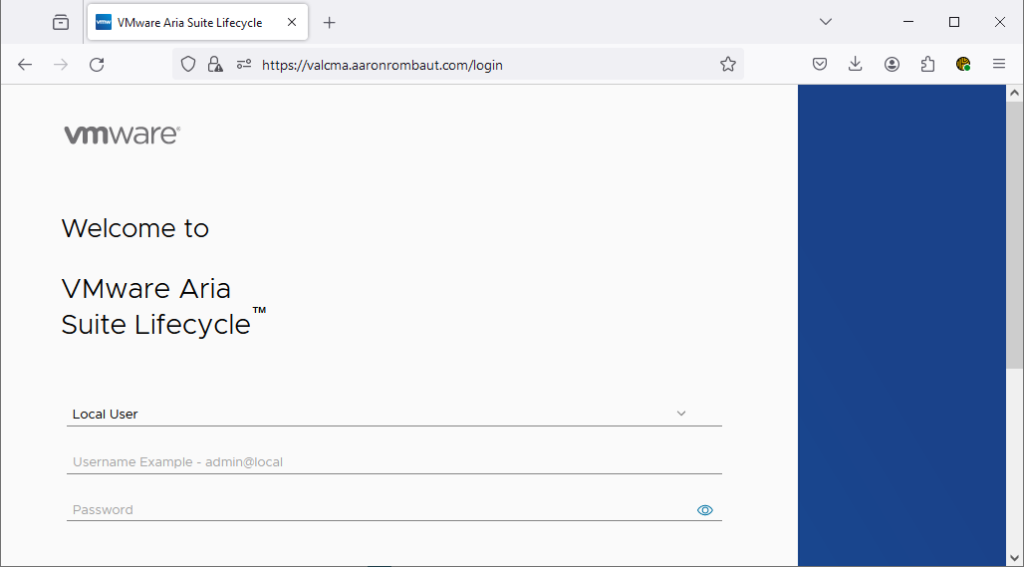
Log in with the admin@local user and the configured password. This will take you to the dashboard.

Certificates
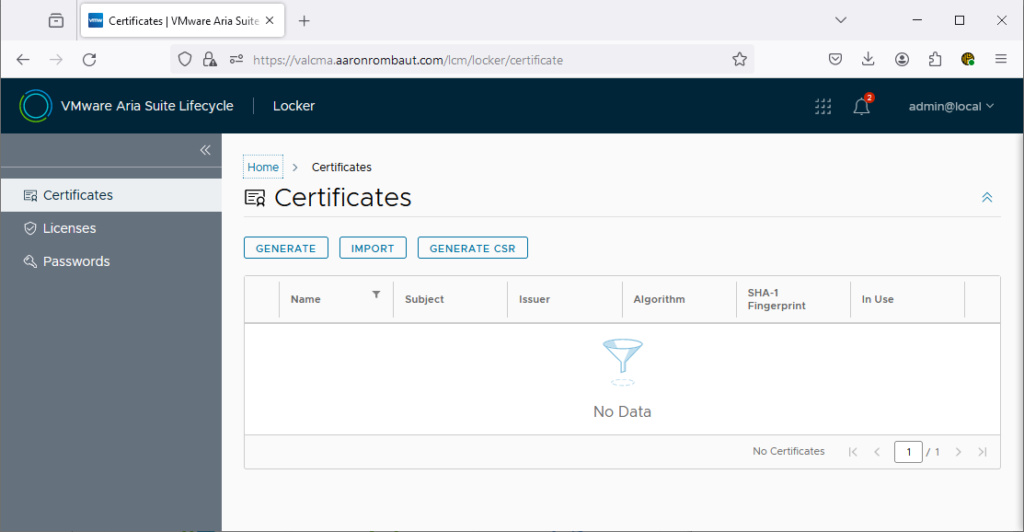
Click Locker so that we can configure the certificate for the appliance.
Go through the necessary steps for your organization to get the Aria Suite Lifecycle and Identity Manager certificates requested and signed by a certificate authority. For my lab, in the past, I have used a Windows Certificate Authority, pfSense, and also Let’s Encrypt. For this post, I am going to use Let’s Encrypt on my local pfSense with the Acme Certificates package.
The following is a breakdown of the Certificate Signing Request (CSR) fields I used.
Name: This is metadata and is not parsed. I use the fully qualified domain name.
Common Name (CN): This is the host name of the machine. In the case of Identity Manager, where there will be a virtual IP (VIP), the hostname of the VIP would be used for the Common Name field.
Organization (O): This is the name of the organization. I use my personal name since I am testing.
Organization Unit (OU): This would be the department or division. I use home or lab for testing.
Country Code (C): This is an Alpha-2 code as maintained here, https://www.iban.com/country-codes. I am in the United States, so I use US.
City/Locality (L): This field is the city for the organization and should not be abbreviated.
State/County/Region (ST): This would be the state where the organization is and should not be abbreviated.
Subject Alternative Name (SAN): This field provides space to enter additional names and representative IP addresses for the machine or service that this certificate will be applied to.
The following are examples of the two certificates I am going to request for each of the respective services being configured.
| Name | valcma.aaronrombaut.com |
| Common Name (CN) | valcma.aaronrombaut.com |
| Organization (O) | Aaron Rombaut |
| Organization Unit (OU) | Home |
| Country Code (C) | US |
| Locality (L) | Fairport |
| State (ST) | New York |
| Key Length | 2048 |
| Server Domain / Hostname | valcma.aaronrombaut.com, valcma |
| IP Address | 172.30.1.100 |
| Name | vidm.aaronrombaut.com |
| Common Name (CN) | vidm.aaronrombaut.com |
| Organization (O) | Aaron Rombaut |
| Organization Unit (OU) | Home |
| Country Code (C) | US |
| Locality (L) | Fairport |
| State (ST) | New York |
| Key Length | 2048 |
| Server Domain / Hostname | vidm.aaronrombaut.com, vidm, vidm-1.aaronrombaut.com, vidm-1, vidm-2.aaronrombaut.com, vidm-2, vidm-3.aaronrombaut.com, vidm-3 |
| IP Address | 172.30.1.150, 172.30.1.151, 172.30.1.152, 172.30.1.153 |
After you submit the Certificate Signing Requests for signing, you should have access to the certificates in either base-64 or as PFX files. I am going to get back base-64, so I will need to download the machine certificate, the key that corresponds to the certificate, and the chain of certificate authorities that signed the certificate.
Back in Aria Suite Lifecycle Manager, on the Locker page for certificates, I am going to Import the certificates.
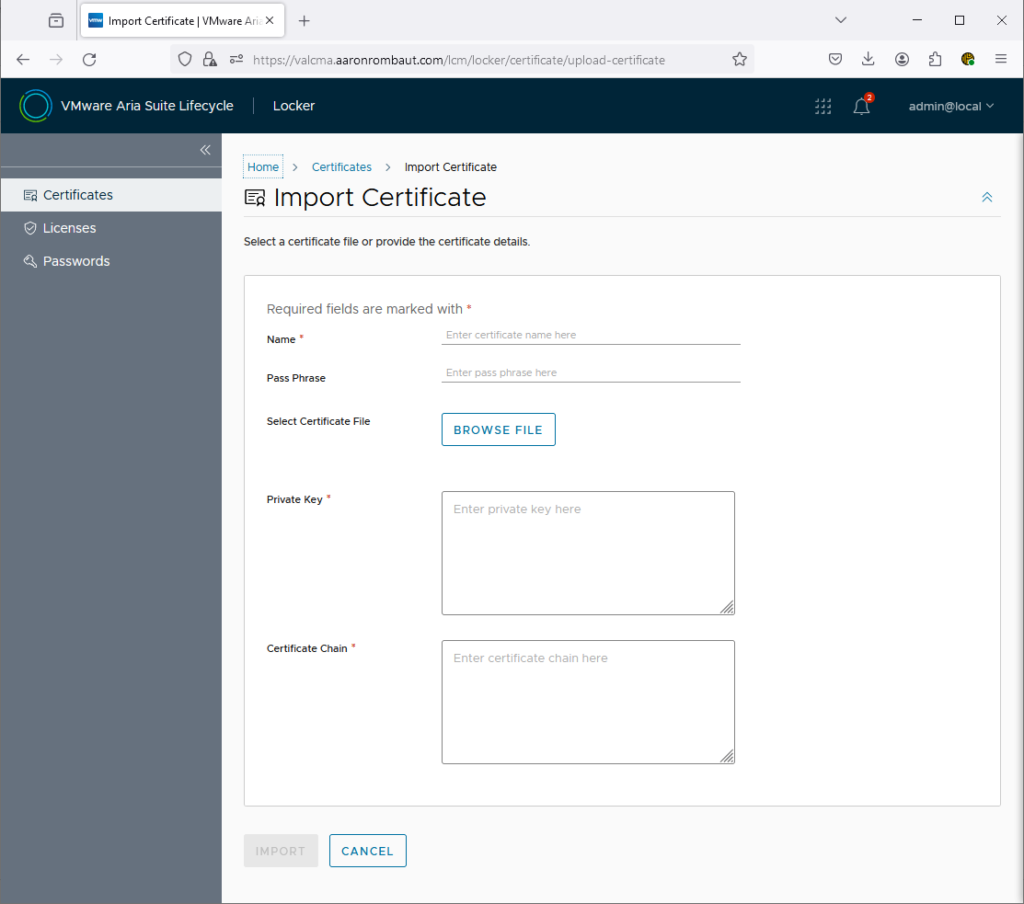
Enter a name for the certificate. I usually will use the fully qualified domain name as that also matches the Common Name (CN) for the certificate.
Open the private key file in a text editor and copy all the contents to paste into the Private Key box.
For the Certificate Chain, open the certificate file to view the certificate signing chain.
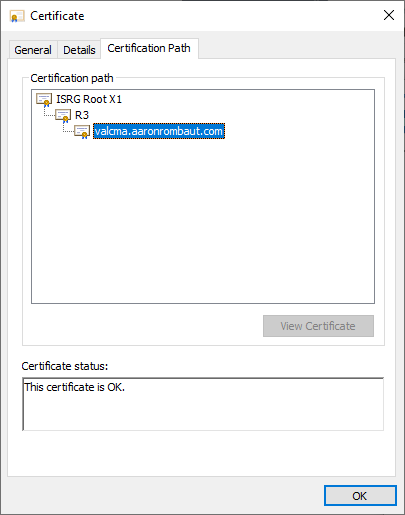
In the example above, we can see the Certification Path. We need to chain the files starting with the lowest level certificate followed by the rest of the chain.
The order will be valcma.aaronrombaut.com > R3 > ISRG Root X1.
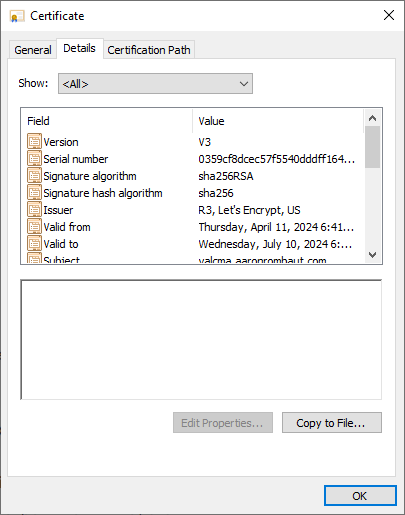
If you do not have the other certificates downloaded, you can find them from the Certificate Signing Authority where the certificate was signed, export them if they are already installed in your system (as indicated above, there is no red “X” over a certificate), or Copy to File… To Copy to Files, double-click on the necessary certificate and click the Details tab. You will see a Copy to File… button. Save the certificate so it is readily accessible.
Now, open all of these certificate files in a text editor so that they can be chained together. While chaining them together, in the order mentioned above, be sure to grab all of the contents, to include the Begin and End lines, including the hyphens. Below is an example of my Aria Suite Lifecycle certificate in Base-64.
-----BEGIN CERTIFICATE-----
MIIE+jCCA+KgAwIBAgISA1nPjc7Ff1VA3d/xZHH4pEfbMA0GCSqGSIb3DQEBCwUA
MDIxCzAJBgNVBAYTAlVTMRYwFAYDVQQKEw1MZXQncyBFbmNyeXB0MQswCQYDVQQD
EwJSMzAeFw0yNDA0MTExMDQxMjdaFw0yNDA3MTAxMDQxMjZaMCIxIDAeBgNVBAMT
F3ZhbGNtYS5hYXJvbnJvbWJhdXQuY29tMIIBIjANBgkqhkiG9w0BAQEFAAOCAQ8A
MIIBCgKCAQEAzFrU95by1XbxDgtwrGbUe0auh6QMuZDvr0xpXArgRvDxiQ6Ci2s6
hk7Wub36WgqgNhj7YMCwxzokJbzE3nZB66abMbB9Y+XMiRA12EPYaxoUmdjbzSCa
M+HS9DqITThwGG467Cfs0T1W9/+GuIYzellfRhXBVz169hrTJCcgt9kxCvPZJG8f
+DGlK6QHikAqfoGwhvbluag3A9vm42R343ZQhMI2QWaMur7rPPY40FimZ1Cbt7Vw
toYTxgTLbaV0SmSMGQC4CrbOboxtpC23BTPTd4qxW50jPDpJMPPttvPtQ02MWIeM
FlDHQ0eMabXnDPsM/GGe3XagIXku5+s7sQIDAQABo4ICGDCCAhQwDgYDVR0PAQH/
BAQDAgWgMB0GA1UdJQQWMBQGCCsGAQUFBwMBBggrBgEFBQcDAjAMBgNVHRMBAf8E
AjAAMB0GA1UdDgQWBBRKv+JEXKYBoJJLPCcipSafTNiS4DAfBgNVHSMEGDAWgBQU
LrMXt1hWy65QCUDmH6+dixTCxjBVBggrBgEFBQcBAQRJMEcwIQYIKwYBBQUHMAGG
FWh0dHA6Ly9yMy5vLmxlbmNyLm9yZzAiBggrBgEFBQcwAoYWaHR0cDovL3IzLmku
bGVuY3Iub3JnLzAiBgNVHREEGzAZghd2YWxjbWEuYWFyb25yb21iYXV0LmNvbTAT
BgNVHSAEDDAKMAgGBmeBDAECATCCAQMGCisGAQQB1nkCBAIEgfQEgfEA7wB2AEiw
42vapkc0D+VqAvqdMOscUgHLVt0sgdm7v6s52IRzAAABjsz2c48AAAQDAEcwRQIh
AOlCo0kqShWx29i2fGbwkTpt3QX5TzLUKYDYwZUN3L90AiBZ48+yuYiWfxGiQ9ux
cVu11lVep1X+z/9jRU1Z+BevfAB1ABmYEHEJ8NZSLjCA0p4/ZLuDbijM+Q9Sju7f
zko/FrTKAAABjsz2c6UAAAQDAEYwRAIgE5gLC8+FpRNlRiXI+qCwSXCr5G+4gCCm
f+tpbsvRN4YCIFO+63hYRrMrQiM7FR89DOHhFbWJD0RXrd8zZ/o89V6xMA0GCSqG
SIb3DQEBCwUAA4IBAQCprZWBLrlw+reAm7InF91io+PABR3OvavXhnJoSHVysxcd
8mIQgHYfzv9HBZI0A7i/ROccDyxFzF7YLYOvH0D3+RCVnepPFd6i/TrIvLqpuqxq
s7M/aNmFJXaWl6Thl0/uBsAYwmgW+oEKGDBWZv/EM4TUcBdXwnbhkFXdnA33V1MX
Aaq4K5MD8Fo+vdV+FN28WZxEdSBAMbmRxedABUVxdruuOFTn2OwBS1KqGpzG9Uth
lVyrqRFAAhpHX/qudz8k5ud1jBiUVV10ZVxRr0eQTTQZ8QbaXbkMkbY0RG2eVdXh
lhVjYVP6Q+6im6EGOjbvDwAoiM6xmTWxgWg/B6tj
-----END CERTIFICATE-----
Chain each certificate on it’s own, not next to each other, and with no extra blank lines. Below is an example of how the chained certificates will look in the text editor.
Aaq4K5MD8Fo+vdV+FN28WZxEdSBAMbmRxedABUVxdruuOFTn2OwBS1KqGpzG9Uth
lVyrqRFAAhpHX/qudz8k5ud1jBiUVV10ZVxRr0eQTTQZ8QbaXbkMkbY0RG2eVdXh
lhVjYVP6Q+6im6EGOjbvDwAoiM6xmTWxgWg/B6tj
-----END CERTIFICATE-----
-----BEGIN CERTIFICATE-----
MIIFFjCCAv6gAwIBAgIRAJErCErPDBinU/bWLiWnX1owDQYJKoZIhvcNAQELBQAw
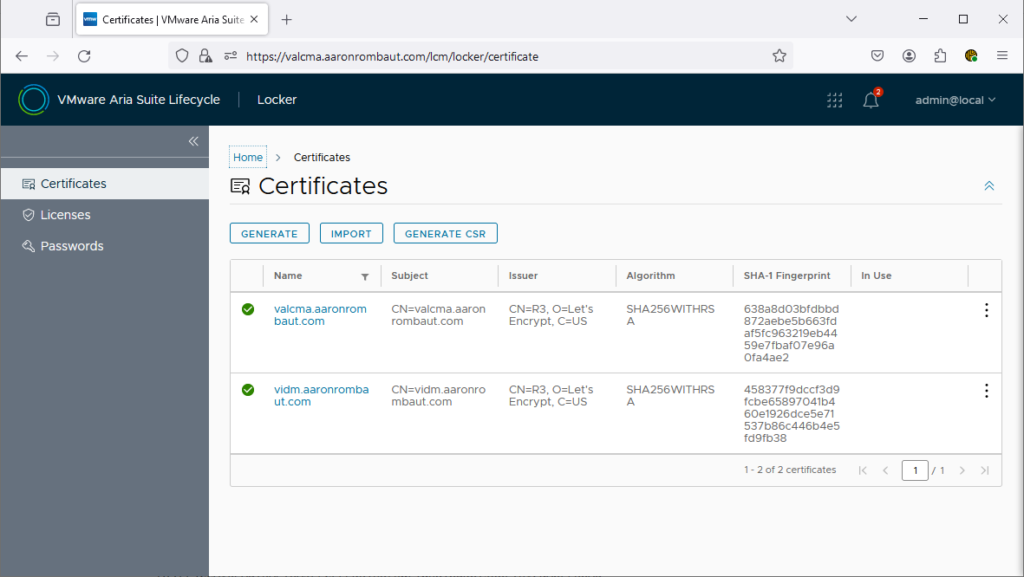
TzELMAkGA1UEBhMCVVMxKTAnBgNVBAoTIEludGVybmV0IFNlY3VyaXR5IFJlc2VhI added the Aria Suite Lifecycle Manager certificate as well as the VMware Identity Manager certificate to the Locker.
Deploy VMware Identity Manager Cluster
To deploy a new vIDM Cluster, a globalenvironment will need to be configured. To get to the Lifecycle Operations page, click the VMware Aria Suite Lifecycle banner in the top left corner and then the Lifecycle Operations card.
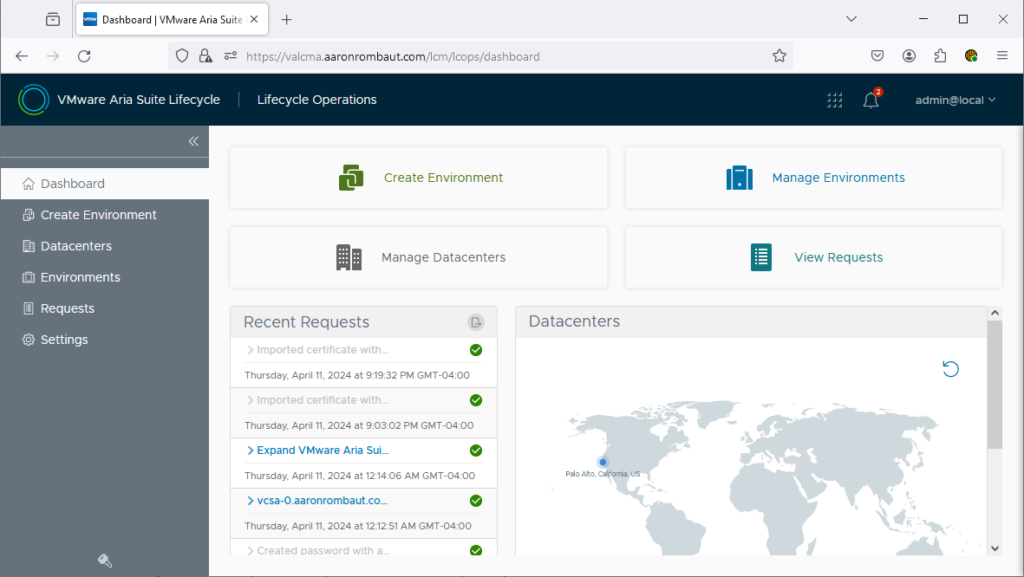
Click Create Environment to get started.
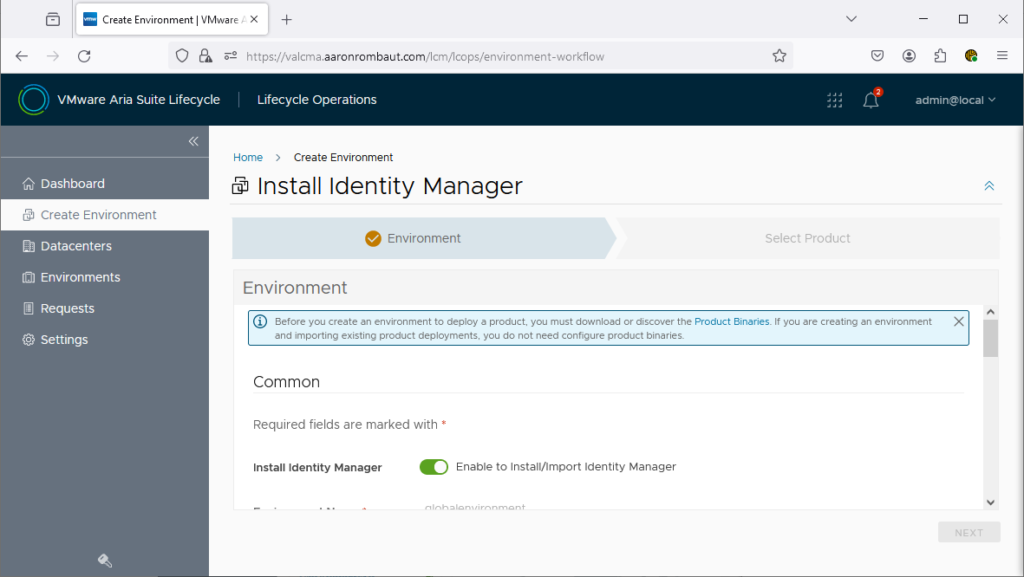
Toggle on Enable to install/import Identity Manager. The Environment Name will populate with globalenvironment. Add a description, if desired.
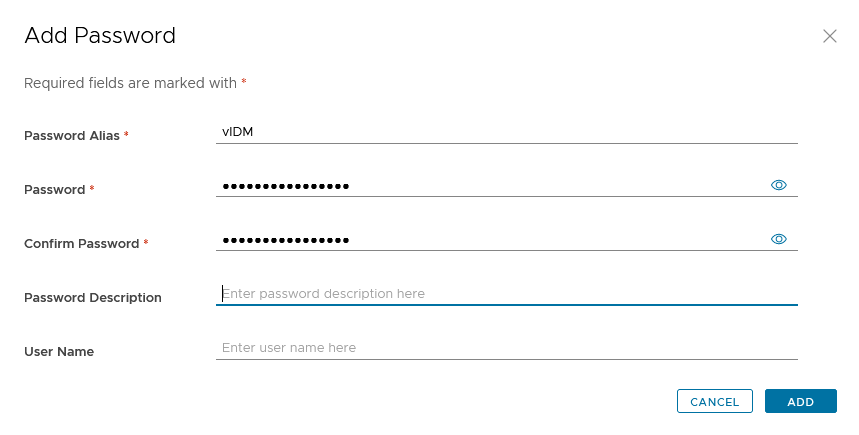
Next to the Default Password field, there is a plus sign in a circle. Click on the button to add a new password for Identity Manager. Click Add to return to the Install Identity Manager window.
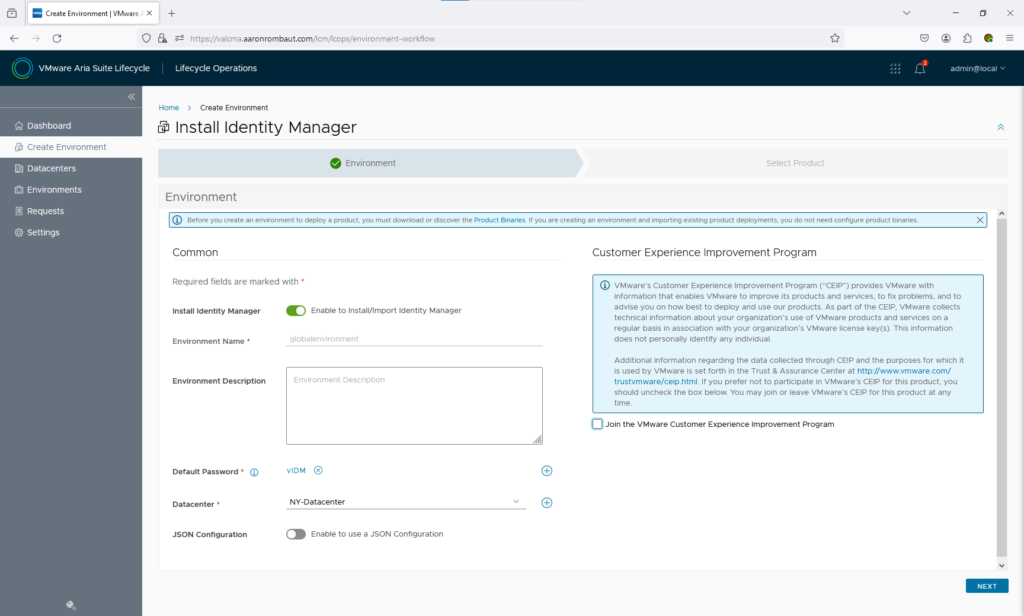
Select the new password that was just created and select the Datacenter to deploy to. Choose whether or not to Join the VMware Customer Experience Improvement Program.
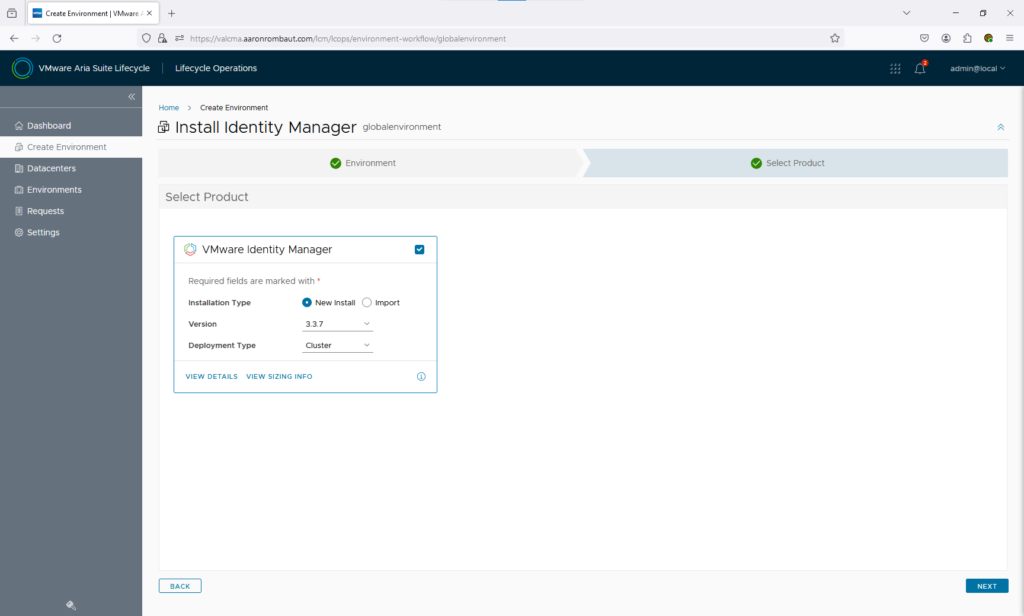
Choose the VMware Identity Manager product and select the Deployment Type to Cluster.
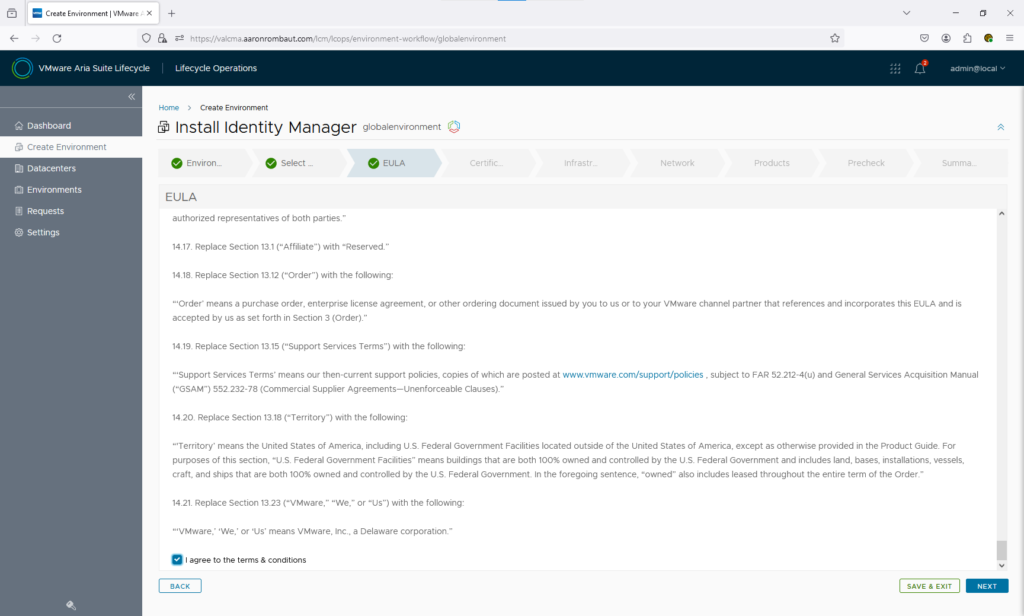
Scan through the EULA and select the checkbox, I agree to the terms & conditions.
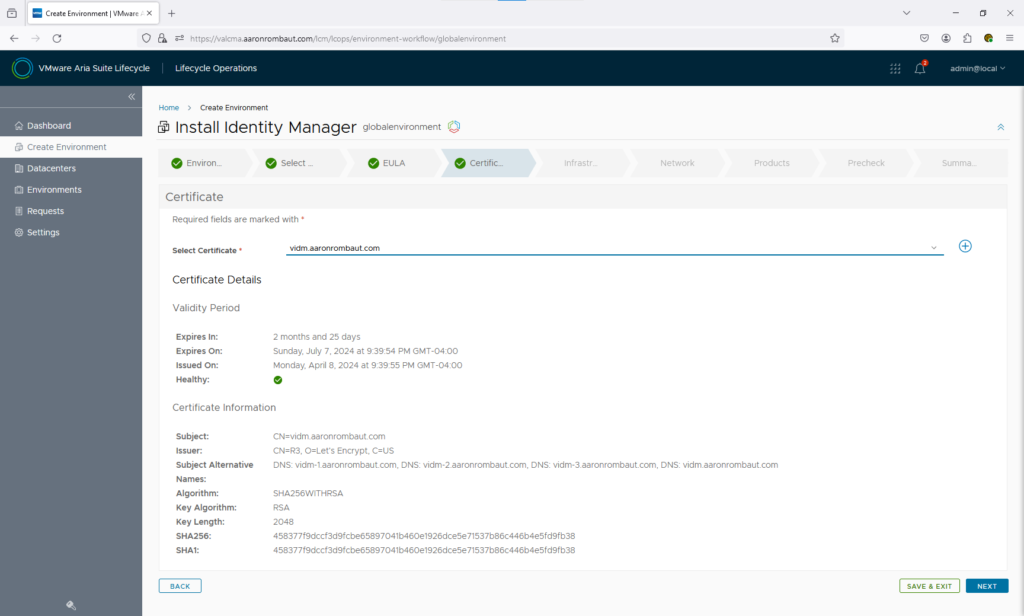
Choose the certificate that was created previously (or optionally create a new one by selecting the icon with the plus sign).
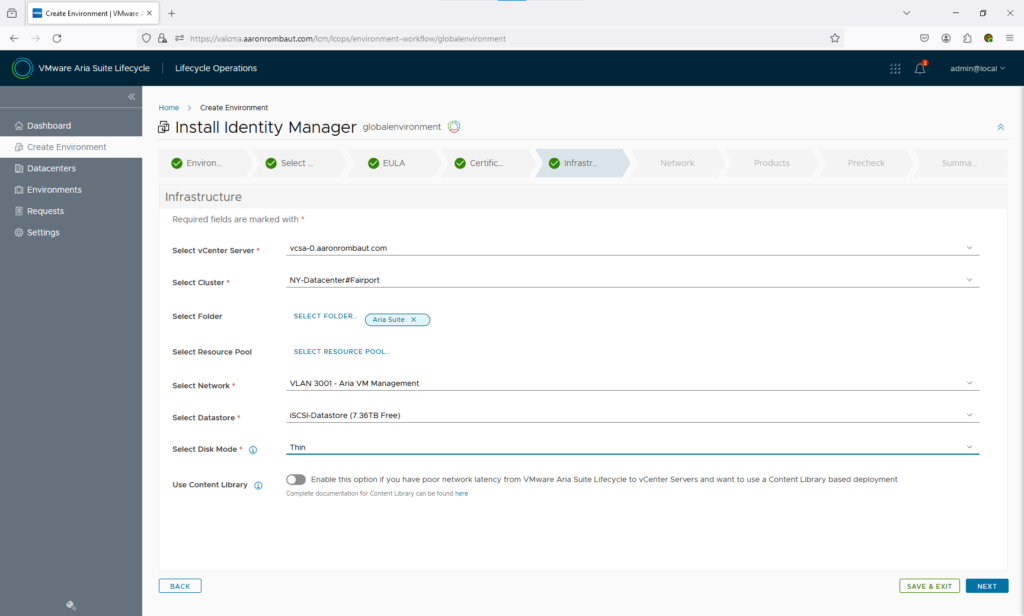
Configure the Infrastructure details as appropriate for your environment.
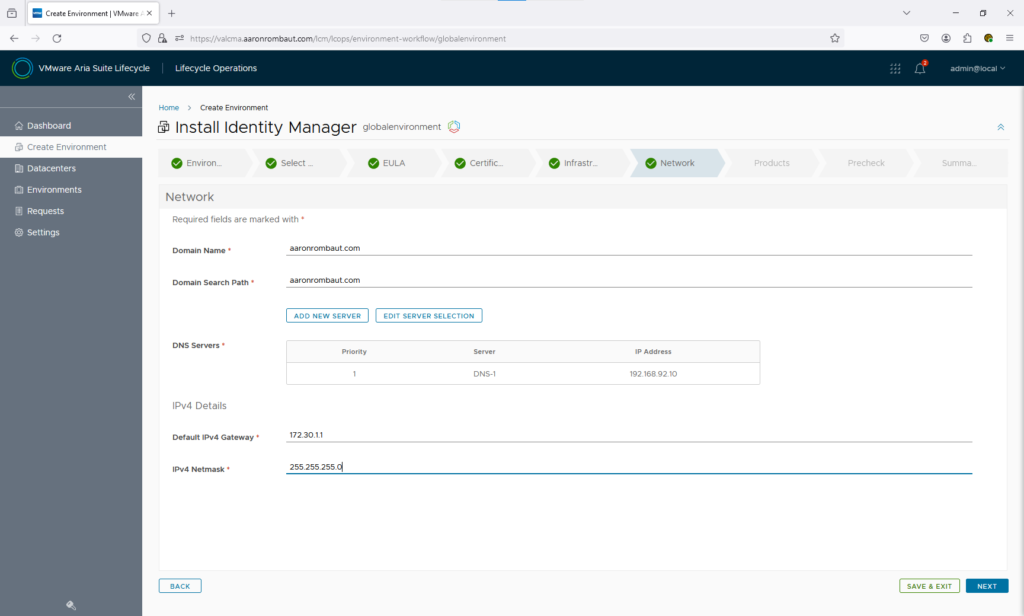
Configure the Network details as appropriate for your environment.
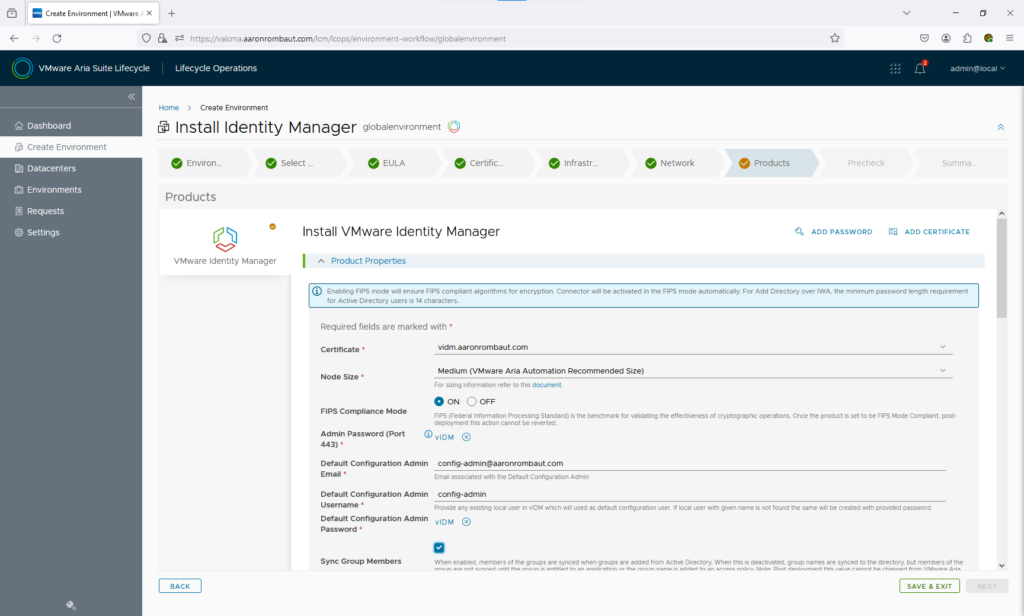
In the Product Properties on the Install VMware Identity Manager page, configure the required fields. Choose whether to enable FIPS Compliance Mode, noting that this cannot be changed in the future. For the Default Configuration Admin Username, choose a username (I chose config-admin). I also chose to Sync Group Members.
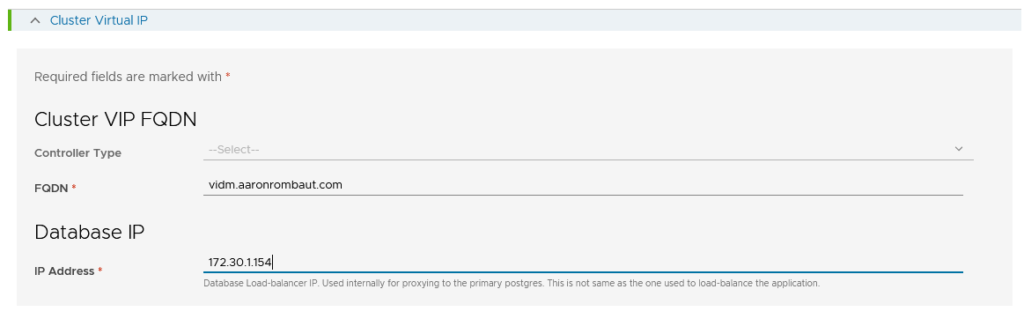
Further down the page is the Cluster Virtual IP details. Configure the Cluster VIP FQDN and Database IP. The FQDN should match the Common Name (CN) of the certificate being used. The Database IP is actually the Delegate IP address I mentioned at the beginning of this post. This is not the load balanced IP address.
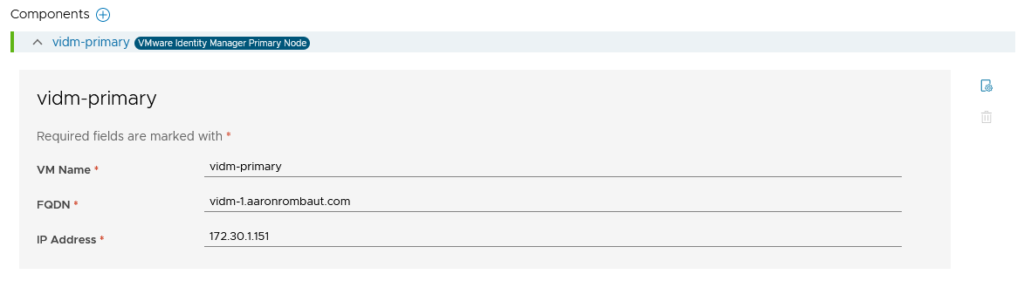
The rest of the page requests the VM Name, FQDN, and IP Address of the three individual nodes. The VM Name is what will be visible in the vCenter inventory, so configure according to your organization.
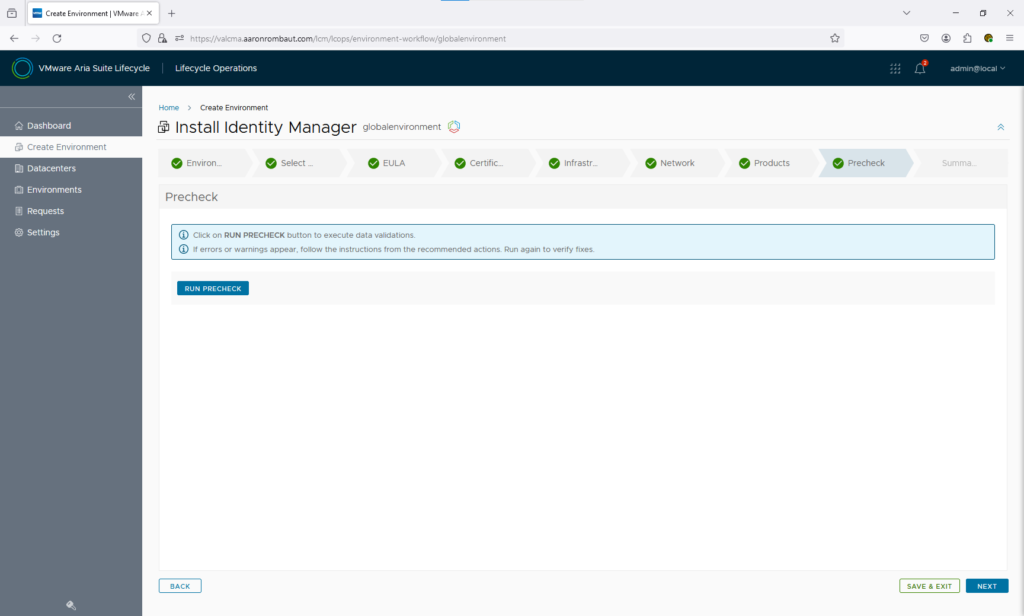
The next screen will be for a Precheck. This ensures (not guarantees) that all of the configured inputs will work with the environment and check that infrastructure details are configured correctly (IP addresses available, DNS configured). Select Run Precheck to run the precheck.
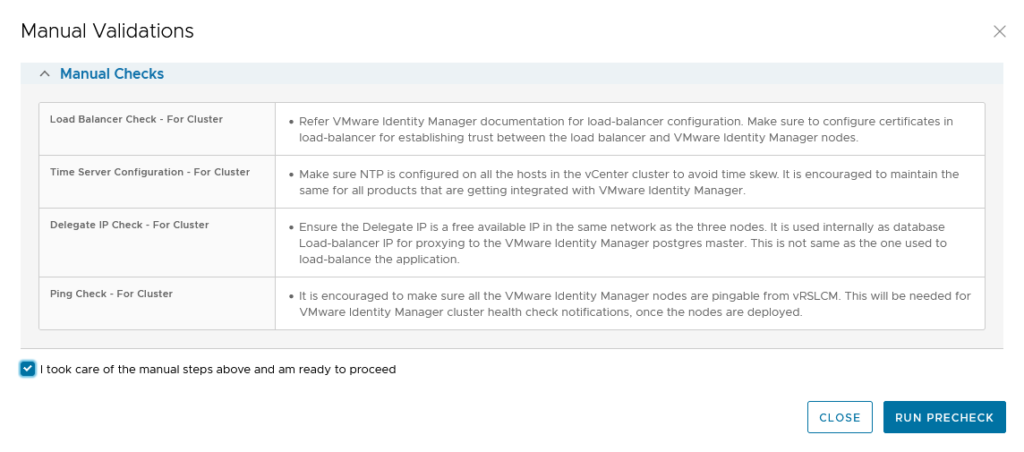
A Manual Validations window will pop up and provide an opportunity to configure or confirm the checks. Select the I took care of the manual steps above and am ready to proceed checkbox when ready. Select Run Precheck to start the actual precheck.
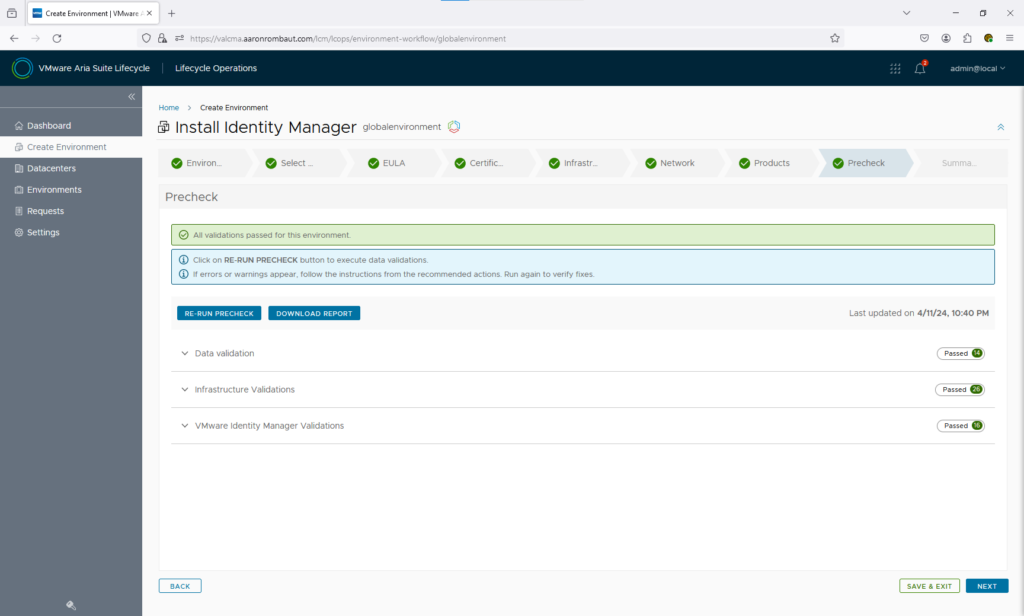
Review the results of the Precheck for any issues, if necessary. A report can also be downloaded for future reference.
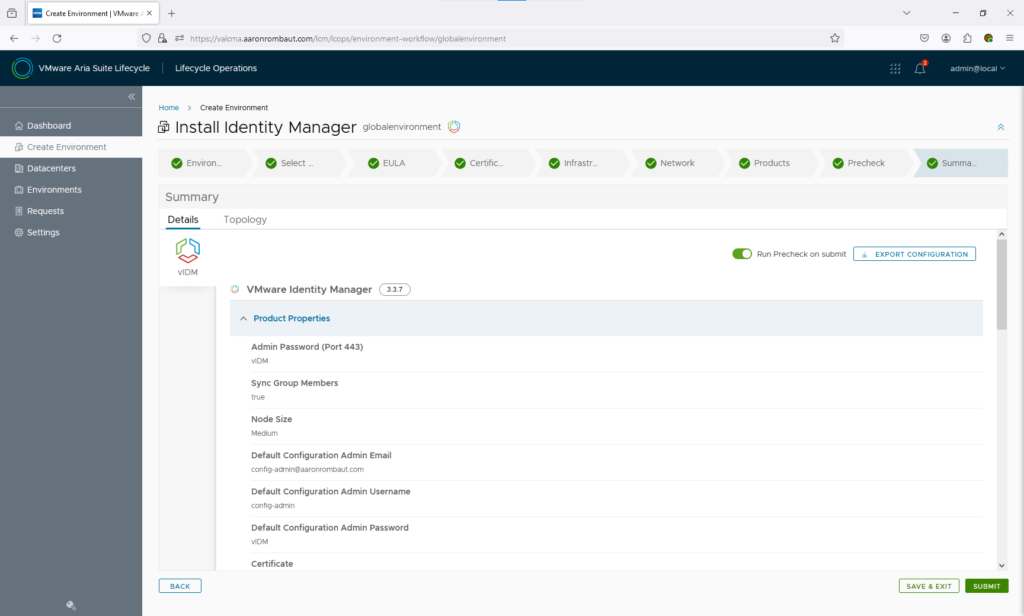
On the Summary Details screen, notice the Run Precheck on submit is selected by default. Also, the configuration can be exported with the Export Configuration button. After reviewing all the details, seelct Submit to start the deployment.
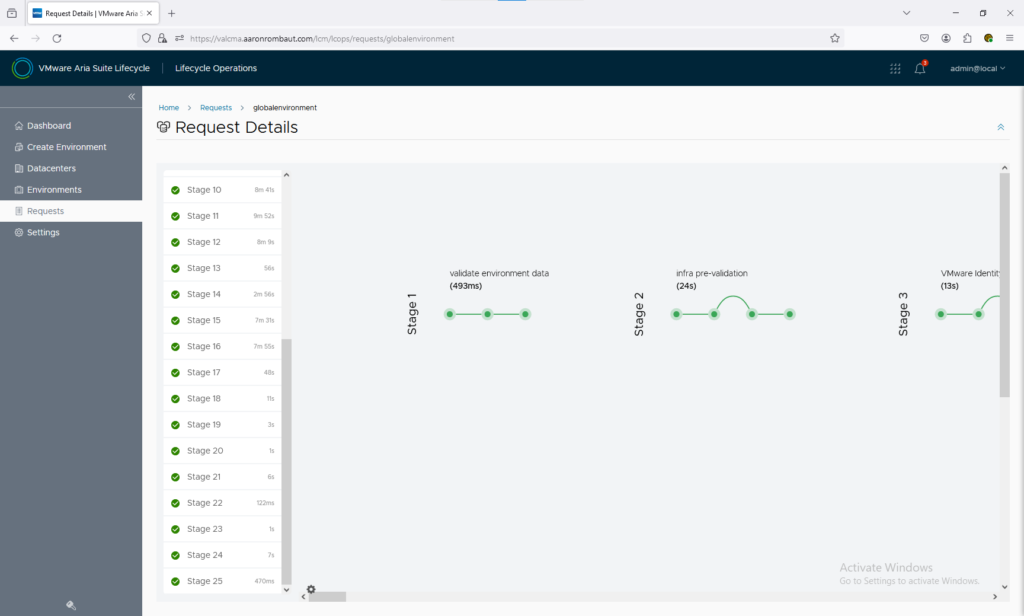
Get up and take a walk, there are 25 stages, this isn’t going anywhere (in the physical sense, hopefully).
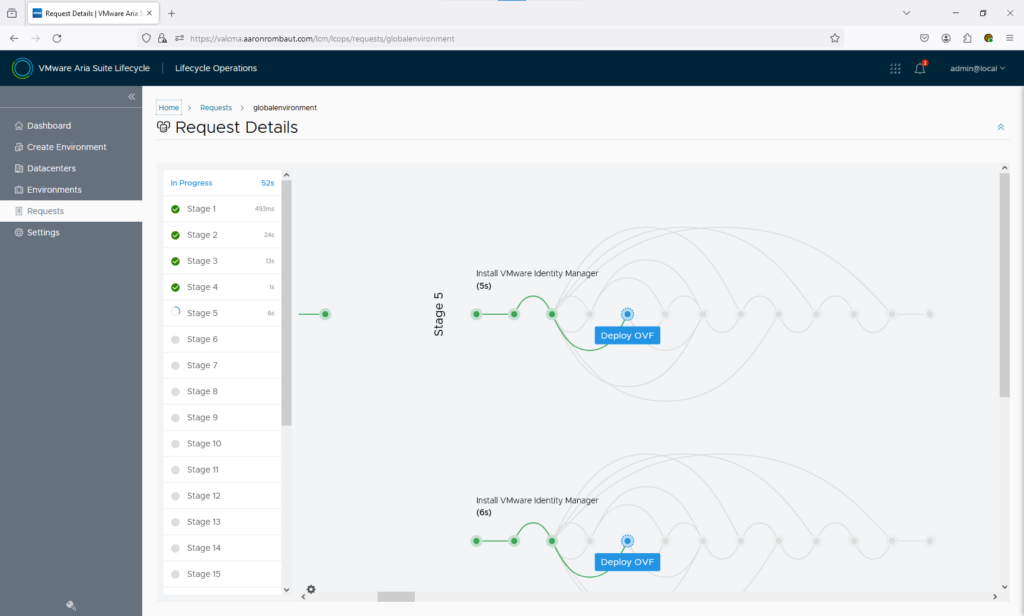
During the deployment, I did receive the following error:
Error Code: LCMVIDM71084
Unable to access the deployed vIDM. Please check whether all the provided network details are correct and retry.
Failed waiting for appliance to restart on the host. Exception message: Failed to do ssl handshake with server vidm-1.aaronrombaut.com:8443, within limited retires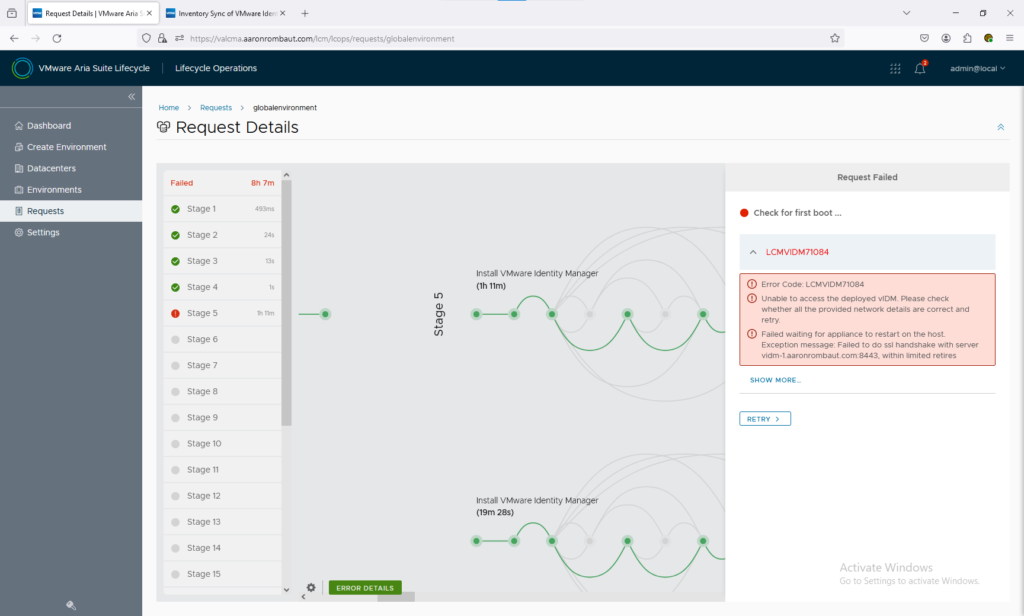
When I tried to manually go to the web interface for the appliance, I also received a “Failed to Connect” message on my first deployed. The other two came up with normal certificate issues. My lab is slow so I do get some timeout issues with deployments. I simply rebooted the virtual machine from vCenter and waited until I could access the web page before clicking Retry on the request.
After 9 hours in my lab, it finally finished. Ok, really it didn’t take that long. Since I kicked off the deployment before going to sleep one night, I didn’t perform the reboot until the following morning. Either way, this took quite a long time to deploy out.
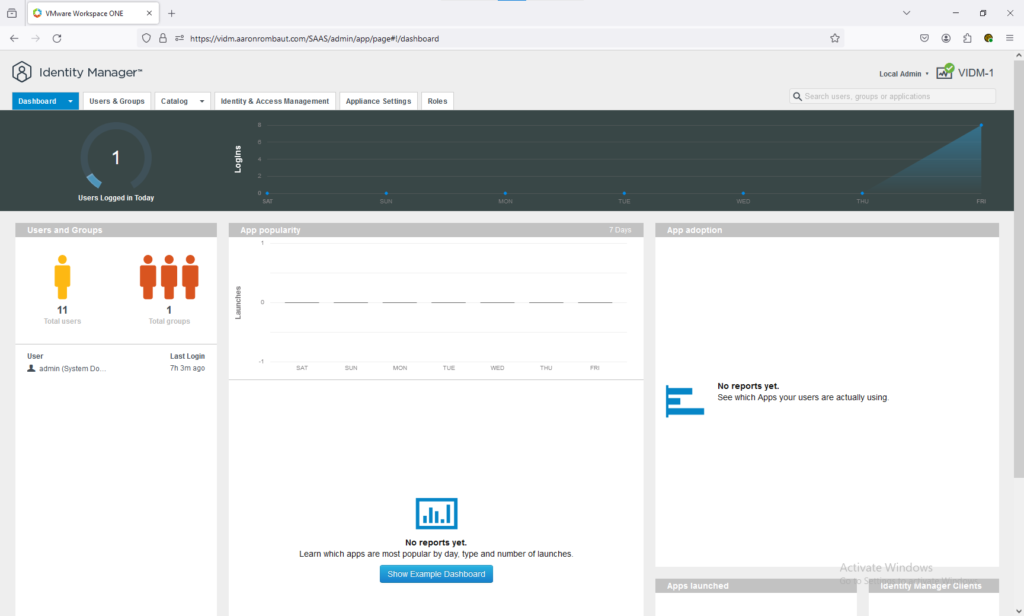
You should now be able to access the Identity Manager appliance at the designated load balanced host name.
Leave a Reply