Overview
The VMware STIG Tools Appliance is a prebuilt, easy-to-deploy virtual appliance that packages validated automation content and tools to support VMware Security Technical Implementation Guide (STIG) compliance at scale.
STIGs are designed to be portable, offline hardening guides that allow administrators to manually secure systems step by step without external dependencies. In practice, however, many VMware STIGs are either operationally complex or must be applied across large environments, making purely manual implementation impractical. To address this gap, the VMware STIG Tools Appliance provides automation that augments traditional STIG documentation while preserving alignment with DISA compliance requirements.
By delivering all required tools, profiles, and supporting frameworks in a single appliance, the STIG Tools Appliance reduces setup overhead and enables repeatable, auditable compliance workflows.
Key Capabilities
The VMware STIG Tools Appliance enables administrators to:
- Scan VMware products for STIG compliance using automated assessments
- Generate compliance artifacts, including reports and DISA-compatible CKL files
- Remediate VMware products using controlled, repeatable automation
Together, these capabilities support an end-to-end compliance lifecycle—from assessment, to remediation, to accreditation—while integrating cleanly into established DoD security and RMF processes.
Prerequisites
The appliance can be obtained by talking to your Broadcom Technical Account Manager (TAM) or emailing [email protected]. It is not publicly available, otherwise.
Before deploying, have the following information available:
- Hostname
- IPv4 address
- Subnet mask
- Default gateway
- DNS servers
- (Optional) DNS A record
Ports and Protocols
The appliance uses the following ports and protocols:
- 22/tcp – SSH
- 80/tcp – Documentation
- 5480/tcp – Virtual Appliance Management Interface (VAMI)
- 8080/tcp – Heimdall Lite
Deployment
If using vCenter, select Deploy OVF Template.

If using an ESX/ESXi host, select Virtual Machines, select Create / Register VM, select Deploy a virtual machine from an OVF or OVA file.

For the rest of this post, I will be using vCenter.
Select Local file and then Upload Files. Navigate to the .ova file that was downloaded.

Provide a virtual machine name.

Select a compute resource.

Review the details that have been chosen. When ready, select Next.

Select storage to deploy the appliance to. First choose a datastore, then choose a virtual disk format.

Select the network to connect to.

Configure the following deployment properties according to your organization.


On the Ready to complete page, review all the configured settings for accuracy before selecting Finish.

After the deployment, optionally take an initial snapshot, and then power on the virtual machine.
Access the Documentation
There is a web interface, but it is only there to provide documentation. If a DNS entry was made, connect to the appliance with a fully qualified domain name, otherwise connect to the appliance with the IP address. The documentation interface uses HTTP (not HTTPS).
http://<appliance-ip>
http://<fully.qualified.domain.name>
When the web page loads, select the Get Started button.

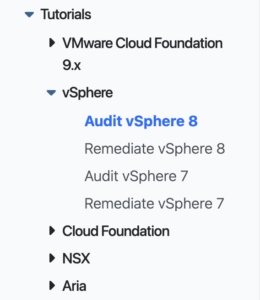
The Appliance Overview provides a What’s Included page that lists all the Automation Tools and versions as well as the STIG Automation Content, versions, and locations.

Expand Tutorials to view the relevant section that you want to audit or remediate.

Access the Appliance Management Interface
Access the appliance management interface via port 5480. Also note, this uses the https:// protocol.
https://<appliance-ip>:5480https://<fully.qualified.domain.name>:5480
Connect to the Console
Using an SSH client, connect to the appliance with the root user and password configured during the OVA deployment.
Connect via the ip address.
ssh root@<appliance-ip>Connect via the fully qualified domain name.
ssh root@<fully.qualified.domain.name>Audit
Auditing uses the cinc-auditor tool, which is an open-source, community-maintained fork of Chef InSpec that executes the same compliance profiles and controls without requiring Chef’s commercial licensing. Functionally, it is equivalent to Chef InSpec for compliance scanning, but decoupled from Chef’s ecosystem and governance model.
Create a directory to store audit reports before running the command.
mkdir -p /tmp/reportsI am going to use a vSphere 8 lab vCenter as an example. Results will vary based on your organization’s configuration. The first place to start is the documentation. Navigate to the tutorials section and expand the appropriate section.
Review the documentation, but wherever it states to install a tool, you should be able to ignore that as this is a self-contained appliance. The included documentation is gathered from VMware’s GitHub and is not tailored for this appliance.
The actual part to start configuring is listed in the Auditing vSphere (Product Controls) section.

Next, make an SSH connection to the appliance using the root account.
Now, it’s as simple as following along with the documentation. So in this example, enter the PowerShell subsystem. All PowerShell commands are executed locally on the STIG Tools Appliance.
pwshConfigure the environment variables that will allow connectivity to the vCenter to be tested.
$env:VISERVER='vcsa.example.local'
$env:VISERVER_USERNAME='[email protected]'
$env:VISERVER_PASSWORD='password'
Note: These variables are not persistent. If you exit PowerShell, they must be set again.
I suggest making a copy of the inputs-example.yml inputs file. If there are multiple vCenters to test with different configured critical infrastructure (DNS, NTP, log servers, etc.) it helps to make a copy for each.
cp /usr/share/stigs/vsphere/8.0/v2r3-stig/vsphere/inspec/inputs-example.yml \
   /root/vcsa-inputs.yml
Open the copied file in vi to begin editing.
vi /root/vcsa-inputs.ymlBelow is a generic copy and paste from the appliance. I did add additional comments for the individual technologies because the stock file blends together.
########
# ESXi #
########
# Choose whether to scan a single host, all hosts in a cluster, or all hosts in vCenter.
vmhostName: '10.243.104.126'
cluster: ''
allesxi: false
# Set to true if hosts are joined to active directory for authentication
adJoined: false
# If ESXi is joined to AD, enter the AD group that has administrative access to ESXi.
adAdminGroup: 'MyAdAdminGroup'
# Enter the environment specific syslog server ESXi should be forwarding logs to
syslogServer: 'tcp://log.test.local:514'
# Enter the environment specific time servers.
esxiNtpServers:
  - 'time-a-g.nist.gov'
  - 'time-b-g.nist.gov'
# Enter the environment specific vMotion VLAN Id.
vMotionVlanId: '100'
# Enter the environment specific Management VLAN Id.
mgtVlanId: '101'
# Enter an array of users that should be in the lockdown mode exceptions list.
exceptionUsers:
  - root
  - dcui
# If snmp is used in the environment change to true.
snmpEnabled: 'false'
# Enter the latest build number for ESXi.
esxiBuildNumber: '24674464'
# Enter the approved certificate issuer organization name (issuer_organization field in the cert).
certificateIssuerOrg: 'U.S. Government'

###########
# vCenter #
###########
# Enter the environment specific syslog server vCenter should be forwarding logs to.
syslogServers:
  - 'loginsight.vmware.com'
  - 'syslog.server2.com'
# Enter the environment specific time servers.
ntpServers:
  - 'time-a-g.nist.gov'
  - 'time-b-g.nist.gov'
# If an IPfix collector is used enter the IP.
ipfixCollectorAddress: ''
# List any users/groups that should be in the default roles that have crypto permissions. The default users/groups are provided below.
vcCryptoAdmins:
  - 'VSPHERE.LOCAL\Administrator'
  - 'VSPHERE.LOCAL\Administrators'
  - 'VSPHERE.LOCAL\vCLSAdmin'
# List any roles that are approved to have crypto permissions. The default roles are provided below.
vcCryptoRoles:
  - 'Admin'
  - 'NoTrustedAdmin'
  - 'vCLSAdmin'
  - 'vSphereKubernetesManager'
  - 'VMOperatorController'
# Enter any approved users in the bash shell administrators users group
bashShellAdminUsers:
  - 'Administrator'
# Enter any approved group in the bash shell administrators group
bashShellAdminGroups: []
# Enter any approved users in the trusted admin users group
trustedAdminUsers: []
# Enter any approved users in the trusted admin group
trustedAdminGroups: []
# Set to false if file based backups are used via the VAMI
backup3rdParty: false
# Is Integrated Windows Authentication(IWA) configured? Set to true.  Leave false if not used.
iwaEnabled: false
# Choose whether to scan a single VM or all VMs in vCenter.
vmName: ''
allvms: true
Once the file has been modified according to your liking, it’s time to run the audit. I should note here that I have seen issues if the STIG Tools Appliance does not have a working DNS configuration. In that case, you can edit the local /etc/hosts file or use IP addresses.
The following targets can be audited depending on scope:
cinc-auditor exec ./esxi/- Targets ESX or ESXi hosts
cinc-auditor exec ./vcenter/- Targets vCenter
cinc-auditor exec ./vm/- Targets virtual machines
cinc-auditor exec .- Combined scan for all vSphere controls
Run the audit file from the working directory, substituting the filenames:
cinc-auditor exec ./vcenter/ -t vmware:// \
  --show-progress \
  --enhanced-outcomes \
  --input-file /root/vcsa-inputs.yml \
  --reporter cli json:/tmp/reports/vcsa-audit.json
Be patient after running the command. It will take a few minutes to actually start outputting anything. If it runs for more than 10 minutes without any progress, it’s likely there is a stuck control. Review the Troubleshooting section below for more information on how to diagnose.
During the audit, you should see a visual representation of the status.
* is a manual control
. is Not a Finding
F is a Finding
At the end of the audit, there will be a short summary of the reviewed controls.
Profile Summary: 23 successful controls, 21 control failures, 14 controls not reviewed, 7 controls not applicable, 2 controls have error
Test Summary: 213 successful, 26 failures, 21 skipped
Converting InSpec Output
The SAF tools convert cinc-auditor JSON results (HDF) into STIG Checklist (CKL) files using hdf2ckl, producing assessor-ready artifacts that support validation, accreditation, and formal sign-off activities. The resulting CKL files can be opened directly in the DISA STIG Viewer, where assessors can review findings, add comments, apply justified overrides, and track POA&M items as part of the standard DoD compliance workflow.
saf convert hdf2ckl \
  -i /tmp/reports/vcsa-audit.json \
  -o /tmp/reports/vcsa-audit.ckl
When running the command, there will not be any output, only a slight delay before returning to the command prompt.
Note that at the time of this writing, there is not a direct conversion from a .json file to a .cklb file (i.e. no hdf2cklb option) for STIG Viewer 3.x. The converted file can still be opened from STIG Viewer 3.x with the Import V2 Checklist option.

Once the file is opened in STIG Viewer, it can then be re-saved as a .cklb file.

Transferring the Checklist File
Now that the file is converted to a checklist file that can be viewed in STIG Viewer, it’s time to copy the file off. If using Windows for the desktop, WinSCP or SecureFX are easy to use methods to copy the files off.
If those tools are not available, plain scp works. Note that the STIG Tools Appliance runs with FIPS enabled. The scp -c aes256-ctr command forces a strong cipher that can usually connect to other devices.
scp -c aes256-ctr \
  /tmp/reports/vcsa-audit.ckl \
  user@destination:/path
Viewing Audit with Heimdall
Regardless if you have the audit file from the appliance that was copied off or a manual checklist from STIG Viewer, the file can be viewed with Heimdall Lite. To access Heimdall, navigate to the fully qualified domain name or ip address with the port 8080. Note the protocol is http://.
http://<appliance-ip>:8080When you see the following screen, select the Choose file(s) to upload or drag & drop here text. Select the file that was copied off or from a manual checklist.

Here is an example of what this might look like with a sample file uploaded.

Remediate
Remediating uses Red Hat Ansible, which is an agentless automation platform that applies desired configuration changes over SSH using declarative playbooks. In contrast to auditing tools, Ansible focuses on enforcing system state and remediation at scale, making it well suited for applying STIG fixes consistently across ESXi hosts and supporting infrastructure.
Troubleshooting
cinc-auditor Hanging
When I ran this in my lab, my audit got stuck on control VCSA-80-000158, which ended up being an NTP issue. But without some additional investigation, I would not have known this.
The first thing to do is add some logging to the cinc-auditor exec command. Notice the command has two additional options attached to the command that was run previously.
cinc-auditor exec ./vcenter/ -t vmware:// \
  --show-progress \
  --enhanced-outcomes \
  --input-file /root/vcsa-inputs.yml \
  --reporter cli json:/tmp/reports/vcsa-audit.json \
  --log-level debug \
  --log-location /tmp/reports/cinc-auditor-debug.log
Open up an additional SSH session and prepare to run the tail command. Unless the file already exists, execute the cinc-auditor command prior to starting the tail so that the debug file can be created.
tail -f /tmp/reports/<filename-debug>.logIf the output stops at a particular control, it is likely the control is failing to run. In my case, I had an NTP issue and the STIG Tools Appliance was unable to get past it.
tail -f /tmp/reports/cinc-auditor-debug.log
# Logfile created on 2025-12-14 15:58:51 +0000 by logger.rb/v1.6.5
[2025-12-14T15:58:51+00:00] DEBUG: Prepping to run feature 'inspec-audit-logging'
[2025-12-14T15:58:51+00:00] DEBUG: Prepping to run feature 'inspec-audit-logging'
[2025-12-14T15:59:02+00:00] DEBUG: Option backend_cache is enabled
[2025-12-14T15:59:02+00:00] DEBUG: Resolve ./vcenter/ into cache /root/.inspec/cache
[2025-12-14T15:59:02+00:00] DEBUG: Dependency does not exist in the cache ./vcenter/
[2025-12-14T15:59:03+00:00] DEBUG: Prepping to run feature 'inspec-mandatory-profile-signing'
[2025-12-14T15:59:03+00:00] DEBUG: Starting run with targets: ["Inspec::Profile<VMware vSphere 8.0 vCenter STIG>"]
[2025-12-14T15:59:03+00:00] DEBUG: Determined telemetry operation is not applicable and hence aborting it.
[2025-12-14T15:59:03+00:00] DEBUG: Using existing lockfile ./vcenter/inspec.lock
[2025-12-14T15:59:03+00:00] DEBUG: Loading libraries/powercli_command.rb into #<Inspec::ProfileContext:0x00007f53657018a8>
[2025-12-14T15:59:03+00:00] DEBUG: Loading libraries/ssl_certificate.rb into #<Inspec::ProfileContext:0x00007f53657018a8>
[2025-12-14T15:59:03+00:00] DEBUG: Prepping to run feature 'inspec-mandatory-profile-signing'
[2025-12-14T15:59:03+00:00] DEBUG: Loading ./vcenter/controls/VCSA-80-000009.rb into #<Inspec::ProfileContext:0x00007f53657018a8>
[2025-12-14T15:59:03+00:00] DEBUG: Loading ./vcenter/controls/VCSA-80-000023.rb into #<Inspec::ProfileContext:0x00007f53657018a8>
[2025-12-14T15:59:03+00:00] DEBUG: Loading ./vcenter/controls/VCSA-80-000024.rb into #<Inspec::ProfileContext:0x00007f53657018a8>
[2025-12-14T15:59:03+00:00] DEBUG: Loading ./vcenter/controls/VCSA-80-000034.rb into #<Inspec::ProfileContext:0x00007f53657018a8>
[2025-12-14T15:59:03+00:00] DEBUG: Loading ./vcenter/controls/VCSA-80-000057.rb into #<Inspec::ProfileContext:0x00007f53657018a8>
[2025-12-14T15:59:03+00:00] DEBUG: Loading ./vcenter/controls/VCSA-80-000059.rb into #<Inspec::ProfileContext:0x00007f53657018a8>
[2025-12-14T15:59:03+00:00] DEBUG: Loading ./vcenter/controls/VCSA-80-000060.rb into #<Inspec::ProfileContext:0x00007f53657018a8>
[2025-12-14T15:59:03+00:00] DEBUG: Loading ./vcenter/controls/VCSA-80-000069.rb into #<Inspec::ProfileContext:0x00007f53657018a8>
[2025-12-14T15:59:03+00:00] DEBUG: Loading ./vcenter/controls/VCSA-80-000070.rb into #<Inspec::ProfileContext:0x00007f53657018a8>
[2025-12-14T15:59:03+00:00] DEBUG: Loading ./vcenter/controls/VCSA-80-000071.rb into #<Inspec::ProfileContext:0x00007f53657018a8>
[2025-12-14T15:59:03+00:00] DEBUG: Loading ./vcenter/controls/VCSA-80-000072.rb into #<Inspec::ProfileContext:0x00007f53657018a8>
[2025-12-14T15:59:03+00:00] DEBUG: Loading ./vcenter/controls/VCSA-80-000073.rb into #<Inspec::ProfileContext:0x00007f53657018a8>
[2025-12-14T15:59:03+00:00] DEBUG: Loading ./vcenter/controls/VCSA-80-000074.rb into #<Inspec::ProfileContext:0x00007f53657018a8>
[2025-12-14T15:59:03+00:00] DEBUG: Loading ./vcenter/controls/VCSA-80-000077.rb into #<Inspec::ProfileContext:0x00007f53657018a8>
[2025-12-14T15:59:03+00:00] DEBUG: Loading ./vcenter/controls/VCSA-80-000079.rb into #<Inspec::ProfileContext:0x00007f53657018a8>
[2025-12-14T15:59:03+00:00] DEBUG: Loading ./vcenter/controls/VCSA-80-000080.rb into #<Inspec::ProfileContext:0x00007f53657018a8>
[2025-12-14T15:59:03+00:00] DEBUG: Loading ./vcenter/controls/VCSA-80-000089.rb into #<Inspec::ProfileContext:0x00007f53657018a8>
[2025-12-14T15:59:03+00:00] DEBUG: Loading ./vcenter/controls/VCSA-80-000095.rb into #<Inspec::ProfileContext:0x00007f53657018a8>
[2025-12-14T15:59:03+00:00] DEBUG: Loading ./vcenter/controls/VCSA-80-000110.rb into #<Inspec::ProfileContext:0x00007f53657018a8>
[2025-12-14T15:59:04+00:00] DEBUG: Loading ./vcenter/controls/VCSA-80-000123.rb into #<Inspec::ProfileContext:0x00007f53657018a8>
[2025-12-14T15:59:04+00:00] DEBUG: Loading ./vcenter/controls/VCSA-80-000145.rb into #<Inspec::ProfileContext:0x00007f53657018a8>
[2025-12-14T15:59:04+00:00] DEBUG: Loading ./vcenter/controls/VCSA-80-000148.rb into #<Inspec::ProfileContext:0x00007f53657018a8>
[2025-12-14T15:59:06+00:00] DEBUG: Loading ./vcenter/controls/VCSA-80-000150.rb into #<Inspec::ProfileContext:0x00007f53657018a8>
[2025-12-14T15:59:06+00:00] DEBUG: Loading ./vcenter/controls/VCSA-80-000158.rb into #<Inspec::ProfileContext:0x00007f53657018a8>
Options to resolve this vary depending on the control that is failing and what is failing. The easiest is likely to not run the control and just handle it manually. In my case, I just disabled NTP on the vCenter server and this control no longer was an issue. Also, because it now failed to be configured for NTP, cinc-auditor reported that as a fail and I won’t forget to remediate or troubleshoot, further.
To disable a control, rename the file. The path of the control is in the debug log.
mv ./vcenter/controls/VCSA-80-000158.rb \
   ./vcenter/controls/VCSA-80-000158.rb.disabled
Now on the next run, the log should not even show the control. Notice that control VCSA-80-000158 now is not on the list.
[2025-12-14T16:57:44+00:00] DEBUG: Loading ./vcenter/controls/VCSA-80-000148.rb into #<Inspec::ProfileContext:0x00007faa728760a8>
[2025-12-14T16:57:46+00:00] DEBUG: Loading ./vcenter/controls/VCSA-80-000150.rb into #<Inspec::ProfileContext:0x00007faa728760a8>
[2025-12-14T16:57:46+00:00] DEBUG: Loading ./vcenter/controls/VCSA-80-000195.rb into #<Inspec::ProfileContext:0x00007faa728760a8>
[2025-12-14T16:57:46+00:00] DEBUG: Loading ./vcenter/controls/VCSA-80-000196.rb into #<Inspec::ProfileContext:0x00007faa728760a8>
Change the Network Configuration
Sometimes the appliance gets deployed and a network setting was either misconfigured or the network administrator makes changes to the network. If the appliance is still accessible via the browser, the network settings can be configured using the appliance management interface at port 5480 as described earlier in this post.
The alternative is to redeploy the appliance, but if a lot of files have been configured and not backed up or moved off, this may not be ideal. The other option is to configure the network settings on the command line from the appliance console.
vi /etc/systemd/network/10-static-en.network +5Change any settings as necessary and then save and close the file.
Esc
:wq
If the network settings were updated, restart the systemd-networkd.service service unit.
systemctl restart systemd-networkd.serviceDomain Name System (DNS) Settings
If you are unsure of your DNS configuration, view the current configuration.
resolvectl statusIf the DNS configuration needs to be altered permanently.
vi /etc/systemd/network/10-static-en.network +8Change any settings as necessary and then save and close the file.
Esc
:wq
If the DNS configuration is changed, restart the systemd-resolved.service service unit.
systemctl restart systemd-resolved.serviceConclusion
The VMware STIG Tools Appliance provides a practical, automation-first approach to implementing and maintaining STIG compliance across VMware environments. By combining assessment, remediation, and reporting capabilities into a single, prebuilt appliance, it reduces operational overhead while producing assessor-ready artifacts aligned with DoD compliance workflows. This approach allows teams to scale STIG compliance while maintaining transparency and assessor confidence.
Need Additional Help?
Organizations with complex environments or formal accreditation requirements may benefit from additional guidance. For deeper assistance with STIG automation, remediation strategy, or compliance workflows, engage with Broadcom Professional Services through your Account Director or Technical Account Manager (TAM).
Leave a Reply